How To Use Thinning Shears To Cut Hair

Thinning shears are a valuable tool in any hairdresser’s arsenal, allowing for precise and controlled texturizing of hair. Whether you’re a professional hairdresser or looking to learn how to use thinning shears at home, this guide will walk you through the steps to achieve a seamless and even haircut.
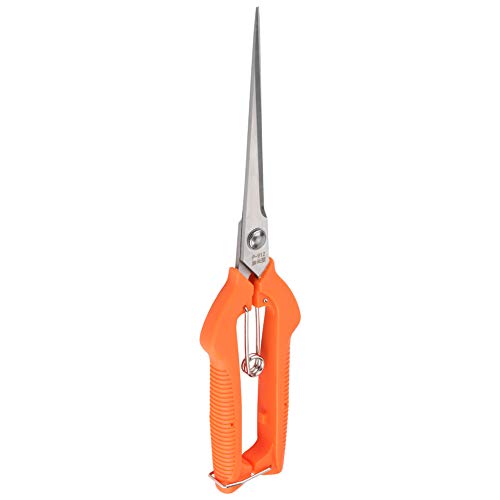
Thinning shears, also known as texturizing shears, contain teeth on one or both blade edges, which allows for the removal of bulk and weight from the hair. They are primarily used to blend and soften the hair, creating movement and volume. However, it’s important to note that thinning shears should not be used as a substitute for regular hair cutting scissors, as they serve a different purpose.
Before using thinning shears, it’s important to properly prepare the hair. Ensure the hair is clean, dry, and tangle-free. Comb through the hair to remove any knots or tangles, as cutting through them can result in uneven and choppy results. It’s also helpful to section off the hair using hair clips or elastics, as this allows for more control and precision during the cutting process.
When using thinning shears, it’s crucial to have a clear vision of the desired end result. Start by holding the shears at a slight angle, pointing towards the ends of the hair. Take small sections of hair between the blades of the shears and gently close them, allowing the teeth to remove small amounts of hair with each cut. Remember, it’s always better to start with less hair and make additional cuts if needed, rather than removing too much hair at once.
Continue working through the hair, ensuring to blend any harsh lines or transitions. For a softer and more natural look, avoid using thinning shears near the root area, as this can result in a choppy appearance. Instead, focus on the mid-lengths and ends of the hair, using the shears to create texture and movement.

Once you’ve finished using the thinning shears, it’s important to properly care for them. Clean the shears after each use with a specialized cleaning solution or warm, soapy water. Oil the pivot area regularly to ensure smooth operation. Additionally, consider having your thinning shears professionally sharpened every six months to maintain their effectiveness.
In conclusion, thinning shears can be a valuable tool in achieving a well-texturized haircut. By properly preparing the hair, having a clear vision, and using the shears with precision, you can achieve a seamless and professional-looking result. Remember to care for your thinning shears properly, and they will continue to be a reliable asset in your hairstyling journey.
What are Thinning Shears?
Thinning shears, also known as thinning scissors or texturizing shears, are a type of haircutting tool used by hairstylists to create texture and remove bulk from the hair. They have two blades that are notched, jagged, or serrated, which helps in cutting some of the strands of hair and leaving others untouched.
Thinning shears are designed to thin out or reduce the volume of thick hair, removing excess weight, and creating a more blended look. They are commonly used in combination with regular scissors to achieve the desired haircut style.
How do Thinning Shears Work?
Thinning shears work by cutting some of the hair strands while leaving others untouched. The notched blades of the shears create gaps or holes between the cutting edges, allowing only a portion of the hair to be cut with each snip. This process helps in reducing the bulkiness of the hair and creates texture and movement.

Hairstylists use thinning shears strategically to remove excess bulk from the mid-lengths and ends of the hair, creating a more even and blended appearance. They can also be used to blend different hair lengths together, create layers, and soften harsh lines.
Thinning shears are suitable for all hair types, but they are especially beneficial for thick, coarse, or curly hair that tends to be heavy and difficult to style. However, it is essential to use them correctly and in moderation to avoid over-thinning or creating uneven results.
Tips for Using Thinning Shears:
- Start with dry hair: Thinning shears are typically used on dry hair to achieve more accurate results.
- Use them sparingly: It’s important not to overdo the thinning process, as it can lead to an uneven or choppy appearance. Start with small sections of hair and gradually thin out as needed.
- Hold them correctly: Hold the thinning shears at a slight angle and avoid cutting straight across to create a more natural-looking texture.
- Work in sections: Divide the hair into sections and thin out each section separately, making sure to blend the cut sections with the uncut sections for a seamless look.
- Consult a professional: If you’re unsure about using thinning shears or want a more complex haircut, it’s best to consult a professional hairstylist who can guide you and ensure the best results.
With the proper technique and practice, thinning shears can be a valuable tool for achieving various haircut styles and adding texture to the hair.
Choosing the Right Thinning Shears
When it comes to cutting hair with thinning shears, choosing the right pair is essential. Here are some factors to consider when selecting thinning shears:
1. Blade Type: Thinners usually come in two types of blades: straight and curved. Straight blades are versatile and suitable for most hair types, while curved blades provide better precision and control when cutting specific areas such as bangs or layers.

2. Teeth Count: Thinning shears feature teeth on one or both blades. The number of teeth per inch (TPI) determines the thinning or blending effect. Higher TPI means more teeth, resulting in a more subtle thinning effect. For professional use, shears typically range from 25 to 40 TPI.
3. Material: The material of the shears affects their durability and performance. Stainless steel shears are a popular choice due to their corrosion resistance and sharpness. For those with allergies or sensitivity, titanium-coated shears are a great option as they minimize skin irritation.
4. Handle Design: The handle design should provide comfort and control during use. Look for ergonomic handles with finger rests and rubber grips to reduce hand fatigue and provide a secure grip.
5. Length: The length of the shears should be suitable for your hand size and the type of cutting you’ll be doing. Longer shears offer more leverage for cutting larger sections of hair, while shorter shears provide better control for precision cutting.
6. Budget: Thinning shears come in a wide price range, so it’s important to set a budget before starting your search. Keep in mind that investing in a high-quality pair of thinning shears can make a significant difference in the outcome of your haircuts.

By considering these factors, you can choose the right thinning shears that meet your needs and achieve the desired haircut results.
Preparing Your Hair for Thinning
Before you begin using thinning shears to cut your hair, it’s important to prepare your hair properly. Follow these steps to ensure that your hair is ready for thinning:
- Start with clean, dry hair: Make sure that your hair is clean and free from any product buildup. Wash your hair with a mild shampoo and allow it to dry completely before attempting to thin it.
- Section your hair: Divide your hair into manageable sections using hair clips or elastics. This will make it easier to thin your hair evenly and prevent any uneven cutting.
- Decide on the desired thickness: Determine how much hair you want to thin out. This will depend on the thickness of your hair and the desired final look. It’s best to start with a small amount and gradually thin more if needed.
- Plan your thinning pattern: Decide on the thinning pattern you want to use. You can thin the hair evenly throughout, concentrate on specific areas, or create layers. Consider the overall shape and style you want to achieve.
- Test the shears: Before you start thinning your hair, test the shears on a small section to ensure that they are sharp and in proper working condition.
By following these steps, you can ensure that your hair is properly prepared for thinning. This will help you achieve the desired results and avoid any potential mishaps during the thinning process.
Techniques for Using Thinning Shears
Thinning shears are a versatile tool that can be used to create texture and remove bulk from hair. Here are some techniques for using thinning shears effectively:
1. Point-Cutting: Hold the thinning shears at a 45-degree angle and make small cuts along the hair shaft. This technique helps to remove weight and create movement in the hair.

2. Slithering: Hold the thinning shears vertically and gently slide them down the hair shaft. This technique helps to thin out the hair without cutting too much length.
3. Blending: Use thinning shears to blend layers and create a seamless transition between different lengths. This technique is especially useful for creating natural-looking hairstyles.
4. Texturizing: Use thinning shears to add texture to the hair by randomly cutting small sections of hair. This technique works particularly well for adding volume to fine or thin hair.
5. Feathering: Hold the thinning shears at an angle and make light snips along the hair shaft. This technique helps to create soft, feathery ends and add dimension to the hair.
Remember to always start with small, conservative cuts and gradually remove more hair as needed. It’s also important to keep the thinning shears clean and sharp for optimal performance.

Tips for Using Thinning Shears Safely
Thinning shears are a valuable tool for creating texture and removing bulk from hairstyles. However, they can be dangerous if not used properly. Follow these tips to ensure safe and effective use of thinning shears:
| 1. Use High-Quality Thinning Shears | Investing in a pair of high-quality thinning shears is crucial. Cheap or dull shears can cause damage to the hair and will not provide the desired results. Look for shears made from stainless steel with a sharp cutting edge. |
| 2. Start with Dry Hair | Thinning shears are preferably used on dry hair as wet hair can stretch and lead to uneven results. Make sure the hair is clean and dry before starting the thinning process. |
| 3. Use Light Pressure | When using thinning shears, apply gentle and light pressure. Avoid cutting large chunks of hair in one go. Gradually thin out the hair by taking small sections at a time, ensuring that the shears smoothly glide through the strands. |
| 4. Maintain an Even Grip | Hold the thinning shears with an even grip to prevent uneven or choppy results. Avoid making jagged or rough cuts by keeping a steady hand and maintaining control over the shears. |
| 5. Practice on a Mannequin or with Professional Supervision | If you are new to using thinning shears, it is recommended to practice on a mannequin or seek professional supervision. This will help you develop a proper technique and gain confidence before attempting to use the shears on a client or yourself. |
| 6. Clean and Sanitize the Shears | Regularly clean and sanitize your thinning shears to prevent the spread of bacteria and maintain their effectiveness. Use a cleaning solution specifically designed for shears and wipe them dry after each use. |
| 7. Trim Conservatively | It is better to trim less hair than desired, rather than removing too much. Take your time and assess the results as you go along. Remember, it is easier to trim more hair later than to wait for it to grow back. |
By following these tips, you can safely and effectively use thinning shears to achieve the desired results, whether it’s adding texture or reducing bulk from the hair.
Aftercare for Thinning Shears
Proper aftercare for your thinning shears is essential to maintain their performance and prolong their lifespan. Here are some tips to keep your shears in tip-top shape:
Clean your shears regularly: After each use, make sure to clean your thinning shears thoroughly. Use a soft cloth or towel to wipe away any hair or product buildup. If necessary, you can also use a mild soap and warm water to remove stubborn residue. Remember to dry them completely before storing.
Oil your shears: Regularly lubricating your thinning shears is crucial to keep them functioning smoothly. Apply a few drops of clipper or shear oil to the pivot point and blades after every few uses. This will help to reduce friction and keep the shears cutting efficiently.

Store them properly: When you’re not using your thinning shears, it’s important to store them correctly. Keep them in a dry and clean place, away from moisture and humidity. You can use a protective case or a sheath to prevent any accidental damage.
Sharpen when necessary: Over time, even with proper care, thinning shears can start to dull. If you notice that your shears are not cutting as smoothly as before, it may be time to get them sharpened. You can either take them to a professional sharpening service or learn how to sharpen them yourself using a sharpening stone or sharpening tool.
Use them properly: Finally, using your thinning shears correctly will also contribute to their longevity. Avoid using them on wet hair, as this can cause rust and damage the blades. Additionally, make sure not to drop or mishandle the shears, as this can lead to misalignment and affect their performance.
By following these aftercare tips, you can ensure that your thinning shears are always in optimal condition, allowing you to achieve the desired haircutting results.
Questions and answers
What are thinning shears used for?
Thinning shears are used to remove bulk from the hair and create texture. They can also be used to blend layers and create softer edges.
Can thinning shears be used on all hair types?
Thinning shears can be used on most hair types, but they are especially beneficial for thick, heavy hair. They help to reduce the weight of the hair and make it more manageable.


Meet Harrison Clayton, a distinguished author and home remodeling enthusiast whose expertise in the realm of renovation is second to none. With a passion for transforming houses into inviting homes, Harrison's writing at https://thehuts-eastbourne.co.uk/ brings a breath of fresh inspiration to the world of home improvement. Whether you're looking to revamp a small corner of your abode or embark on a complete home transformation, Harrison's articles provide the essential expertise and creative flair to turn your visions into reality. So, dive into the captivating world of home remodeling with Harrison Clayton and unlock the full potential of your living space with every word he writes.