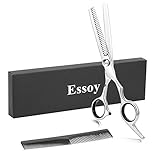
How To Use Thinning Shears To Add Volume

If you have thin or fine hair, you know that adding volume can sometimes be a struggle. But there’s a simple tool that can help: thinning shears. Thinning shears are a type of scissors with teeth on one or both blades, allowing them to remove bulk and create texture in the hair. By strategically using thinning shears, you can add volume and movement to your hair without sacrificing its length or thickness.
The first step in using thinning shears is to determine the areas where you want to add volume. This could be the top layers of your hair or specific sections that tend to look flat. Once you’ve identified these areas, separate them from the rest of your hair using clips or hair ties.
Next, comb through the section of hair that you want to thin out. Make sure it’s free of tangles and evenly distributed. Then, take the thinning shears and hold them parallel to the section of hair, about halfway between the roots and the ends. Open and close the shears as you move them down the length of the hair, making sure to only cut small sections at a time. This will help maintain a natural look and prevent any blunt lines.
As you work your way down the section of hair, you’ll notice that the thinning shears are removing bulk and creating texture. This will give your hair a lighter and more voluminous appearance. Be careful not to over-thin, as this can make your hair look sparse and uneven. It’s better to start with less and gradually add more if needed.
Once you’ve finished thinning out the section of hair, release it from the clip or hair tie and let it fall back into place. Comb through it again to remove any extra hair that may have been caught in the thinning shears. You can then style your hair as usual, using volumizing products or heat tools to enhance the volume even further.

Thinning shears are a great tool for adding volume to thin or fine hair. With a little practice and patience, you can achieve a fuller and more voluminous look without having to resort to drastic measures like cutting off length or using extensions. So give thinning shears a try and see the difference they can make in your hair!
The Importance of Thinning Shears
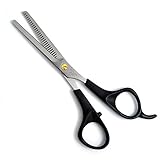
Thinning shears are a crucial tool for hairstylists and individuals looking to add volume to their hair. These specialized scissors are designed with teeth, allowing them to remove excess bulk from the hair while preserving its length. Here are some reasons why thinning shears are important:
- Removing Bulk: Thinning shears are specifically designed to remove bulk from the hair. When hair is too thick or heavy, it can appear flat and lack volume. Thinning shears strategically remove some of the hair, creating a lighter, more voluminous look.
- Preserving Length: Unlike regular scissors that cut across the entire hair strand, thinning shears only remove a portion of the hair, leaving the rest untouched. This allows individuals to maintain their desired hair length while still achieving a fuller look.
- Creating Texture: Thinning shears can also be used to add texture to the hair. By selectively removing sections of hair, hairstylists can create layers and add dimension to the hairstyle. This adds movement and body to the hair, resulting in a more voluminous appearance.
- Blending Layers: Thinning shears are also commonly used to blend layers in the hair. When cutting hair with layers, thinning shears can be used to soften the transition between different lengths, creating a more seamless and natural look.
- Reducing Thickness: For individuals with thick or coarse hair, thinning shears can be a game-changer. By removing some of the bulk, thinning shears help to reduce the overall thickness of the hair, making it more manageable and easier to style.
Overall, thinning shears are an essential tool for anyone looking to add volume and texture to their hair. Whether you want to remove bulk, create layers, or reduce thickness, thinning shears can help you achieve your desired hairstyle with ease.
Why Thinning Shears Are Essential for Adding Volume to Your Hair
Thinning shears are an essential tool for achieving volume in your hair. Whether you have thin or thick hair, these specialized scissors can help you achieve the fullness and texture you desire. Here are a few reasons why thinning shears are a game-changer when it comes to adding volume:
Removes Excess Weight
Thinning shears are designed with teeth or notches along the blade, allowing them to remove bulk from the hair. By strategically thinning out sections of your hair, these shears help to remove excess weight that can make your hair look flat and lifeless. This thinning technique creates more movement and lifts at the roots, giving your hair a voluminous appearance.
Creates Texture and Body
Thinning shears are especially effective at creating texture and body in your hair. By selectively removing hair at different lengths, these shears help to add dimension and movement to your locks. The uneven cut created by thinning shears adds texture and creates the illusion of thicker hair, making it perfect for those with fine or thin hair.
Additionally, thinning shears can be used to create layers, which also add volume and shape to your hairstyle. By blending and softening the ends, these shears help to create a more seamless and natural look.
Tip: When using thinning shears, it’s important to remember that a little goes a long way. Start with small sections and gradually thin out your hair to avoid removing too much and creating an uneven or choppy look.
Overall, thinning shears are an essential tool for adding volume to your hair. They help to remove excess weight, create texture and body, and can even be used to create layers. When used correctly, thinning shears can transform your flat or lifeless hair into a voluminous and bouncy style that is sure to turn heads.
Choosing the Right Thinning Shears
When it comes to adding volume to your hair with thinning shears, it’s important to choose the right tool for the job. Here are some factors to consider when selecting a pair of thinning shears:

Type of Teeth
Thinning shears come with different types of teeth, including straight teeth, curved teeth, and double-serrated teeth. Straight teeth are ideal for precision cutting and removing bulk, while curved teeth are great for creating softer, blended looks. Double-serrated teeth provide extra grip and are perfect for thick or coarse hair.
Tooth Size
The size of the teeth on the thinning shears will determine the amount of hair that is removed with each snip. Smaller teeth will remove less hair, making them suitable for fine or thin hair. Larger teeth will remove more hair, making them better for thick or dense hair.
Length of Shears
The length of the shears is another important consideration. Longer shears are great for trimming and thinning longer hair, while shorter shears are more maneuverable and work well for shorter styles or when detailing specific areas.
Quality of Shears
Investing in a high-quality pair of thinning shears is crucial for achieving the best results. Cheap, low-quality shears can leave hair looking frayed or damaged, and they may not provide a smooth cutting experience. Look for shears made from high-quality stainless steel and with a sharp, precise blade.
By considering these factors and choosing the right thinning shears for your hair type and desired style, you can achieve the best results and add volume to your hair with ease.
Factors to Consider When Selecting Thinning Shears for Adding Volume
Thinning shears are an essential tool for adding volume to your hair. However, not all thinning shears are created equal, and it’s important to consider certain factors before making a purchase. Here are some key factors to keep in mind:

Blade Type: The blade type is crucial when selecting thinning shears for adding volume. There are two main types of blades: straight and curved. Straight blades are ideal for removing bulk and creating texture, while curved blades are great for blending and softening the hair.
Tooth Count: The tooth count refers to the number of teeth on the blade. A higher tooth count means more hair will be removed with each cut, resulting in a more drastic thinning effect. For adding volume, it’s recommended to choose thinning shears with a lower tooth count to achieve a subtle thinning effect.
Tooth Shape: The shape of the teeth on the thinning shears also plays a role in the final result. V-shaped teeth create a more aggressive thinning effect, while straight or curved teeth provide a softer and more natural-looking result. Consider the desired outcome when selecting thinning shears based on tooth shape.
Quality: Investing in high-quality thinning shears is essential for achieving the best results. Look for shears made from durable materials, such as stainless steel, and ensure they have a smooth cutting action. High-quality shears are more comfortable to use and will last longer.
Handle Design: The handle design is another important factor to consider. Look for thinning shears with ergonomic handles that fit comfortably in your hand. This will allow for better control and minimize the risk of hand fatigue during use.

By considering these factors, you can select the right thinning shears for adding volume to your hair. Remember to choose shears that suit your specific needs and preferences, as this will help you achieve the desired result and make the process easier and more enjoyable.
Preparation and Technique
Before using thinning shears to add volume to your hair, it is important to properly prepare and follow the correct technique. Here are the steps to ensure a successful result:
- Start by washing and drying your hair. Thinning shears work best on clean and dry hair, so make sure to remove any excess moisture before beginning.
- Section your hair. Divide your hair into several sections, depending on the thickness and length of your hair. This will make it easier to work with and ensure that you apply the thinning shears evenly throughout.
- Hold the thinning shears correctly. Grasp the thinning shears with your dominant hand, making sure that your thumb and ring finger go into the appropriate holes. This will give you better control and precision when cutting.
- Position the thinning shears. Place the thinning shears vertically on a small section of hair, about half an inch away from the scalp. Avoid cutting too close to the roots to prevent any unwanted accidents.
- Use a gentle cutting motion. Open and close the thinning shears gradually and smoothly, working your way down the hair strand. Avoid making sudden, jerky movements as this can result in uneven cuts.
- Vary the length and direction of your cuts. To create a textured and voluminous look, make sure to cut the hair at different lengths and angles. This will prevent the hair from looking too choppy and stiff.
- Repeat the process on each section. Once you have completed one section, move on to the next until you have worked through all the sections of your hair. Take your time and focus on creating an even distribution of volume.
- Style and finish your hair. After using thinning shears, style your hair as desired. You can use other tools like a round brush or a curling iron to further enhance the volume and texture.
Remember to practice caution and patience when using thinning shears. If you are unsure or uncomfortable performing this technique on your own, it is always recommended to seek the assistance of a professional hairstylist.
Step-by-Step Guide on How to Use Thinning Shears for Maximum Volume
Thinning shears are an incredible tool for adding volume and texture to your hair. With the right technique and a bit of practice, you can achieve a full and voluminous look. Here is a step-by-step guide on how to use thinning shears to add maximum volume to your hair:
Step 1: Start with Clean and Dry Hair
Before you begin, ensure that your hair is clean, dry, and properly styled. This will give you a better idea of where you need to add volume and texture.

Step 2: Section Your Hair
Divide your hair into sections, starting with the bottom section and gradually moving upwards. Use hair clips or elastic bands to secure the sections you’re not working on.
Step 3: Determine the Areas to Thin
Take a look at your hair and identify the areas where you want to add more volume. These are typically the heavier areas or where you feel your hair lacks movement. It could be the crown, around the face, or the back of your head.
Step 4: Hold the Thinning Shears Correctly
Hold the thinning shears vertically so that the blades are parallel to your hair strands. This will help create a natural-looking texture and prevent any harsh lines.
Step 5: Start Thinning
Starting with the bottom section, take a thin section of hair and hold it between your fingers. Slide the thinning shears along the section in a downward motion, about halfway up the hair shaft. Avoid thinning the ends, as this can result in a choppy appearance.
Step 6: Continue Thinning
Repeat the thinning process on each section, working your way up towards the top of your head. Remember to only thin the areas that need more volume, as over-thinning can result in thin and wispy hair.
Step 7: Blend the Layers
Once you have thinned the desired areas, release the sections you secured earlier and gently blend the layers. This will ensure a smooth transition between the thinned and non-thinned sections of your hair.
Step 8: Style as Desired
Finish off by styling your hair as desired. You will notice that your hair has more volume and movement, giving you a fuller and more textured look.
Using thinning shears to add volume to your hair can be a game-changer. With a bit of practice and this step-by-step guide, you can achieve that voluminous and textured hairstyle you’ve always wanted.
Troubleshooting
If you’re not getting the desired results with your thinning shears, here are some troubleshooting tips to help you achieve the volume you want:
- Check the condition of your shears. Dull or improperly maintained shears may not cut hair evenly, resulting in an uneven and inconsistent texture.
- Make sure you’re using the right technique. Thinning shears should be used vertically and not horizontally. Use a gentle cutting motion and avoid cutting too much hair at once.
- Consider the length of your hair. Thinning shears work best on medium to long hair lengths. If your hair is too short, the effect of the shears may not be as noticeable.
- Review your sectioning technique. Make sure you’re sectioning your hair evenly and taking equal amounts of hair with each cut. Uneven sections can lead to an uneven and lumpy texture.
- Experiment with the amount of hair you’re thinning. If you’re not getting the desired volume, try thinning more hair or vice versa. Find the right balance for your hair type and desired outcome.
Remember, practice makes perfect. It may take some time and experimentation to master the technique and achieve the volume you want with thinning shears. Don’t be afraid to seek professional help or consult with a hairstylist if you’re having trouble.
Questions and answers
What are thinning shears?
Thinning shears, also known as texturizing shears, are special scissors used by hairstylists to remove bulk from hair and add texture. They have teeth-like notches on one blade, which help to remove some hair while leaving the rest untouched.
Can thinning shears be used to add volume to hair?
Yes, thinning shears can be used to add volume to hair. By strategically removing some hair using thinning shears, hairstylists can create layers, texture, and movement, which can give the appearance of added volume.
How do I use thinning shears to add volume to my hair?
To use thinning shears to add volume, start by sectioning your hair and identifying the areas where you want to add volume. Hold a small section of hair between your fingers and use the thinning shears to remove some hair from the mid-lengths to the ends. Repeat this technique on different sections of your hair to create layers and texture, which will give the illusion of added volume.

Harrison Clayton
Meet Harrison Clayton, a distinguished author and home remodeling enthusiast whose expertise in the realm of renovation is second to none. With a passion for transforming houses into inviting homes, Harrison's writing at https://thehuts-eastbourne.co.uk/ brings a breath of fresh inspiration to the world of home improvement. Whether you're looking to revamp a small corner of your abode or embark on a complete home transformation, Harrison's articles provide the essential expertise and creative flair to turn your visions into reality. So, dive into the captivating world of home remodeling with Harrison Clayton and unlock the full potential of your living space with every word he writes.

