How To Use Thinning Shears On Wigs

Thinning shears are a useful tool when it comes to styling wigs, as they can help create a more natural and blended look. Whether your wig is too thick or you want to add texture, thinning shears can be a great option. However, it’s important to use them correctly to avoid any mistakes or damage to the wig.
Step 1: Preparation
Before using thinning shears on your wig, make sure it is clean and dry. Comb through the wig to remove any tangles or knots, as this will make the thinning process easier. It’s also a good idea to section off the hair into smaller sections, especially if you’re working on a long wig.
Pro tip: Start with small sections and thin gradually. You can always remove more hair, but it’s difficult to put it back.
Step 2: Thinning

Hold a small section of the wig hair and comb it through to remove any tangles. Once the hair is smooth, hold the section between your index and middle finger, about an inch away from the ends. With the thinning shears, make small, downward cuts into the hair. Be careful not to cut off too much hair at once, as you can always thin it more later.
Pro tip: Angle the thinning shears diagonally for a more natural look. This technique will create soft layers and blend the hair seamlessly.
Step 3: Checking the Progress
After thinning a section, let go of the hair and see how it looks. Comb through to see if it has the desired texture and thickness. If necessary, you can repeat the thinning process on that section or move on to the next one. Remember to take breaks and step back occasionally, as it’s easy to over-thin the wig.
Pro tip: Be cautious when thinning near the wig’s cap or edges, as you don’t want to create any holes or damage the structure.

Step 4: Final Touches
Once you have thinned the entire wig, give it a final comb-through to ensure everything is blended and natural-looking. Style the wig as desired, using heat tools or styling products if needed. Remember, practice makes perfect, so don’t be discouraged if it doesn’t turn out exactly how you envisioned the first time.
Pro tip: If you accidentally thin too much hair, you can use hair fibers or volumizing products to add back some thickness and volume.
Thinning shears can be a great tool for achieving a natural-looking wig. By following these steps and practicing, you’ll be able to create a beautifully textured wig that looks like real hair.
What are Thinning Shears?
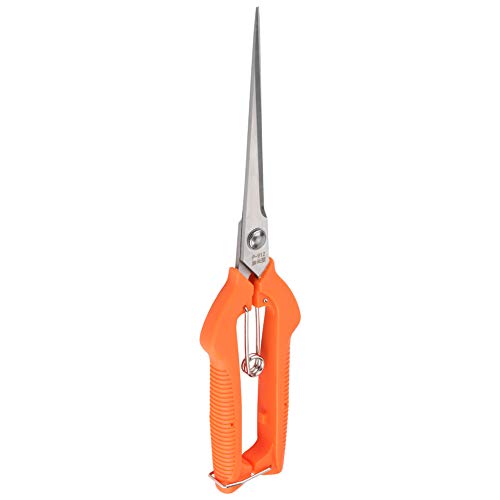
Thinning shears, also known as texturizing shears or blending shears, are a type of hair cutting tool that is specifically designed to remove bulk from thick hair or hair extensions, including wigs. Thinning shears feature special blades that have teeth or notches cut into them, allowing them to remove hair in a more gradual and controlled manner.

Thinning shears are commonly used by hairstylists to create a more natural-looking blend when cutting or thinning hair. They can be used to remove weight and create texture, especially in areas where the hair appears too thick or heavy. Thinning shears are especially beneficial for those with thicker hair or wigs, as they can help achieve a more seamless and lightweight look.
Thinning shears are different from regular scissors as they have one serrated edge and one straight edge. The serrated edge contains teeth or notches that help to remove a small amount of hair with each cut, resulting in a softer and less harsh appearance. The straight edge of the shears can be used to create clean lines and even out the hair length after thinning.
How do Thinning Shears Work?
Thinning shears work by removing some of the hair volume while maintaining the overall length of the hair. The teeth or notches on the serrated edge of the shears create gaps through which some hair can pass, while others remain untouched. This selective cutting technique helps create texture and remove bulk without compromising the length or structure of the hair.
When using thinning shears on a wig, it is important to use them in a controlled and precise manner. The shears should be used in small sections, working through the layers of the wig slowly and carefully. It is also crucial to blend the thinned sections with the unthinned sections to ensure a natural and seamless look.
Why Use Thinning Shears on Wigs?
Thinning shears are a valuable tool for maintaining wigs because they can help create a more natural and realistic look. Here are a few reasons why using thinning shears on wigs is beneficial:

- Reduce bulk: Thinning shears can effectively remove excess hair and reduce bulkiness in the wig, making it appear lighter and more natural.
- Create texture: Thinning shears can be used to add texture and movement to the wig, giving it a more natural and layered look.
- Blend layers: If the wig has multiple layers, thinning shears can be used to blend them seamlessly, creating a smoother transition and a more cohesive appearance.
- Eliminate harsh lines: Thinning shears can soften harsh lines and edges, making the wig look more natural and less like a solid block of hair.
- Improve hair density: Thinning shears can be used to thin out areas of the wig that are too thick, creating a more even and balanced hair density.
Overall, using thinning shears on wigs can help achieve a more natural and polished look. It is important to use them with care and precision to avoid over-thinning and damaging the wig. Consider consulting with a professional stylist or following a tutorial to ensure proper usage and achieve the desired results.
Step-by-Step Guide
If you want to achieve a natural-looking and textured wig, thinning shears are a valuable tool. Here’s a step-by-step guide to help you use thinning shears on wigs:
1. Prepare Your Wig
Before you start, make sure your wig is clean and dry. Brush it thoroughly to remove any tangles or knots. You want to work with a smooth and manageable wig.
2. Section Your Wig
Divide your wig into several sections using hair clips or hairbands. This will help you work on a specific area at a time and ensure even thinning.
3. Start Thinning
Take one section of your wig and hold it between your fingers. Gradually slide the thinning shears along the length of the hair, starting from the mid-shaft. Be careful not to cut too much hair at once; you can always thin more later if needed.

Use short, diagonal cuts instead of long straight cuts to create a more natural look. Always hold the shears at an angle and avoid cutting straight across. Remember, it’s easier to take more hair off than to put it back.
4. Blend the Thinning
After thinning a section, comb through the hair to blend the thinning and assess the results. If necessary, repeat the thinning process on the same section or move on to the next section.
5. Work on the Entire Wig
Continue thinning section by section until you have covered the entire wig. Take breaks and step back to evaluate the overall texture and volume. Adjust as needed to achieve your desired look.
6. Style Your Wig
Once you are satisfied with the thinning, style your wig as desired. You can use heat styling tools, products, or accessories to create your desired hairstyle.
7. Final Touches
After styling, give your wig a final comb through and make any additional adjustments. This will ensure that the thinning looks seamless and natural.

And there you have it! By following this step-by-step guide, you can effectively use thinning shears to achieve a beautifully textured wig.
Prepare the Wig
Before using thinning shears on a wig, it is important to prepare the wig properly. This involves a few key steps to ensure the best results:
- Start by combing or brushing the wig gently to remove any tangles or knots. Use a wide-toothed comb or a wig brush specifically designed for synthetic or human hair wigs.
- If the wig is long or has excess volume, consider using hair clips or hair ties to section off the top layers of hair. This will make it easier to work on one section at a time and prevent any accidental cutting of hair that you want to keep.
- Place the wig on a wig stand or mannequin head to keep it stable and in position while you work. This will also make it easier to see the sections of hair that need to be thinned.
- Inspect the wig for any areas that may require thinning. Look for areas that are too thick or bulky and may benefit from some thinning. It is important to identify these areas before starting the thinning process.
- Once you have identified the areas that need thinning, you can start using the thinning shears. Make sure the shears are clean and sharp, as dull shears can pull or damage the hair.
By properly preparing the wig before using thinning shears, you can help achieve a natural and balanced look while reducing excess volume. Taking the time to prepare the wig will ensure the best results and help maintain the overall quality and longevity of the wig.
Section the Hair
Before using thinning shears on a wig, it is important to section the hair properly. This helps to ensure an even and controlled thinning process.
Start by combing the hair thoroughly to remove any tangles or knots. Then, use hair clips or hair ties to divide the hair into smaller sections. The number of sections will depend on the density and length of the wig.

Take a small section of hair and twist it gently to keep it separate from the other sections. This will allow you to thin each section individually, ensuring a more precise and natural-looking result. Use a hair clip to secure the twisted section so it stays out of the way while you work on other sections.
Repeat this process for each section of the wig. Make sure the sections are not too thick or too thin, as this can affect the overall thinning process. Ideally, each section should be uniform in size and thickness.
Once all the sections are prepared, you are ready to proceed with thinning the hair using the thinning shears.
Trim with Thinning Shears
Thinning shears are a great tool to use when you want to remove bulk and add texture to your wig. They have a unique design with teeth on one blade and a straight edge on the other. This allows you to thin out the hair without taking off much length. Here’s how to use thinning shears on your wig:
|
Thinning shears are a versatile tool that can help you achieve a natural and blended look on your wig. Practice on a small section first to get the hang of it, and remember to go slow and take your time. Happy trimming!
Tips and Tricks
Thinning shears can be a valuable tool when it comes to achieving the perfect look for your wig. Here are some tips and tricks to help you use thinning shears effectively:
1. Start with a Clean Wig
Before using thinning shears on your wig, make sure it is clean and free of any tangles. This will ensure that the shears glide smoothly through the hair and prevent any unwanted breakage or damage.
2. Use the Right Technique
When using thinning shears on your wig, it is important to use the right technique. Instead of cutting straight across, hold the shears at a slight angle and make small, gentle cuts. This will create a more natural and blended look.
3. Take Small Sections
Instead of trying to thin out the entire wig at once, take small sections of hair and thin them out one at a time. This will give you better control and prevent you from taking off too much hair.
4. Use a Comb as a Guide
To ensure an even and uniform thinning, use a comb as a guide. Comb through the section of hair you want to thin, and then position the thinning shears parallel to the comb. This will help you create a more precise and controlled thinning effect.
5. Don’t Overdo It
It’s important not to go overboard with thinning. Start with a conservative approach and thin the hair gradually. You can always go back and thin more if needed, but it’s difficult to add hair back once it’s been cut.
6. Blend the Thinning Effect
After using thinning shears on your wig, comb through the hair to blend the thinning effect. This will help create a seamless and natural look.
By following these tips and tricks, you can make the most out of thinning shears and achieve the desired look for your wig. Remember to be patient and take your time to ensure the best results.
Start with Small Amounts
When using thinning shears on wigs, it is best to start with small amounts of hair at a time. This will help you maintain control and prevent any drastic changes to the overall look of the wig.
Begin by separating a small section of hair, making sure to hold it away from the rest of the wig. Comb through the hair to remove any tangles or knots.
Next, take the thinning shears and carefully trim the ends of the hair. Start by making small, light cuts to remove a little bit of hair at a time. It’s easier to take off more hair later if needed, but it’s much harder to add hair back once it’s been cut.
Continue working your way through the wig, section by section, until you achieve the desired level of thinning. Remember to constantly step back and assess the overall look as you go.
Be sure to take breaks and run your fingers through the wig to check for any uneven areas or spots that may need further thinning. This will help ensure a more natural and blended appearance.
It’s important to be patient and take your time when thinning a wig. Rushing through the process can result in an unbalanced or unnatural look. Practice on small sections before tackling larger areas to build confidence and skill.
Remember, thinning shears can be a great tool for creating texture and removing bulk from a wig, but it’s always best to err on the side of caution and start with small amounts of hair.
Questions and answers
What are thinning shears and how do they work on wigs?
Thinning shears are specialized scissors with teeth that are used to thin out hair. When used on wigs, they can help create a more natural look by removing bulk and reducing thickness. The shears work by cutting some strands of hair while leaving others untouched, resulting in a textured and blended effect.
Can I use regular scissors instead of thinning shears on wigs?
Regular scissors are not recommended for thinning out wigs as they can create uneven results and may damage the hair fibers. Thinning shears are specifically designed with teeth that help to remove bulk without causing any harm. It is best to invest in a good pair of thinning shears for the best results.
Are thinning shears suitable for all types of wigs?
Thinning shears can be used on most types of wigs, including synthetic and human hair wigs. However, it is important to exercise caution when thinning out synthetic wigs as the hair fibers are more delicate and can be easily damaged. It is recommended to seek professional advice or practice on a small section before thinning out the entire wig.


Meet Harrison Clayton, a distinguished author and home remodeling enthusiast whose expertise in the realm of renovation is second to none. With a passion for transforming houses into inviting homes, Harrison's writing at https://thehuts-eastbourne.co.uk/ brings a breath of fresh inspiration to the world of home improvement. Whether you're looking to revamp a small corner of your abode or embark on a complete home transformation, Harrison's articles provide the essential expertise and creative flair to turn your visions into reality. So, dive into the captivating world of home remodeling with Harrison Clayton and unlock the full potential of your living space with every word he writes.