How To Use A Sharpening Stone On Garden Shears

Garden shears are essential tools for any gardener. They help in trimming, shaping, and maintaining the beauty of plants and trees in our gardens. However, over time, the blades of these shears can become dull and lose their cutting edge. This not only makes gardening tasks more difficult but also affects the health of the plants. To ensure your garden shears are always in top shape, it is important to regularly sharpen them using a sharpening stone.
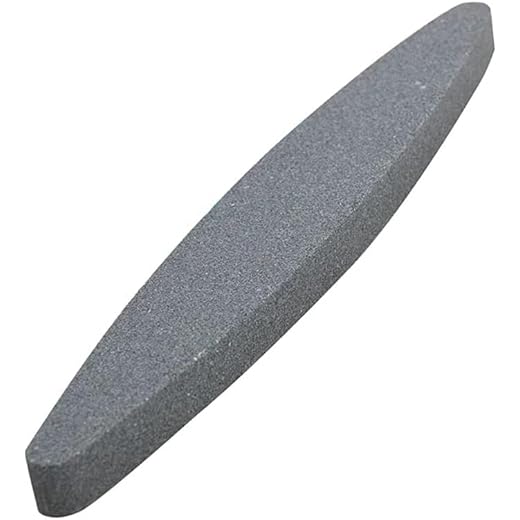
A sharpening stone is a simple tool that helps restore the sharpness of blades. It is made up of a flat surface with abrasive particles embedded in it. These particles help remove metal from the blade, creating a new, sharp edge. Sharpening garden shears with a stone is a relatively easy process that anyone can do at home, with a little patience and practice.
Before you begin sharpening your garden shears, it is important to gather the necessary materials. You will need a sharpening stone, lubricating oil, a cloth or brush for cleaning, and safety gloves to protect your hands. Once you have everything ready, follow these simple steps to sharpen your garden shears.
Step 1: Start by cleaning the shears. Use a cloth or brush to remove any dirt, debris, or sap from the blades. This will ensure a smooth sharpening process and prevent any damage to the stone.
Step 2: Apply a few drops of lubricating oil on the surface of the sharpening stone. This will help reduce friction and make the sharpening process easier. Spread the oil evenly across the stone.
Step 3: Hold the garden shears firmly in one hand and position the blade against the sharpening stone at a 20-degree angle. Make sure the blade is in full contact with the stone.
Step 4: Using light pressure, glide the blade along the stone in a smooth, sweeping motion. Start at the base of the blade and work your way towards the tip. Repeat this motion 5-10 times, or until you start to see a shiny, new edge forming.
Step 5: Flip the shears over and repeat the process on the other blade. Make sure to maintain the same angle and apply consistent pressure.
Step 6: After sharpening both blades, clean off any oil residue from the shears using a cloth or brush. This will prevent any oil from transferring to the plants during future use.
Step 7: Check the sharpness of the blades by gently cutting through a piece of paper or a thin branch. If the shears cut smoothly and effortlessly, then they are ready to use. If not, repeat the sharpening process until desired sharpness is achieved.

By regularly sharpening your garden shears with a sharpening stone, you can ensure they stay sharp and ready to tackle any gardening task. Remember to take your time and be patient when sharpening, as rushing can lead to uneven sharpening and potential damage to the shears. Happy gardening!
Overview of Garden Shears
Garden shears are a versatile tool used in gardening for pruning and trimming plants. They are designed to cut through various types of branches and stems with ease, allowing gardeners to maintain the health and appearance of their plants. Garden shears come in different sizes and shapes, with some models specifically designed for particular tasks.
Types of Garden Shears
There are several types of garden shears available, each designed for a specific purpose:
Hedge Shears:
Hedge shears are characterized by their long handles and straight blades. They are ideal for trimming and shaping hedges and shrubs. The long handles provide leverage, making it easier to cut through thicker branches.
Pruning Shears:
Also known as bypass pruners, pruning shears have curved blades that pass by each other like scissors. They are perfect for precision pruning of small branches and stems. Pruning shears are commonly used for deadheading flowers, removing unwanted growth, and shaping plants.
Lopping Shears:
Lopping shears have long handles and thick, curved blades. They are designed to cut through thicker branches that are too large for pruning shears. Lopping shears are commonly used for cutting back overgrown trees and shrubs.
Maintenance of Garden Shears
Proper maintenance is essential to keep garden shears in good working condition. Regular cleaning, oiling, and sharpening are crucial to ensure optimal performance and longevity. Sharpening garden shears using a sharpening stone is an effective method to restore the sharpness of the blades and improve cutting efficiency.

By understanding the different types of garden shears and how to properly maintain them, you can ensure that your shears are always ready to tackle any gardening task with precision and ease.
Selecting the Right Sharpening Stone
When it comes to sharpening garden shears, using the right sharpening stone is essential for achieving the best results. There are several types of sharpening stones available, each with its own unique characteristics and benefits. Here are some key factors to consider when selecting the right sharpening stone:
- Grit: Sharpening stones come in different grit levels, ranging from coarse to fine. Coarse stones remove more material and are suitable for repairing heavily damaged or very dull shears. Fine stones, on the other hand, are ideal for finishing and polishing the edge.
- Material: Sharpening stones can be made from a variety of materials, including natural stones like Arkansas and Japanese waterstones, as well as synthetic stones like aluminum oxide and diamond stones. Natural stones are known for their high quality and ability to produce extremely sharp edges, while synthetic stones are more affordable and require less maintenance.
- Size: The size of the sharpening stone you choose will depend on the size of your garden shears and personal preference. Larger stones offer a larger sharpening surface and can be more convenient for sharpening larger shears.
- Combination stones: Some sharpening stones are double-sided, featuring different grits on each side. These combination stones are versatile and allow you to switch between grit levels for different stages of the sharpening process.
It’s important to select a sharpening stone that suits your specific needs and preferences. Consider the type of shears you have, the level of sharpening required, and your budget. By choosing the right sharpening stone, you can ensure that your garden shears remain sharp and effective for years to come.
Types of Sharpening Stones
Sharpening stones are available in a variety of materials, each offering different benefits.
- Oil Stones: Oil stones, also known as whetstones, are made from natural or artificial materials and require the use of oil to lubricate the surface. They are known for their ability to quickly remove metal and provide a sharp edge. Oil stones are available in different grits, which determine the coarseness of the stone.
- Water Stones: Water stones are made from natural or synthetic materials and need to be soaked in water before use. They are known for their ability to produce a razor-sharp edge and are popular among professional sharpeners. Water stones come in different grits and can be used for both coarse and fine sharpening.
- Diamond Stones: Diamond stones are made from metal plates that are coated with industrial-grade diamonds. They are extremely hard and durable, making them ideal for sharpening garden shears and other tools. Diamond stones are available in various grits and can be used for both rough shaping and fine sharpening.
- Ceramic Stones: Ceramic stones are made from a combination of ceramic and synthetic materials. They are known for their ability to provide a smooth and consistent sharpening surface. Ceramic stones are available in different grits and are suitable for both coarse and fine sharpening.
When choosing a sharpening stone for your garden shears, consider the type of metal and the level of dullness. Coarser stones are better for removing a significant amount of metal, while finer stones are suitable for refining the edge.

Preparing the Garden Shears for Sharpening
Before you begin sharpening your garden shears, it’s important to properly prepare them. This will ensure that you achieve the best results and avoid damaging the blades. Follow these steps to prepare your garden shears for sharpening:
| Step 1: | Inspect the shears for any dirt, rust, or debris. Clean them thoroughly using a soft cloth or brush, warm soapy water, and a bit of elbow grease. Make sure to remove any stubborn dirt or rust that may be present. |
| Step 2: | Once the shears are clean, dry them completely with a clean towel. Moisture can promote rusting, so it’s essential to remove all traces of water. |
| Step 3: | Inspect the blades for any nicks, dents, or other damage. If you notice any major issues, it may be necessary to seek professional assistance or consider replacing the shears. |
| Step 4: | Loosen any bolts or screws that hold the shears together, if applicable. This will make it easier to access the blades for sharpening. |
| Step 5: | Secure the shears in a vice or clamp to prevent them from moving while you sharpen them. This will ensure that you have steady control over the sharpening process. |
By properly preparing your garden shears before sharpening them, you’ll be able to achieve the best possible results. This will help ensure that your shears remain sharp and effective for all your gardening needs.
Cleaning the Shears
Before you begin sharpening your garden shears, it’s important to first clean them thoroughly. This will help remove any dirt, rust, or debris that may be affecting their performance. Here’s how to clean your shears:
1. Remove any debris
Use a soft brush or cloth to gently remove any loose dirt or plant material from the blades of the shears. You can also use a toothbrush to get into tight spaces.
2. Rinse with water
Once you’ve removed the debris, rinse the shears with water to remove any remaining dirt. Be sure to rinse both the blades and the handles.

3. Dry thoroughly
After rinsing, dry the shears thoroughly with a clean towel. Pay special attention to the blade edges to prevent any rusting.
4. Remove rust, if necessary
If you notice any rust spots on the shears, use a mixture of equal parts white vinegar and water to gently scrub away the rust. Rinse the shears thoroughly and dry them again.
By cleaning your garden shears before sharpening them, you ensure that you have a clean and smooth surface to work with. This will result in a more effective sharpening process and improved performance when using the shears in your garden.
Sharpening the Garden Shears
Garden shears are essential tools for maintaining a beautiful and healthy garden. Over time, the blades of the shears can become dull and inefficient, making it difficult to prune or trim your plants effectively. Sharpening your garden shears regularly is crucial for keeping them in optimal condition. In this guide, we will walk you through the step-by-step process of sharpening your garden shears using a sharpening stone.
What You Will Need
Before you begin sharpening your garden shears, gather the following items:

- A sharpening stone
- A bucket or container
- A lubricating oil
- A rag or cloth
- A pair of gloves
Step 1: Prepare the Shears
Start by cleaning the blades of your garden shears to remove any dirt or debris. You can use a small brush or an old toothbrush to scrub away the residue. Once the blades are clean, dry them thoroughly with a rag or cloth.
Step 2: Lubricate the Shears
Apply a small amount of lubricating oil to the blades of the shears. This will help prevent rust and ensure a smooth sharpening process. Make sure to spread the oil evenly across the entire blade surface.
Step 3: Use the Sharpening Stone
Hold the garden shears firmly in one hand and the sharpening stone in the other. Position the sharpening stone at a 20-degree angle to the blade, with the coarse side facing up. Begin by running the stone along the cutting edge of the blade, moving in a sweeping motion from the base to the tip. Repeat this motion several times, applying even pressure to the blade.
After a few passes, flip the shears over and repeat the process on the opposite blade. Remember to maintain the 20-degree angle and use even pressure throughout.
Step 4: Test the Sharpness
Once you have finished sharpening both blades, wipe off any excess oil and test the sharpness of the shears. Carefully make a few cuts on a piece of paper or a small branch. If the shears cut smoothly and effortlessly, they are sharp and ready to be used. If not, repeat the sharpening process until you achieve the desired sharpness.
By regularly sharpening your garden shears using a sharpening stone, you can ensure that they remain in excellent working condition for years to come. With sharp and efficient shears, you will be able to keep your garden beautifully manicured and thriving.
Proper Angle for Sharpening
When sharpening garden shears using a sharpening stone, it is important to maintain the proper angle to achieve the best results. The correct angle for sharpening garden shears is typically around 20 to 25 degrees. This angle allows the blade to properly cut through branches and leaves with ease.
To find the correct angle, hold the shears flat against the sharpening stone with the beveled side facing up. Slowly tilt the shears until you reach the desired angle. It may be helpful to use a protractor or angle guide to ensure accuracy.
Once you have found the correct angle, apply light pressure and move the shears in a sweeping motion across the sharpening stone. Be sure to maintain the angle throughout the sharpening process, and regularly check the blade for sharpness. Repeat this process until the blade is sharp and free from nicks or burrs.
Remember to take your time and be careful while sharpening garden shears. It is important to maintain the proper angle to ensure the shears are sharpened effectively and to prevent any potential damage to the blade. With practice, you will become more proficient at sharpening garden shears and maintaining their performance.
Finishing the Sharpening Process
After you have completed the sharpening process for your garden shears using a sharpening stone, it is important to finish the process properly to ensure optimal performance. Here are a few steps to follow:
| Clean the Shears | Wipe off any debris or metal shavings from the blades of the shears using a clean cloth. This will help prevent any build-up that could affect the shears’ cutting ability. |
| Apply Lubricant | Apply a thin layer of lubricant, such as oil or silicone, to the blades and pivot point of the shears. This will help reduce friction and ensure smooth operation. |
| Check the Alignment | Hold the shears up to the light and check if the blades are properly aligned. If they are misaligned, use a wrench or pliers to adjust the pivot screw until the blades meet evenly along the entire length. |
| Test the Shears | Test the shears by making a few cuts on a scrap piece of paper or cardboard. If the shears feel sharp and cut smoothly, then you have successfully finished the sharpening process. |
By following these steps, you can ensure that your garden shears are properly sharpened and ready for use. Regular maintenance and sharpening will help extend the life of your shears and keep them in excellent condition.
Questions and answers
Can I use a sharpening stone on my garden shears?
Yes, you can use a sharpening stone to sharpen your garden shears. It is a great tool for maintaining the sharpness of the blades and keeping your shears in top condition.
How often should I use a sharpening stone on my garden shears?
It depends on how frequently you use your shears and the type of work you do. As a general guideline, it is recommended to sharpen your garden shears at least once or twice a year. However, if you use your shears heavily, you may need to sharpen them more often.


Meet Harrison Clayton, a distinguished author and home remodeling enthusiast whose expertise in the realm of renovation is second to none. With a passion for transforming houses into inviting homes, Harrison's writing at https://thehuts-eastbourne.co.uk/ brings a breath of fresh inspiration to the world of home improvement. Whether you're looking to revamp a small corner of your abode or embark on a complete home transformation, Harrison's articles provide the essential expertise and creative flair to turn your visions into reality. So, dive into the captivating world of home remodeling with Harrison Clayton and unlock the full potential of your living space with every word he writes.

