How To Thin Out Curly Hair With Thinning Shears

If you have curly hair, you may know how challenging it can be to manage its volume and thickness. Thinning shears can be a great tool to help you achieve a more desired and manageable look. However, it is essential to use them correctly to maintain the health and integrity of your hair.
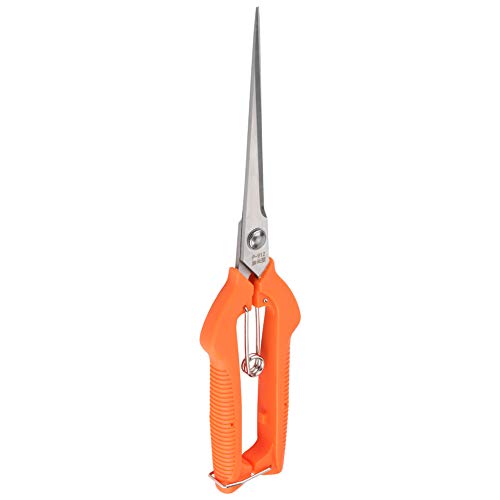
Thinning shears are specialized cutting tools with teeth on one or both blades that help remove bulk from the hair without sacrificing its length. They are particularly useful for people with thick or curly hair, as they can help reduce weight and give the hair a more balanced appearance.
When using thinning shears on curly hair, it is important to follow a few key steps to achieve the best results. First, make sure your hair is clean and dry, as wet hair can stretch and lead to uneven cutting. Comb through your hair to remove any tangles or knots.
Next, section your hair into manageable parts, so you can easily work through each section. Start with a small section at the back or bottom of your head, as this area is less noticeable if you make any mistakes. Hold the thinning shears vertically, parallel to the hair shaft, and make small, downward-pointing cuts, blending the shorter and longer hair together.
Remember to take breaks and step back to assess your progress. It is better to take it slow and make gradual changes rather than thinning out too much hair at once. Once you have finished thinning out one section, move on to the next until you have achieved your desired result.
It is crucial to remember that thinning shears should be used sparingly and with caution, as too much thinning can lead to frizziness and breakage. If you are unsure about using thinning shears on your own, it is always best to seek the help of a professional hairstylist who can guide you and ensure the best outcome for your curly hair.
Thinning out curly hair with thinning shears can be an effective way to manage its volume and reduce bulk. With the right technique and care, you can achieve a more balanced and desirable look that maintains the health and integrity of your hair.
Thin Out Curly Hair With Thinning Shears: A Step-by-Step Guide
If you have curly hair and are looking to achieve a lighter, more manageable look, thinning shears can be a great tool to add to your hairstyling routine. Thinning shears are designed to remove bulk and create texture in the hair, making it easier to style and preventing it from looking too heavy or overwhelming.
Step 1: Prepare Your Hair
Start by washing and conditioning your hair as you normally would. Make sure to use products that are specifically designed for curly hair to enhance your natural texture.
Step 2: Detangle Your Hair
Before you begin thinning your hair, it’s important to detangle it to ensure an even result. Use a wide-toothed comb or your fingers to gently remove any knots or tangles in your hair.

Step 3: Section Your Hair
Divide your hair into sections to make the thinning process more manageable. You can use hair clips or hair ties to hold each section in place.
Step 4: Start Thinning
Take a small section of hair from one of the sections and hold it between your fingers, about halfway down the hair strand. Open the thinning shears and hold them parallel to the hair strand.
Tip: It’s important to only thin the mid-lengths and ends of your hair, avoiding the roots. This will help prevent your hair from looking thin or straggly.
Slowly close the thinning shears while moving them towards the hair ends. Be careful not to cut too much hair in one go, as it’s easier to remove more hair later than to add it back. Repeat this process for each section of hair, working your way through your entire head.
If you’re not sure how much hair to thin, it’s always better to start with a smaller amount and then thin more if needed. It’s easier to add more texture later than to remove too much and end up with uneven or choppy hair.

Step 5: Blend and Style
Once you’ve finished thinning your hair, use your fingers or a wide-toothed comb to gently blend the cut sections with the untouched sections. This will help create a seamless and natural look.
Style your hair as desired using your preferred hair products. Thinning your hair with thinning shears can make it easier to achieve the desired hairstyle, as the reduced bulk allows for better control and definition of your curls.
Step 6: Maintain Your Thinned Hair
To keep your hair looking its best, make sure to maintain it properly. Regularly trim any split ends and deep condition your hair to keep it healthy and moisturized.
Note: If you’re unsure about using thinning shears on your own, it’s best to consult a professional hairstylist. They can provide expert advice and ensure that the thinning process is done correctly.
Thin out your curly hair with thinning shears and enjoy a lighter, more manageable hairstyle that enhances your natural curls. With the right technique and products, you can achieve a stunning look that suits your individual style.

Prepare Your Hair for Thinning
Thinning out curly hair can be an effective way to reduce bulk and add more movement to your locks. However, it’s important to properly prepare your hair before using thinning shears to avoid any potential damage or unwanted results.
1. Cleanse and condition your hair
Start by washing your hair with a gentle shampoo and conditioner to remove any product buildup or oils. This will help to create a clean canvas for thinning and ensure that the shears can easily glide through your locks.
2. Detangle your hair
Before using thinning shears, it’s crucial to detangle your hair. Use a wide-toothed comb or a brush with flexible bristles to gently remove any knots or tangles. This will ensure that the shears can evenly and smoothly thin out your curls without causing any breakage or pulling.
Choose the Right Thinning Shears
When it comes to thinning out curly hair, selecting the right type of thinning shears is crucial. There are a few key factors to consider when choosing the perfect pair:
Type of Shears: Opt for thinning shears specifically designed for curly hair. Look for shears with fine teeth spaced evenly apart, as this will allow for controlled thinning without removing excessive volume.

Material: Consider the material of the shears. Stainless steel is a popular choice as it is durable and resistant to corrosion. Additionally, it provides a smooth cutting experience.
Handle Design: Choose shears with a comfortable handle design. Look for ergonomic handles with a good grip to ensure maximum control and reduce strain on your hand and wrist.
Size and Weight: Select shears that are the right size and weight for your hand. Shears that are too heavy or too small can cause discomfort and affect your ability to achieve the desired results.
Quality and Maintenance: Invest in high-quality shears that will last. Proper maintenance, such as regular cleaning and oiling, will prolong the lifespan of your shears and ensure optimal performance.
By carefully selecting the right thinning shears, you can effectively thin out your curly hair without compromising its natural texture and volume.

Section Your Hair
To begin thinning out your curly hair with thinning shears, it’s important to first section your hair properly. This will make the process easier and more manageable. Follow these steps to section your hair:
- Start by combing through your hair to detangle any knots or tangles.
- Divide your hair into multiple sections using hair clips or hair ties. This will help you work on one section at a time.
- Begin by separating the top layer of your hair from the rest. Clip it up or away to keep it out of the way while you work on the lower layers.
- Next, divide the remaining hair into two or more sections depending on the thickness of your hair. Clip each section up to keep it separate.
- Release one section at a time to work on with the thinning shears. Start with the section closest to the nape of your neck and move upwards.
By sectioning your curly hair, you’ll be able to thin out your hair evenly and ensure that no area is overlooked. Take your time and be careful when using the thinning shears to avoid cutting too much hair at once.
Start Thinning Your Hair
Thinning shears are a great tool for reducing bulk and volume in curly hair. Here are some steps to help you get started with thinning your hair using thinning shears:
Step 1: Wash and Condition Your Hair
Start by washing your hair with a moisturizing shampoo and conditioner specifically designed for curly hair. This will help to soften your hair and make it easier to work with.
Step 2: Detangle Your Hair
After washing and conditioning, gently detangle your hair using a wide-toothed comb or your fingers. This will help to prevent any tangles or knots from getting in the way when you start thinning your hair.

Step 3: Divide Your Hair Into Sections
Using clips or hair ties, divide your hair into manageable sections. This will help you have better control over each section and ensure that you don’t miss any areas while thinning your hair.
Step 4: Start Thinning
|
Hold the thinning shears with the teeth pointing downwards, and comb through a small section of hair with your regular comb. Make sure the section of hair is not too thick. |
Hold the thinning shears parallel to the hair shaft, about 2-3 inches away from the roots, and start cutting into the hair using short, quick snips. Be careful not to cut too much hair in one go. |
|
Continue combing through the section of hair while using the thinning shears to cut into the hair. This will help to create a more natural blend and prevent any harsh lines. |
Repeat this process on each section of hair, focusing on areas where you want to reduce bulk and volume. Remember to comb through the hair before each snip to ensure an even and controlled cut. |
Thinning your hair with thinning shears can be an effective way to remove excess bulk and create a more balanced and manageable hairstyle. Take your time and be patient while thinning your hair to achieve the desired results.
Finish the Look
Once you have thinned out your curly hair with thinning shears, it’s time to finish the look. Here are some tips to help you achieve the desired outcome:
1. Style with Product
Apply a styling product to your hair to help define and enhance your curls. Choose a product that suits your hair type and desired style, such as a curl-defining cream or a texturizing spray.
2. Use a Diffuser
Dry your hair with a diffuser attachment on your blow dryer to minimize frizz and preserve the natural shape of your curls. This will help to maintain the volume and texture created by thinning out your hair.
3. Trim any Stray Ends
Inspect your hair after using the thinning shears and identify any stray ends that might need further trimming. Use regular hair cutting scissors to remove these stray ends and ensure a polished finish.
4. Maintain Regular Haircuts
To keep your curly hair looking its best, schedule regular haircuts to remove any split ends and maintain the shape of your hairstyle. Consult with a professional stylist to determine the best frequency for your specific hair type.
With these finishing touches, you can achieve the desired look for your thinned out curly hair. Experiment with different styling techniques and products to find the perfect balance between volume, definition, and manageability.
Questions and answers
What are thinning shears?
Thinning shears are scissors that have a notched blade that helps to remove bulk from thick or curly hair without completely cutting it off.
How do you use thinning shears on curly hair?
To use thinning shears on curly hair, you should start by separating a small section of hair. Then, hold the shears at a slight angle to the hair and make small, quick cuts along the length of the section. This will help to remove some of the bulk and create a more even look.
Can you thin out curly hair without using thinning shears?
Yes, you can thin out curly hair without using thinning shears. One way to do this is by using a technique called “twist and pull.” This involves twisting small sections of the hair and then gently pulling the twisted hair away from the scalp. This will help to stretch out the curls and reduce the volume.
How often should I use thinning shears on my curly hair?
The frequency of using thinning shears on curly hair depends on your hair type and desired outcome. It’s generally recommended to use them every 6-8 weeks to maintain the desired shape and reduce bulk. However, it’s important to consult with a professional hairstylist to determine the best schedule for your specific hair type and style goals.
Can thinning shears damage curly hair?
If used improperly or too frequently, thinning shears can potentially damage curly hair. Over-thinning can lead to the hair appearing frizzy or uneven. It’s important to consult with a professional hairstylist who is experienced with working with curly hair to ensure the thinning process is done correctly and does not cause any damage.


Meet Harrison Clayton, a distinguished author and home remodeling enthusiast whose expertise in the realm of renovation is second to none. With a passion for transforming houses into inviting homes, Harrison's writing at https://thehuts-eastbourne.co.uk/ brings a breath of fresh inspiration to the world of home improvement. Whether you're looking to revamp a small corner of your abode or embark on a complete home transformation, Harrison's articles provide the essential expertise and creative flair to turn your visions into reality. So, dive into the captivating world of home remodeling with Harrison Clayton and unlock the full potential of your living space with every word he writes.