How To Sterilize Pruning Shears Between Cuts

Pruning shears are essential tools for any gardener or landscaper, but they can also be a breeding ground for bacteria, fungi, and other harmful organisms. If not properly cleaned and sterilized between cuts, these shears can spread diseases and pests throughout your garden, potentially causing damage to your plants and trees.
Fortunately, sterilizing pruning shears is a simple process that can help protect your plants and ensure their overall health and vitality. By following a few easy steps, you can effectively remove any potentially harmful contaminants from your shears, preventing the spread of diseases and promoting a clean cutting environment.
The first step in sterilizing your pruning shears is to clean them thoroughly. Start by removing any visible dirt, plant debris, or sap using a dry cloth or brush. Then, fill a bucket or basin with warm water and add a small amount of dish soap. Soak your shears in this soapy water for a few minutes, gently scrubbing any remaining residue with a brush. Rinse the shears with clean water and dry them completely before proceeding to the next step.
After cleaning the pruning shears, the next step is to sterilize them. One of the most effective methods of sterilization is to use rubbing alcohol or hydrogen peroxide. Place a small amount of either liquid into a clean cloth or paper towel and wipe down the entire surface of the shears, paying close attention to the blades and cutting edges. The alcohol or hydrogen peroxide will help kill any remaining bacteria or fungi present on the shears.
For an extra level of disinfection, you can also use a 10% bleach solution to sterilize your pruning shears. Mix one part bleach with nine parts water and soak your shears in this solution for about 30 minutes. Be sure to rinse the shears thoroughly with clean water and dry them completely before using them again. This bleach solution is particularly effective against stubborn pathogens and can help prevent the transmission of diseases.

By regularly sterilizing your pruning shears between cuts, you can maintain a clean and healthy cutting environment for your plants. This simple yet crucial step can greatly reduce the risk of spreading diseases and pests, ensuring that your garden thrives and flourishes. Remember to always wear gloves during the sterilization process to protect your hands, and store your shears in a clean and dry place when not in use.
Why It’s Important: Sterilizing Pruning Shears
Pruning shears are essential tools for maintaining the health and appearance of plants. Whether you are a seasoned gardener or just beginning to explore the world of plant care, understanding the importance of sterilizing your pruning shears is crucial.
Infection Control
One of the primary reasons for sterilizing pruning shears is to control the spread of infections. When you prune a plant, you create an open wound that can easily become a breeding ground for bacteria, fungi, and other pathogens. By sterilizing your pruning shears between cuts, you can minimize the risk of introducing these harmful microorganisms into healthy plant tissues.
Preventing Disease Transmission
Plants can be susceptible to various diseases, and some can be spread through contaminated pruning tools. Sterilizing pruning shears helps prevent the transmission of diseases between plants, especially if you are working with different plant specimens. This practice is particularly important if you suspect a plant is infected, as it can help prevent the disease from spreading and causing further damage.
Regular sterilization of pruning shears is especially crucial if you work with a variety of plants or if you are pruning diseased foliage.

It is important to note that cleaning your pruning shears with soap and water is not enough to properly sterilize them. Soap and water may remove visible dirt, but they are not effective at killing the microorganisms that cause infections and diseases. Instead, proper sterilization methods such as using rubbing alcohol or a bleach solution should be employed.
By understanding the importance of sterilizing your pruning shears, you can ensure the health and well-being of your plants and prevent the spread of infections and diseases.
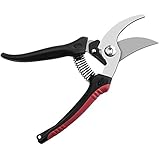
The Right Tools: Pruning Shears
When it comes to garden maintenance, having the right tools is essential. One of the most important tools for any gardener is a pair of pruning shears. Pruning shears, also known as hand pruners or secateurs, are a versatile tool that is used for trimming and shaping plants.
There are several types of pruning shears available, including anvil pruners, bypass pruners, and ratchet pruners. Anvil pruners have a straight cutting blade that cuts against a flat surface, while bypass pruners have two curved blades that work like scissors. Ratchet pruners have a mechanism that allows for easier cutting of thicker branches.
Features of Pruning Shears:
Pruning shears are designed with features that make them effective and comfortable to use. Some common features include:

- Sharp blades: Pruning shears have sharp blades that ensure clean and precise cuts, reducing the risk of damage or disease to plants.
- Ergonomic handles: The handles of pruning shears are usually designed with ergonomic grips that make them comfortable to hold and reduce hand fatigue.
- Locking mechanism: Many pruning shears have a locking mechanism that keeps the blades closed when not in use, ensuring safe storage and preventing accidental cuts.
- Adjustable tension: Some pruning shears have an adjustable tension mechanism that allows the user to customize the cutting strength to suit different branches or plants.
Cleaning and Maintenance:
It’s important to regularly clean and maintain your pruning shears to ensure that they remain in good working condition. After each use, wipe the blades with a cloth or brush to remove any debris or sap. This will help prevent the spread of diseases between plants. It’s also a good idea to regularly oil the blades and hinges to keep them moving smoothly.
In addition to regular cleaning, it’s important to sterilize your pruning shears between cuts, especially when working with diseased plants or plants susceptible to diseases. This can be done by soaking the blades in a solution of one part bleach to nine parts water for a few minutes. After sterilizing, rinse the blades with clean water and dry them thoroughly.
| Step | Description |
|---|---|
| 1 | Wipe the blades with a cloth or brush to remove debris. |
| 2 | Apply a drop of oil to the blades and hinges to keep them moving smoothly. |
| 3 | Prepare a solution of one part bleach to nine parts water. |
| 4 | Soak the blades in the bleach solution for a few minutes. |
| 5 | Rinse the blades with clean water. |
| 6 | Dry the blades thoroughly before storing them. |
By taking good care of your pruning shears and sterilizing them between cuts, you can ensure that they remain sharp and effective for years to come. Happy pruning!
Preventing the Spread: Sterilization Essentials
Pruning shears are an essential tool for any gardener, but they can also be a breeding ground for bacteria and disease if not properly cleaned and sterilized. Preventing the spread of these potential pathogens is crucial for maintaining the health of your plants. Here are some essential steps to follow when sterilizing your pruning shears:

1. Cleaning: Before sterilizing your pruning shears, it is important to clean them thoroughly. Remove any dirt, debris, or plant material from the blades and handles using a stiff brush or cloth. Pay attention to hard-to-reach areas, such as the joint and pivot points.
2. Disinfecting: Once the pruning shears are clean, it’s time to disinfect them. Prepare a solution of one part bleach to nine parts water in a container large enough to submerge the shears. Alternatively, you can use isopropyl alcohol or hydrogen peroxide as a disinfectant. Submerge the shears in the solution for at least 10 minutes to ensure all surfaces are thoroughly disinfected.
3. Drying: After disinfecting the pruning shears, take them out of the solution and allow them to air-dry completely. Avoid using a cloth or towel to dry them, as it may introduce contaminants back onto the shears.
4. Lubrication: Once the pruning shears are dry, apply a light coating of oil or lubricant to the blades and pivot points. This will help prevent rust and keep the shears in optimal condition for future use.
5. Sterilization Frequency: It is recommended to sterilize your pruning shears between each cut, especially when working with different plants or infected plant material. This will minimize the risk of spreading pathogens from one plant to another.

By following these sterilization essentials, you can significantly reduce the spread of bacteria and disease, keeping your pruning shears and plants healthy. Remember to incorporate these steps into your regular pruning routine to maintain the overall health and vitality of your garden.
How to Sterilize: Step-by-Step Guide
Proper sterilization of pruning shears is important to prevent the spread of diseases and pests between plants. Follow these steps to ensure your pruning shears are clean and ready for use:
Step 1: Clean the Pruning Shears
Start by wiping off any dirt or debris from the pruning shears using a brush or a cloth. Make sure to remove any sap or residue that might be stuck on the blades.
Step 2: Disassemble (if possible)
If your pruning shears can be disassembled, separate the blades and handles for a more thorough cleaning. This will also make it easier to reach all the nooks and crannies.
Step 3: Wash with Soapy Water
Fill a bucket or sink with warm water and add a few drops of mild dish soap. Submerge the pruning shears in the soapy water and let them soak for a few minutes. Use a scrub brush or sponge to clean the blades and handles, paying special attention to any areas with residue or sap.
Step 4: Rinse with Water
After scrubbing, rinse the pruning shears under running water to remove any soap residue. Make sure to rinse both the blades and handles thoroughly.

Step 5: Sanitize with Rubbing Alcohol or Bleach
To sterilize the pruning shears, you can either use rubbing alcohol or a bleach solution. For rubbing alcohol, soak a cotton ball or a cloth in the alcohol and wipe down the blades and handles. If using a bleach solution, mix 1 part bleach with 9 parts water and soak the pruning shears for 10 minutes.
Step 6: Dry and Oil
After sanitizing, make sure to dry the pruning shears completely to prevent rust. Use a clean cloth or paper towel to remove any excess moisture. Once dry, you can apply a few drops of oil to the blades and pivot point to lubricate the shears and prevent rusting.
Step 7: Reassemble (if applicable)
If you disassembled the pruning shears in step 2, reassemble them once they are dry and oiled. Make sure all the components are securely in place and the shears are functioning properly before using them.
Step 8: Store in a Clean and Dry Place
Finally, store your sterilized pruning shears in a clean and dry place to prevent contamination. A gardening toolbox or a dedicated tool storage area would be ideal for keeping your shears clean and ready for use.
By following these steps, you can ensure that your pruning shears are properly sterilized and ready to tackle any pruning task without spreading diseases or pests to your plants.
Maintaining Healthy Plants: Additional Tips
In addition to sterilizing pruning shears between cuts, there are several other practices you can follow to keep your plants in optimal health. Implementing these tips will not only promote healthy growth but also protect your plants from diseases and pests.
| Tips | Description |
|---|---|
| Proper Watering | Water your plants regularly, but be mindful not to overwater. Different plants have different water requirements, so it’s important to understand the needs of each specific plant. |
| Good Drainage | Ensure that your pots or garden beds have proper drainage to prevent water from pooling and causing root rot. Use well-draining soil and consider placing pebbles or stones at the bottom of the container. |
| Adequate Sunlight | Most plants require a certain amount of sunlight to thrive. Place your plants in locations where they can receive the appropriate amount of sunlight for their species. If you have indoor plants, consider using artificial grow lights. |
| Fertilization | Using appropriate fertilizers can provide essential nutrients to your plants. Follow the instructions on the fertilizer packaging and avoid over-fertilizing, as it can harm the plants. |
| Pruning and Trimming | Regularly prune and trim your plants to promote healthy growth and remove dead or diseased parts. Sterilize pruning shears between cuts to prevent the spread of diseases. |
| Pest Control | Regularly inspect your plants for signs of pests and take appropriate measures to control them. This can include using organic insecticides, introducing beneficial insects, or manually removing pests. |
| Proper Plant Placement | Consider the specific needs of your plants when deciding where to place them. Some plants prefer shade, while others thrive in direct sunlight. Placing them in the right location will greatly contribute to their overall health. |
| Regular Monitoring | Keep a close eye on your plants and monitor their growth regularly. This will allow you to detect any problems or changes in their health early on, so you can take timely action to address them. |
By following these additional tips, you can create an environment that promotes the health and well-being of your plants. Remember to tailor your care routines to the specific needs of each plant species for optimal results.
Questions and answers
Why is it important to sterilize pruning shears between cuts?
It is important to sterilize pruning shears between cuts to prevent the spread of diseases and pests. When pruning plants, there is a risk of transferring pathogens from one plant to another, especially if there are any diseased or infected plants in the garden. Sterilizing the pruning shears helps to kill any harmful microorganisms and prevent their spread.
What can happen if you don’t sterilize pruning shears between cuts?
If pruning shears are not sterilized between cuts, there is a risk of spreading diseases and pests throughout the garden. Pathogens from infected plants can be transferred to healthy plants, causing them to become infected as well. This can lead to widespread damage and can even result in the death of plants if the infection is severe.
How should pruning shears be sterilized between cuts?
To sterilize pruning shears between cuts, you can use rubbing alcohol or bleach. First, make sure to remove any debris or plant material from the blades. Then, soak a cloth or paper towel with rubbing alcohol or bleach and wipe down the blades thoroughly. Let the shears air dry before using them again. It is important to repeat this sterilization process between each prune, especially when moving from one plant to another.
Can I use other cleaning agents to sterilize pruning shears?
While rubbing alcohol and bleach are commonly used to sterilize pruning shears, you can also use other cleaning agents. Hydrogen peroxide and household disinfectants are effective alternatives. However, make sure to follow the instructions provided with the cleaning agent to ensure proper sterilization. It is important to choose a cleaning agent that will effectively kill pathogens and is safe for use on gardening tools.
How often should pruning shears be sterilized between cuts?
Pruning shears should be sterilized between each cut to prevent the spread of diseases and pests. This is especially important when working with different plants, as it can help prevent cross-contamination. It is good practice to sterilize the shears before starting to prune and repeating the process between each prune.


Harrison Clayton
Meet Harrison Clayton, a distinguished author and home remodeling enthusiast whose expertise in the realm of renovation is second to none. With a passion for transforming houses into inviting homes, Harrison's writing at https://thehuts-eastbourne.co.uk/ brings a breath of fresh inspiration to the world of home improvement. Whether you're looking to revamp a small corner of your abode or embark on a complete home transformation, Harrison's articles provide the essential expertise and creative flair to turn your visions into reality. So, dive into the captivating world of home remodeling with Harrison Clayton and unlock the full potential of your living space with every word he writes.

