How To Sharpen Metal Cutting Shears

Do you have a pair of metal cutting shears that have become dull and ineffective? Don’t worry, sharpening them is easier than you might think! With just a few simple steps, you can bring your shears back to their sharp and efficient state.
Firstly, it’s important to understand the anatomy of your shears. They typically consist of two blades that meet at a pivot point. Over time, these blades can become worn and lose their sharpness. But fear not, with the right tools and technique, you can have them cutting like new again.
The first step in sharpening your metal cutting shears is to clean them thoroughly. Remove any dirt, rust, or debris that may have accumulated on the blades. You can use a cloth or brush to gently wipe away the grime. This step ensures that you have a clean surface to work with and prevents any further damage to the blades during the sharpening process.
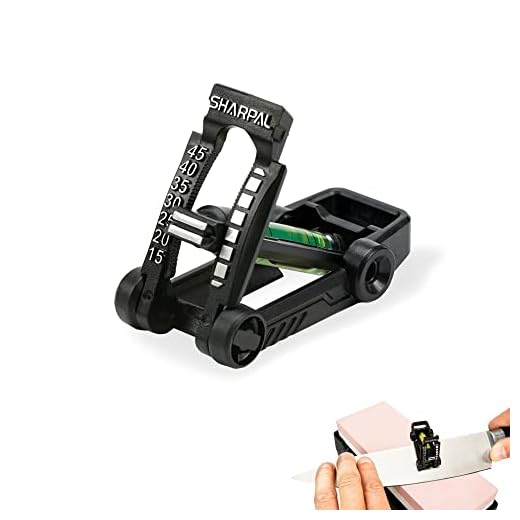
Once your shears are clean, it’s time to start sharpening. One of the most effective methods is to use a sharpening stone or a file. Hold the stone or file at a 20-degree angle and carefully run it along the edge of each blade. Be sure to maintain a consistent angle and apply even pressure throughout the process. Repeat this motion several times on both blades until you start to see a shiny, polished edge.
After sharpening, it’s important to test the shears to ensure they are cutting properly. Try cutting through a piece of paper or a thin fabric to see if the blades glide smoothly and effortlessly. If you still feel resistance or the cut is not clean, repeat the sharpening process until you achieve the desired sharpness.

Remember, proper maintenance and regular sharpening are essential to prolong the life and performance of your metal cutting shears. By following these simple steps, you can keep your shears in top-notch condition and enjoy clean, precise cuts every time.
Tips for Sharpening Metal Cutting Shears
If you want to keep your metal cutting shears in top shape, regular sharpening is essential. Here are some tips to help you sharpen them effectively:
1. Use the right tools: To sharpen metal cutting shears, you will need a sharpening stone or a honing file. Make sure you have the proper tools before you begin the sharpening process.
2. Clean the shears: Before sharpening, it’s important to clean the blades of the shears. Wipe them down with a cloth to remove any dirt or debris that may be present.
3. Start with the bevel edge: When sharpening, begin with the bevel edge of the shear’s blade. Place the blade against the sharpening stone at a 20-degree angle and move it along the stone in a sweeping motion. Repeat this process several times on both sides of the blade.

4. Move on to the convex edge: After sharpening the bevel edge, move on to the convex edge of the blade. This edge should be sharpened at a slightly higher angle, around 25 degrees. Use the same sweeping motion along the sharpening stone to sharpen this edge.
5. Test the sharpness: Once you have sharpened both edges of the shears, test their sharpness by cutting a piece of paper. If the shears cut through the paper smoothly without tearing, they are sharp enough. If not, continue sharpening until the desired sharpness is achieved.
6. Maintain the sharpness: To maintain the sharpness of your metal cutting shears, make sure to clean them after each use and store them in a dry place. Regularly inspect the blades for any signs of dullness and sharpen them as needed.
Remember, sharpening metal cutting shears requires precision and patience. Follow these tips to keep your shears sharp and ready for any cutting tasks.
Gather the Necessary Equipment
Before you begin sharpening your metal cutting shears, it is important to gather all the necessary equipment. Having the right tools will ensure that the sharpening process is effective and efficient. Here’s a list of the items you will need:
1. Metal File
A metal file is the primary tool you will use to sharpen the blades of your shears. Look for a file with a fine or medium cut, as this will provide the best results. Make sure the file is clean and free from any rust or debris.
2. Honing Stone
In addition to the metal file, you will also need a honing stone. This stone is used to smooth out any rough edges or burrs that may be left after filing. Choose a fine-grit honing stone, as it will give your shears a polished finish.
3. Lubricant
Using lubricant during the sharpening process is crucial to prevent the shears from overheating and causing damage to the blades. You can use regular household oil or a specialized sharpening oil. Apply the lubricant to the blades before and during the sharpening process.
4. Safety Equipment
Sharpening metal cutting shears can be a potentially dangerous task, so it’s important to prioritize safety. Gather safety equipment such as gloves and safety glasses to protect your hands and eyes from any potential injuries. Ensure that you have a stable surface to work on and enough space to move the shears freely.
Once you have gathered all the necessary equipment, you will be ready to proceed with the sharpening process. This preparation ensures that you have everything you need to successfully sharpen your metal cutting shears and achieve optimal results.

Inspect the Shears for Damage
Before beginning the sharpening process, it is important to inspect the metal cutting shears for any signs of damage. This will ensure that the shears are in good condition and will not be further damaged during sharpening.
1. Check the blades
Start by examining the blades of the shears for any nicks, chips, or deformities. Run your finger along the edges of the blades to feel for any rough spots or irregularities. If you notice any damage, it is important to address it before sharpening. You can try to smooth out minor imperfections using a file or sandpaper.
2. Check the pivot point
Next, inspect the pivot point of the shears. This is the area where the blades are attached to the handles. Make sure the pivot is tightly secured and does not have any excessive wobble. If there is any looseness or play in the pivot, it may need to be tightened or replaced.
It is also important to check the handles for any cracks or breaks. The handles should be sturdy and provide a comfortable grip. If you notice any damage to the handles, it is best to replace them before sharpening the shears.
By thoroughly inspecting the shears for damage, you can ensure that the sharpening process will be successful and that the shears will be safe to use. Address any issues before sharpening to prevent further damage and maximize the lifespan of your metal cutting shears.

Prepare the Shears for Sharpening
Before sharpening your metal cutting shears, it is important to properly prepare them to ensure optimal results. Follow these steps to get your shears ready for sharpening:
Clean the Shears
Start by cleaning the shears to remove any dirt or debris that may be present on the blades. This can be done using a soft cloth or a brush. Make sure to remove any rust or sticky substances as well. Cleaning the shears will allow you to see the condition of the blades more clearly and prevent any interference during the sharpening process.
Inspect the Blades
Next, inspect the blades of the shears for any damage or signs of wear. Look for chips, nicks, or dull edges that may affect the cutting performance. If you notice any major damage, it may be necessary to replace the blades entirely. Minor damage or dullness can typically be addressed through sharpening.
You can use a magnifying glass or a bright light source to examine the blades more closely, ensuring that you don’t miss any potential issues. If you find any problems, take note of them so you know what areas to focus on during the sharpening process.
Disassemble the Shears
In some cases, it may be necessary to disassemble the shears to access the blades for sharpening. Check the manufacturer’s instructions or look for any screws or bolts that hold the shears together. Use the appropriate tools to remove these fasteners and separate the shears into their individual parts.

Be careful while disassembling the shears and make sure to keep track of all the small components, such as screws or washers, to avoid losing them. Remember the order in which the parts were assembled to ensure correct reassembly later on.
Once the shears are disassembled, you will have better access to the blades for sharpening. It will also allow you to clean any hard-to-reach areas more effectively.
 |
 |
 |
|
Clean the shears to remove dirt and debris. |
Inspect the blades for damage or wear. |
Disassemble the shears if necessary. |

Choose the Right Sharpening Method
When it comes to sharpening metal cutting shears, there are a few different methods you can choose from. The method you choose will depend on the condition of your shears and your personal preference. Here are some common sharpening methods to consider:
1. Hand Sharpening:
Hand sharpening is a traditional method that requires a steady hand and a sharpening stone. This method involves holding the shears at the correct angle and gently sliding the stone along the blades to remove any nicks or dullness. It can take some practice to master the technique, but it is a cost-effective option if you have the time and patience.
2. Professional Sharpening:
For those who prefer to leave the sharpening to the experts, professional sharpening is a convenient option. Many hardware stores or shear manufacturers offer sharpening services. They have the necessary tools and experience to sharpen your shears quickly and effectively. This option may be more expensive, but it ensures that your shears are sharpened properly.
Whichever method you choose, it’s important to note that regular maintenance and sharpening will extend the lifespan of your metal cutting shears. Dull shears not only perform poorly, but they also put unnecessary strain on your hands and wrists. So, choose the method that works best for you and keep your shears in top-notch condition!
Sharpen the Blades
To begin sharpening your metal cutting shears, you will need a sharpening stone or a sharpening tool specifically designed for shears. Make sure the tool you choose is suitable for your shears and follow the manufacturer’s instructions for its use.
Step 1: Clean the Blades
Before you start sharpening, it’s essential to clean the blades of your shears. Use a cloth or a brush to remove any dirt, rust, or debris that may have accumulated on the blades. Cleaning the blades will ensure a smoother sharpening process and prevent any damage to the sharpening tool.
Step 2: Observe the Blade Angle
Take a close look at the blades of your shears and determine the angle at which they were originally sharpened. This angle should guide your sharpening process to maintain the shears’ cutting efficiency. Most metal cutting shears have a beveled edge, typically around 30 degrees.
Note: If you are unsure about the original blade angle, try to match the existing angle as closely as possible when sharpening.
Step 3: Sharpen with the Sharpening Tool
Hold the shears firmly, ensuring that you have a good grip and control. Start sharpening the blades by following the manufacturer’s instructions using the chosen sharpening tool. Maintain a consistent angle throughout the sharpening process to achieve an even edge on both blades.
Tip: It’s recommended to move the sharpening tool in the same direction as the blade’s bevel, starting at the base and moving towards the tip of the blade.
Continue sharpening until you feel the blades are adequately sharpened, but be careful not to overdo it, as this can lead to excessive wear on the blades.
Step 4: Test the Sharpness
After sharpening, carefully wipe off any metal shavings or debris from the blades using a cloth. Test the sharpness of your shears by cutting a piece of paper or a thin piece of fabric. If the shears cut cleanly and smoothly without any snags or tears, then your sharpening process was successful.
Note: If the shears don’t cut properly, you may need to repeat the sharpening process or seek professional sharpening services.
By following these steps, you can effectively sharpen the blades of your metal cutting shears, ensuring they perform optimally for your cutting needs. Remember to take proper safety precautions and read the instructions provided with your sharpening tool to ensure a successful sharpening process.
Test the Shears for Sharpness
Once you have finished sharpening your metal cutting shears, it’s important to test them to ensure they are sharp enough for use. Here are some methods you can use to test the sharpness of your shears:
- Try cutting a piece of paper or lightweight cardboard. Hold the shears at a slight angle and make a clean, straight cut. If the shears effortlessly cut through the material without tearing or snagging, they are likely sharp enough.
- Test the shears on a piece of fabric. Hold the fabric taut and make a smooth cutting motion. If the shears easily glide through the fabric with clean cuts, the shears are sharp.
- Another way to test the sharpness is by cutting a thin piece of aluminum foil. If the shears make a clean, smooth cut without leaving jagged edges or folding the foil, they are sharp.
If your shears fail any of these tests or feel dull when cutting, you may need to repeat the sharpening process or seek professional sharpening services.
Questions and answers
What are metal cutting shears?
Metal cutting shears are tools used for cutting and shaping metal.
Why do I need to sharpen metal cutting shears?
Sharpening metal cutting shears is important to ensure clean and efficient cuts. Over time, the blades can become dull and lose their sharpness, making it difficult to cut through metal.


Meet Harrison Clayton, a distinguished author and home remodeling enthusiast whose expertise in the realm of renovation is second to none. With a passion for transforming houses into inviting homes, Harrison's writing at https://thehuts-eastbourne.co.uk/ brings a breath of fresh inspiration to the world of home improvement. Whether you're looking to revamp a small corner of your abode or embark on a complete home transformation, Harrison's articles provide the essential expertise and creative flair to turn your visions into reality. So, dive into the captivating world of home remodeling with Harrison Clayton and unlock the full potential of your living space with every word he writes.

