How To Sharpen Barber Shears

Barber shears are essential tools for any hairstylist or barber. Over time, constant use and exposure to hair and products can cause the blades to become dull. Dull shears can lead to uneven and sloppy cuts, making it difficult to achieve the desired hairstyle. To ensure optimal performance and prolong the lifespan of your barber shears, regular sharpening is necessary. Sharpening your shears may seem like a daunting task, but with the right tools and techniques, it can be done easily and effectively.
Step 1: Gather the necessary materials.
To sharpen your barber shears, you’ll need a few essential materials: a sharpening stone or honing wheel, lubricating oil, a screwdriver, and a soft cloth. The sharpening stone or honing wheel should be specifically designed for sharpening scissors or shears to achieve the best results.
Step 2: Disassemble the shears.
Before you begin sharpening, it’s important to disassemble the shears. Use a screwdriver to remove the screw that holds the two blades together. This will allow you to sharpen each blade individually for a more precise and effective result.

Step 3: Sharpen the blades.
Once the shears are disassembled, it’s time to sharpen the blades. Place the sharpening stone or honing wheel on a stable surface. Hold one blade at a time and gently glide it along the stone or wheel. Make sure to maintain a consistent angle and apply light pressure. Repeat this process several times until the blade is sharp.
Note: If you’re using a sharpening stone, it’s important to wet it with water or lubricating oil before starting the sharpening process.
Step 4: Reassemble and lubricate the shears.
After sharpening both blades, carefully reassemble the shears by aligning the holes and attaching the screw. Tighten the screw, but make sure not to overtighten, as it may affect the smooth movement of the shears. Once the shears are reassembled, apply a few drops of lubricating oil to the pivot area and blades to ensure smooth operation.

Step 5: Test and adjust if necessary.
Finally, it’s time to test the sharpened shears. Hold them in your hand and make a few cutting motions to ensure they are working properly. If you notice any issues or uneven cutting, you may need to readjust the blades or repeat the sharpening process.
By following these steps, you can keep your barber shears in excellent condition and ensure precise and clean haircuts every time. Regular maintenance and sharpening will not only enhance the performance of your shears but also extend their lifespan, saving you time and money in the long run.
Step-by-Step Guide to Sharpening Barber Shears
Keeping your barber shears sharp is crucial for achieving clean and precise haircuts. Dull shears can snag hair and create uneven and jagged cuts. Here is a step-by-step guide to help you sharpen your barber shears effectively:
Step 1: Clean the Shears

Before sharpening the shears, make sure they are free from any hair or debris. Use a brush or a damp cloth to remove any dirt or grime. Cleaning the shears will ensure a smooth sharpening process.
Step 2: Disassemble the Shears
To sharpen the shears properly, you need to disassemble them. Carefully unscrew the pivot screw and separate the two blades. Be cautious not to damage the blades or the screw during this process.
Step 3: Sharpening Method
There are different sharpening methods available, such as using a sharpening stone or a sharpening system. Choose the method that you are most comfortable with and have the necessary tools for.

– Using a Sharpening Stone:
If you opt for using a sharpening stone, wet the stone with water or oil according to the manufacturer’s instructions. Hold the blade at a 10-15 degree angle and slowly slide it back and forth across the stone. Repeat this motion several times on each side of the blade until you achieve a sharp edge.
– Using a Sharpening System:
A sharpening system can offer more precision and ease. Follow the instructions provided with the sharpening system to set it up correctly. Place the blade in the system and move it along the designated slots to sharpen the blade.
Step 4: Check the Sharpness

After sharpening the blade, check its sharpness. You can carefully run your thumb along the edge to feel if it is sharp enough. If the blade is still dull, repeat the sharpening process until you achieve the desired sharpness.
Step 5: Reassemble the Shears
Once you are satisfied with the sharpness of the blade, carefully reassemble the shears. Align the blades properly and tighten the pivot screw securely. Ensure that the blades move smoothly and do not have any wobbling or misalignment.
Step 6: Lubricate the Shears
To maintain the shears’ smooth operation, apply a few drops of oil to the pivot screw and between the blades. Use a lightweight oil specifically designed for shears to prevent rust and keep the blades lubricated.

Step 7: Test the Shears
Finally, test the shears to ensure they are cutting smoothly and efficiently. Cut a small section of hair to confirm the sharpness and accuracy of the blades. Make any necessary adjustments before using the shears on clients.
By following these step-by-step instructions, you can keep your barber shears sharp and ready for flawless haircuts. Remember to regularly maintain and sharpen your shears to extend their lifespan and maintain the quality of your haircuts.
Why It’s Important to Sharpen Barber Shears Regularly
Sharp barber shears are essential tools for any barber or hair stylist. Regularly sharpening your shears is crucial for several reasons:
1. Precision and Accuracy: Sharpened shears provide precise and accurate cuts, allowing you to create clean lines, layers, and textures. Dull shears can result in uneven, jagged, or damaged haircuts, leaving your clients unsatisfied.

2. Time Efficiency: Sharp shears enable you to work faster and more efficiently. With properly sharpened blades, you can achieve the desired hairstyle in fewer passes, reducing the overall time spent on each client.
3. Comfort and Ergonomics: Dull shears can strain your hand and wrist muscles due to excessive force required to cut through hair. Sharpened shears require less effort, reducing the risk of repetitive strain injuries and enhancing your overall comfort during the haircutting process.
4. Extending Shear Lifespan: Regularly sharpening your shears helps to maintain their cutting edge and prevents them from becoming too dull. This can significantly extend the lifespan of your shears, saving you money in the long run by avoiding frequent replacements.
5. Client Satisfaction: Keeping your shears consistently sharp ensures that every haircut you provide meets or exceeds your client’s expectations. Happy clients are more likely to become repeat customers and refer your services to others, contributing to the growth of your business.
Remember, investing in a professional sharpening service or learning how to sharpen your shears yourself is essential for maintaining the quality and efficiency of your hair cutting tools. By prioritizing regular sharpening, you can enhance your skills as a barber or hair stylist and deliver exceptional results to your clients.
Essential Tools and Materials for Sharpening Barber Shears
Sharpening barber shears is a precise and delicate process that requires the right tools and materials. Here are the essential tools and materials you will need:
1. Sharpening Stone
A high-quality sharpening stone is crucial for achieving a sharp edge on your barber shears. Look for a stone with a fine grit, as this will give you a polished and sharp finish.
Tip: Wet the stone before use and lubricate it with honing oil to prevent overheating and ensure a smooth sharpening process.
2. Hone
A honing tool is used to refine and smooth the sharpened edge on the barber shears. It helps remove any burrs or imperfections, resulting in a clean and precise cut.
Tip: Hone the shears regularly to maintain their sharpness and prolong their lifespan.
3. Screwdriver
A screwdriver is essential for disassembling and reassembling the shears. This will allow you to access the blades and properly sharpen them without any hindrances.
Tip: Take note of the screw type and size of your shears to ensure you have the correct screwdriver for the job.
4. Cleaning Brush
A cleaning brush is necessary for removing debris, hair, and any buildup from the shears. This will not only keep the shears clean but also prevent any interference with the sharpening process.
Tip: Regularly clean and lubricate the shears to maintain their performance and prevent rusting.
5. Safety Gloves
Safety gloves are vital to protect your hands during the sharpening process. This will prevent any accidental cuts or injuries while handling the shears and using the sharpening tools.
Tip: Choose gloves that are comfortable yet provide adequate protection.
By having these essential tools and materials, you will be well-equipped to sharpen your barber shears effectively and achieve professional-grade results. Remember to follow proper sharpening techniques and take your time to ensure the best outcome.
Step 1: Cleaning and Preparing the Shears
Before sharpening your barber shears, it is important to clean and prepare them. This step ensures that the shears are free from any debris or buildup that may affect the sharpening process.
Start by wiping down the shears with a clean, dry cloth to remove any dust, hair, or other particles. Make sure to clean both the blades and the handles thoroughly.
If there is any residual buildup on the shears, you can use a mild detergent and warm water to gently clean them. Avoid using harsh chemicals or abrasive materials that can damage the shears.
After cleaning, dry the shears completely to prevent any rusting or corrosion. You can use a clean cloth or towel to carefully dry all the surfaces of the shears.
Next, inspect the shears for any damage or signs of wear. Look for any nicks, chips, or bends in the blades, as these can affect the sharpening process. If you notice any damage, it is best to have the shears repaired by a professional before attempting to sharpen them.
Finally, make sure the shears are properly lubricated before sharpening. Apply a few drops of oil to the pivot screw and the area where the blades meet. This will ensure smooth movement and prevent excessive wear and tear during the sharpening process.
By taking the time to clean and prepare your barber shears before sharpening, you will ensure optimal results and prolong the lifespan of your shears.
Step 2: Using the Sharpening Stone to Sharpen the Shears
Once you have gathered all the necessary tools, it’s time to sharpen your barber shears using a sharpening stone. Follow these steps to ensure a precise and effective sharpening process:
- Place the sharpening stone on a stable surface, making sure it doesn’t move or wobble.
- Hold the barber shears firmly in one hand, with the blade facing away from you.
- With the other hand, grip the sharpening stone and position it at a 45-degree angle against the beveled edge of the shear blade.
- Apply light pressure and move the sharpening stone along the entire length of the blade in a smooth, sweeping motion.
- Repeat this process several times, gradually increasing the pressure to ensure an even sharpening.
- Pay special attention to any nicks or dull areas on the blade, using extra strokes to remove them.
- After sharpening one side of the blade, flip the shear over and repeat the process on the other side.
- Continue alternating between sides until the entire blade has been sharpened to your satisfaction.
- Once you are done sharpening, wipe off any metal shavings or residue from the blade using a clean, dry cloth.
- Test the sharpness of the shears by cutting through a piece of paper or hair. If they glide smoothly without catching or tearing, you have successfully sharpened them.
Remember to be patient and take your time while sharpening the shears. Rushing through the process may result in an uneven sharpening or damage to the blades. With practice, you will become more comfortable and proficient at sharpening your barber shears.
Questions and answers
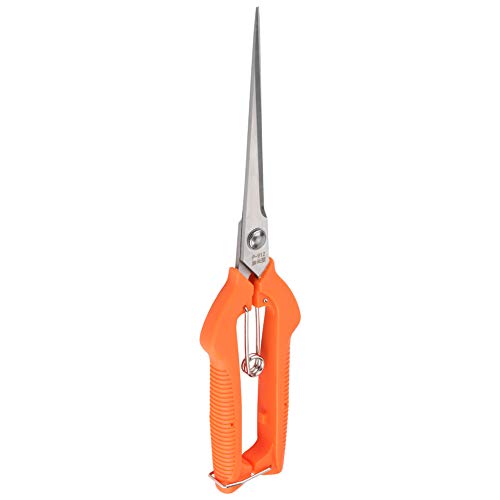
What are barber shears?
Barber shears are special scissors designed for hair cutting and grooming. They have sharp, straight blades that are longer than those of regular scissors, allowing for more precise and efficient cuts.
How often should barber shears be sharpened?
The frequency of sharpening barber shears depends on how frequently they are used and the type of hair being cut. As a general guideline, it is recommended to sharpen them every 3-6 months for professional barbers or every 6-12 months for occasional home users.

Meet Harrison Clayton, a distinguished author and home remodeling enthusiast whose expertise in the realm of renovation is second to none. With a passion for transforming houses into inviting homes, Harrison's writing at https://thehuts-eastbourne.co.uk/ brings a breath of fresh inspiration to the world of home improvement. Whether you're looking to revamp a small corner of your abode or embark on a complete home transformation, Harrison's articles provide the essential expertise and creative flair to turn your visions into reality. So, dive into the captivating world of home remodeling with Harrison Clayton and unlock the full potential of your living space with every word he writes.