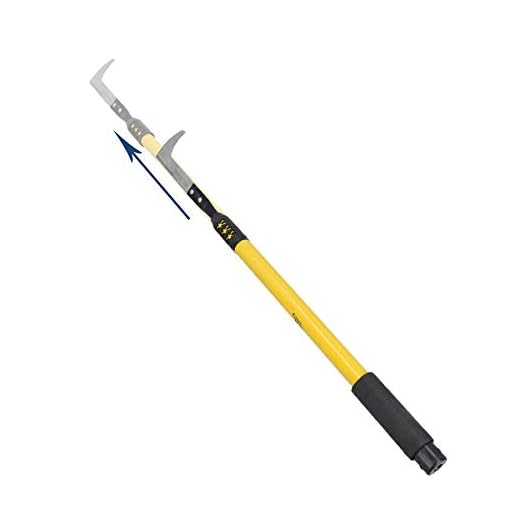
How To Repair Gardenline Telescopic Hedge Shears Handle

Hedge shears are essential tools for maintaining a well-groomed garden or yard. However, due to frequent use and exposure to outdoor elements, the handle of your Gardenline telescopic hedge shears may become damaged or worn out over time. Instead of replacing the entire tool, you can easily repair the handle yourself with just a few simple steps.
First, start by examining the extent of the damage to the handle. If it is a minor crack or chip, you can repair it using epoxy glue. Clean the handle thoroughly and dry it completely before applying the glue. Apply a small amount of epoxy glue to both sides of the crack and press them firmly together. Allow the glue to dry and cure according to the manufacturer’s instructions.
If the damage is more severe and the handle is completely broken or split, you will need to replace it. Begin by removing the old handle from the hedge shears. This can usually be done by unscrewing the bolts or screws that secure it in place. Once the old handle is removed, take accurate measurements of its length and diameter to ensure you purchase a suitable replacement handle.
When purchasing a new handle, consider opting for a durable and weather-resistant material such as fiberglass or hardwood. These materials are known for their strength and ability to withstand outdoor conditions. Once you have obtained the replacement handle, attach it to the hedge shears by screwing it in securely. Double-check that it is tightly fastened and does not wobble or move when in use.
Finally, test the repaired or replaced handle by using the Gardenline telescopic hedge shears on a small section of your hedge or shrub. Ensure that the handle feels comfortable and secure in your hands and that it allows for smooth and efficient cutting. If any issues persist, re-check the attachment of the handle and make any necessary adjustments.

By following these simple steps, you can easily repair or replace the handle of your Gardenline telescopic hedge shears, saving you money and ensuring that your gardening tasks can be carried out effectively and efficiently.
Tools for Repairing Gardenline Telescopic Hedge Shears Handle
Repairing the handle of your Gardenline Telescopic Hedge Shears can be a simple and cost-effective solution to prolong the life of your tool. To complete this repair, you will need a few basic tools:
1. Screwdriver Set
A screwdriver set with various sizes and types of screwdrivers will be necessary for disassembling the handle of the hedge shears. Different screws may be used in different parts of the tool, so having a versatile screwdriver set will ensure you have the right tool for the job.
2. Pliers
Pliers will come in handy for gripping and manipulating small components or fasteners. They can be used to hold screws in place while you tighten them or remove stubborn parts that may be difficult to access or unscrew.
3. Wire Cutters
Wire cutters can be useful for cutting through any wire or cable connections that may be present in the handle of the hedge shears. This can be particularly helpful if the handle is damaged and needs to be replaced.

4. Sandpaper
Sandpaper of various grits will be necessary for smoothing any rough or uneven surfaces on the handle or any replacement parts. This can help ensure a comfortable grip and prevent any potential injury from sharp edges.
5. Epoxy or Adhesive
If certain parts of the handle are cracked or broken, a strong epoxy or adhesive can be used to bond them back together. Make sure to choose an adhesive that is suitable for the materials used in the handle construction.
6. Replacement Parts
If the handle is badly damaged and cannot be repaired, you may need to consider purchasing replacement parts. These can include a new handle grip, screws, or any other components that are necessary for the repair.
Having these tools on hand will make the process of repairing your Gardenline Telescopic Hedge Shears handle much easier and more efficient. Take your time and ensure that you follow any manufacturer’s instructions or guidelines for the specific tool model you are working on.
Screwdriver
A screwdriver is an essential tool for repairing the handle of Gardenline telescopic hedge shears. It is used to remove and replace screws that secure the handle to the shears. Having the right screwdriver is crucial to avoid damaging the screws or the handle.

Types of Screwdrivers
There are several types of screwdrivers available, each designed for specific types of screws. The most common types of screwdrivers are:
| Type | Description |
|---|---|
| Flathead Screwdriver | A flathead screwdriver has a flat, straight edge and is used for screws with a single slot on top. |
| Phillips Screwdriver | A Phillips screwdriver has a cross-shaped tip and is used for screws with a cross-shaped slot on top. |
| Torx Screwdriver | A Torx screwdriver has a star-shaped tip and is used for screws with a star-shaped slot on top. |
| Hex Screwdriver | A hex screwdriver has a hexagonal-shaped tip and is used for screws with a hexagonal slot on top. |
Choosing the Right Screwdriver
Before attempting to repair the handle of the Gardenline telescopic hedge shears, it is important to determine the type of screws used. Inspect the screws and choose the corresponding screwdriver.
Using the wrong screwdriver can strip the head of the screw or cause damage to the handle, making it difficult to repair. It’s always best to use a screwdriver that fits snugly into the screw head to provide maximum control and prevent slippage.
When selecting a screwdriver, consider the size and length of the handle. A longer handle provides more leverage, making it easier to turn the screws. Additionally, choose a screwdriver with a comfortable grip to prevent hand fatigue during the repair process.
Remember to always apply steady and even pressure when using a screwdriver to prevent any accidents or injuries. After successfully repairing the handle, make sure to tighten the screws securely to ensure the handle is stable and safe to use.

Replacement Handle
If the handle of your Gardenline telescopic hedge shears is damaged or broken, you can easily replace it with a new one. Here are the steps to follow:
1. Purchase a Replacement Handle: Before you can proceed with the repair, you will need to find a replacement handle that is compatible with your Gardenline telescopic hedge shears. You can try contacting the manufacturer or look for spare parts online or at a local garden store.
2. Remove the Old Handle: Carefully unscrew any screws or bolts that are securing the old handle to the shears. Once they are removed, gently detach the old handle from the shears.
3. Attach the New Handle: Take the new handle and align it with the openings on the shears. Insert any screws or bolts that came with the replacement handle and tighten them to secure the new handle in place.
4. Test the Repair: Once the new handle is securely attached, test the shears by extending and retracting the telescopic handle. Make sure it moves smoothly and without any resistance.

5. Tighten any Loose Parts: Check if any other parts of the shears are loose or need tightening. This will help ensure that the shears are fully functional and safe to use.
Note: If you are unsure about the repair process or lack the required tools, it is recommended to seek assistance from a professional or contact the manufacturer for further guidance.
Pliers
Pliers are a versatile tool that can be very useful when repairing the handle of your Gardenline telescopic hedge shears. They come in various shapes and sizes, but the most common type used for repairs is the needle-nose or long-nose pliers.
Here are some ways you can use pliers to repair your shears:
- Removing broken parts: If the handle of your shears is damaged or broken, you can use pliers to remove the broken parts. The long-nose pliers are especially useful for reaching into tight spaces and gripping small pieces.
- Bending metal: Pliers can also be used to bend any metal parts that may have become misaligned or deformed. This is particularly helpful if the handle needs to be reshaped to fit properly.
- Tightening screws: Pliers can act as a makeshift wrench to tighten any loose screws or bolts on your shears. Simply grip the screw head with the pliers and turn it clockwise to tighten.
- Attaching new handle: If you need to attach a new handle to your shears, pliers can be used to secure it in place. You can use them to grip and twist any nuts or bolts that are needed to hold the handle securely.
When using pliers, it’s important to use the right amount of force and grip the tool firmly to avoid slipping and causing injury. Additionally, make sure to select pliers that are the appropriate size for the task at hand to ensure efficient repairs.
Overall, pliers are a valuable tool to have for repairing the handle of your Gardenline telescopic hedge shears. Whether you need to remove broken parts, bend metal, tighten screws, or attach a new handle, pliers can help you get the job done effectively.
Removing the Damaged Handle
Before you can repair the handle of your Gardenline telescopic hedge shears, you’ll need to remove the damaged handle. Follow the steps below to safely remove the handle:
Step 1: Gather the Necessary Tools
Make sure you have the following tools on hand before you begin:
- Phillips screwdriver
- Flathead screwdriver
- Pliers
- Hammer
Step 2: Loosen the Screws
Start by using the Phillips screwdriver to loosen the screws that are securing the handle to the shears. This will typically involve unscrewing two or three screws, depending on the model of your shears.
Step 3: Remove the Screws
Once the screws are loose, use the flathead screwdriver to carefully remove them from the handle. Set the screws aside in a safe place so you don’t lose them.

Step 4: Detach the Handle
With the screws removed, you can now detach the handle from the shears. Gently pull the handle away from the main body of the shears, being careful not to force or twist it too much.
Depending on the condition of the handle, it may come off easily or require a bit of force. If it seems stuck, you can use pliers to carefully wiggle and loosen the handle from its position.
Be cautious not to damage any other parts of the shears during this step. If needed, use a hammer to tap the handle gently from underneath to help loosen it.
Step 5: Inspect the Handle
Once the handle is separated from the shears, take a close look at it to assess the extent of the damage. This will help determine whether you can simply repair the handle or if you need to replace it entirely.
Now that you have successfully removed the damaged handle, you can proceed with the necessary repairs or replacement to restore your Gardenline telescopic hedge shears to their full functionality.
Installing the Replacement Handle
Once you have obtained a replacement handle for your Gardenline telescopic hedge shears, follow these steps to install it:
- Begin by removing the worn or damaged handle from the hedge shears. You can do this by unscrewing any screws or bolts that are holding it in place.
- Next, prepare the replacement handle by removing any packaging or protective coverings.
- Align the holes on the replacement handle with the corresponding holes on the hedge shears.
- Insert the screws or bolts through the holes and tighten them securely to attach the replacement handle to the shears.
- Ensure that the replacement handle is secure and stable by giving it a gentle tug or shake.
- Test the newly installed handle by extending and retracting the telescopic feature of the shears to make sure it is functioning properly.
- If the handle feels loose or unstable, tighten the screws or bolts further until it is secure.
- Once you are confident that the replacement handle is installed correctly, you can start using your Gardenline telescopic hedge shears again.
Remember to follow the manufacturer’s recommendations and guidelines for maintenance and care of your shears to prolong their lifespan.
Securing the Replacement Handle
Once you have obtained a replacement handle for your Gardenline telescopic hedge shears, the next step is to securely attach it to the shears. Follow these steps to ensure a sturdy and long-lasting handle replacement:
- Start by applying a small amount of wood glue to the end of the new handle. This will help create a strong bond between the handle and the shears.
- Insert the end of the new handle into the opening on the shears where the old handle was removed. Make sure the handle is aligned properly with the shears.
- Use a hammer to gently tap the end of the handle into place. Be careful not to apply too much force, as this can damage the handle or the shears.
- If necessary, use a screwdriver to gently pry the opening on the shears slightly wider to accommodate the new handle. Take care not to widen the opening too much, as this can weaken the shears.
- Once the handle is fully inserted, wipe away any excess glue with a damp cloth.
- Allow the handle to dry and set according to the instructions provided with the wood glue. This can usually take a few hours or overnight.
- After the handle is securely attached and fully dried, test the shears to make sure they are working properly. If any issues arise, such as handle instability or difficulty in cutting, double-check the attachment and contact the manufacturer if necessary.
By following these steps, you can effectively secure the replacement handle for your Gardenline telescopic hedge shears, ensuring their functionality and longevity.
Testing and Finishing up
Once you have finished replacing the handle on your Gardenline telescopic hedge shears, it’s important to test the repair to ensure it was successful. Here are some steps to follow:
- Hold the shears in your hands and extend the handle to its maximum length.
- Check that the handle is securely locked into place and doesn’t wobble or slide.
- Move the shears in a cutting motion to ensure that the handle is stable and provides proper control.
- Open and close the shears a few times to ensure that the blades are aligned correctly and function smoothly.
- Inspect the overall stability and durability of the shears.
If everything looks and feels good during the testing phase, you can finish up the repair by giving the shears a final cleaning and lubrication. Use a cloth to wipe off any dirt or debris on the blades and handle. Apply a small amount of lubricating oil to the pivot point and any other moving parts of the shears to keep them functioning properly.
After the cleaning and lubrication, you can store your repaired Gardenline telescopic hedge shears in a dry and safe place until they are ready to be used again.
Questions and answers
What are telescopic hedge shears?
Telescopic hedge shears are garden tools used for trimming and shaping hedges. They have long handles that can be extended or retracted to reach high or low branches and provide better leverage.
How do I repair a broken handle on my Gardenline telescopic hedge shears?
To repair a broken handle on your Gardenline telescopic hedge shears, start by removing the screws or bolts that secure the handle to the blade. Once the handle is detached, assess the damage and determine if it can be repaired or needs to be replaced. If it can be repaired, use epoxy or strong adhesive to mend any cracks or breakages in the handle. Allow the adhesive to dry completely before reattaching the handle to the blade. If the handle needs to be replaced, contact the manufacturer or search for a replacement handle online or at a garden supply store.

How many steps in 100 meters

Meet Harrison Clayton, a distinguished author and home remodeling enthusiast whose expertise in the realm of renovation is second to none. With a passion for transforming houses into inviting homes, Harrison's writing at https://thehuts-eastbourne.co.uk/ brings a breath of fresh inspiration to the world of home improvement. Whether you're looking to revamp a small corner of your abode or embark on a complete home transformation, Harrison's articles provide the essential expertise and creative flair to turn your visions into reality. So, dive into the captivating world of home remodeling with Harrison Clayton and unlock the full potential of your living space with every word he writes.

