How To Loosen Garden Shears
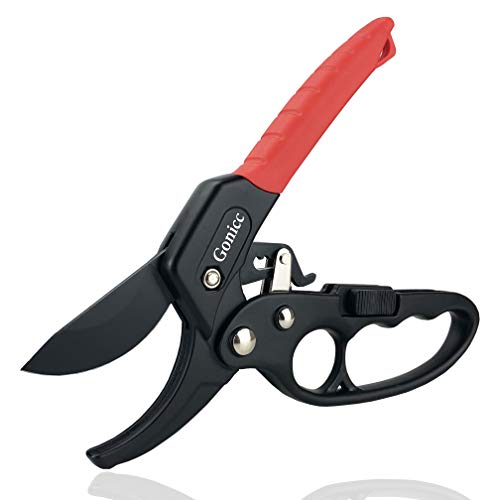
Garden shears are essential tools for any gardener, allowing them to trim and shape plants with precision. However, over time, these shears can become stiff and difficult to use, making gardening tasks more challenging. Fortunately, there are several simple steps you can take to loosen your garden shears and restore their functionality.
Firstly, it’s important to clean your shears thoroughly to remove any dirt, debris, or rust that may be causing them to seize up. Start by wiping the blades with a clean, damp cloth to remove any surface dirt. Then, use a wire brush or steel wool to scrub away rust and grime. Be sure to pay attention to the joint where the blades meet, as this area is particularly prone to buildup.
Once your shears are clean, it’s time to lubricate them. Apply a few drops of oil to the joint, allowing it to seep into the mechanism. You can use a general-purpose oil or specifically designed garden tool oil. After applying the oil, work the blades back and forth to distribute it evenly. This will help to loosen any rust and ensure smooth operation.
Lastly, if your garden shears remain stiff, you may need to adjust the tension. Most shears have a nut or bolt near the joint that can be tightened or loosened to adjust the tension. Use a wrench or pliers to turn the nut or bolt counterclockwise, loosening it slightly. Test the shears to see if they move more freely. If necessary, repeat the process until you achieve the desired tension.
By following these steps, you can easily loosen your garden shears and enhance your gardening experience. Remember to clean your shears regularly and lubricate them to prevent future stiffness. With well-maintained shears, you’ll be able to tackle your gardening tasks with ease and efficiency.

Why Maintain Garden Shears?
Garden shears are an essential tool for any gardener. Whether you use them for pruning plants, trimming hedges, or cutting flowers, having a pair of sharp and well-maintained shears can make your gardening tasks much easier and more efficient.
Regular maintenance of your garden shears is important for several reasons:
1. Improved Cutting Performance
Over time, garden shears can become dull due to regular use, which can make cutting tasks more difficult. By maintaining your shears properly, you can ensure that the blades remain sharp and cutting becomes effortless. This will save you time and effort when working in your garden.
2. Longer Tool Lifespan
Maintaining your garden shears can also help extend their lifespan. By cleaning and lubricating the blades regularly, you can prevent rust and corrosion, which can weaken the metal over time. Regular maintenance will ensure that your shears last for many years, saving you money in the long run.
Tip: It’s a good idea to inspect your garden shears before each use to check for any signs of damage or wear. If you notice any loose screws or worn-out parts, make sure to repair or replace them promptly to prevent further damage.

3. Prevent the Spread of Diseases
When working with plants, it’s important to prevent the spread of diseases. Garden shears can easily transfer plant pathogens from one plant to another if they are not properly cleaned and disinfected. By regularly sanitizing your shears, you can reduce the risk of spreading diseases and keep your plants healthy.
Regular maintenance of your garden shears is a simple task that can greatly benefit both you and your plants. By keeping your shears sharp, well-maintained, and clean, you can enjoy a more efficient and enjoyable gardening experience.
Signs of Tightened Shears
When your garden shears are too tight, they will not operate at their full potential, and it can become difficult to make clean, precise cuts. Here are some signs that your garden shears may be too tight:
1. Difficulty Opening and Closing
If you are struggling to open and close your garden shears, this is a clear sign that they may be tightened too much. The blades should move smoothly and easily when you squeeze the handles. If you feel resistance or hear any creaking or grinding noises, it’s time to loosen them up.
2. Poor Cutting Performance
Another indication that your shears are too tight is if they are not cutting as effectively as they used to. When the blades are tightened excessively, they can become misaligned, resulting in jagged or incomplete cuts. If you notice that your shears are not cleanly trimming branches or leaves, it’s a sign that they need to be loosened.

It’s important to regularly check the tightness of your garden shears to ensure optimal performance. By paying attention to these signs and adjusting the tightness accordingly, you can keep your shears in excellent working condition and enjoy successful cutting in your garden.
Step-by-Step Method to Loosen Shears
If you find that your garden shears are stiff or difficult to open and close, it’s important to address the issue before it affects the performance of your shears. Here is a step-by-step method to loosen garden shears:
1. Clean the Shears
First, take a cloth or sponge and remove any dirt, debris, or sap that may have accumulated on the shears. This will help prevent further damage and will make it easier to identify the areas that need additional attention.
2. Apply Penetrating Oil
Next, apply a few drops of penetrating oil to the pivot point and the area where the blades intersect. The penetrating oil will help loosen any rust or grime that may be causing the shears to stick. Allow the oil to sit for a few minutes to penetrate the surface.
3. Work the Shears
Using a pair of pliers, hold the shears by the handles and work them back and forth to loosen any rust or debris. Be careful not to apply too much pressure and accidentally damage the shears.

If the shears are still stiff, you can also try tapping them against a hard surface to help loosen any stuck particles.
4. Apply Lubricant
After working the shears, apply a small amount of lubricant to the pivot point and any moving parts. This will help ensure smooth operation and prevent future rust or corrosion.
Choose a lubricant that is specifically designed for garden tools to ensure optimal performance.
5. Test the Shears
Finally, test the shears by opening and closing them a few times. They should now move freely and smoothly. If you still experience resistance, you may need to repeat the steps or seek professional help.
Remember to clean and lubricate your garden shears regularly to prevent them from becoming stiff and difficult to use. Proper maintenance will help prolong the life of your shears and ensure that they continue to perform their best.

Regular Maintenance Tips
To ensure that your garden shears continue to perform optimally, regular maintenance is essential. Here are some tips to help you keep your shears in top shape:
1. Clean the Blades
After each use, it’s important to clean both the blades of your garden shears. Use a clean cloth or sponge to remove any dirt, sap, or other debris that may have accumulated. This will prevent any build-up that can cause your shears to become sticky or ineffective.
2. Lubricate the Pivot Point
The pivot point of your shears should be lubricated regularly to maintain smooth and easy operation. Apply a small amount of oil or lubricant to the pivot area and work it into the mechanism by opening and closing the shears a few times.
3. Sharpen the Blades
Over time, the blades of your shears may become dull due to regular use. Sharpening them periodically will ensure that they continue to cut cleanly and effortlessly. Use a sharpening stone or file to gently sharpen the cutting edges, following the original angle of the blades.
4. Store Properly
When not in use, store your garden shears in a safe and dry place. Make sure they are protected from moisture and direct sunlight, as these can cause rust and damage to the blades. Hanging them on a wall or storing them in a tool cabinet will help prevent any accidents and keep them easily accessible.

By following these regular maintenance tips, you can prolong the lifespan of your garden shears and ensure that they always function at their best. Remember, proper care and maintenance will not only save you time and effort but also extend the overall durability of your shears.
Questions and answers
Why do garden shears get stiff?
Garden shears can become stiff due to rust, debris build-up, or lack of lubrication. Additionally, over time, the blades may become misaligned, causing the shears to bind and become difficult to use.
What are some signs that garden shears need loosening?
If your garden shears feel stiff and difficult to open and close, if they make a squeaking sound when in use, or if you notice that the blades are not properly aligned, it may be time to loosen them.
How can I loosen my garden shears without damaging them?
To loosen garden shears without causing damage, you can start by cleaning them thoroughly, removing any debris or rust. Then, lubricate the pivot point and blade edges with oil. If the shears are still stiff, you can use a wrench to gently adjust the tension bolt. It’s important to make small adjustments and test the shears regularly to ensure they are not too loose or tight.


Meet Harrison Clayton, a distinguished author and home remodeling enthusiast whose expertise in the realm of renovation is second to none. With a passion for transforming houses into inviting homes, Harrison's writing at https://thehuts-eastbourne.co.uk/ brings a breath of fresh inspiration to the world of home improvement. Whether you're looking to revamp a small corner of your abode or embark on a complete home transformation, Harrison's articles provide the essential expertise and creative flair to turn your visions into reality. So, dive into the captivating world of home remodeling with Harrison Clayton and unlock the full potential of your living space with every word he writes.

