How To Cut Straight With Pinking Shears

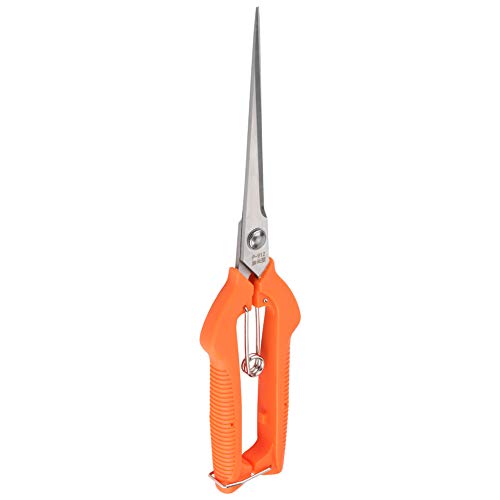
Getting a straight line while cutting fabric can be a real challenge, especially if you don’t have the right tools. However, if you want to achieve clean and professional-looking edges, pinking shears can be a game-changer. Pinking shears are scissors with serrated blades that create a zigzag pattern along the cut edge, preventing fraying. These specialized shears are perfect for cutting fabrics like cotton, linen, or lightweight materials.
When it comes to cutting straight lines with pinking shears, there are a few crucial steps to follow. First, ensure that you have a reliable pair of pinking shears. Look for shears that have a sharp and precise cutting edge to ensure clean and accurate cuts.
Before you start cutting, make sure to mark the fabric with a straight line. You can use a fabric marker, tailor’s chalk, or a pencil, depending on the type of fabric you’re working with. Use a ruler or a straight edge to guide your markings and ensure a crisp and even line.
When cutting, hold the fabric taut and slowly guide the pinking shears along the marked line with steady pressure. Avoid rushing or forcing the shears through the fabric, as this can lead to jagged or uneven edges. It’s important to maintain a consistent pace to achieve smooth and straight cuts.
Practice makes perfect when it comes to cutting straight with pinking shears, so don’t get discouraged if your first attempts are not flawless. Take your time and be patient with the process. With a bit of practice and the right technique, you’ll be able to cut straight lines with pinking shears like a pro.

Choosing the Right Pair of Pinking Shears
When it comes to cutting straight with pinking shears, using the right pair is essential. Not all pinking shears are created equal, and selecting the perfect pair for your project can make a big difference in the final result.
Here are a few factors to consider when choosing the right pair of pinking shears:
| Blade Quality | Look for pinking shears with sharp, durable blades. Stainless steel blades are often the best choice, as they are rust-resistant and provide clean and precise cuts. |
| Size | The size of the pinking shears can impact your ability to cut straight lines. If you are working on small and intricate projects, consider using a pair with a shorter blade length for better control. |
| Handle Design | Ergonomics play an important role in ensuring comfort and control while cutting. Look for pinking shears with comfortable handles that fit your hand well, reducing hand fatigue during long cutting sessions. |
| Weight | Consider the weight of the pinking shears, as heavier shears can be more difficult to maneuver, especially if you are working on delicate fabrics. Opt for lightweight pinking shears that are easy to handle. |
| Price | While quality is important, it is also essential to consider your budget. Pinking shears come in a range of prices, so make sure to find a pair that offers a good balance between quality and affordability. |
By taking these factors into account and selecting the right pair of pinking shears, you can ensure cleaner and straighter cuts in your projects, making your designs stand out with a professional finish.
Preparing Your Fabric
Before you start cutting with pinking shears, it’s important to properly prepare your fabric. Follow these steps to get your fabric ready:
- Wash and dry your fabric: Before cutting, make sure to wash and dry your fabric according to the manufacturer’s instructions. This will help remove any sizing or chemicals that may affect the cutting process.
- Iron your fabric: Use an iron to remove any wrinkles or creases from your fabric. This will make it easier to cut straight lines and ensure accurate results.
- Choose the right pinking shears: Select a pair of high-quality pinking shears that are sharp and in good condition. Dull or damaged shears can result in uneven cuts and frayed edges.
- Mark your fabric: Use a fabric marker or chalk to mark the areas where you want to cut. This can help you maintain straight lines and prevent any mistakes.
By properly preparing your fabric, you can ensure that your cuts are straight and clean. Take the time to follow these steps before starting your project to achieve professional-looking results.

Marking Your Cutting Line
Before you start cutting with pinking shears, it’s important to mark your cutting line to ensure straight and accurate cuts. This will help you achieve the desired professional finish on your fabric. Here are some steps to follow:
- Measure and align: Use a ruler or measuring tape to measure the desired length of your fabric. Mark the cutting line using a fabric marker or tailor’s chalk. Make sure the line is straight and aligned with the grain of the fabric.
- Double-check: Before making any cuts, double-check your measurements and alignment. This will minimize the chances of making any mistakes or uneven cuts.
- Cut a test piece: If you’re unsure about the accuracy of your markings, it’s a good idea to cut a test piece first. This will help you see if you need to make any adjustments to your markings before cutting the actual fabric.
- Use a cutting guide: If you’re working on a project that requires multiple straight cuts, consider using a cutting guide. This can be a long, straight piece of cardboard or a ruler that you can place along your marked cutting line. It will help you guide the pinking shears smoothly and maintain a straight cutting line.
- Take your time: Cutting straight with pinking shears requires patience and precision. Take your time to ensure each cut is aligned with your marking. Rushing can lead to mistakes and uneven cuts.
By following these steps and taking the necessary precautions, you will be able to mark your cutting line accurately and achieve straight cuts with your pinking shears. Remember to always practice on scrap fabric before cutting your actual project to gain more confidence and improve your cutting technique.
Holding the Pinking Shears Correctly
Properly holding the pinking shears is essential for cutting straight and achieving clean, precise edges. Follow these guidelines to ensure the correct grip:
- Hold the shears with a firm but relaxed grip: Grip the handles of the shears firmly, but avoid squeezing them too tightly. A relaxed grip will allow for smoother and more controlled cutting.
- Place your fingers in the finger loops: Insert your thumb into the larger loop and your ring finger or middle finger into the smaller loop. The finger loops should fit comfortably and securely around your fingers.
- Position your thumb and fingers: Your thumb should be pointing upwards while your fingers rest comfortably on the outside of the handles. This positioning will provide stability and control while cutting.
- Keep your hand perpendicular to the work surface: Ensure that your hand is positioned perpendicular to the surface you are cutting on. This will help maintain a straight cutting line.
Remember, practice makes perfect! Take the time to become familiar with holding the pinking shears correctly, as it will greatly improve your cutting technique and the overall quality of your projects.
Cutting the Fabric
Before you start cutting with pinking shears, make sure your fabric is properly prepared. This includes washing and ironing the fabric to remove any wrinkles or creases. It’s also a good idea to pre-shrink the fabric if it’s a natural fiber like cotton, as this will prevent any unexpected shrinking after you’ve completed the project.

Once your fabric is ready, lay it out on a flat surface. Ensure that the fabric is smooth and flat, without any bumps or lumps. Use pins or weights to secure the fabric in place, especially if you’re working with slippery or stretchy fabric.
Next, measure and mark the dimensions you need for your project. Use a fabric marker or chalk to make precise markings. Make sure to use a ruler or measuring tape to ensure accuracy.
When cutting with pinking shears, it’s important to hold them at a slight angle. This will help create clean and even zigzag edges. Start cutting from the edge of the fabric, following your marked lines. Hold the shears firmly but not too tightly, allowing the blades to glide smoothly through the fabric.
If you’re cutting a curved or intricate shape, it may be helpful to make small snips around the shape before using the pinking shears. This will allow for easier maneuverability and more precise cuts.
Continue cutting along the marked lines until you have cut out all the necessary pieces for your project.

Remember to always be cautious when working with sharp tools like pinking shears. Take your time and be mindful of your fingers to avoid any accidents or injuries.
Maintaining Your Pinking Shears
Properly maintaining your pinking shears is essential for achieving clean and precise cuts. Follow these tips to keep your pinking shears in excellent condition:
1. Clean the blades: After each use, wipe the blades of your pinking shears with a clean, dry cloth to remove any residue or debris. This helps prevent buildup that can dull the blades over time.
2. Oil the pivot and screws: Apply a small amount of oil to the pivot point and screws of your pinking shears. This helps keep them lubricated and ensures smooth movement while cutting.
3. Store them properly: When not in use, store your pinking shears in a dry and safe place. Avoid leaving them exposed to moisture or extreme temperatures, as this can cause rust or damage to the blades.

4. Sharpen the blades: Over time, the blades of your pinking shears may become dull. Use a sharpening stone or take them to a professional for sharpening when needed. This will help maintain their cutting performance.
5. Avoid cutting hard materials: Pinking shears are designed to cut fabric and other soft materials. Avoid using them to cut hard materials such as cardboard or plastic, as this can damage the blades and reduce their effectiveness.
6. Handle with care: Handle your pinking shears with care to avoid accidental drops or mishandling. This can lead to misalignment or damage to the blades, affecting their cutting ability.
By following these maintenance tips, you can ensure that your pinking shears remain sharp and in top condition, allowing you to achieve clean and straight cuts every time.
Questions and answers
What are pinking shears used for?
Pinking shears are used to create a zigzag pattern along the edge of fabric. This helps to prevent fraying and adds a decorative touch to the fabric. They are commonly used in sewing and crafting projects.

Can pinking shears be used to cut straight lines?
Yes, pinking shears can be used to cut straight lines. However, because of the zigzag blade, it may be more difficult to achieve a perfectly straight cut compared to using regular scissors. With practice and careful attention, it is possible to cut straight lines with pinking shears.


Meet Harrison Clayton, a distinguished author and home remodeling enthusiast whose expertise in the realm of renovation is second to none. With a passion for transforming houses into inviting homes, Harrison's writing at https://thehuts-eastbourne.co.uk/ brings a breath of fresh inspiration to the world of home improvement. Whether you're looking to revamp a small corner of your abode or embark on a complete home transformation, Harrison's articles provide the essential expertise and creative flair to turn your visions into reality. So, dive into the captivating world of home remodeling with Harrison Clayton and unlock the full potential of your living space with every word he writes.