How To Cut An Outside Corner With Mitre Shears

If you’re working on a home improvement project that involves installing baseboards or crown moldings, you’ll often encounter outside corners. These corners can be tricky to cut and join together seamlessly. However, with the right tools and technique, you can achieve professional-looking results. One tool that can be particularly helpful in this task is a pair of mitre shears.
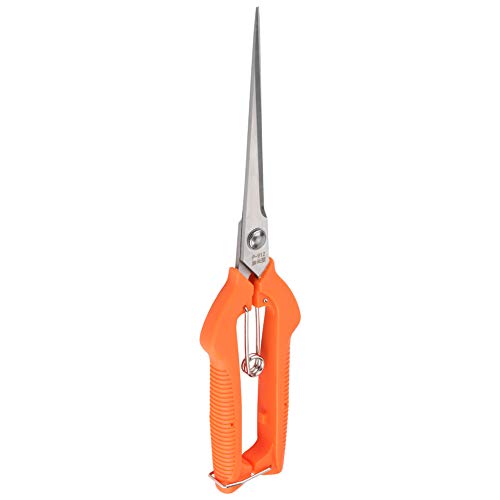
Mitre shears are specially designed cutting tools that allow you to make precise angled cuts in materials like wood, plastic, and even metal. They have a unique shape and a sharp blade that can easily cut through the material at a precise angle. When it comes to cutting outside corners, mitre shears can be a game-changer.
Here’s how you can use mitre shears to cut an outside corner:
- Measure: Start by measuring the length of the material that you need to cut. Use a tape measure and mark the measurement on the material.
- Angle: Determine the angle of the outside corner. Most corners are either 90 degrees or 45 degrees. Use a protractor or an angle finder to measure the angle accurately.
- Position: Position the material securely on a stable surface, such as a workbench or sawhorse. Ensure that it is clamped or held tightly to prevent any movement during the cutting process.
- Cut: Hold the mitre shears firmly with one hand and align the blade with the marked measurement on the material. Slowly and steadily apply pressure to the shears to make the cut. Start at one end and work your way towards the other, keeping the blade aligned with the marked measurement.
- Smooth the edges: After making the cut, use sandpaper or a file to smooth any rough edges or burrs left by the shears. This will help ensure a seamless join when installing the material.
By following these steps and using mitre shears, you can easily cut an outside corner and achieve professional results. Remember to practice on scrap material before working on your actual project to get a feel for the tool and perfect your technique. With a little patience and practice, you’ll be able to tackle any outside corner with confidence.
What are Mitre Shears and How Do They Work?
Mitre shears, also known as mitre scissors or mitre cutters, are specialized tools used for cutting and trimming angles in various materials such as wood, plastic, and metal. They are commonly used in carpentry, woodworking, and picture framing to create clean and precise cuts at specific angles.

Unlike traditional saws or power tools, mitre shears operate by using a scissor-like cutting mechanism. They have two sharp blades that are angled and designed to cut at specific angles, typically 45 degrees. The blades can be adjusted to different angles to accommodate different cutting needs.
When using mitre shears, the material to be cut is placed between the blades, and the handles are squeezed together to make the cut. The sharp blades create clean and accurate cuts without the need for excessive force or complicated setups. The scissor-style design and the precise angle adjustments allow for easy and efficient cutting of outside corners and other angled cuts.
Mitre shears are popular among DIY enthusiasts and professionals alike due to their versatility, ease of use, and portability. They are particularly useful for tasks that require frequent angle cuts, such as installing crown molding, making picture frames, or creating decorative trim.
Overall, mitre shears are a handy tool for anyone working with angles and needing precise, clean cuts. They provide a quick and efficient way to achieve accurate angles without the need for complex tools or extensive setup, making them a reliable choice for various woodworking and carpentry projects.
Choosing the Right Mitre Shears for Your Project
Mitre shears are an essential tool for any DIY enthusiast or professional carpenter. They are designed to make precise cuts at various angles, allowing you to achieve clean and accurate corners for your woodworking or home improvement projects. When selecting the right mitre shears for your project, there are several factors you should consider:

Blade Quality
One of the most important factors to consider when choosing mitre shears is the quality of the blades. Look for shears with sharp, durable blades made from high-quality materials such as carbon steel or stainless steel. These blades will not only last longer but also provide cleaner and smoother cuts.
Adjustability
Another important feature to look for is the adjustability of the shears. Different projects may require different cutting angles, so it’s essential to choose shears that offer a wide range of adjustment options. Look for shears with adjustable stops or locking mechanisms that allow you to set the desired cutting angle accurately.
Ergonomics
Comfort is crucial when working with mitre shears for extended periods. Look for shears with ergonomic handles that are comfortable to hold and reduce hand fatigue. Grips with non-slip materials are also beneficial, as they provide a secure hold and minimize the risk of accidents.
Size and Weight
The size and weight of the mitre shears can affect maneuverability and ease of use. Consider the size and weight of the shears in relation to the scale of your project and your personal strength and dexterity. Smaller and lighter shears are generally more maneuverable but may be less suitable for heavy-duty projects.
Additional Features
Some mitre shears come with additional features that can enhance their functionality. These may include built-in rulers, extendable handles, or blade sharpeners. Consider whether these features would be useful for your specific project needs and choose shears accordingly.

By considering these factors, you can choose the right mitre shears that will help you achieve precise and clean cuts for your woodworking or home improvement projects.
Tips for Selecting the Correct Blade Size
When using mitre shears to cut an outside corner, it’s important to select the correct blade size for the job. Here are some tips to help you choose the right blade for your project:
Consider the Material: Different materials require different blade sizes. For example, if you’re cutting through thick wood, you’ll need a larger blade to ensure clean and smooth cuts. On the other hand, if you’re working with thin materials like plastic or laminate, a smaller blade will be more suitable.
Think about the Cut Angle: The angle at which you’re cutting the outside corner can also affect the blade size you need. If you’re cutting at a steep angle, a smaller blade may be easier to maneuver, while a larger blade may be needed for wider angles.
Consider the Blade Teeth: The number and size of the teeth on the blade can also impact your cutting results. Blades with more teeth will typically provide smoother cuts, while blades with fewer teeth may be faster but leave a rougher edge. Consider the desired finish of your cut when choosing the blade with the right teeth configuration.

Refer to the Manufacturer’s Recommendations: Always check the manufacturer’s recommendations for the specific shears you’re using. They will often provide guidance on the ideal blade sizes for different materials and applications.
Test and Evaluate: If you’re uncertain about the correct blade size, it’s always a good idea to test it on a scrap piece of material before making your final cuts. This will help you determine whether the blade you’ve chosen is suitable for the job and allows you to make any necessary adjustments before starting your project.
By following these tips and selecting the correct blade size, you’ll be able to achieve precise and clean cuts when using mitre shears to cut an outside corner.
Preparing the Material
Before you can start cutting an outside corner with mitre shears, it’s important to make sure that your material is properly prepared. Here are the steps you need to take:
-
Measure the length of the corner
-
Choose the right material
-
Mark the material
-
Secure the material
-
Safety precautions
First, measure the length of the outside corner where you will be making the cut. Use a tape measure to get an accurate measurement.

Next, select the appropriate material for your project. Consider factors such as the type of corner you are working with, the durability needed, and the aesthetic you want to achieve. For example, if you’re working on an exterior project, you may want to use weather-resistant material.
Once you have your material, use a pencil to mark the area where you will make the cut. Make sure your marking is clear and easily visible.
To ensure that your material doesn’t move or shift during the cutting process, secure it using clamps or a vice. This will help you achieve clean and precise cuts.
Finally, before you begin cutting, make sure you have the necessary safety equipment on hand. Wear safety goggles to protect your eyes from any flying debris, and consider using gloves to protect your hands.
By following these steps to prepare your material, you’ll be ready to start cutting an outside corner with mitre shears safely and accurately.

How to Measure and Mark the Outside Corner
Before cutting an outside corner with mitre shears, it’s important to accurately measure and mark the corner. Follow these steps to ensure precise cutting:
- Start by measuring the length of the outside corner using a measuring tape. Take the measurement from the point where the two walls of the corner meet.
- Record the measurement on a piece of paper or in a notes app for reference.
- Using a pencil, make a small mark at the measured length on both walls of the corner.
- Use a straightedge or a carpenter’s square to connect the two marks. This will create a straight line across both walls.
- Double-check the line to ensure it is straight and level. Adjust the marks if necessary.
- Once you are satisfied with the line, use the mitre shears to cut along the marked line. Follow the manufacturer’s instructions for proper cutting technique.
By accurately measuring and marking the outside corner before cutting, you can ensure a precise and clean cut. This will result in a professional-looking finish for your project.
Clamping the Material for Stability
When using mitre shears to cut an outside corner, it is important to ensure that the material is stable and securely in place. Clamping the material will prevent slippage and ensure a clean and accurate cut.
Here are some steps to follow when clamping the material:
1. Position the Material
Place the material flat on a stable surface, such as a workbench or table. Make sure that the area where you will be cutting the outside corner is easily accessible and not obstructed.

2. Apply Clamps
Using clamps, secure the material to the work surface. Position the clamps so that they hold the material firmly in place, but make sure that they are not obstructing the cutting path of the mitre shears.
3. Adjust and Tighten
Check that the material is held securely by the clamps. If necessary, adjust the position of the clamps and tighten them to ensure a stable grip on the material. This will prevent any movement or slippage during the cutting process.
Remember to remove the clamps once you have completed the cut. Always exercise caution and follow safety guidelines when working with mitre shears.
Cutting the Outside Corner with Mitre Shears
When it comes to cutting an outside corner with mitre shears, there are a few important steps to follow to ensure a clean and accurate cut.
First, measure and mark the length of the material you wish to cut. Use a pencil or marker to make a clear and visible mark, as this will guide your cutting action.
Next, place the material securely in the mitre shears. Make sure it is positioned correctly, with the corner that you wish to cut lined up with the blades of the shears.
Hold the shears firmly with both hands, ensuring a stable grip. This will help you maintain control and accuracy throughout the cutting process.
With a steady hand, apply even pressure to the shears and begin cutting along the marked line. Take your time and let the shears do the work – avoid forcing the blades or attempting to rush the cut.
As you cut, keep the blades of the shears aligned with the marked line to ensure a clean and straight cut. If you notice any deviation from the line, adjust your cutting angle accordingly.
Continue cutting along the marked line until you reach the end of the material. At this point, release the pressure on the shears and remove the cut piece of material.
Inspect the cut to ensure it meets your desired specifications. If necessary, use sandpaper or a file to smooth out any rough edges or imperfections.
Remember to always exercise caution when using mitre shears, as they have sharp blades that can cause injury if mishandled. Take your time, follow the correct techniques, and prioritize safety to achieve the best results.
Finishing and Sanding the Cut Edge
After cutting an outside corner with mitre shears, it is important to finish and sand the cut edge to ensure a smooth and professional-looking result.
1. Inspect the Cut Edge
Start by inspecting the cut edge to check for any roughness or irregularities. Use your fingertips to run along the edge and feel for any bumps or jagged areas.
2. Sand the Cut Edge
If you notice any roughness, use sandpaper or a sanding block to smooth out the cut edge. Start with a coarse grit sandpaper and gradually move to a finer grit for a polished finish.
Wrap the sandpaper around a block to create a more even sanding surface. Hold the block firmly and move it back and forth along the cut edge in a smooth, steady motion. Be sure to sand the entire length of the cut edge to ensure consistency.
Keep checking the smoothness of the cut edge with your fingertips as you sand. The goal is to achieve a seamless transition between the cut edge and the rest of the material.
3. Remove Any Dust
After sanding, it is important to remove any dust or debris from the cut edge. This can be done by using a soft brush to gently sweep away the particles or by blowing compressed air.
Make sure to thoroughly clean the cut edge to ensure a clean and smooth finish.
By following these steps, you can achieve a professional-looking cut edge with mitre shears. Remember to take your time and pay attention to detail for the best results.
Questions and answers
What are mitre shears used for?
Mitre shears are used for cutting corners at a precise 45-degree angle. They are commonly used in carpentry and woodworking projects.
Can I use mitre shears to cut an outside corner?
Yes, you can use mitre shears to cut an outside corner. They are designed to cut both inside and outside corners with ease.
What is the process for cutting an outside corner with mitre shears?
The process for cutting an outside corner with mitre shears is relatively simple. First, mark the cut line on the material. Then, hold the mitre shears at a 45-degree angle and align the blade with the marked line. Finally, squeeze the handles of the shears to make the cut. Make sure to practice proper safety measures while using the shears.


Meet Harrison Clayton, a distinguished author and home remodeling enthusiast whose expertise in the realm of renovation is second to none. With a passion for transforming houses into inviting homes, Harrison's writing at https://thehuts-eastbourne.co.uk/ brings a breath of fresh inspiration to the world of home improvement. Whether you're looking to revamp a small corner of your abode or embark on a complete home transformation, Harrison's articles provide the essential expertise and creative flair to turn your visions into reality. So, dive into the captivating world of home remodeling with Harrison Clayton and unlock the full potential of your living space with every word he writes.