How To Cut A Dogs Hair With Thinning Shears

If you’re a dog owner looking to groom your furry friend at home, then learning how to cut a dog’s hair with thinning shears can be a valuable skill. Thinning shears are a type of scissors that have teeth on one or both blades, which helps to blend and thin out the hair. This tool is particularly useful for dogs with long, thick coats or breeds that require regular haircuts. With some patience, practice, and the right technique, you can achieve professional-looking results.
Before you start cutting your dog’s hair, it’s important to gather the necessary supplies. You will need a pair of high-quality thinning shears, dog clippers (if needed), a comb or brush, and treats to reward your dog during the grooming process. It’s also a good idea to have some styptic powder or cornstarch on hand in case of any minor cuts or nicks.
Start by preparing your dog for the grooming session. Make sure they are relaxed and comfortable, and choose a quiet, well-lit area where you can work. Begin by thoroughly brushing your dog’s coat to remove any tangles or mats. This will make it easier to work with and ensure a smoother finish. You can use the comb or brush to part the hair and separate it into sections, making it easier to trim.
When using thinning shears, it’s important to remember that less is more. Start by making small, gentle cuts with the shears, rather than trying to remove a large amount of hair at once. This will help you maintain control over the length and texture of the cut. Hold the shears at a slight angle to the hair, and use short, quick snipping motions. It’s important to work slowly and carefully, checking your progress frequently to avoid taking off too much hair.
Choosing The Right Thinning Shears For Your Dog
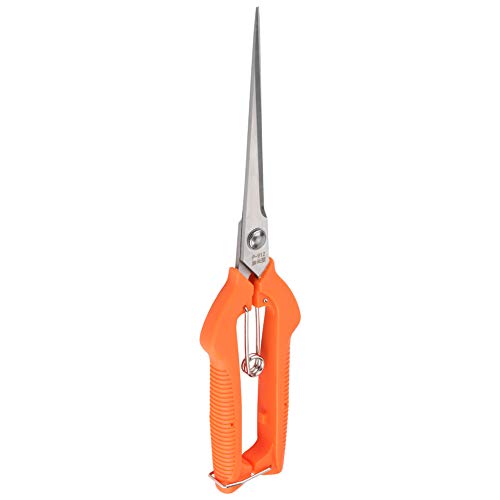
When it comes to grooming your dog’s hair, having the right tools is essential. One of the most commonly used tools for dog grooming is thinning shears. Thinning shears are designed to remove bulk and blend the dog’s hair for a more natural look.

When choosing the right thinning shears for your dog, there are a few factors to consider:
| Factor | Consideration |
|---|---|
| Size | Choose thinning shears that are appropriate for your dog’s size and coat type. Smaller breeds with fine hair may require smaller shears, while larger breeds with thick coats may need larger shears. |
| Teeth Count | The number of teeth on the shears determines how much hair is removed with each cut. For dogs with thick coats, shears with a higher teeth count can remove more hair, while shears with a lower teeth count are more suitable for dogs with fine hair. |
| Quality | Invest in high-quality thinning shears that are made from durable materials. This ensures that the shears will last longer and provide a clean and precise cut. |
| Handle Comfort | Consider the comfort of the handles when choosing thinning shears. Look for shears with ergonomic handles that provide a comfortable grip to prevent hand fatigue during grooming sessions. |
| Price | Thinning shears come in a wide range of prices. While it may be tempting to choose the cheapest option, investing in a higher-quality pair of shears will more likely result in a better grooming experience and a more professional-looking cut. |
When selecting thinning shears for your dog, it may be helpful to consult with a professional groomer or veterinarian who can provide recommendations based on your dog’s specific needs. By choosing the right thinning shears, you can ensure that your dog’s hair is trimmed and styled to perfection.
Preparing Your Dog For Haircutting
Before you begin cutting your dog’s hair with thinning shears, it is important to take some steps to ensure that the process goes smoothly and safely. Here are some tips to help you prepare your dog for the haircutting session:
- Brush your dog’s fur to remove any tangles or mats. This will make it easier to cut their hair evenly and reduce pulling on their skin.
- Give your dog a bath and make sure they are completely dry before starting the haircut. Wet fur can make it more difficult to achieve a clean and precise cut.
- Choose a quiet and well-lit area in your home where you can comfortably groom your dog. This will help create a calm environment and minimize distractions.
- Have all the necessary tools ready, including thinning shears, clippers, combs, and a grooming table or a non-slip surface. This will make the process more efficient and organized.
- Keep a supply of treats nearby to reward your dog for their cooperation during the haircut. Positive reinforcement will make the experience more enjoyable for both of you.
- Consider using a grooming restraint system or having someone else hold your dog while you cut their hair. This will help prevent them from moving around too much and potentially getting injured.
- Take breaks if needed. If your dog becomes stressed or uncomfortable during the haircut, give them a short break to relax and calm down before continuing.
- Be patient and gentle with your dog. Cutting their hair can be a sensitive and delicate process, so take your time and ensure their comfort throughout.
By following these preparations, you will create a positive and safe environment for both you and your dog during the haircutting session. Remember to always prioritize your dog’s well-being and make the experience as stress-free as possible.
Step-By-Step Guide To Cutting Your Dog’s Hair
If you’re looking to give your dog a trim at home, it’s important to use the right tools and follow the proper steps to ensure a safe and successful grooming session. Here’s a step-by-step guide on how to cut your dog’s hair:

1. Gather the necessary tools:
Before you begin, make sure you have all the tools you’ll need. This includes a pair of thinning shears, a comb, grooming clippers, a grooming table or a non-slip surface, and treats to reward your dog’s good behavior.
2. Prepare your dog:
Help your dog get comfortable by giving them a calming treat and praising them. Make sure your dog is clean and dry before grooming. Brush their fur to remove any tangles or mats.
3. Start with the body:
Begin cutting from the neck down the back to the tail. Use the thinning shears to gradually remove excess hair, working in small sections at a time. Be careful around sensitive areas like the ears, tail, and belly.
4. Trim the legs:
Take the thinning shears and carefully trim the hair on your dog’s legs. Start from the top and work your way down, using short and gentle strokes. Be cautious around the paws and between the toes.
5. Tidy up the face:
Using a comb and the thinning shears, trim around your dog’s face, being careful around the eyes, ears, and muzzle. Only remove excess hair to maintain a natural and clean appearance.

6. Reward and reassess:
Throughout the grooming process, reward your dog with treats and praise for their good behavior. Take breaks if needed, and always reassess your dog’s comfort level. If your dog becomes stressed or anxious, it’s best to stop and consult a professional groomer.
7. Clean up:
Once you’ve finished, clean up the grooming area and remove any loose fur. Make sure to store your tools properly to keep them in good condition for future use.
Remember, grooming your dog’s hair with thinning shears requires patience and care. If you’re unsure about any step, it’s always best to seek advice from a professional groomer to ensure your dog receives the best care.
| Tools needed: |
|---|
| Thinning shears |
| Comb |
| Grooming clippers |
| Grooming table or non-slip surface |
| Treats |
Trimming Different Areas Of Your Dog’s Coat
When using thinning shears to trim your dog’s coat, it’s important to know how to properly trim different areas of their body. Here are some tips for trimming specific areas:
1. Face and Ears
When trimming your dog’s face and ears, use thinning shears with caution. Start by combing the hair away from their face and gently trim around their ears, being careful not to get too close to the skin. For the face, use the thinning shears to carefully trim the hair around their eyes, muzzle, and cheeks.

2. Neck and Chest
The neck and chest area can have dense hair, so thinning shears can be used to remove excess bulk. Use the thinning shears to blend the longer hair on the sides of your dog’s neck with the shorter hair on their chest, creating a natural transition.
3. Back and Sides
When trimming the back and sides of your dog’s body, use thinning shears to create a balanced shape and remove any uneven or bulky areas. Start by combing the hair in the direction it naturally grows and use the thinning shears to trim small amounts of hair at a time, blending as you go.
4. Legs and Paws
To trim your dog’s legs and paws, start by combing the hair downwards and use the thinning shears to carefully trim any long or unruly hair. Pay attention to the areas between their toes and around their paw pads, as these can easily become matted or tangled.
5. Tail
When trimming your dog’s tail, use thinning shears to create a tapered and natural-looking shape. Start at the base of the tail and work your way towards the tip, blending the longer hair on top with the shorter hair on the sides.
Remember, always keep a steady hand and work slowly when trimming your dog’s coat with thinning shears. It’s better to take small amounts of hair off at a time and gradually achieve the desired look, rather than cutting too much at once.

Tips for Achieving Professional-Like Results
When cutting your dog’s hair with thinning shears, there are a few tips that can help you achieve professional-like results:
1. Use the Right Shears
Investing in a good pair of thinning shears is crucial for achieving professional results. Look for shears that have sharp, high-quality blades and a comfortable grip. This will ensure clean cuts and minimize the risk of discomfort or injury to your dog.
2. Choose the Right Technique
Using thinning shears requires a different technique compared to regular scissors. Instead of making straight cuts, you want to use a feathering or blending technique. This involves making small, choppy cuts along the length of the hair to create a natural, layered look.
Pro tip: Start by practicing on a small section of your dog’s hair to get the hang of the technique before moving on to the rest of the body.
3. Take Your Time
Rushing through the grooming process can result in uneven cuts and a stressed-out dog. Take your time and work slowly, especially in areas that require more precision, such as around the face and paws. This will help ensure a more polished and professional finish.

4. Keep Your Dog Calm
Keeping your dog calm and relaxed during the grooming session is crucial to achieving professional-like results. Use positive reinforcement, treats, and a calm voice to help your dog feel at ease. Consider breaking up the grooming session into multiple shorter sessions to prevent your dog from becoming anxious or restless.
Note: If your dog is particularly anxious or difficult to handle during grooming, it may be best to seek the help of a professional groomer.
5. Maintain Regular Maintenance
Regular maintenance is key to keeping your dog’s coat looking professional. Schedule regular grooming sessions to trim any excess hair and maintain the desired length. This will help prevent matting and keep your dog’s coat healthy and shiny.
By following these tips, you can achieve professional-like results when cutting your dog’s hair with thinning shears. Remember to have patience, practice the technique, and prioritize your dog’s comfort throughout the process.
Caring For Your Thinning Shears
Thinning shears are a valuable tool for any dog owner who wants to maintain their pet’s coat. To keep your thinning shears in good condition and ensure they last a long time, it is important to properly care for them. Here are some tips on how to care for your thinning shears:

Clean your thinning shears regularly
After each use, make sure to clean your thinning shears to remove any hair or debris that may have accumulated. Use a soft cloth or towel to wipe off any hair, and then wash the blades with warm, soapy water. Be sure to dry them thoroughly before storing them away.
Oil your thinning shears
Regularly oiling your thinning shears is essential to keep them working smoothly. Apply a few drops of blade oil to the pivot screw and blades, and then open and close the shears a few times to distribute the oil evenly. This will help prevent rust and ensure the shears operate smoothly.
Store your thinning shears properly
When not in use, it is important to store your thinning shears in a safe place to prevent damage. Use a protective case or a dedicated storage pouch to keep them free from dust and moisture. Avoid storing them in a damp environment, as this can cause rusting.
Sharpen your thinning shears when necessary
Over time, the blades of your thinning shears may become dull and less effective. When this happens, it is important to have them sharpened by a professional. Using dull shears can cause discomfort to your dog and may result in uneven cuts.
By following these tips, you can ensure that your thinning shears remain in good condition and continue to provide great grooming results for your furry friend.
Questions and answers
Can I use regular scissors to cut my dog’s hair?
While regular scissors can be used to trim some areas of your dog’s hair, they may not provide the desired finish. Thinning shears are specifically designed to create a more natural and blended look, making them a better option for cutting your dog’s hair.
How do I choose the right pair of thinning shears for my dog?
When choosing thinning shears for your dog, look for ones with a comfortable grip and sharp blades. It’s also important to consider the length and thickness of your dog’s hair. Thinning shears with more teeth are ideal for dogs with thick hair, while ones with fewer teeth are better for dogs with shorter hair.


Meet Harrison Clayton, a distinguished author and home remodeling enthusiast whose expertise in the realm of renovation is second to none. With a passion for transforming houses into inviting homes, Harrison's writing at https://thehuts-eastbourne.co.uk/ brings a breath of fresh inspiration to the world of home improvement. Whether you're looking to revamp a small corner of your abode or embark on a complete home transformation, Harrison's articles provide the essential expertise and creative flair to turn your visions into reality. So, dive into the captivating world of home remodeling with Harrison Clayton and unlock the full potential of your living space with every word he writes.