How Can I Sharpen My Garden Shears At Home


Having sharp garden shears is crucial for maintaining a beautiful garden and ensuring clean, precise cuts. Over time, the blades of garden shears can become dull and less effective. But don’t worry, you don’t have to rush out and buy a new pair. With a few simple tools and some patience, you can easily sharpen your garden shears at home.
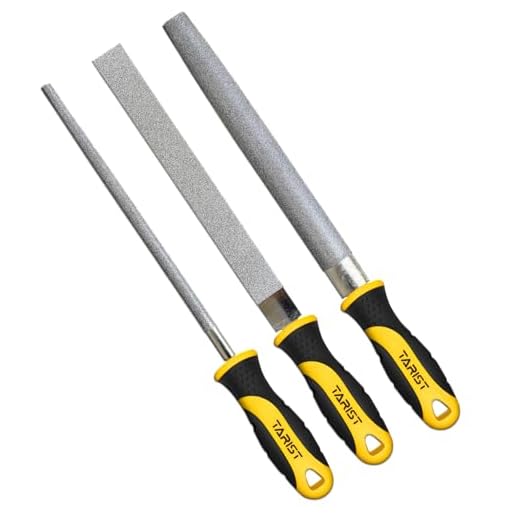
To begin, you will need a sharpening stone or a metal file. Both options work well, so use whichever one you feel most comfortable with. Start by securely gripping one of the blades of your garden shears with one hand. Using your other hand, run the sharpening stone or file along the cutting edge of the blade, moving from the base to the tip. Apply light pressure and make sure to maintain a consistent angle, usually around 20 degrees. Repeat this process several times until the blade feels sharp to the touch.
Next, it’s important to sharpen the other blade in the same manner. Remember to stay focused and take your time to ensure an even sharpening. After both blades are sharpened, you can check their sharpness by cutting a small twig or piece of paper. If the shears cut smoothly and cleanly through the material, then you have successfully sharpened them.
Finally, don’t forget to clean your garden shears after sharpening them. Residue from the sharpening process can build up on the blades, so it’s important to remove it to prevent contamination. Use a clean cloth or paper towel to wipe off any debris, and you can also apply a light coat of oil to keep the shears lubricated and prevent rusting.
Sharpening your garden shears at home is a simple and cost-effective way to maintain their performance and prolong their lifespan. By following these easy steps and regularly sharpening your shears, you can ensure they stay sharp and ready to tackle any gardening task that comes your way.
Tips to Sharpen Your Garden Shears at Home
Garden shears are essential tools for maintaining a beautiful and healthy garden. Over time, the blades of your garden shears can become dull and less effective. Instead of replacing them, you can sharpen them at home with a few simple steps.
1. Clean the Shears
Before you begin sharpening your garden shears, it’s important to clean them properly. Remove any dirt, debris, or rust from the blades using a wire brush or a piece of sandpaper. A clean surface will make the sharpening process easier and more effective.
2. Secure the Shears
After cleaning the shears, securely clamp the shears or hold them firmly in place. This will ensure that the shears remain stable during the sharpening process and prevent any accidents or injuries.
3. Sharpen with a File
Using a fine-grit file, gently and evenly file the edges of the blades, ensuring that you maintain the original bevel angle. Start at the base of the blade and work your way towards the tip. Repeat this process on both sides of the blades until you achieve a sharp edge.
4. Use a Sharpening Stone
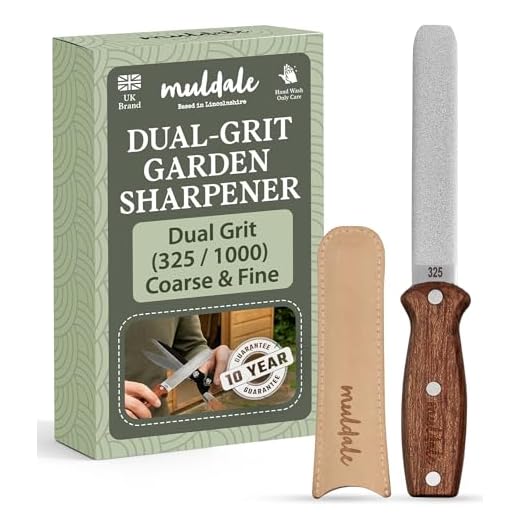
Alternatively, you can use a sharpening stone to sharpen your garden shears. Wet the stone and hold it at a slight angle. Slide the blades along the stone in a sweeping motion, maintaining a consistent angle. Repeat this process on both sides of the blades until the edges are sharpened.
5. Test the Shears
After sharpening your garden shears, it’s important to test them to ensure they are properly sharpened. Carefully cut through a piece of paper or a small branch to check the sharpness. If the shears still feel dull, repeat the sharpening process until desired sharpness is achieved.
By following these simple tips, you can easily sharpen your garden shears at home and extend their lifespan. Remember to always exercise caution and wear protective gloves when working with sharp tools. A set of sharp garden shears will make your gardening tasks much more efficient and enjoyable.
Choosing the Right Tools for the Job
When it comes to working in your garden, having the right tools can make all the difference. The success of a task often depends on the quality and suitability of the tools you use.
When choosing garden shears, it’s important to consider a few key factors. First and foremost, you’ll want to think about the types of plants you’ll be working with. Different plants require different types of shears. For example, if you have delicate flowers or shrubs, you’ll want to choose pruning shears with a bypass design, as they provide a clean cut without crushing the stem. On the other hand, if you have thicker branches or dense foliage to trim, you’ll need a pair of anvil shears, which have a blade that closes against a flat surface and provides extra cutting power.
The size and weight of the shears are also important considerations. If you have a small or medium-sized garden, a compact and lightweight pair of shears will likely be sufficient. However, if you have a large garden or need to tackle more substantial tasks, you may want to opt for a larger and more robust pair of shears.
In addition to the functionality and size, you should also think about the quality and durability of the shears. Look for shears made from high-quality materials, such as stainless steel blades and durable handles. Investing in a good pair of shears will ensure they last longer and perform better, saving you time and effort in the long run.
Lastly, it’s always a good idea to read reviews and seek recommendations from other gardeners. They can provide valuable insights and help you make an informed decision. By taking the time to choose the right tools for the job, you’ll have a much more enjoyable and successful gardening experience.
Cleaning Your Garden Shears Properly
Properly cleaning your garden shears is an essential step in maintaining their sharpness and effectiveness. Here are some tips to help you clean your garden shears properly:
1. Remove any debris:
Before cleaning your garden shears, remove any dirt, grass, or plant residue that may be stuck on the blades. Use a brush or a cloth to wipe away the debris.
2. Soak in soapy water:
Fill a bucket or basin with warm water and add a small amount of mild dish soap. Submerge the blades of your garden shears into the soapy water and let them soak for a few minutes. This will help to loosen any remaining dirt or sap.
3. Scrub the blades:
Using a soft brush or a toothbrush, scrub the blades of your garden shears to remove any remaining dirt or sap. Pay special attention to the area between the blades, as this is often where the most build-up occurs.
4. Rinse with clean water:
After scrubbing, rinse the garden shears with clean water to remove any soap residue. Make sure to rinse both the blades and the handles thoroughly.
5. Dry thoroughly:
Once your garden shears are clean, use a clean cloth to dry them thoroughly. This will help to prevent any residual moisture from causing rust or corrosion.
Important note: It is essential to wear gloves while handling and cleaning garden shears to protect yourself from any sharp edges or potential contamination.
In conclusion, by following these steps to clean your garden shears properly, you can ensure that they remain sharp and ready for use whenever you need them.
Understanding the Sharpening Process
Sharpening garden shears is an essential task that helps maintain their cutting efficiency and prolong their lifespan. By understanding the sharpening process, you can easily keep your garden shears in top shape and ensure they always perform optimally.
The Importance of Sharp Garden Shears
Sharp garden shears are crucial for achieving clean, precise cuts on plant stems, branches, and foliage. When the shears are dull, they tend to crush the plant material rather than making clean cuts. This can lead to the spread of diseases and pests, as well as hinder the plant’s overall health and growth. Additionally, using dull garden shears can be more physically demanding, as you’ll need to exert more force to make cuts, which can strain your hand and arm muscles.
The Sharpening Tools You’ll Need
To sharpen your garden shears at home, you’ll need a few essential tools:
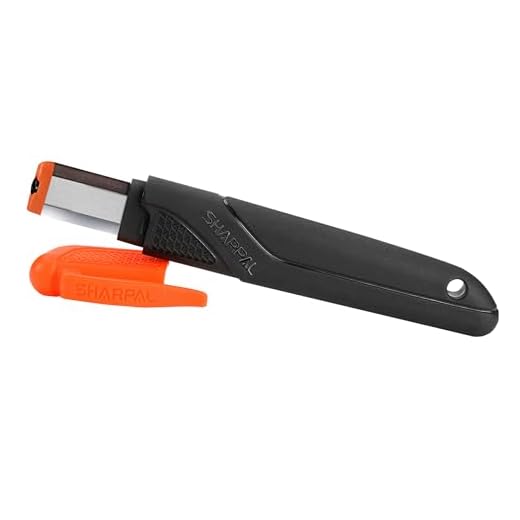
- A mill file or a sharpening stone specifically designed for shears.
- A pair of leather gloves to protect your hands.
- A clean cloth for wiping off any debris.
- A lubricating oil to prevent rust and ensure smooth operation.
The Step-by-Step Sharpening Process
Follow these steps to sharpen your garden shears:
- Prepare the shears: Start by cleaning the blades of any dirt or debris using a clean cloth. If necessary, you can use a brush to remove stubborn residues. Make sure to wear gloves for added safety.
- Inspect for damages: Examine the shears for any signs of damage, such as nicks or chips. If you notice any significant damage, consider taking the shears to a professional for repair.
- Choose the sharpening tool: Depending on the type of shears you have, select either a mill file or a sharpening stone. Follow the manufacturer’s instructions on how to properly use the chosen tool.
- Sharpen the shears: Hold the shears securely and position the sharpening tool at a 20-degree angle against the beveled edge of the blade. Push the tool along the edge, applying consistent pressure. Repeat this process several times until you restore a sharp edge to the blades.
- Test the sharpness: Carefully close and open the shears to check if the blades are cutting smoothly and cleanly. If needed, repeat the sharpening process until you achieve the desired sharpness.
- Lubricate and maintain: After sharpening, apply a few drops of lubricating oil to the hinge and pivot points of the shears. This will prevent rust and ensure smooth operation.
- Store the shears properly: Finally, store your sharpened garden shears in a clean, dry place where they won’t get damaged or rust. Consider using a blade cover or a sheath to protect the blades.
By understanding and following these steps, you can confidently sharpen your garden shears at home and enjoy their efficient cutting performance for a long time.
Using the Right Techniques to Sharpen Your Shears
Sharpening your garden shears at home can help extend their lifespan and improve their cutting performance. By using the right techniques, you can ensure that your shears are always sharp and ready for use.
Here are some steps you can follow to sharpen your garden shears effectively:
| Step | Description |
|---|---|
| 1 | Inspect the shears: Before sharpening, inspect the shears for any damage or signs of wear. If there are any major issues, consider getting them repaired or replaced. |
| 2 | Clean the blades: Use a wire brush or a steel wool pad to remove any dirt, sap, or rust from the blades. This will ensure that the sharpening process is more effective. |
| 3 | Secure the shears: Use a vice or clamps to secure the shears in a stable position. This will prevent any accidents and make it easier to sharpen the blades. |
| 4 | Sharpen the bevel edge: Use a sharpening stone or a file to sharpen the bevel edge of the blades. Hold the stone or file at a 20-degree angle and move it along the edge in smooth and even strokes. Repeat this process until the bevel edge is sharp. |
| 5 | Sharpen the flat edge: After sharpening the bevel edge, switch to the flat edge of the blades. Hold the stone or file at a 45-degree angle and repeat the same sharpening motion as before. This will help remove any burrs and make the blades even sharper. |
| 6 | Test the sharpness: After sharpening, test the sharpness of the shears by cutting through a small branch or piece of paper. If the shears cut smoothly and cleanly, they are now sharp and ready to use. |
| 7 | Apply lubricant: To keep the blades in good condition, apply a few drops of lubricant or machine oil to the pivot point and any other moving parts of the shears. This will help reduce friction and prevent rust. |
By regularly sharpening your garden shears and using the right techniques, you can ensure that they stay sharp and effective for a long time. This will make your gardening tasks much easier and help you achieve better results in your garden.
Maintaining and Storing Your Newly Sharpened Garden Shears
Once you have successfully sharpened your garden shears, it is important to properly maintain and store them to ensure their longevity and effectiveness. Follow these tips to keep your garden shears in optimal condition:
- Clean the blades: After each use, make sure to remove any dirt or debris from the blades of your shears. This can be done by wiping them down with a damp cloth or using a soft brush to gently scrub away any residue.
- Oil the blades: To prevent rust and keep the blades moving smoothly, apply a thin coat of oil to the blades of your garden shears. Use a rust-preventing oil or a light machine oil and make sure to wipe off any excess oil before storing the shears.
- Store in a dry place: It is important to store your garden shears in a dry location to prevent rust and damage. Consider using a storage container or a tool belt to keep them protected and easily accessible.
- Regular sharpening: Even if your garden shears are sharp, it is important to regularly check and touch up the blades to maintain their cutting performance. Depending on how often you use them, you may need to sharpen them every few months or at least once a year.
- Protect the blades: When not in use, consider using blade covers or keeping the shears in a dedicated pouch or tool drawer to protect the blades from accidental damage. This will also help prevent any accidental injuries while handling the shears.
By following these tips, you can ensure that your newly sharpened garden shears will stay sharp and ready for use whenever you need them. Proper maintenance and storage will not only prolong the lifespan of your shears but also make your gardening tasks easier and more efficient.
Questions and answers
What are the signs that my garden shears need sharpening?
There are several signs that your garden shears need sharpening. If you notice that they are not cutting as well as they used to or are tearing the plant material instead of making clean cuts, it may be time to sharpen them. Additionally, if you see rust or nicks on the blades, it is a good idea to give them a sharpening.
Can I sharpen my garden shears using household items?
Yes, you can sharpen your garden shears using household items. One popular method is to use aluminum foil. Simply fold a sheet of aluminum foil several times and cut into it with the shears. This will help remove any burrs or nicks from the blades. Another household item that can be used is a whetstone. Wet the whetstone and run the shears over it at a 20-degree angle, moving the shears back and forth until they are sharp.
Should I oil my garden shears after sharpening?
Yes, it is a good idea to oil your garden shears after sharpening them. Applying a thin layer of oil to the blades will help prevent rust and keep them in good working condition. You can use any type of lubricating oil, such as mineral oil or machine oil. Simply apply a small amount of oil to a cloth or paper towel and wipe it onto the blades of the shears.


