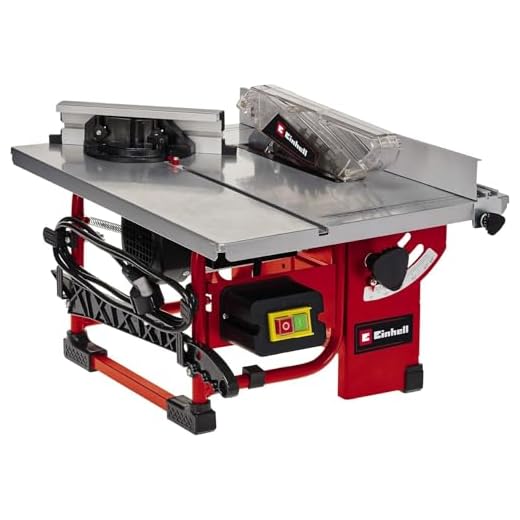
How To Measure Table Saw Blade Height

Table saws are versatile tools that can be found in many woodworking shops. Whether you’re an experienced woodworker or just starting out, one of the most important measurements to know is the blade height. The blade height determines the depth of cut, and getting it right is crucial for accurate and safe cutting.
Measuring the blade height on a table saw is a simple process, but it’s important to follow the correct steps to ensure accuracy. The first step is to turn off and unplug the saw to eliminate any risk of injury. Next, locate the blade height adjustment wheel or knob, which is usually located on the front or side of the saw.
Once you’ve located the adjustment wheel or knob, use a measuring tool such as a combination square or a ruler to measure the distance from the top of the blade to the table. Place the measuring tool against the blade, making sure it’s parallel to the saw’s miter gauge slots. Carefully adjust the blade height by turning the adjustment wheel or knob, and check the measurement again to ensure accuracy.
Remember, it’s important to set the blade height correctly to ensure safe and precise cuts. A blade that is too high can cause kickback or a rough finish, while a blade that is too low may not cut all the way through the material. By following these simple steps, you’ll be able to measure the blade height on your table saw accurately and confidently.
Why Measuring Table Saw Blade Height is Important
Measuring the height of your table saw blade is an important step in ensuring precise and accurate cuts. By properly measuring the blade height, you can ensure that your cuts are clean, safe, and consistent.
Here are a few reasons why measuring table saw blade height is important:
| 1. Safety | Setting the correct blade height can significantly reduce the risk of accidents and injuries. A blade that is too high increases the chances of kickback, where the workpiece is violently thrown back towards the operator. On the other hand, a blade that is too low can lead to binding and kickback as well. By measuring the blade height and setting it at the proper level, you can minimize the risk of accidents and create a safer working environment. |
| 2. Clean Cuts | The height of the blade directly affects the quality of the cuts. A blade that is set too high can cause tear-out and splintering, resulting in rough and ragged edges. On the contrary, a blade that is set too low might not cut all the way through the material, leaving an incomplete and sloppy cut. By measuring the blade height accurately, you can ensure clean, precise, and professional-looking cuts. |
| 3. Consistency | Measuring the blade height allows you to ensure consistency in your cuts. When the blade height is inconsistent, it can lead to variations in the width or depth of your cuts, resulting in ill-fitting joints or uneven workpieces. By measuring the blade height and making necessary adjustments, you can achieve consistent and accurate cuts every time. |
| 4. Blade Life | Measuring the blade height regularly can also help extend the life of your saw blade. When the blade height is set too high, it puts unnecessary strain on the blade, leading to faster wear and tear. By measuring the blade height and ensuring it is set correctly, you can avoid overworking the blade and extend its lifespan. |
Overall, measuring table saw blade height is a crucial step in achieving precision, safety, and consistency in your woodworking projects. It is worth taking the time to measure and adjust the blade height correctly to ensure the best possible results.
Different Blade Heights for Different Cuts
When using a table saw, it’s important to adjust the blade to the correct height for the specific type of cut you are making. Different cuts require different blade heights in order to achieve the best results. Here are some guidelines for adjusting the blade height for different types of cuts:
Rip Cuts
For rip cuts, which involve cutting along the length of the workpiece, it is best to set the blade height about 1/8 inch higher than the thickness of the workpiece. This helps prevent the blade from getting bogged down and allows for smoother cutting.
Cross Cuts
Cross cuts, which involve cutting across the width of the workpiece, require a different blade height setting. In general, the blade height should be set so that it extends about 1/8 inch above the workpiece. This helps minimize tear-out and ensures cleaner cuts.

It’s important to note that these guidelines are just starting points and may need to be adjusted based on the specific material being cut and the desired outcome. It’s always a good idea to make test cuts on scrap wood before making your final cuts.
Pro Tip: When making bevel cuts or dado cuts, the blade height will need to be adjusted accordingly. It’s important to consult the saw’s user manual for specific instructions on adjusting the blade height for these types of cuts.
Remember to always prioritize safety when working with a table saw. Ensure the saw is properly set up and use appropriate safety equipment, such as goggles and push sticks, to prevent accidents.
Ensuring Safety and Accuracy
When measuring the height of the table saw blade, it is important to prioritize safety and accuracy. Here are some tips to ensure you are measuring correctly:
1. Turn off and unplug the table saw: Before measuring the blade height, make sure the table saw is turned off and unplugged. This will prevent any accidental startup while you are working around the blade.

2. Use a reliable measuring tool: To get an accurate measurement, use a reliable measuring tool such as a dial caliper or a precision ruler. Avoid using tools that are worn out or damaged, as they may affect the accuracy of your measurement.
3. Adjust the blade to its lowest position: Lower the blade of the table saw as far down as possible while still clearing the table surface. This will give you a starting point to measure the blade height from.
4. Place the measuring tool: Carefully place the measuring tool on the table saw surface next to the blade. Make sure it is flat and straight against the blade, without any gaps or obstructions.
5. Take the measurement: Once the measuring tool is properly positioned, read the measurement indicated. Ensure that you are accurately reading the height of the blade without any skew or misalignment.
6. Repeat the measurement: To make sure your measurement is accurate, repeat the process at least two more times. This will help eliminate any possible errors or inconsistencies.
7. Adjust the blade if necessary: If the measurement is not at the desired height, adjust the blade height accordingly. Ensure you follow the manufacturer’s instructions for adjusting the blade height to maintain safety and proper functionality.
By following these steps, you can measure the height of your table saw blade safely and accurately. Remember to always prioritize safety and take your time to double-check your measurements before making any adjustments or using the table saw.
Tools Needed to Measure Table Saw Blade Height
Measuring the height of your table saw blade is an important task to ensure accurate and safe woodworking. To measure the blade height, you will need some tools:
Tape Measure
A tape measure is a crucial tool for any woodworking project, including measuring the height of a table saw blade. Make sure you have a reliable and accurate tape measure that can measure in inches or millimeters.
Height Gauge
A height gauge is a specialized tool designed specifically for measuring blade height on table saws. It consists of a ruler-like device with a sliding head that can be locked at the desired height. Height gauges are available in both analog and digital formats.

Combination Square
A combination square is another useful tool for measuring table saw blade height. It consists of a ruler and a sliding head that can be locked at a 90-degree angle. The combination square can provide a quick and easy way to ensure the blade is perfectly perpendicular to the table surface.
Wooden Blocks
Wooden blocks can be used to stabilize the height gauge or combination square during the measurement process. These blocks should be the same thickness as the saw’s insert plate to ensure an accurate measurement.
By having these tools on hand and using them correctly, you can easily measure the height of your table saw blade and ensure that it is set correctly for precise and safe woodworking.
Measuring Tape or Ruler
One of the simplest ways to measure the height of a table saw blade is by using a measuring tape or ruler. This method requires only a few basic tools that most woodworkers already have in their workshop.
To measure the height of the blade, first, make sure the table saw is turned off and unplugged for safety. Locate the blade height adjustment wheel or knob on your table saw; it is usually located on the front or side of the machine. This wheel or knob allows you to raise or lower the blade.

Next, position the measuring tape or ruler vertically against the teeth of the blade, starting from the table saw’s surface. Make sure to align the zero mark of the measuring tape or ruler with the table saw’s surface.
Gently and carefully rotate the blade height adjustment wheel or turn the knob to raise or lower the blade. As you adjust the blade height, keep an eye on the measuring tape or ruler. Stop adjusting the blade height when the desired height is reached.
| Tools Required: |
| Measuring tape or ruler |
Using a measuring tape or ruler to measure the blade height is a straightforward and accurate method. However, it is important to exercise caution and move slowly when adjusting the blade height to avoid any accidents or injuries.
Square or Combination Square
A square or combination square is a versatile tool that can be used to measure the height of a table saw blade. This tool consists of a ruler and a head, which can be adjusted to form a perfect 90-degree angle.
To measure the blade height using a square or combination square, follow these steps:

- Ensure the table saw is turned off and unplugged for safety.
- Place the square or combination square against the saw blade.
- Adjust the head of the square or combination square so that it is completely perpendicular to the saw blade.
- Lock the head in place to maintain the right angle.
- Take a measurement from the base of the tool to the top of the saw blade, which will give you the blade height.
It is important to note that when using a square or combination square to measure the table saw blade height, accuracy is key. Make sure the square or combination square is properly aligned and the measurement is taken from the base of the tool to the top of the blade.
Using a square or combination square is a reliable and accurate method to measure the table saw blade height, ensuring precise cuts and excellent woodworking results.
Step-by-Step Guide to Measure Table Saw Blade Height
Accurate blade height on a table saw is crucial for achieving precise cuts and ensuring safety. In this step-by-step guide, we will walk you through the process of measuring the blade height on your table saw.
Step 1: Safety First
Before starting the measurement, make sure your table saw is turned off and unplugged. This will prevent any accidental injuries.
Step 2: Find the Zero Clearance Insert
Locate and remove the zero-clearance insert from your table saw. This will expose the blade, making it easier to measure its height.
Step 3: Prepare a Height Gauge
Using a height gauge or a combination square with a ruler attachment, set it to zero by aligning the base of the gauge with the table surface.
Step 4: Measure the Blade Height
Place the height gauge or the ruler attachment onto the table saw’s surface, making sure it rests against the blade. Take note of the measurement displayed on the gauge or ruler attachment. This will be your blade height.
Step 5: Adjust the Blade Height, if Necessary
If the blade height does not match your desired setting, you can adjust it using the height adjustment mechanism on your table saw. Follow the manufacturer’s instructions for making height adjustments.
Step 6: Double-check the Blade Height
After making any adjustments, repeat the measurement process to ensure that you have achieved the desired blade height. It’s important to double-check for accuracy before proceeding with any cutting tasks.
Step 7: Replace the Zero Clearance Insert
Once you are satisfied with the blade height, reinsert the zero-clearance insert back into your table saw. This will help reduce tear-out and provide better support for your workpiece during cuts.
Step 8: Testing
Before starting any cutting operation, do a test cut on a piece of scrap material to verify that the blade height is accurate and meets your requirements.
Remember, always prioritize safety when working with power tools. If you’re unsure about measuring or adjusting the blade height on your table saw, consult the manufacturer’s manual or seek guidance from an experienced woodworker.
Prepare the Table Saw
Before measuring the blade height on a table saw, it is important to properly prepare the machine to ensure accurate results. Follow these steps to prepare the table saw:
1. Safety First
Always prioritize safety when working with power tools. Make sure the table saw is unplugged from the power source before you begin any adjustments or measurements.
2. Clean the Surface
Ensure that the table saw surface is clean and free from any debris. Remove any sawdust, dirt, or wood chips that may interfere with the measurements.
3. Check the Blade
Inspect the blade for any signs of damage or wear. A dull or damaged blade can affect the accuracy of your measurements. If necessary, replace the blade with a new one.
4. Lower the Blade
Lower the blade to its lowest position by turning the elevation handwheel counterclockwise. Confirm that the blade is fully retracted below the table surface.
5. Align the Blade Angle
Ensure that the blade is parallel to the miter gauge slots or any other reference point on the table. Use a square or a reliable angle gauge to make the necessary adjustments.
6. Install a Zero-Clearance Insert
To eliminate tear-out and provide better accuracy, consider installing a zero-clearance insert on the table saw. This will create a tight fit around the blade, reducing the chance of splintering.
7. Fence Alignment
Check and adjust the fence alignment to ensure it is parallel to the blade. An aligned fence will prevent kickbacks and ensure clean and accurate cuts.
By following these steps to prepare the table saw, you can ensure that your measurements of the blade height are accurate, improving the safety and quality of your cuts.
Questions and answers
What is the purpose of measuring the table saw blade height?
Measuring the table saw blade height is important because it ensures that the blade is at the correct height for cutting. If the blade is too high, it can be dangerous and may not cut properly. If the blade is too low, it can cause the wood to bind or kickback.
What are the steps to measure the table saw blade height?
There are several steps to measure the table saw blade height. First, make sure the saw is turned off and unplugged. Then, raise the blade to its highest position. Next, use a ruler or measuring tape to measure the distance from the table top to the highest point of the blade. This measurement is the blade height.
Can I use any ruler or measuring tape to measure the table saw blade height?
Yes, you can use any ruler or measuring tape to measure the table saw blade height. It is important to use a tool that is accurate and easy to read. Some rulers and measuring tapes have markings specifically for measuring saw blade height, but any measuring tool with clear markings will work.
Are there any safety precautions I should take when measuring the table saw blade height?
Yes, there are several safety precautions you should take when measuring the table saw blade height. Always make sure the saw is turned off and unplugged before attempting to measure the blade height. Use caution when handling the ruler or measuring tape to avoid injury. It is also a good idea to wear safety glasses and follow all other safety guidelines recommended by the manufacturer.


Meet Harrison Clayton, a distinguished author and home remodeling enthusiast whose expertise in the realm of renovation is second to none. With a passion for transforming houses into inviting homes, Harrison's writing at https://thehuts-eastbourne.co.uk/ brings a breath of fresh inspiration to the world of home improvement. Whether you're looking to revamp a small corner of your abode or embark on a complete home transformation, Harrison's articles provide the essential expertise and creative flair to turn your visions into reality. So, dive into the captivating world of home remodeling with Harrison Clayton and unlock the full potential of your living space with every word he writes.


