How To Make Dovetail Joints With A Jig Saw

Dovetail joints are one of the most popular and aesthetically pleasing joinery techniques in woodworking. Traditionally, they are made by hand using a chisel and a coping saw, but with the advent of power tools, it is now possible to create dovetail joints with a jig saw.
A jig saw, also known as a scroll saw, is a versatile tool that can be used for cutting intricate shapes and patterns in various materials. By using a properly designed jig, you can easily make dovetail joints with precision and accuracy.
In this article, we will guide you through the process of making dovetail joints with a jig saw. We will cover all the necessary steps, from preparing the workpiece and marking the dovetails, to cutting the joints and fitting them together. Whether you are a beginner or an experienced woodworker, this guide will help you master the art of making dovetail joints with a jig saw.
What are Dovetail Joints?
Dovetail joints are a strong and aesthetically pleasing type of joint used in woodworking. They are known for their distinctive interlocking shapes, which resemble the tail of a bird (dovetail) and the corresponding pins on the other piece of wood. These joints are used to connect two pieces of wood at a right angle, creating a secure and durable bond.
The unique shape of dovetail joints provides a mechanical lock, preventing the joint from separating under stress or strain. This type of joint is commonly used in cabinetmaking, furniture construction, and woodworking projects where strength and durability are essential.

There are two main types of dovetail joints: through dovetail joints and half-blind dovetail joints. Through dovetail joints are visible from both sides of the wood and are often used in exposed areas where the joint will be seen. Half-blind dovetail joints, on the other hand, are only visible from one side and are commonly used in drawers or other concealed areas.
Creating dovetail joints traditionally required intricate hand tools and a high level of skill. However, with the advent of power tools like jig saws, creating dovetail joints has become more accessible to woodworkers of all skill levels. Jig saws equipped with a dovetail jig can quickly and accurately create these strong joints, making them a popular choice in modern woodworking.
In conclusion, dovetail joints are a versatile and attractive option for joining wood pieces together. Whether you prefer traditional hand tools or modern power tools, learning how to make dovetail joints can enhance your woodworking skills and enable you to create strong, durable, and visually appealing projects.
Benefits of Using a Jig Saw
When it comes to woodworking, a jig saw is a versatile and indispensable tool. Here are some of the benefits of using a jig saw:
|
1. Precision and Accuracy: |
With its small, thin blade, a jig saw allows for intricate and precise cuts in a variety of materials. Whether you’re cutting curves, angles, or intricate patterns, a jig saw offers the control you need to make accurate cuts. |
|
2. Versatility: |
A jig saw can be used for a wide range of woodworking tasks, including cutting straight lines, curves, and corners. It can also be used to make plunge cuts and bevel cuts, making it a versatile tool for various projects. |
|
3. Ease of Use: |
Compared to other woodworking tools, a jig saw is relatively easy to use, making it suitable for both beginners and experienced woodworkers. Its lightweight design and ergonomic handle allow for comfortable and controlled operation. |
|
4. Speed and Efficiency: |
With its rapid cutting action, a jig saw can help you complete your woodworking projects quickly and efficiently. Its variable speed settings allow for customization based on the material being cut, ensuring optimal results. |
|
5. Accessibility: |
Jig saws are widely available and can be found at most hardware stores. They come in a range of prices, making them accessible to woodworkers of all budgets. Additionally, they can be used in a variety of settings, including workshops, garages, and job sites. |


In conclusion, a jig saw is an essential tool for any woodworking enthusiast. Its precision, versatility, ease of use, speed, and accessibility make it a valuable addition to your toolbox.
Step-by-Step Guide to Making Dovetail Joints
Making dovetail joints is a classic woodworking technique that adds strength and beauty to your projects. While traditionally done by hand, using a jig saw can simplify the process and make it accessible to beginners. Here’s a step-by-step guide to help you make dovetail joints using a jig saw:
Step 1: Measure and mark your wood pieces. Start by measuring and marking the length and width of each wood piece that will form the joint. Make sure to add a bit of extra length to accommodate for any potential mistakes.
Step 2: Set up your jig saw. Attach the appropriate blade for cutting dovetail joints to your jig saw. Make sure it is securely fastened and tighten any necessary screws. Check that the blade is sharp and in good condition.
Step 3: Align the wood pieces. Place the wood pieces that will form the joint on a flat surface, ensuring that their edges are aligned properly. Use clamps or weights to hold them in place securely.
Step 4: Make the first dovetail cut. Position the jig saw at an angle of 45 degrees to the edge of the wood piece. Slowly guide the saw along the marked line, keeping a steady hand and maintaining the correct angle. Make sure to stay within the marked lines.

Step 5: Make the second dovetail cut. Repeat the previous step on the other wood piece that will form the joint. Make sure the angle and alignment are consistent with the first cut.
Step 6: Test the fit. Carefully fit the two wood pieces together to check the alignment and fit of the dovetail joint. If necessary, make minor adjustments using sandpaper or a chisel until you achieve a tight fit.
Step 7: Glue and assemble the joint. Apply wood glue to the surfaces of the joint, then carefully fit the pieces together. Use clamps or weights to hold the joint firmly in place while the glue dries according to the manufacturer’s instructions.
Step 8: Sand and finish. Once the glue is fully dried, use sandpaper to smooth any rough edges or surfaces. Apply your desired finish, such as paint or varnish, to protect and enhance the beauty of the joint.
Remember, practice makes perfect when it comes to making dovetail joints. Don’t be discouraged if your first attempts are not flawless. With time and experience, you will improve your skills and create stunning joints!

Step 1: Choose the Right Type of Wood
When it comes to making dovetail joints with a jig saw, selecting the right type of wood is crucial. The type of wood you choose will determine the strength and durability of your joints, as well as the overall appearance of your finished project. Here are a few factors to consider when selecting the right wood for your dovetail joints:
1. Hardwood vs Softwood
There are two main categories of wood: hardwood and softwood. Hardwood, such as oak, maple, or cherry, is known for its strength and durability, making it an excellent choice for dovetail joints. Softwood, like pine or cedar, is easier to work with but may not provide the same level of strength.
2. Grain Orientation
The grain orientation of the wood can also affect the strength and appearance of your dovetail joints. When choosing wood for dovetail joints, look for boards with straight and even grains that run parallel to the long edge of the board. Avoid boards with knots or irregularities in the grain, as they can weaken the joint.
3. Thickness
Consider the thickness of the wood when making dovetail joints. Thicker boards will provide more strength and stability, but they may also be more difficult to work with. Thinner boards, on the other hand, are easier to cut and shape but may not offer the same level of strength.
In conclusion, selecting the right type of wood is an important first step in making dovetail joints with a jigsaw. Consider the strength, durability, grain orientation, and thickness of the wood to ensure successful and aesthetically pleasing joints.

Step 2: Measure and Mark the Wood
Before you can start making dovetail joints with a jigsaw, you need to measure and mark the wood accurately. This step is crucial for achieving precise and tight-fitting joints.
Here are the steps to measure and mark the wood:
- First, determine the width and length of the wood pieces you will be joining together with dovetail joints.
- Use a measuring tape or a ruler to measure the dimensions accurately. Make sure to measure from the ends of the wood pieces to ensure proper alignment.
- Once you have measured the dimensions, mark the wood pieces with a pencil or a marking knife. You will need to mark both the tails and the pins.
- To mark the tails, draw parallel lines across the width of the wood piece. The number of lines will depend on the number of tails you want to create. For example, if you want to create three tails, draw three evenly spaced lines.
- To mark the pins, use a dovetail template or a dovetail gauge. Place the template or gauge on the end of the wood piece and trace the outline of the pins using a pencil or marking knife.
Remember to double-check your measurements and marks before proceeding to the next step. Accurate measurements and markings will help you create clean and professional-looking dovetail joints.
Step 3: Set up the Jig Saw
Before you can start cutting your dovetail joints, it’s important to set up your jig saw correctly. Follow these steps to ensure proper setup:
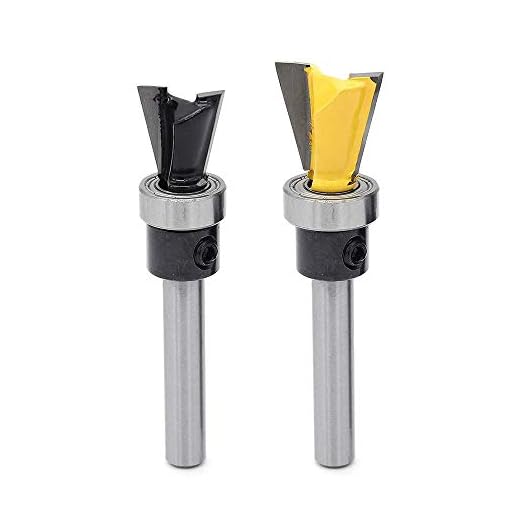
1. Insert the appropriate blade into your jig saw. Dovetail blades are specifically designed for making dovetail joints and have a unique shape that allows for precise cuts.
2. Adjust the blade’s speed and orbital settings. The speed setting controls how fast the blade moves, while the orbital setting determines the cutting action. For dovetail joints, a slower speed and a low orbital setting are usually recommended to ensure clean and accurate cuts.
3. Attach the jig saw to a stable surface or workbench using clamps or a vise. This will provide stability and prevent the saw from moving during the cutting process.
4. Secure your workpiece to a workbench or cutting surface using clamps. Make sure the piece is securely in place to prevent movement or slipping while cutting.
5. Adjust the cutting depth of your jig saw. For dovetail joints, it’s important to set the blade depth to match the thickness of your workpiece. This will ensure that the cuts are at the correct depth and will create a tight-fitting joint.
Once your jig saw is set up and ready to go, you can move on to the next step of the process: making the dovetail cuts.
Questions and answers
What is a dovetail joint?
A dovetail joint is a type of joinery technique that is commonly used in woodworking. It involves interlocking two pieces of wood by cutting a series of pins and tails in a specific way, creating a strong and durable joint.
Why would I want to use a jig saw to make dovetail joints?
Using a jig saw to make dovetail joints can be a faster and more convenient method compared to using traditional hand tools. The jig saw allows for more precise and accurate cuts, taking less time and effort to create the desired joint.
What materials do I need to make dovetail joints with a jig saw?
To make dovetail joints with a jig saw, you will need a jig saw with a fine-toothed blade, a dovetail jig, clamps to hold the wood in place, a pencil for marking the wood, and sandpaper for smoothing out any rough edges.


Meet Harrison Clayton, a distinguished author and home remodeling enthusiast whose expertise in the realm of renovation is second to none. With a passion for transforming houses into inviting homes, Harrison's writing at https://thehuts-eastbourne.co.uk/ brings a breath of fresh inspiration to the world of home improvement. Whether you're looking to revamp a small corner of your abode or embark on a complete home transformation, Harrison's articles provide the essential expertise and creative flair to turn your visions into reality. So, dive into the captivating world of home remodeling with Harrison Clayton and unlock the full potential of your living space with every word he writes.


