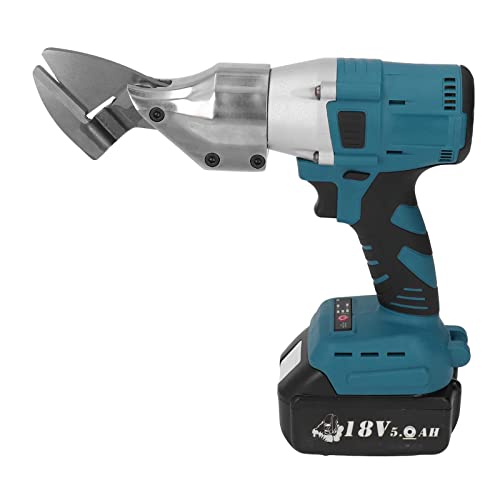
How To Attach A Straighing Tool To A Electric Saw

If you’re looking to achieve precise cuts in your woodworking projects, attaching a straightening tool to your electric saw is essential. This simple yet effective tool ensures that your cuts are accurate and straight, resulting in professional-looking pieces. Whether you’re a beginner or an experienced woodworker, this guide will walk you through the step-by-step process of attaching a straightening tool to your electric saw.
Firstly, make sure you have the necessary tools and materials on hand. You will need an electric saw, a straightening tool, a screwdriver, and screws. It’s important to choose a straightening tool that is compatible with your electric saw model. Check the specifications of both your saw and the straightening tool to ensure they are a perfect fit.
Once you have gathered all the required items, start by turning off and unplugging your electric saw. Safety is paramount during any woodworking task, so always follow proper safety precautions. Next, locate the slot or holes on your saw that are designated for attaching the straightening tool. These are usually found near the blade guide or guard, depending on your saw model.
Using a screwdriver, align the holes of the straightening tool with those on the saw. Make sure the tool is aligned parallel to the blade to ensure straight cuts. Secure the tool in place by inserting screws through the holes and tightening them securely using the screwdriver. Double-check the tightness of the screws to ensure that the straightening tool is securely attached. Now, you can power on your electric saw and begin making precise and flawless cuts with the assistance of your newly attached straightening tool.
Remember to frequently check the alignment of your straightening tool as you work to ensure that it remains securely in place. Over time, vibrations or prolonged use may cause the tool to become loose. If this happens, simply turn off and unplug your saw, re-tighten the screws, and continue with your woodworking project. By attaching a straightening tool to your electric saw, you’ll be able to achieve professional-level cuts and take your woodworking skills to the next level.

What is a Straightening Tool in an Electric Saw?
A straightening tool is an essential accessory for electric saws that helps to ensure precise and accurate cuts. It is a device designed to attach to the saw and provide a guide for the blade, keeping it in a straight line as it cuts through the material.
The straightening tool consists of a metal bar or rail that extends from the base of the saw and runs parallel to the cutting blade. It is fixed securely to the saw and remains stable throughout the cutting process, allowing the user to maintain complete control over the saw’s movement.
By using a straightening tool, the user can achieve straight cuts without the risk of the blade veering off course, resulting in misaligned or uneven cuts. The tool acts as a visual guide, allowing the user to follow a straight line or mark on the material, ensuring precise cuts every time.
Some electric saws come with built-in straightening tools, while others may require the attachment of a separate accessory. These tools are typically adjustable, allowing the user to set the desired cutting angle, ensuring versatility and accuracy in various cutting tasks.
It is important to note that the straightening tool should be used in conjunction with proper safety precautions, such as wearing protective eyewear, gloves, and following the manufacturer’s guidelines for safe operation. Additionally, it is important to ensure that the tool is firmly attached and aligned correctly before starting any cutting task.

In conclusion, a straightening tool is a valuable accessory for electric saws that aids in achieving precise and accurate cuts. It provides stability and control, allowing the user to follow a straight line and produce professional results.
The Importance of Using a Straightening Tool
When it comes to using an electric saw, having precise and accurate cuts is essential for a successful project. One of the key tools that can help achieve this is a straightening tool. This tool is designed to attach to the electric saw and ensure a straight and steady cutting line.
Benefits of Using a Straightening Tool
Using a straightening tool offers several benefits:
| Benefits | Description |
|---|---|
| Enhanced Precision | A straightening tool helps to maintain a consistent and straight cutting line, resulting in more precise cuts. This is especially important when working with materials that require clean edges, such as plywood or melamine. |
| Improved Safety | By using a straightening tool, you can reduce the risk of kickbacks and other accidents that may occur when the saw deviates from the intended cutting line. This can significantly improve the safety of your work environment. |
| Time and Effort Saving | With a straightening tool, you can save time and effort by eliminating the need for additional measurements and adjustments during the cutting process. The tool helps you maintain a straight line effortlessly, allowing you to complete your projects more efficiently. |
| Versatility | Straightening tools are compatible with various types of electric saws, making them a versatile accessory for both professionals and DIY enthusiasts. Whether you are using a circular saw, a miter saw, or a table saw, a straightening tool can help you achieve accurate cuts. |
Tips for Using a Straightening Tool
Here are some tips to keep in mind when using a straightening tool:
- Ensure that the straightening tool is securely attached to the electric saw before beginning the cutting process.
- Make sure the tool is aligned properly with the desired cutting line.
- Check the tool regularly during the cutting process to ensure it remains securely in place.
- Follow the manufacturer’s instructions for adjusting and maintaining the straightening tool.
- Practice using the tool on scrap materials before attempting to make cuts on your actual project.
- Always wear appropriate safety gear, such as goggles and gloves, when using an electric saw.
By using a straightening tool, you can greatly improve the accuracy, safety, and efficiency of your cuts when using an electric saw. Invest in a quality straightening tool and follow the proper usage guidelines to achieve professional-level results in your woodworking projects.

Step-by-Step Guide to Attaching a Straightening Tool
Attaching a straightening tool to an electric saw can greatly improve the accuracy and precision of your cuts. Follow these step-by-step instructions to properly attach the tool:
Step 1: Begin by ensuring that the electric saw is turned off and unplugged from the power source. Safety should always be the top priority when working with power tools.
Step 2: Locate the attachment point on the electric saw where the straightening tool will be connected. This is usually a small hole or groove near the saw blade.
Step 3: Take your straightening tool and examine it closely. Look for any markings or indicators that may help you align it correctly with the attachment point on the saw.
Step 4: Hold the straightening tool firmly in one hand and align it with the attachment point on the electric saw. Make sure it fits securely and is properly seated.

Step 5: Once the straightening tool is aligned, use your other hand to tighten any screws or fasteners that are used to secure it in place. This will ensure that it does not come loose while in use.
Step 6: Double-check the alignment of the straightening tool and make any necessary adjustments. It should be straight and parallel to the saw blade for optimal performance.
Step 7: Once you are satisfied with the alignment, plug the electric saw back into the power source and turn it on. Test the straightening tool by making a few practice cuts to ensure everything is working properly.
Step 8: Remember to always follow safety guidelines and precautions when using power tools. Wear appropriate protective gear, such as safety glasses and gloves, and make sure to read and understand the manufacturer’s instructions for both the electric saw and the straightening tool.
Following these step-by-step instructions will help you attach a straightening tool to your electric saw correctly and safely. Enjoy the improved accuracy and precision that this tool provides!
Tips for Properly Using a Straightening Tool in an Electric Saw
Using a straightening tool in conjunction with an electric saw can greatly improve the accuracy and precision of your cuts. However, it is important to use the tool correctly to ensure optimal results. Here are some tips to help you properly use a straightening tool with an electric saw:
1. Choose the right straightening tool
There are different types of straightening tools available for electric saws, so it’s important to choose the right one for your needs. Consider factors such as the type of cut you need to make and the size of your saw. Some common straightening tools include guides, fences, and miter gauges. Research and select the tool that will best suit your specific project.
2. Ensure the straightening tool is securely attached
Before using the straightening tool, make sure it is properly and securely attached to your electric saw. This will prevent any potential accidents or errors during the cutting process. Check that all screws and fasteners are tightened and that the tool is aligned correctly.
3. Adjust the straightening tool accurately
Once the tool is attached, you’ll need to adjust it to the desired width or angle for your cut. Take your time to ensure the tool is accurately aligned and positioned. Double-check your measurements and make any necessary adjustments before starting the saw.
4. Use the straightening tool as a guide
The primary purpose of a straightening tool is to act as a guide for your electric saw. As you make your cuts, keep the saw blade aligned with the straightening tool. This will help you maintain straight and precise cuts. Avoid pushing or forcing the saw against the tool, as this can cause inaccuracies or damage to the tool or saw.
Note: Always follow the manufacturer’s instructions for your specific straightening tool and electric saw model.
In conclusion, using a straightening tool properly with an electric saw can greatly enhance the accuracy and precision of your cuts. By choosing the right tool, securely attaching it, adjusting it accurately, and using it as a guide, you can achieve clean and professional results for your woodworking projects.
Questions and answers
What is a straightening tool and how does it work?
A straightening tool is a device used to ensure a straight cut when using an electric saw. It is typically a metal or plastic guide that attaches to the saw and acts as a fence, guiding the saw blade along a straight line. The tool is positioned parallel to the edge of the material being cut, allowing for precise and accurate cuts.
Can a straightening tool be used with any type of electric saw?
Yes, a straightening tool can generally be used with any type of electric saw that has a compatible attachment system. However, it’s always recommended to check the compatibility of the tool with your specific saw model before purchasing or using it.
How do you attach a straightening tool to an electric saw?
The exact method of attaching a straightening tool to an electric saw can vary depending on the specific tool and saw model. However, in general, the tool will have a clamping mechanism or an attachment system that allows it to be securely fastened to the saw. This can involve tightening screws, adjusting knobs, or using a quick-release mechanism. It’s important to carefully read and follow the instructions provided with the tool to ensure proper attachment.

Meet Harrison Clayton, a distinguished author and home remodeling enthusiast whose expertise in the realm of renovation is second to none. With a passion for transforming houses into inviting homes, Harrison's writing at https://thehuts-eastbourne.co.uk/ brings a breath of fresh inspiration to the world of home improvement. Whether you're looking to revamp a small corner of your abode or embark on a complete home transformation, Harrison's articles provide the essential expertise and creative flair to turn your visions into reality. So, dive into the captivating world of home remodeling with Harrison Clayton and unlock the full potential of your living space with every word he writes.


