How To Add Table Saw Fin

When it comes to woodworking, having a table saw is essential. It allows you to make accurate and precise cuts, and with the addition of a table saw fin, you can take your woodworking to the next level. A table saw fin is a small accessory that attaches to the back of your table saw blade. Its purpose is to help guide and stabilize the wood as you cut, resulting in cleaner and straighter cuts.
The process of adding a table saw fin is relatively simple, and with a few tools and some basic woodworking skills, you can do it yourself. First, you’ll need to gather the necessary materials, including a table saw fin kit, a drill, screws, and a screwdriver. You’ll also need to measure the distance between the back of your table saw blade and the back of your table saw’s throat plate, as this will determine the size of the table saw fin you need.
Once you have your materials and measurements, you can start the installation process. Begin by removing the throat plate from your table saw. Then, following the instructions provided with your table saw fin kit, drill holes into the back of the throat plate that correspond to the pre-drilled holes in the table saw fin. Next, attach the table saw fin to the throat plate using the screws provided, making sure it is securely fastened.
With the table saw fin attached, you can now reinsert the throat plate into your table saw. Make sure it is in the correct position and securely tightened. Once everything is in place, turn on your table saw and make a test cut. You should notice a difference in the stability and accuracy of the cut, thanks to the added support provided by the table saw fin.
Adding a table saw fin to your setup is a simple and effective way to improve the performance of your table saw. With the ability to make cleaner and straighter cuts, you’ll be able to take on more advanced woodworking projects with confidence. So why wait? Get yourself a table saw fin and start making the most out of your table saw today!

Preparation Before Adding Table Saw Fin
Before adding a fin to your table saw, it is important to properly prepare the saw for the task. This will help ensure a smooth and successful fin installation, as well as improve overall saw performance.
1. Safety First
Safety should be the top priority when working with any power tool, including a table saw. Before starting the fin installation process, make sure to wear appropriate safety gear such as safety glasses, ear protection, and gloves. Additionally, clear the workspace of any clutter or obstacles that could potentially cause accidents.
2. Clean the Saw Surface
Prior to adding the fin, thoroughly clean the surface of the table saw. Remove any dust, debris, or residue that may have accumulated. This will ensure proper adhesion of the fin and prevent any particles from interfering with the fin’s functionality.
Note: If the table saw has been previously used with a different type of fin, it is recommended to remove any adhesive or remnants left behind to allow for a clean and smooth installation of the new fin.
3. Measure and Mark
Take accurate measurements of the table saw surface to determine the appropriate size and placement of the fin. Use a measuring tape or ruler to mark the desired location on the table saw. This will help guide the fin installation process and ensure precise alignment.

Tip: It is advisable to refer to the manufacturer’s instructions or guidelines for specific measurements and placement recommendations.
By following these preparation steps, you can ensure a successful and efficient installation of a fin on your table saw. Remember to always prioritize safety and take necessary precautions when working with power tools.
The Importance of Proper Table Saw Setup
Setting up your table saw properly is crucial for both safety and achieving accurate cuts. A poorly set up table saw can lead to dangerous kickbacks, inaccurate cuts, and overall frustration.
One of the most important aspects of table saw setup is ensuring that the blade is aligned and parallel to the miter gauge slots. This alignment ensures that your cuts will be straight and accurate, minimizing the need for excessive sanding or rework.
Additionally, it is essential to have a properly adjusted rip fence. The fence should be parallel to the blade and securely locked in place. A misaligned fence can lead to dangerous kickbacks and inaccurate cuts. Take the time to check the alignment of your fence before making any cuts.

Another crucial step in table saw setup is checking the blade height and angle. The blade should be set at the appropriate height for the thickness of the material you are cutting. Adjusting the blade angle is important for making bevel cuts or angled cuts accurately.
Proper table saw setup also includes ensuring that the table surface is clean, flat, and level. Any debris or unevenness on the table can affect the stability of your cuts and potentially lead to accidents. Use a straight edge to check for any significant deviations, and adjust as necessary.
Remember to always wear appropriate safety equipment, such as safety glasses and hearing protection, when operating a table saw. Following proper setup procedures and safety protocols will not only improve the quality and accuracy of your cuts but also ensure a safe working environment.
In conclusion, investing time in properly setting up your table saw is imperative for achieving accurate, safe, and efficient woodworking. Neglecting this crucial step can lead to poor results, potential accidents, and frustration. Take the time to perform regular maintenance and adjustments for optimal performance and peace of mind.
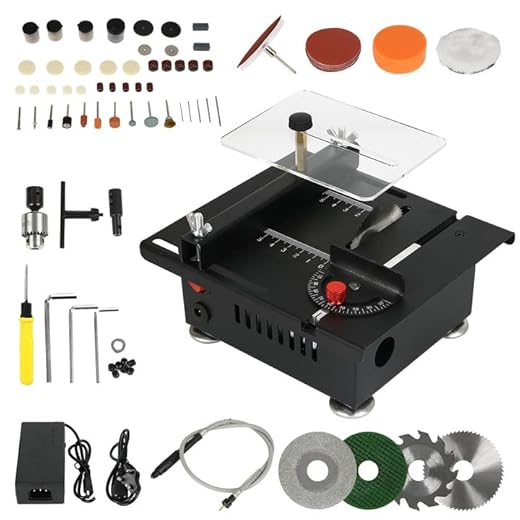
Gathering the Necessary Materials
Before you can add a fin to your table saw, you will need to gather a few materials. Here is a list of what you will need:

- A table saw – make sure it is in good working condition and properly maintained.
- A fin – choose one that is suitable for your table saw and the type of cuts you will be making.
- Safety goggles – protect your eyes from any potential flying debris.
- Gloves – keep your hands safe and provide a better grip on the tools.
- A tape measure – use it to ensure accurate placement of the fin.
- A marker or pencil – mark the placement of the fin on the table saw.
- A screwdriver or drill – depending on the type of fin, you may need to secure it with screws.
- Screws or bolts – if required by the fin, make sure you have the appropriate size and type.
Once you have gathered all of these materials, you will be ready to proceed with adding the fin to your table saw.
List of Tools and Materials for Adding a Table Saw Fin
Adding a fin to your table saw can greatly improve its performance and accuracy. To successfully complete this project, you will need the following tools and materials:
Tools:
- A table saw
- A measuring tape or ruler
- A pencil or marker
- A drill with drill bits
- A screwdriver or wrench
- A circular saw or jigsaw
- Sandpaper or a sander
- A brush or roller
- A level
Materials:
- A fin bracket or fin set
- Wood or aluminum for the fin
- Screws or bolts
- Wood glue or adhesive
- Finishing nails
- Paint or stain
Before starting the project, ensure that you have all the necessary tools and materials on hand. This will help you complete the installation process smoothly and efficiently. Additionally, it is important to follow the manufacturer’s instructions and safety guidelines when using the tools and materials.
Remember to measure and mark the fin placement accurately to ensure the best performance from your table saw. Take your time during the installation process and make any necessary adjustments to ensure a secure and stable fin.
By having a list of the required tools and materials, you can easily gather everything you need before starting the project. This will save you time and allow you to complete the installation smoothly.
Step-by-Step Guide to Adding the Table Saw Fin
Adding a fin to your table saw can greatly enhance its accuracy and safety. A table saw fin, also known as a riving knife or splitter, helps prevent kickback and ensures a smooth and precise cut. If you’re ready to take your woodworking to the next level, follow this step-by-step guide to add a fin to your table saw.
Tools and Materials You’ll Need
- Table saw with a removable blade guard
- Riving knife or splitter
- Wrench or Allen key (depending on your table saw)
- Owner’s manual for your table saw
Step 1: Gather Safety Equipment
Before starting any work on your table saw, it’s important to ensure your safety. Put on your safety glasses and any other necessary safety equipment recommended by the manufacturer of your table saw.
Step 2: Remove the Blade Guard
Check your owner’s manual to find the instructions for removing the blade guard on your specific table saw model. Typically, you’ll need to use a wrench or Allen key to remove the bolts holding the guard in place.
Step 3: Install the Riving Knife or Splitter
Once the blade guard has been removed, carefully install the riving knife or splitter into the slot located behind the saw blade. Follow the instructions in your owner’s manual for the proper installation technique specific to your table saw model.
Step 4: Align the Riving Knife or Splitter
After installing the riving knife or splitter, make sure it is properly aligned with the saw blade. Use a straight edge or ruler to ensure that the knife is parallel to the saw blade throughout its entire length. Adjust the position if necessary.

Step 5: Secure the Riving Knife or Splitter
Once the riving knife or splitter is properly aligned, tighten the bolts or screws to secure it in place. Make sure it is firmly attached and doesn’t move during operation.
Step 6: Test the Fin
Before using your table saw, make sure to test the fin by making a few test cuts on scrap wood. Ensure that the fin doesn’t interfere with the cutting process and provides the necessary support and safety.
By following these steps and adding a table saw fin, you can greatly improve your woodworking experience. Always refer to your owner’s manual for specific instructions and guidelines related to your table saw model. Remember to prioritize safety and take appropriate precautions when working with power tools.
| Benefits of Adding a Table Saw Fin |
|---|
| 1. Increased safety by preventing kickback |
| 2. Enhanced accuracy and precision in cuts |
| 3. Reduced risk of blade binding or wood splintering |
| 4. Facilitates the use of various sawing techniques |
| 5. Improves overall control and stability of the workpiece |
Measuring and Marking for the Table Saw Fin
Before you can begin adding a table saw fin, it is important to properly measure and mark the location on your workpiece. This will ensure that the fin is placed accurately and will result in a clean and precise cut.
First, determine the desired location for the fin on your workpiece. Consider factors such as the overall design, balance, and functionality of your project. Once you have decided on the location, use a measuring tape or ruler to measure the distance from the edge of the workpiece to where the fin will be placed. Make a light pencil mark at this measurement.

Next, it is important to mark the depth of the fin. This will determine how far the saw blade will cut into the workpiece. Measure the desired depth using a depth gauge or by referring to the specifications of your table saw. Make a second pencil mark at this depth, perpendicular to the first mark.
To ensure accuracy and prevent any mistakes, it is recommended to double-check your measurements before proceeding. Use a square or ruler to ensure that your marks are straight and perpendicular to the edge of the workpiece. Additionally, make sure that your marks are clear and easily visible.
Once you have measured and marked the location and depth for your table saw fin, you are ready to proceed with the cutting process. Remember to always wear appropriate safety gear, such as safety glasses and gloves, and to follow the manufacturer’s guidelines for your specific table saw.
By properly measuring and marking for the table saw fin, you can ensure precise and accurate cuts that will result in a professional-looking finished project.
Installing the Table Saw Fin
Once you have prepared your table saw for the addition of a fin, you can move on to the installation process. Here are the steps to follow:
-
Gather the necessary tools and materials:
- Table saw fin
- Screws
- Screwdriver or drill
- Measuring tape
- Pencil
-
Measure and mark:
Use the measuring tape to determine the location where you want to install the fin. Mark this spot with a pencil.
-
Align the fin:
Place the fin on the marked spot, making sure it is centered and straight. Double-check the alignment before proceeding.
-
Secure the fin:
Using the screws, attach the fin to the table saw. Start by inserting the screws through the pre-drilled holes in the fin, and then carefully tighten them using a screwdriver or drill.
-
Test the fin:
After securing the fin, make sure it is securely in place by gently pushing on it from different angles. It should not move or wobble.
Once you have completed these steps, you have successfully installed the table saw fin. It is now ready to provide additional stability and support during your woodworking projects.
Questions and answers
What is a table saw fin and why would I need to add one to my table saw?
A table saw fin is a device that is attached to the table saw blade to help improve the quality of the cut. It is particularly useful when cutting thin or delicate materials, as it helps to prevent splintering and tearing. Adding a table saw fin can also help to reduce kickback and increase overall safety.
How do I add a table saw fin to my table saw?
Adding a table saw fin is a relatively simple process. First, you will need to purchase a table saw fin that is compatible with your specific model of table saw. Then, follow the instructions provided with the fin to properly attach it to your blade. It is important to make sure that the fin is securely fastened and properly aligned with the blade before use.
Are there different types of table saw fins available?
Yes, there are several different types of table saw fins available on the market. Some fins are designed specifically for ripping cuts, while others are better suited for crosscuts or angled cuts. There are also different sizes of fins available to accommodate different blade sizes. It is important to choose a fin that is appropriate for the type of cutting you will be doing.
Will adding a table saw fin affect the performance or accuracy of my cuts?
When properly installed and aligned, a table saw fin should not negatively affect the performance or accuracy of your cuts. In fact, it should improve the overall quality of your cuts by reducing splintering and tear-out. However, it is important to follow the manufacturer’s instructions and regularly check and adjust the alignment of the fin to ensure optimal performance.
Can I use a table saw fin with any type of table saw blade?
While most table saw fins are designed to be compatible with a wide range of table saw blades, it is important to check the manufacturer’s specifications to ensure compatibility. Some fins may only work with certain blade types or sizes. Additionally, it is important to make sure that the fin does not interfere with the proper operation of the blade guard or any other safety features on your table saw.


Meet Harrison Clayton, a distinguished author and home remodeling enthusiast whose expertise in the realm of renovation is second to none. With a passion for transforming houses into inviting homes, Harrison's writing at https://thehuts-eastbourne.co.uk/ brings a breath of fresh inspiration to the world of home improvement. Whether you're looking to revamp a small corner of your abode or embark on a complete home transformation, Harrison's articles provide the essential expertise and creative flair to turn your visions into reality. So, dive into the captivating world of home remodeling with Harrison Clayton and unlock the full potential of your living space with every word he writes.


