Which Sander For Smoothing Filler On Wall
When it comes to achieving a smooth and flawless finish on a wall, using a filler is often necessary. Whether you are repairing cracks, holes, or uneven surfaces, applying a filler can help create a seamless appearance. However, once the filler is applied, it needs to be sanded down to achieve that desired smoothness. But which sander is the best tool for the job?
Orbital Sanders:
An orbital sander is a versatile tool that is commonly used for sanding flat surfaces. It operates by rotating the sanding disk in a circular motion, which helps prevent swirl marks and ensures an even finish. When it comes to smoothing filler on a wall, an orbital sander can be a good option. Its random orbit motion covers a large area efficiently, making it ideal for larger wall sections. However, it may not reach tight corners or edges effectively.
Palm Sanders:
If you are looking for a sander that is more maneuverable and can access tight spaces easily, a palm sander could be the right choice. As the name suggests, a palm sander is small and lightweight, allowing you to hold it comfortably in one hand. It is particularly useful for sanding small patches of filler, corners, and edges where an orbital sander may not reach. However, keep in mind that it may take more time and effort to cover larger areas with a palm sander.

Belt Sanders:
When dealing with larger and more challenging wall surfaces, a belt sander can be a powerful tool to have. Belt sanders feature a continuous loop of sandpaper wrapped around two rollers, providing a high level of abrasiveness. They are designed for heavy-duty tasks and can remove material quickly. However, due to their aggressive nature, they may be too harsh for smoothing filler on walls, especially if you are not experienced in using them.
Conclusion:
Choosing the right sander for smoothing filler on a wall depends on the specific needs of your project. Orbital sanders are great for covering large areas efficiently, while palm sanders excel in accessing tight spaces. Belt sanders are better suited for more challenging surfaces but may be too aggressive for smoothing filler. Consider the size of the wall, the amount of filler to be sanded, and your comfort level with each type of sander before making a decision. Ultimately, the goal is to achieve a smooth and flawless finish that enhances the appearance of your walls.
The Importance of Choosing the Right Sander for Smoothing Filler on Wall
When it comes to smoothing filler on a wall, choosing the right sander can make a world of difference. The type of sander you use will greatly impact the finish of your walls, as well as the amount of time and effort required to achieve the desired results.

Why is choosing the right sander important?
First and foremost, using the right sander will ensure that you achieve a smooth and flawless finish on your walls. Different sanders have different levels of power, speed, and versatility, and it’s crucial to select one that is suitable for the specific task at hand. Using the wrong sander can result in uneven surfaces, visible sanding marks, and even damage to the wall itself.
Additionally, choosing the right sander can save you both time and effort. A sander that is designed for the type of filler you are using will be more efficient and effective in smoothing out the surface. This means that you’ll spend less time sanding and more time enjoying a perfectly smooth wall.
Which sander should you choose?
There are several types of sanders available on the market, each with its own advantages and purposes. Here are a few options to consider:
1. Orbital sander: This type of sander is versatile and suitable for most smoothing tasks. It operates in a circular motion and is ideal for removing rough spots and achieving a smooth finish.
2. Detail sander: As the name suggests, this sander is perfect for working on detailed areas. It has a small triangular shape that allows for precise sanding in tight corners and edges.

3. Belt sander: If you have larger areas to sand, a belt sander is a good option. It features a continuous sanding belt that quickly removes material and can tackle rougher surfaces.
Remember, it’s important to select a sander that is suitable for the task at hand and compatible with the type of filler you are using. Reading product descriptions and reviews, as well as seeking advice from professionals, can help you make an informed decision.
In conclusion, choosing the right sander for smoothing filler on a wall is essential for achieving a flawless finish and saving time and effort. Consider the type of sander that best suits your needs, and remember to always prioritize safety when operating any power tools.
Understanding Different Types of Sanders
When it comes to smoothing filler on a wall, having the right sander can make all the difference. There are several types of sanders available, each designed for specific tasks and surfaces. Understanding the different types of sanders will help you choose the most suitable one for your project.
1. Orbital Sander
An orbital sander is a versatile tool that can be used for a variety of sanding tasks. It has a square or rectangular pad that moves in an orbital motion, providing a random sanding pattern. This type of sander is ideal for smoothing large surfaces and removing paint or varnish.

2. Belt Sander
A belt sander is a powerful tool that uses a continuous loop of sanding paper. It is best suited for removing a large amount of material quickly. Belt sanders are commonly used for rough sanding tasks, such as leveling uneven surfaces or removing old paint.
Tip: Be careful when using a belt sander on walls, as it can be aggressive and may damage the surface if not used properly.
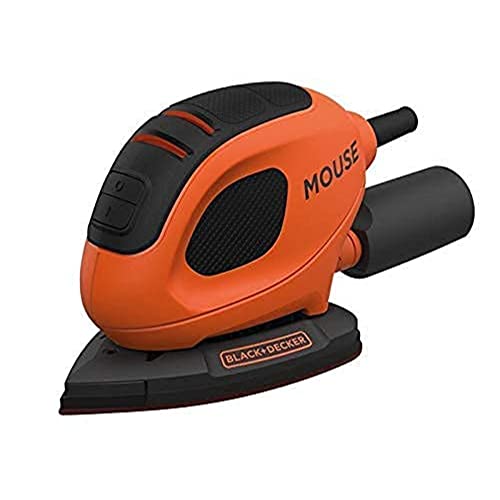
3. Detail Sander
A detail sander, also known as a corner sander or mouse sander, is a small, lightweight tool that is perfect for sanding tight spaces or corners. It usually has a triangular or pointed pad, allowing for precise sanding in hard-to-reach areas.
4. Random Orbit Sander
A random orbit sander combines the characteristics of an orbital sander and a belt sander. It has a round pad that moves in both an orbital and circular motion, creating a smooth finish without swirl marks. Random orbit sanders are great for final sanding or polishing tasks.
Note: Always follow the manufacturer’s instructions and wear appropriate safety gear when using any type of sander.

By understanding the different types of sanders available, you can select the right tool for smoothing filler on a wall. Whether you need to remove paint, level surfaces, or sand corners, there is a sander out there to help you achieve professional results.
Factors to Consider When Choosing a Sander
When it comes to choosing a sander for smoothing filler on walls, there are several factors that you should take into consideration. The right sander can make a big difference in the quality and efficiency of your work, so it’s important to choose carefully. Here are some key factors to consider:
Type of Sander
There are several types of sanders available on the market, each with its own advantages and uses. The two most common types for smoothing filler on walls are orbital sanders and random orbital sanders. Orbital sanders move in a circular motion, while random orbital sanders combine circular and elliptical motions. Consider the type of sander that would work best for your specific project and personal preference.
Power Source
Sanders can be powered by electricity, batteries, or compressed air. Electric sanders are the most commonly used and provide consistent power. Battery-powered sanders offer more mobility but may have limited battery life. Compressed air sanders are typically used for more heavy-duty applications. Decide which power source would be most convenient and practical for your needs.
Sanding Speed
The sanding speed of a sander is an important factor to consider, as it determines how quickly you can complete your work. Some sanders have adjustable speed settings, allowing you to control the sanding speed to match the requirements of your project. Make sure to choose a sander with a sanding speed that aligns with your preferences and project needs.

Dust Collection
Dust collection is an important consideration, especially when sanding drywall filler. Look for a sander that has a built-in dust collection system or can be easily connected to a vacuum cleaner for efficient dust removal. Minimizing dust not only keeps your work area cleaner but also helps protect your health.
Ergonomics
Consider the ergonomics of the sander, such as its weight, grip, and overall design. A sander that feels comfortable and is easy to maneuver will reduce fatigue and enhance your overall sanding experience. Test out different sanders to find one that feels the most comfortable in your hand.
By taking these factors into consideration, you can choose the right sander for smoothing filler on walls that will help you achieve professional-quality results efficiently and comfortably.
Benefits of Using the Correct Sander for Smoothing Filler on Wall
When it comes to smoothing filler on a wall, using the correct sander can make a significant difference in the outcome of your project. Here are some key benefits of using the right sander for the job:
Efficiency: Using the correct sander ensures that the smoothing process is done efficiently. A sander specifically designed for smoothing filler will have the right power and speed to effectively remove excess material and create a smooth finish.

Time-saving: With the right sander, you can save a significant amount of time during the smoothing process. The correct sander will be able to quickly and evenly smooth the filler on the wall, reducing the need for manual sanding and minimizing the overall project duration.
Consistency: Using the correct sander helps maintain a consistent and uniform finish across the entire wall. Different sanders have different sanding patterns and techniques, so using the appropriate one ensures that the filler is smoothed out evenly without leaving any noticeable inconsistencies or marks.
Better control: The correct sander provides better control and maneuverability, allowing you to easily navigate corners, edges, and detailed areas of the wall. This ensures that every part of the wall receives the required attention, resulting in a professional-looking finish.
Reduce dust: Choosing the right sander can also help minimize the amount of dust generated during the smoothing process. Some sanders come with built-in dust collection systems or can be connected to a vacuum, effectively containing the dust and keeping your workspace cleaner.
Professional results: Ultimately, using the correct sander for smoothing filler on a wall helps achieve professional results. The right sander will give you the ability to create a smooth, even, and polished finish, making your walls look flawless and ready for paint or wallpaper.
Remember, using the correct sander for smoothing filler on a wall is essential to achieve optimal results. Invest in the right tool, and you’ll save time, effort, and frustration while achieving a high-quality finish.
Tips for Properly Using a Sander to Smooth Filler on Wall
When it comes to smoothing filler on a wall, using a sander can be a great tool to achieve a smooth and even surface. Here are some tips to help you properly use a sander for this purpose:
1. Choose the right sander
There are different types of sanders available, such as palm sanders, orbital sanders, and belt sanders. For smoothing filler on a wall, orbital sanders are usually the best option. They are lightweight, easy to control, and produce a fine finish. Make sure to choose a sander that is suitable for your project.
2. Use the proper sandpaper
The type of sandpaper you use is essential for achieving the desired result. For smoothing filler on a wall, it is recommended to start with a coarse-grit sandpaper (around 80 grit) to remove excess filler and even out the surface. As you progress, you can switch to a finer-grit sandpaper (around 120-220 grit) for a smoother finish.
3. Prepare the wall
Before you start sanding, it is crucial to prepare the wall. Remove any loose debris or uneven patches of filler. If necessary, apply a second coat of filler and let it dry completely before sanding. This will ensure a more even and smooth result.
4. Start with light pressure
When using a sander, it is important to start with light pressure. Applying too much pressure can cause uneven sanding and can also damage the wall. Allow the sander to do the work, and gradually increase the pressure as needed to achieve the desired smoothness.
5. Keep the sander moving
To prevent over-sanding in one area, it is essential to keep the sander moving. Move the sander in a circular or back-and-forth motion, making sure to cover the entire surface evenly. This will help prevent uneven patches and create a consistent finish.
6. Work in sections
If you are working on a large wall, it is best to divide the surface into smaller sections. This will make it easier to control the sanding process and ensure a more uniform result. Work on one section at a time, gradually progressing to the next until the entire wall is sanded.
7. Use a vacuum or dust extraction system
Sanding generates a lot of dust, which can be harmful if inhaled and can also make a mess. To minimize the amount of dust, use a sander with a built-in dust collection system or connect it to a vacuum cleaner or dust extraction system. This will help keep the work area clean and protect your health.
By following these tips, you can use a sander effectively to achieve a smooth and even finish when smoothing filler on a wall. Remember to take the necessary safety precautions, such as wearing goggles and a dust mask, and always read and follow the manufacturer’s instructions for your specific sander.
Questions and answers
What types of sanders can be used for smoothing filler on a wall?
There are several types of sanders that can be used for smoothing filler on a wall, including belt sanders, orbital sanders, and detail sanders. Belt sanders are larger and more powerful, making them suitable for larger surfaces. Orbital sanders have a round sanding pad that moves in a circular motion, making them ideal for smoothing curved surfaces. Detail sanders have a triangular sanding pad and are great for sanding in tight corners and hard-to-reach areas.
Which type of sander is best for smoothing filler on a wall?
The best type of sander for smoothing filler on a wall depends on the specific project and personal preference. Belt sanders are great for larger surfaces and heavy-duty sanding. Orbital sanders are versatile and can be used on both flat and curved surfaces. Detail sanders are perfect for intricate sanding and hard-to-reach areas. It’s recommended to choose a sander that suits your needs and preferences to ensure efficient and effective smoothing of filler on the wall.

How to underpin a house

Meet Harrison Clayton, a distinguished author and home remodeling enthusiast whose expertise in the realm of renovation is second to none. With a passion for transforming houses into inviting homes, Harrison's writing at https://thehuts-eastbourne.co.uk/ brings a breath of fresh inspiration to the world of home improvement. Whether you're looking to revamp a small corner of your abode or embark on a complete home transformation, Harrison's articles provide the essential expertise and creative flair to turn your visions into reality. So, dive into the captivating world of home remodeling with Harrison Clayton and unlock the full potential of your living space with every word he writes.

