How To Sand A Hardwood Floor With A Belt Sander
Are you tired of looking at scratched and worn hardwood floors? Sanding your hardwood floors can give them a fresh new look and restore their natural beauty. One of the most efficient tools you can use for this project is a belt sander. With its powerful motor and abrasive belt, a belt sander can quickly and effectively remove old finish, scratches, and stains from your hardwood floors.
In this article, we will guide you through the process of sanding a hardwood floor with a belt sander. Before you start, it’s important to gather the necessary tools and materials. You will need a belt sander, sanding belts of various grits, safety goggles, ear protection, a respirator mask, a vacuum cleaner or broom, and a clean cloth for wiping away dust.
The first step is to prepare the room. Remove all furniture, rugs, and any other obstacles that may get in the way of sanding. Close any doors or openings to prevent dust from spreading to other areas of your home. It’s also a good idea to cover vents and electrical outlets with plastic to protect them.
Once the room is prepared, it’s time to start sanding your hardwood floor. Begin with a coarse grit sanding belt, such as 36 or 40, to remove the old finish and deep scratches. Move the belt sander in the direction of the wood grain, applying even pressure. Be careful not to stay in one spot for too long, as it can cause uneven sanding. Continuously check the progress and switch to a finer grit sanding belt as you go.
After sanding the entire floor with the belt sander, it’s important to do a final pass with a finer grit sanding belt, around 80 or 100. This will smooth out any remaining imperfections and prepare the floor for refinishing. Remember to switch off the belt sander and clean the room thoroughly before applying any finish to the floor.

Sanding a hardwood floor with a belt sander can be a time-consuming and physically demanding task. However, with the right tools, preparation, and technique, you can achieve professional-looking results. Take your time, follow safety precautions, and enjoy the process of transforming your tired hardwood floors into a stunning feature of your home.
How To Prepare Your Hardwood Floor For Sanding
Before you begin sanding your hardwood floor with a belt sander, it’s important to properly prepare the surface to ensure the best results. Here are some steps you can follow to prepare your hardwood floor for sanding:
1. Clear the room
Start by removing all furniture, rugs, and other items from the room. This will give you plenty of space to work and prevent any damage to your belongings while sanding.
2. Inspect for nails and staples
Carefully inspect the floor for any protruding nails, staples, or other sharp objects. These can damage the sandpaper and hinder the sanding process. Use a hammer or pliers to remove any nails or staples that you find.
3. Clean the floor
Sweep or vacuum the floor to remove any dust, dirt, or debris. It’s important to start with a clean surface to ensure the sanding is even and smooth.

4. Repair any damage
If you have any deep scratches, gouges, or other damage to your hardwood floor, take the time to repair them before sanding. Use wood filler or putty to fill in any holes or gaps and allow it to dry completely.
5. Remove old finishes
Before sanding, it’s necessary to remove any old finishes or coatings on the floor. This can include paint, varnish, or wax. Use a paint stripper or sanding chemicals to remove these coatings, following the manufacturer’s instructions.
6. Protect walls and baseboards
Use painter’s tape or plastic sheeting to protect the walls and baseboards from the sanding process. This will prevent any accidental damage or marks on these surfaces.
By following these steps to prepare your hardwood floor for sanding, you’ll ensure that the sanding process goes smoothly and that you achieve the best results possible.
Gather the necessary tools and materials
Before you start sanding your hardwood floor, it’s important to gather all the necessary tools and materials. Here’s a list of what you’ll need:

| Tool/Material | Description |
| Belt sander | A high-powered tool designed specifically for sanding large surfaces like hardwood floors. |
| Safety goggles | To protect your eyes from any flying debris while sanding. |
| Dust mask | To prevent inhaling dust particles. |
| Ear protection | To protect your ears from the loud noise produced by the belt sander. |
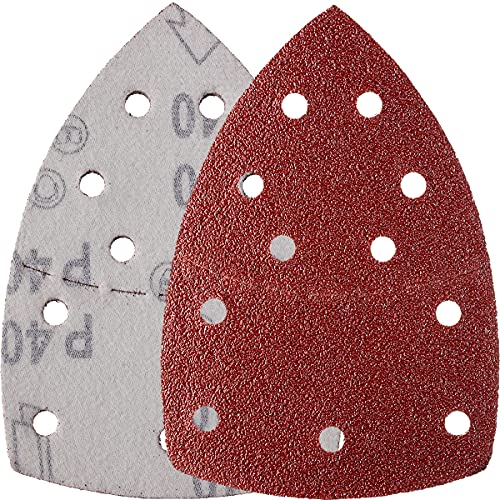
| Sanding belts | Choose grits that are appropriate for your specific hardwood floor. Start with a coarse grit (around 40-60) and progress to finer grits as needed. |
| Vacuum cleaner | To clean up dust and debris during and after sanding. |
| Tack cloth | To wipe away any remaining dust before applying a finish or stain. |
| Wood putty | To fill in any gaps or cracks in the floor. |
| Sputty knife | To apply the wood putty. |
| Sanding block | For sanding hard-to-reach areas or corners that the belt sander can’t reach. |
| Tape measure | To measure the floor and determine the amount of sanding needed. |
| Pencil or marker | To mark any areas that require extra attention. |
| Drop cloths | To protect adjacent areas from dust and debris. |
Make sure you have all these tools and materials ready before you begin sanding. Safety should always be a priority, so wear protective gear and follow the manufacturer’s instructions for using the belt sander.
Clear the room and remove any furniture and obstacles
Before you begin sanding your hardwood floor with a belt sander, it is important to clear the room of any furniture and obstacles. This will allow you to have an unobstructed workspace and avoid any potential damage to your belongings.
Start by removing any large furniture pieces such as sofas, tables, and chairs. If possible, find a safe location to store them temporarily, away from the room you will be working in. If you cannot move them to another room, consider covering them with drop cloths to protect them from dust and debris.
Next, remove any smaller items such as plants, lamps, and decorative objects. Place them in a different room or cover them with plastic wrap to prevent them from getting damaged or dusty during the sanding process.
Take the time to remove any rugs or carpets from the room as well. These can get in the way of the sander and may also become damaged by the sanding process. Roll them up and store them in a safe place until the floor sanding is completed.

Finally, inspect the room for any other obstacles that could interfere with the sanding process. This may include protruding nails, loose floorboards, or electrical cords. Remove or secure these items to ensure a smooth and safe sanding experience.
Inspect the floor for any repairs or replacements
Before you begin sanding your hardwood floor, it’s important to thoroughly inspect it for any areas that may require repairs or replacements. Taking the time to address any issues beforehand will ensure that you achieve the best results with your sanding process.
Start by walking around the room and visually examining the floor for any obvious damage, such as structural issues or loose boards. Use a flashlight to check for any hidden problems, such as water damage or termite infestation. Pay close attention to high traffic areas and corners, as they are more prone to wear and tear.
If you come across any boards that are cracked, warped, or heavily damaged, they will need to be replaced. Replace damaged boards with new ones that match the existing flooring as closely as possible. This will help maintain the overall appearance and integrity of the floor.
Additionally, if there are any nails or screws sticking out of the floor, make sure to remove or replace them. These can not only damage the sandpaper on your belt sander but also pose a safety hazard during the sanding process.

In some cases, you may encounter smaller issues that can be easily repaired, such as minor scratches or gouges. Use wood filler or putty to fill in these imperfections, following the manufacturer’s instructions. Allow the filler to dry completely before proceeding with the sanding process.
Professional tip:
It’s a good idea to take some time and make a list of all the repairs and replacements that need to be done before sanding. This will help you stay organized and ensure that you don’t miss anything.
Remember, proper preparation is key to achieving a flawless finish on your hardwood floor. By thoroughly inspecting the floor and making any necessary repairs or replacements, you’ll be well on your way to a successful sanding project.
Clean the floor thoroughly to remove dirt and debris
Before beginning the sanding process, it is important to clean the hardwood floor to ensure a smooth and even sanding surface.
Start by removing all furniture, rugs, and other items from the room. This will allow for easier access and prevent any damage to the items during the sanding process.

Next, sweep the floor using a broom or vacuum cleaner to remove any loose dirt, dust, or debris. Pay special attention to corners, edges, and hard-to-reach areas as these areas tend to accumulate more dirt.
After sweeping, use a damp mop or cloth to thoroughly clean the floor. This will help remove any remaining dirt or grime that may have been missed during sweeping. Avoid using excessive water, as this can damage the wood. Instead, lightly dampen the mop or cloth and wring out any excess water before cleaning.
If there are any stubborn stains or adhesive residue, you can use a mild hardwood floor cleaner or a mixture of vinegar and water to gently scrub the affected areas. Be sure to follow the manufacturer’s instructions and test any cleaning products on a small, inconspicuous area first to avoid damaging the floor.
Once the floor is clean, allow it to dry completely before proceeding with sanding. This will ensure that the sanding process is effective and that the sandpaper does not become clogged with moisture or debris.
Remember, a clean floor is essential for achieving a professional-looking finish when sanding hardwood floors. Taking the time to thoroughly clean the floor before sanding will help remove any dirt or debris that could potentially damage the sander or affect the quality of the final result.

How To Use A Belt Sander On Your Hardwood Floor
Using a belt sander to sand your hardwood floor can be an effective way to remove old finishes, stains, and imperfections. However, it is important to use the belt sander correctly to avoid damaging your floor. Here are some steps to guide you through the process:
1. Prepare the area:
Before you begin sanding, make sure the room is well-ventilated and clean. Remove any furniture, rugs, or other items from the area to prevent them from getting damaged. Cover any electrical outlets with tape to protect them from dust.
2. Choose the right grit:
The grit of the sandpaper on the belt sander determines how aggressive the sanding action will be. Start with a coarse grit (around 36-60) to remove old finishes and imperfections. Gradually switch to finer grits (around 80-120) for a smoother finish. Remember to always follow the manufacturer’s recommendations for your specific belt sander.
3. Practice proper technique:
Hold the belt sander firmly with both hands, keeping it level and parallel to the floor. Start sanding in one corner of the room, moving in the direction of the wood grain. Avoid applying too much pressure, as it can result in uneven sanding or gouging. Always keep the sander in motion to prevent creating deep grooves or sanding marks.
4. Sand the entire floor:
Work systematically, sanding the floor in small sections at a time. Overlap each pass to ensure consistent sanding. Pay extra attention to high-traffic areas or areas with deep scratches or stains. Be patient and take your time to achieve the desired results.
5. Clean up the dust:
After sanding, thoroughly vacuum the entire area to remove any dust or debris. Use a damp cloth or tack cloth to wipe down the floor and ensure a clean surface for applying finishes or sealants.
6. Finish with finer sandpaper:
If desired, you can further refine the surface by using a hand sander with finer sandpaper (around 120-180 grit). This step helps to remove any remaining imperfections and create a smoother surface for finishing.
7. Proceed with finishing:
Once you have finished sanding, you can proceed with staining, sealing, or applying a finish to your hardwood floor. Follow the manufacturer’s instructions for the specific product you are using, and allow adequate drying time between coats.
Remember, sanding a hardwood floor can be a challenging task, and it’s important to properly prepare and take necessary precautions to avoid damage. If you are not confident in your abilities, it may be best to hire a professional to do the job.
Questions and answers
What is a belt sander?
A belt sander is a power tool that is used to smooth and finish surfaces like wood. It consists of a loop of sandpaper that is stretched tightly around two drums, which rotate when the tool is in use.
Can I use a belt sander to sand a hardwood floor?
Yes, you can use a belt sander to sand a hardwood floor. A belt sander is a great tool for removing old finish and smoothing out imperfections in the wood. However, it is important to use the right technique and be cautious not to damage the floor.


Harrison Clayton
Meet Harrison Clayton, a distinguished author and home remodeling enthusiast whose expertise in the realm of renovation is second to none. With a passion for transforming houses into inviting homes, Harrison's writing at https://thehuts-eastbourne.co.uk/ brings a breath of fresh inspiration to the world of home improvement. Whether you're looking to revamp a small corner of your abode or embark on a complete home transformation, Harrison's articles provide the essential expertise and creative flair to turn your visions into reality. So, dive into the captivating world of home remodeling with Harrison Clayton and unlock the full potential of your living space with every word he writes.

