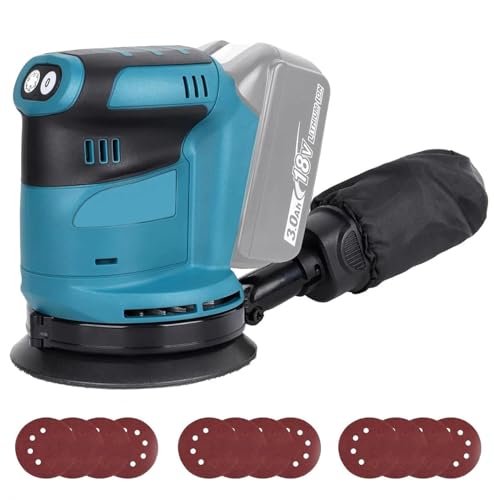
How To Repair Velcro On Dewalt Sander

If you own a Dewalt sander, chances are you’ve experienced the frustration of the Velcro wearing out over time. The Velcro on the pad of the sander is essential for attaching sanding discs securely, but it can become less effective with regular use.
Luckily, repairing the Velcro on your Dewalt sander is a relatively simple process that you can do yourself. In this article, we’ll walk you through the steps to help you get your sander back in working order.
Step 1: Remove the old Velcro
The first step in repairing the Velcro on your Dewalt sander is to remove the old Velcro from the pad. Start by disconnecting the sander from the power source for safety. Then, using a flathead screwdriver or a putty knife, gently pry off the old Velcro from the pad. Be careful not to damage the pad or the surface of the sander.
Step 2: Clean the pad

Once the old Velcro is removed, the next step is to clean the pad thoroughly. Use a mild detergent or soap and water to remove any glue residue or debris. Scrub the pad gently with a soft brush to ensure that it is clean and free from any contaminants that could interfere with the adhesion of the new Velcro.
Step 3: Apply the new Velcro
After cleaning the pad, it’s time to apply the new Velcro. Measure and cut a piece of Velcro that matches the size and shape of the pad. Make sure to use a high-quality Velcro that is specifically designed for heavy-duty applications. Peel off the protective backing from the Velcro and carefully press it onto the cleaned pad. Apply firm pressure to ensure that the Velcro adheres securely to the pad.
By following these simple steps, you can easily repair the Velcro on your Dewalt sander and get back to your sanding projects with ease. Remember to always use caution when working with power tools and disconnect the sander from the power source before starting any repairs.
How To Fix Velcro Strap On Dewalt Sander
If the velcro strap on your Dewalt sander is damaged or not holding securely, you can fix it easily by following these steps:

- Remove any dust or debris from the velcro strap and surface of the sander where the strap attaches.
- Clean the velcro strap and sander surface with a solution of mild detergent and water. Scrub gently with a soft brush to remove any dirt or adhesive residue.
- Allow the strap and sander surface to dry completely.
- Apply a small amount of velcro adhesive to the sander surface and spread evenly with a brush or applicator. Make sure to cover the entire area where the strap will attach.
- Press the velcro strap firmly onto the adhesive, ensuring that it is aligned properly.
- Allow the adhesive to dry according to the manufacturer’s instructions. This usually takes about 24 hours.
- Test the velcro strap by attaching it to the sander and applying some pressure. Ensure that it holds securely before using the sander.
If the velcro strap continues to have issues or fails to hold securely after following these steps, it may be necessary to replace the strap or seek professional repair services.
Step-by-step Guide for Repairing Velcro Strap on Dewalt Sander
If you own a Dewalt sander and the Velcro strap is no longer holding the sandpaper securely, you may need to repair or replace the Velcro strap. This step-by-step guide will walk you through the process of repairing the Velcro strap on your Dewalt sander.
| Materials Needed: |
|---|
| – Replacement Velcro strap |
| – Scissors |
| – Adhesive |
| – Clean cloth |
Step 1: Start by detaching the worn-out Velcro strap from your Dewalt sander. Use scissors to carefully cut away the old strap. Be cautious not to damage any other parts of the sander while removing the strap.
Step 2: Clean the sander’s base where the Velcro strap will be attached. Use a clean cloth to remove any dirt, dust, or debris that may interfere with the adhesive’s bonding ability.
Step 3: Take the replacement Velcro strap and cut it to the appropriate length. Ensure that it matches the size of the old strap and fits securely on the sander’s base.

Step 4: Apply adhesive evenly to the sander’s base where the Velcro strap will be attached. Ensure that you use enough adhesive to create a strong bond but avoid using excess adhesive that may overflow and cause a mess.
Step 5: Carefully press the replacement Velcro strap onto the adhesive-covered area of the sander’s base. Apply firm pressure to ensure a secure bond between the strap and the base. Hold the strap in place for a few minutes to allow the adhesive to set.
Step 6: Once the adhesive has set, test the attachment of the Velcro strap by pressing a piece of sandpaper onto the strap. Ensure that the sandpaper securely holds onto the strap and does not come loose while sanding.
Step 7: Allow the adhesive to cure completely as per the manufacturer’s instructions. This may take a few hours or overnight, depending on the adhesive used. Avoid using the sander until the adhesive has fully cured.
By following these simple steps, you can easily repair the Velcro strap on your Dewalt sander. It is important to ensure a secure bond between the strap and the base to prevent any accidents or damage while sanding.

Common Problems with Velcro Straps and Solutions
Velcro straps are a convenient and versatile fastening solution for a wide range of items, including power tools like Dewalt sanders. However, they can occasionally encounter problems that diminish their effectiveness. Here are some common problems you may encounter with Velcro straps on your Dewalt sander, along with potential solutions:
1. Velcro is not sticking properly
If the Velcro on your Dewalt sander is not adhering properly, it is likely due to dirt, dust, or debris preventing a strong bond. To fix this issue, follow these steps:
- Clean the Velcro surfaces using a soft cloth or brush to remove any dirt or debris.
- If the Velcro is still not sticking, use a damp cloth to remove any residue or sticky substances.
- Allow the Velcro to air dry completely before attempting to use it again.
2. Velcro is worn or frayed
Over time, Velcro straps can become worn or frayed, which can affect their grip and overall effectiveness. Here’s how you can address this issue:
- Inspect the Velcro straps for any signs of wear or fraying.
- If you notice any damage, carefully trim away the frayed edges using sharp scissors.
- Apply a small amount of fabric glue to the trimmed edges to prevent further fraying.
- Allow the glue to dry completely before using the Velcro straps.
3. Velcro is losing its grip
If you find that the Velcro on your Dewalt sander is losing its grip over time, you can try the following tips:
- Use a lint roller or adhesive tape to remove any lint or fibers that may be interfering with the Velcro’s grip.
- Apply a small amount of Velcro-friendly adhesive to reinforce the bond between the Velcro straps and the sander.
- Consider replacing the Velcro straps with new ones if they are significantly worn or damaged.
By addressing these common problems with Velcro straps on your Dewalt sander, you can ensure that your tool remains securely fastened and ready for use.

Tips for Preventing Velcro Strap Issues
Velcro straps are a convenient and secure fastening method for tools like the Dewalt Sander. However, over time, the Velcro may wear down or lose its grip, making it less effective. To prevent Velcro strap issues and maintain the functionality of your Dewalt Sander, follow these tips:
- Clean regularly: Dust and debris can accumulate on the Velcro, affecting its grip. Clean the Velcro straps regularly with a soft brush or cloth to remove any buildup.
- Avoid excessive force: Pulling the Velcro strap too tightly or with excessive force can cause it to wear down faster. Be gentle when fastening and adjusting the strap to prolong its lifespan.
- Store properly: When not in use, store your Dewalt Sander in a clean and dry place. Avoid storing it in an environment with high humidity or extreme temperatures, as this can damage the Velcro.
- Replace when necessary: If you notice that the Velcro strap is no longer holding securely, it may be time to replace it. Check with the manufacturer for replacement parts or consider using adhesive-backed Velcro patches to repair it.
- Inspect before each use: Before using your Dewalt Sander, inspect the Velcro straps for any signs of wear or damage. If you notice any issues, address them promptly to prevent further damage and ensure safety.
By following these tips, you can extend the lifespan of the Velcro straps on your Dewalt Sander and enjoy its reliable performance for many projects to come.
Questions and answers
What can I do if the Velcro on my Dewalt sander is no longer sticky?
If the Velcro on your Dewalt sander is no longer sticky, you can try cleaning it with mild soap and water to remove any dirt or debris that may be affecting its adhesiveness. If that doesn’t work, you can also try using a Velcro cleaning tool or brush to gently scrape away any residue on the Velcro surface. If cleaning doesn’t restore the stickiness, it may be necessary to replace the Velcro backing pad.
Can I repair the Velcro on my Dewalt sander by gluing it?
While you may be tempted to repair the Velcro on your Dewalt sander by gluing it, this is not recommended. Gluing may provide a temporary fix, but it is unlikely to hold up under the stress of sanding. Additionally, glue can affect the performance of the sander and may damage the surface being sanded. It is best to replace the Velcro backing pad if it is no longer functioning properly.
How do I remove the old Velcro backing pad from my Dewalt sander?
To remove the old Velcro backing pad from your Dewalt sander, you will first need to remove the screws that hold it in place. Use a screwdriver or a wrench to unscrew the screws and carefully lift off the old backing pad. Be sure to keep track of the screws so you can reattach the new backing pad. Once the old pad is removed, you can clean the sander base and attach the new pad by screwing it back into place.

Where can I purchase a replacement Velcro backing pad for my Dewalt sander?
You can purchase a replacement Velcro backing pad for your Dewalt sander from various sources. Most home improvement stores carry replacement parts for power tools, so you can check there first. If you prefer to shop online, you can also find a wide range of options on websites such as Amazon or eBay. Make sure to choose a backing pad that is specifically designed for your Dewalt sander model to ensure proper fit and performance.
Is it possible to prevent the Velcro on my Dewalt sander from wearing out?
While it is inevitable that the Velcro on your Dewalt sander will eventually wear out with regular use, there are some steps you can take to prolong its lifespan. One way to prevent premature wear is to regularly clean the Velcro surface to remove any dirt or debris. Avoid excessive force or pressure when attaching and detaching sandpaper to minimize strain on the Velcro. Additionally, storing the sander in a clean and dry environment can also help prevent wear and ensure optimal performance.


Meet Harrison Clayton, a distinguished author and home remodeling enthusiast whose expertise in the realm of renovation is second to none. With a passion for transforming houses into inviting homes, Harrison's writing at https://thehuts-eastbourne.co.uk/ brings a breath of fresh inspiration to the world of home improvement. Whether you're looking to revamp a small corner of your abode or embark on a complete home transformation, Harrison's articles provide the essential expertise and creative flair to turn your visions into reality. So, dive into the captivating world of home remodeling with Harrison Clayton and unlock the full potential of your living space with every word he writes.