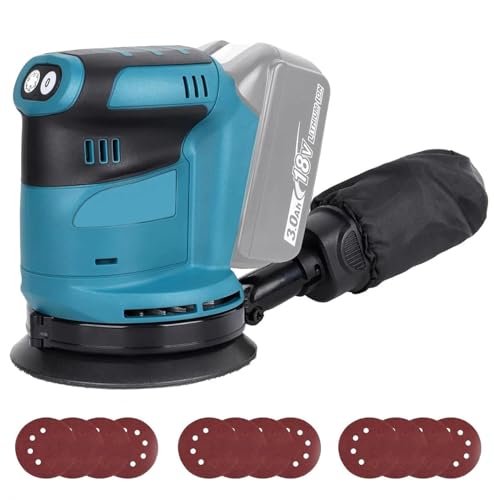
How To Repair Dewalt Orbital Sander

If you’re a handyman who loves to tackle DIY projects, having a reliable orbital sander is a must. The Dewalt orbital sander is known for its power and efficiency, making it a popular choice among professionals and enthusiasts alike. However, like any power tool, it can encounter problems over time. Instead of rushing to the store to buy a new one, you can save money and get your sander back in working condition by repairing it yourself.
One common issue with Dewalt orbital sanders is a broken sanding pad. This can happen if the sander is dropped or if you’re applying too much pressure while sanding. To fix this issue, start by removing the old sanding pad. Use a screwdriver to remove the screws that hold it in place. Once the old pad is removed, clean the surface of the sander to remove any debris or adhesive residue. Apply a thin layer of adhesive to the back of the new sanding pad and press it firmly onto the sander. Allow the adhesive to dry completely before using the sander.
Another problem you might encounter with your Dewalt orbital sander is a loss of power. This can be caused by a worn-out motor or a faulty power cord. To determine the cause, start by checking the power cord for any visible damage or frayed wires. If you notice any issues, replace the power cord with a new one. If the power cord appears to be fine, the problem may lie with the motor. In this case, you may need to replace the motor or take it to a professional for repair.
In some cases, your Dewalt orbital sander may produce excessive vibration. This can be caused by an unbalanced sanding pad or a loose bearing. To fix this issue, start by checking the sanding pad. Make sure it is properly centered on the sander and tighten the screws if necessary. If the vibration persists, you may need to replace the bearing. To do this, remove the bearing cover and take out the old bearing. Replace it with a new one and reassemble the sander.
Repairing your Dewalt orbital sander can save you time and money. By following these simple steps, you can get your sander back in working condition and continue to tackle your DIY projects with ease. Remember to always take safety precautions when working with power tools and consult the user manual for specific repair instructions.

Section 1: Troubleshooting Common Issues
If you’re encountering any problems with your Dewalt orbital sander, there are several common issues you can troubleshoot before seeking professional help. By addressing these issues, you may be able to resolve the problem on your own and save time and money on repairs.
1. Power Issues
If your Dewalt orbital sander is not turning on or experiencing intermittent power, check the power cord for any damages or loose connections. Ensure that the power cord is securely plugged into a working power outlet. If the power cord appears to be damaged, it may need to be replaced. Additionally, check if the sanding pad is tightly secured to the sander, as a loose or faulty connection can also cause power issues.
2. Poor Sanding Performance
If your Dewalt orbital sander is not sanding efficiently or leaving uneven surfaces, the sanding pad may need to be replaced. Over time, the sanding pad can wear down and lose its effectiveness. Refer to the user manual or manufacturer’s instructions for guidance on replacing the sanding pad. Additionally, ensure that you are using the appropriate grit sandpaper for the task at hand, as using improper sandpaper can result in poor sanding performance.
3. Excessive Vibration
If your Dewalt orbital sander is vibrating excessively during operation, it may indicate a problem with the sanding pad, motor, or internal components. Check the sanding pad for any visible signs of wear or damage. If the sanding pad appears to be in good condition, the motor or internal components may require inspection or repair by a professional. Excessive vibration can affect the sander’s performance and may lead to further damage if not addressed.
By troubleshooting these common issues, you can often identify and resolve problems with your Dewalt orbital sander. However, if the issues persist or are beyond your expertise, it is recommended to seek assistance from a certified technician or contact Dewalt customer support for further guidance.

Section 2: Disassembling and cleaning the sander
Before starting the repair process, it is important to disassemble and clean the Dewalt orbital sander to ensure that all parts are accessible and free from dust and debris. This section will guide you through the steps to disassemble and clean your sander.
- Start by unplugging the sander from the power source to avoid any accidents.
- Check the manufacturer’s instructions or manual for any specific disassembling instructions for your model.
- Use a screwdriver to remove the screws that hold the sander’s housing together. Depending on the model, there may be several screws located on the sides or bottom of the sander.
- Once the screws are removed, carefully separate the housing to expose the internal components.
- Take note of the orientation and position of the components as you disassemble them to make reassembly easier later on.
- Inspect the motor and check if it is clean and free from any dust or debris. Use a soft brush or compressed air to remove any buildup.
- Check the sanding pad, ensuring it is securely attached. Remove any dust or residue that may have accumulated on the pad using a damp cloth or brush.
- Inspect the bearings and gears for any signs of wear or damage. If necessary, clean and lubricate them to ensure smooth operation.
- Clean the housing and other exterior parts using a damp cloth to remove any dirt or grime.
- Allow all the components to air dry completely before reassembling the sander.
By following these steps, you can disassemble and clean your Dewalt orbital sander, ensuring that all the components are free from debris and performing optimally. This cleaning process can also help prolong the lifespan of your sander and prevent potential issues in the future.
Section 3: Replacing the sanding pad
Over time, the sanding pad on your Dewalt orbital sander may become worn out or damaged. When this happens, it’s important to replace it to ensure optimal performance. Here’s how you can easily replace the sanding pad:
Step 1: Start by unplugging the sander from the power source and removing any attached sandpaper from the pad.
Step 2: Locate the screws that secure the sanding pad to the sander. These are usually located on the bottom of the pad, near the edges.

Step 3: Use a screwdriver to remove the screws and detach the old sanding pad from the sander. Be careful not to lose the screws as you’ll need them to attach the new pad.
Step 4: Take the new sanding pad and align it with the holes where the screws were previously inserted.
Step 5: Insert the screws into the holes and tighten them with the screwdriver until the sanding pad is securely attached to the sander.
Step 6: Once the sanding pad is in place, you can reattach the sandpaper. Ensure that the sandpaper is aligned with the pad and secure it according to the instructions provided by the manufacturer.
Step 7: After replacing the sanding pad, plug the sander back into the power source and test it to ensure that it’s working properly.

Remember to always refer to the user manual for specific instructions and safety guidelines when replacing any parts on your Dewalt orbital sander.
Section 4: Replacing the power cord
If you have determined that the power cord of your Dewalt orbital sander needs to be replaced, follow these steps to perform the repair:
Step 1: Gather the necessary tools and materials
Before starting the repair, gather the following tools and materials:
- Replacement power cord (compatible with your Dewalt orbital sander model)
- Wire cutters
- Wire strippers
- Screwdriver (if required to access the power cord connections)
- Electrical tape
Step 2: Disconnect the sander from the power source
Before working on the power cord, ensure that your Dewalt orbital sander is completely disconnected from the power source. Unplug it from the outlet if it was connected, and remove any batteries if applicable.
Step 3: Remove the old power cord
Inspect the old power cord for any signs of damage or wear. Once confirmed, follow these steps to remove the old power cord:

- Locate the connection point of the power cord on the sander’s body.
- If required, use a screwdriver to remove any screws or fasteners holding the power cord in place.
- Using wire cutters, carefully cut the power cord near the connection point, ensuring that you leave enough wire length for the replacement.
- Strip the insulation from the cut end of the power cord using wire strippers, exposing the bare wires.
- Remove any additional wiring connections or any other components attached to the power cord.
Step 4: Install the replacement power cord
Follow these steps to install the replacement power cord:
- Take the replacement power cord and insert the stripped end into the connection point on the sander’s body.
- If necessary, secure the power cord with screws or fasteners.
- Connect the bare wires of the replacement power cord with the corresponding wires or terminals inside the sander.
- Twist the wires tightly together and secure them by twisting a wire nut over each connection.
- Wrap each wire connection with electrical tape to provide insulation and protect against any potential short-circuiting.
Once you have completed these steps, your Dewalt orbital sander should have a new power cord installed. Perform a final check to ensure that all connections are secure and insulated. Reconnect the sander to the power source and test it to verify that it is functioning correctly.
Section 5: Reassembling and testing the sander
After successfully troubleshooting and repairing the necessary components of your Dewalt orbital sander, it’s time to reassemble the device. Follow these steps to ensure proper reassembly:
Step 1: Place the motor back into the housing
Carefully position the motor back into its designated place within the sander housing. Ensure that all the wires are properly aligned and connected to their respective terminals.
Step 2: Fasten the housing screws
Using the appropriate screwdriver, tighten the housing screws to secure the motor in place. Make sure the screws are firmly tightened, but be careful not to overtighten them as it may damage the housing.

Step 3: Reattach the sanding pad
Line up the holes on the sanding pad with the mounting points on the bottom of the sander. Press the pad firmly into place until it is securely attached.
Step 4: Install the sanding disc
Gently place a new sanding disc onto the sanding pad, ensuring that it is centered and aligned correctly.
Step 5: Replace the dust bag or connect a dust extraction system
If your Dewalt orbital sander has a dust bag, insert it back into the designated compartment. Alternatively, if you have a dust extraction system, ensure that it is properly connected to the sander.
Step 6: Plug in and test the sander
Before fully reassembling the sander, plug it into a power source and turn it on to test its functionality. Ensure that all the repaired components are working correctly and check for any abnormal vibrations or noises.
If the sander operates as expected, proceed to fully reassemble the remaining components such as the top housing and handles. If any issues persist, review the troubleshooting steps or seek further assistance.

Remember to always prioritize your safety when working with power tools and make sure to disconnect the sander from the power source before performing any repairs or maintenance.
Questions and answers
What is a Dewalt orbital sander?
A Dewalt orbital sander is a power tool that is used for sanding wood, metal, and other surfaces. It has a round sanding pad that moves in a circular motion, providing a smooth and even finish.
How do I know if my Dewalt orbital sander needs repair?
If your Dewalt orbital sander is not working properly or producing uneven results, it may need repair. Some common signs include excessive vibration, lack of power, or the sanding pad not spinning correctly. If you notice any of these issues, it is best to have your sander inspected and repaired by a professional.

How to become a reporter

Meet Harrison Clayton, a distinguished author and home remodeling enthusiast whose expertise in the realm of renovation is second to none. With a passion for transforming houses into inviting homes, Harrison's writing at https://thehuts-eastbourne.co.uk/ brings a breath of fresh inspiration to the world of home improvement. Whether you're looking to revamp a small corner of your abode or embark on a complete home transformation, Harrison's articles provide the essential expertise and creative flair to turn your visions into reality. So, dive into the captivating world of home remodeling with Harrison Clayton and unlock the full potential of your living space with every word he writes.