How To Remove Paint From A Wall Using A Sander

Painting a wall is a great way to refresh the look of a room, but what do you do when you want to remove that old, chipped paint? One option is to use a sander. Sanding is an effective method for removing paint layers from walls, and it can make the job much faster and easier. In this article, we will guide you through the process of removing paint from a wall using a sander.
Before you begin, it’s important to gather the necessary tools and materials. You will need a sander, sandpaper or sanding discs with different grits, a dust mask, safety glasses, and a drop cloth or plastic sheeting to protect the surrounding area. Additionally, it’s a good idea to make sure the room is well-ventilated by opening windows or using fans.
Once you have everything you need, start by preparing the wall. Remove any furniture or decorations from the area and cover the floor with a drop cloth or plastic sheeting to catch the dust and debris. Next, put on your safety glasses and dust mask to protect yourself from flying particles.
Now it’s time to start sanding. Begin with a coarse-grit sandpaper or sanding disc to remove the majority of the paint. Move the sander in slow, even strokes, going in the direction of the wood grain if applicable. Be sure to apply even pressure and avoid pressing too hard, as this can damage the wall. As you sand, keep an eye on the paint dust accumulating on the drop cloth. Once the majority of the paint is removed, switch to a finer-grit sandpaper or sanding disc to smooth out the surface.
What is Paint Removal?
Paint removal refers to the process of stripping or taking off paint from a surface, such as a wall, furniture, or metal object. There are several reasons why one might need to remove paint, including to refinish a surface, repair damage, or simply change the appearance. A common method of paint removal is using a sander, which is a power tool specifically designed for sanding and smoothing surfaces.
| Benefits of Paint Removal |
|---|
|
1. Restoration: Paint removal allows for the restoration of old or damaged surfaces. By stripping away the layers of old paint, the original surface can be revealed, bringing back its natural beauty and character. 2. Surface Preparation: Removing paint is often necessary before applying a new coat of paint or varnish. By removing the old paint, you create a clean and smooth surface, ensuring better adhesion and a more professional finish. 3. Customization: Paint removal gives you the opportunity to change the color or finish of a surface. Whether you want to go from a dark color to a light color or switch from a glossy to a matte finish, removing the existing paint allows you to start with a clean slate. |
While there are different techniques and tools available for paint removal, using a sander is an effective way to remove paint from walls. It helps to achieve a smooth and even surface, allowing you to easily apply a fresh coat of paint or finish.
Why Use a Sander?
When it comes to removing paint from a wall, using a sander is a great option for several reasons. Here are a few benefits of using a sander:

Efficiency
A sander is a powerful tool that can quickly and efficiently remove paint from a wall. It eliminates the need for manual scraping, which can be time-consuming and tiring. With a sander, you can cover a larger surface area in less time, making the job much more efficient.
Uniform surface
Using a sander helps to create a uniform surface by removing any uneven layers of paint. It helps in achieving a smooth finish, making it easier to apply a new coat of paint or any other treatment to the wall. The sander ensures that the wall is properly prepared for the next step in the painting process.
Less physical strain
Manual paint removal methods like scraping can put a strain on your body, especially if you’re working on a large area. Using a sander reduces the physical effort required, making the task much easier on your arms, shoulders, and back. This is especially beneficial for individuals with mobility issues or those who may not have the strength for prolonged manual scraping.
Overall, using a sander is a convenient and efficient way to remove paint from a wall. It saves time, creates a smooth surface, and reduces physical strain, making it an excellent choice for any paint removal project.
Preparation
Before you begin the process of removing paint from your wall using a sander, it is important to take certain precautions and prepare the area properly. This will help ensure that the job is done safely and efficiently.
Gather your tools and materials
Start by gathering all the necessary tools and materials for the job. This includes a sander (preferably an electric sander with variable speed settings), sandpaper with different grits (coarse, medium, and fine), safety goggles, a dust mask, drop cloths or plastic sheets to protect adjacent surfaces, painter’s tape, and a vacuum cleaner.
Protect the surrounding area
Next, protect the surrounding area by covering any furniture, fixtures, or items that could potentially get damaged by dust or paint chips. Use drop cloths or plastic sheets to cover the floor, and secure them in place with painter’s tape to prevent them from shifting during the sanding process.
If there are any electrical outlets, switches, or fixtures on the wall, carefully cover them with painter’s tape to protect them from dust and debris. This will also make it easier to paint or refinish the wall after the sanding is complete.
Wear safety gear
Before you start sanding, it is important to protect yourself by wearing the appropriate safety gear. Put on safety goggles to shield your eyes from flying paint chips and dust particles. Additionally, wear a dust mask to prevent inhaling any harmful particles that may be released during the sanding process.
Prepare the sander
If your sander has a dust-collection feature, make sure it is properly connected and functioning. This will help minimize the amount of dust that is released into the air, making the cleanup process easier.

Depending on the type of sander you have, you may need to attach the appropriate grit sandpaper. For initial paint removal, start with a coarse grit sandpaper and gradually switch to finer grits as you progress. This will help achieve a smooth and even surface.
Finally, check the condition of the sandpaper and replace it if necessary. Worn-out sandpaper will be less effective and may leave scratches on the wall instead of removing the paint.
By taking the time to prepare properly and gather the necessary tools and materials, you can ensure a successful paint removal process using a sander. This will help make your walls ready for a fresh coat of paint or any other desired finish.
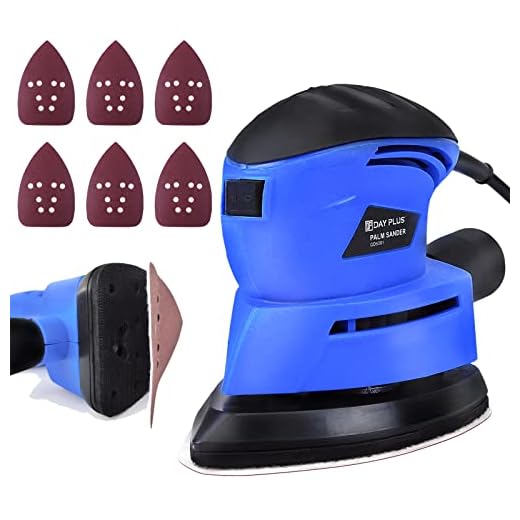
Gather the Necessary Tools
Before you begin the process of removing paint from a wall using a sander, it is important to gather all the necessary tools. Having the right tools will make the job easier and more efficient. Here are the tools you will need:
| Sander: | A random orbital sander or a belt sander will work best for this task. Make sure the sander is equipped with sandpaper suitable for paint removal. |
| Safety goggles: | Protect your eyes from flying paint chips and debris by wearing safety goggles. |
| Dust mask: | Wearing a dust mask will protect you from inhaling paint dust and other particles while sanding. |
| Drop cloth: | Place a drop cloth on the floor to catch any paint chips or dust that may fall during the sanding process. |
| Paint scraper: | A paint scraper will help you remove any loose or peeling paint before sanding. |
| Sandpaper: | Depending on the condition of the wall, you may need different grits of sandpaper. Start with a coarse grit (such as 60 or 80) to remove most of the paint, and then switch to a finer grit (such as 120 or 150) to smooth out the surface. |
| Vacuum cleaner or brush: | After sanding, you will need to clean up the dust and paint residue. A vacuum cleaner or a brush can be used to remove the debris. |
| Safety gloves: | Wearing safety gloves will protect your hands from the sander and any sharp tools you may use during the paint removal process. |
Make sure to have all these tools ready before you start removing the paint from the wall. Having all the necessary tools will ensure that you can work efficiently and safely.

Prepare the Work Area
Before you begin removing paint from a wall using a sander, it’s important to properly prepare the work area. Taking the time to set up the space and protect the surrounding area will help ensure a successful paint removal process.
1. Clear the Room
Start by clearing the room of any furniture, decorations, or other items that may obstruct your work area. This will prevent any accidental damage to your belongings and allow for easy access to the walls.
2. Cover Surfaces
Use drop cloths or plastic sheets to cover the floor and any surfaces that you want to protect from paint chips or dust. Make sure to extend the covering several feet beyond the area you will be working on to catch any stray debris.
3. Protect Yourself
Wearing protective gear is essential when using a sander to remove paint. Put on safety goggles to protect your eyes from any flying debris, and a dust mask or respirator to avoid inhaling paint particles and dust.
4. Ventilate the Area
Open windows and doors to provide proper ventilation while you work. This will help minimize the buildup of dust and fumes, ensuring a safer and more comfortable working environment.

5. Secure Plastic Sheeting
If you are working in an area with a lot of dust or if you are concerned about containing the debris, consider using plastic sheeting to create a makeshift enclosure. Secure the edges of the plastic to the walls or ceiling using painter’s tape or other appropriate adhesive to prevent dust and chips from spreading.
By taking the time to properly prepare the work area, you can minimize the mess and potential damage, making the paint removal process more efficient and effective. Now that your work area is ready, you can proceed with removing the paint from the wall using a sander.
Steps to Remove Paint
Removing paint from a wall can be a difficult task, but with the right tools and techniques, it can be done effectively. Here are some steps to follow when using a sander to remove paint:
1. Prepare the Area
Before starting the paint removal process, make sure to prepare the area. Remove any furniture or items from the room and cover the floor with a drop cloth to protect it from dust and debris.
2. Put on Protective Gear
When working with a sander, it is important to protect yourself. Put on safety goggles, a dust mask, and gloves to prevent any accidents or inhalation of harmful particles.

3. Choose the Right Sandpaper Grit
Selecting the correct sandpaper grit is crucial for effective paint removal. Coarse grits, such as 60 or 80, are ideal for removing thick layers of paint, while finer grits, like 120 or 220, are better for light paint removal and smoothing the surface.
4. Start Sanding
Begin sanding the painted wall using the sander. Hold it firmly and move it in smooth, even strokes. Start with the coarsest grit sandpaper and gradually work your way up to finer grits as needed. Be sure to sand in the direction of the wood grain or vertically for smooth and consistent results.
5. Remove Dust and Debris
After sanding, use a vacuum cleaner or a clean, dry cloth to remove any dust and debris from the wall. This will help you see if any areas need further sanding and ensure a clean surface for the next steps.
6. Touch Up and Repeat if Necessary
Inspect the wall thoroughly for any remaining paint or rough spots. If needed, touch up those areas with the sander using a finer grit sandpaper. Repeat the sanding process until you achieve the desired smoothness and paint-free surface.
Remember, removing paint from a wall using a sander requires patience and precision. Take breaks if needed and work in sections for better control and results. Following these steps will help you achieve a clean and fresh canvas for your next painting or wall treatment project.
Step 1: Safety Precautions
Before starting the process of removing paint from a wall using a sander, it is crucial to take the necessary safety precautions:
- Protective Gear: Wear safety goggles, a mask or respirator, and gloves to protect yourself from flying dust and debris.
- Ventilation: Ensure that the area you are working in is well-ventilated. Open windows or use fans to maintain fresh air flow.
- Clear the Area: Remove any furniture, fixtures, or items that may obstruct your work or potentially be damaged by dust or debris.
- Cover Surrounding Surfaces: Use drop cloths or plastic sheets to cover floors, furniture, and nearby surfaces to prevent them from getting paint or dust on them.
- Turn Off Power: If you are working near electrical outlets or switches, turn off the power to avoid any electrical hazards.
- Secure the Work Area: Make sure the wall is stable and secured properly. Check for loose or cracked sections that need repair before starting.
By following these safety precautions, you can minimize the risk of injuries, inhalation of harmful particles, and damage to the surrounding area. It is important to prioritize safety when undertaking any home improvement project.
Step 2: Sanding Technique
Once you have gathered all the necessary tools and prepared the work area, it’s time to start sanding down the painted wall. Follow these steps to ensure an effective and efficient sanding technique:
1. Safety first: Before you begin, put on some safety goggles and a dust mask to protect your eyes and lungs from the dust particles that will be released during the sanding process.
2. Choose the right sandpaper: Select a medium-grit sandpaper (around 120-150 grit) for initial paint removal. If the paint is particularly thick or stubborn, you may want to start with a coarser grit (80-100) to speed up the process. Avoid using finer grit sandpaper, as it may not effectively remove the paint.
3. Sand in a consistent motion: Hold the sander firmly with both hands and apply even pressure as you move it back and forth across the painted surface. Use long, sweeping motions rather than short, choppy ones to ensure a smooth and even finish. Be careful not to press too hard, as this may damage the wall or create uneven areas.
4. Cover the entire surface: Make sure to sand the entire painted area evenly, including corners, edges, and any intricate details. Pay extra attention to areas with thick layers of paint or stubborn patches. Work systematically and methodically to ensure you don’t miss any spots.
5. Check your progress: Periodically stop sanding and wipe away the dust with a clean cloth or vacuum. This will allow you to see how much paint you have removed and whether you need to continue sanding or switch to a finer grit sandpaper. Repeat the sanding process until you have removed all the unwanted paint.
6. Clean up: Once you have finished sanding, remove the dust and debris from the work area using a vacuum cleaner or broom. Dispose of the waste properly according to your local regulations.
Remember, the sanding process can be time-consuming and physically demanding, so take breaks as needed and pace yourself accordingly. It’s better to spend a little extra time to ensure a thorough job rather than rushing through and potentially damaging the wall.
Now that you have successfully sanded down the painted wall, you are ready to move on to the next step in the paint removal process.
Questions and answers
What is the best way to remove paint from a wall?
The best way to remove paint from a wall is by using a sander. A sander is a power tool that uses abrasion to remove paint and other finishes from surfaces. It can make the task much faster and easier.
What type of sander should I use to remove paint from a wall?
You should use a random orbital sander or a detail sander to remove paint from a wall. These types of sanders have a sanding pad that moves in a circular motion, which helps prevent swirl marks and provides a more even finish.
Do I need to wear protective gear while using a sander to remove paint from a wall?
Yes, it is important to wear protective gear while using a sander to remove paint from a wall. You should wear safety goggles to protect your eyes from flying debris, a dust mask to filter out the fine particles of paint and dust, and earplugs to protect your ears from the noise of the sander.
Are there any precautions I should take before using a sander to remove paint from a wall?
Before using a sander to remove paint from a wall, you should cover and protect any nearby furniture or items that you don’t want to get covered in dust. It is also a good idea to vacuum or sweep the area to remove any loose debris before starting.
Can I use a sander to remove paint from textured walls?
Yes, a sander can be used to remove paint from textured walls, but it may require more time and effort. It is recommended to use a sanding sponge or a detail sander with a small sanding pad to reach into the crevices of the texture. Be sure to use a gentle touch and take your time to avoid damaging the texture.


Meet Harrison Clayton, a distinguished author and home remodeling enthusiast whose expertise in the realm of renovation is second to none. With a passion for transforming houses into inviting homes, Harrison's writing at https://thehuts-eastbourne.co.uk/ brings a breath of fresh inspiration to the world of home improvement. Whether you're looking to revamp a small corner of your abode or embark on a complete home transformation, Harrison's articles provide the essential expertise and creative flair to turn your visions into reality. So, dive into the captivating world of home remodeling with Harrison Clayton and unlock the full potential of your living space with every word he writes.

