How To Get Sandpaper To Stick To Orbital Sander
If you’re a DIY enthusiast or a professional woodworker, you probably understand the frustration of sandpaper not sticking properly to your orbital sander. It can be incredibly annoying when the sandpaper peels off or slides around, making it difficult to achieve a smooth finish on your project.
Fortunately, there are several simple yet effective techniques to ensure that your sandpaper stays securely attached to your orbital sander, allowing you to sand with confidence and precision. Whether you’re working on a small craft project or a large furniture piece, these tips will help you get the job done efficiently.
1. Clean the Sanding Pad: Before attaching the sandpaper, it’s crucial to clean the sanding pad of your orbital sander. Use a damp cloth or a mild cleaning solution to remove any dust, debris, or residue that could interfere with the adhesion of the sandpaper. A clean surface will provide a better grip and prevent the sandpaper from slipping or peeling off prematurely.
2. Use Adhesive Spray: If you’re still having trouble with the sandpaper sticking to your orbital sander, consider using an adhesive spray. Apply a thin, even layer of adhesive spray onto the sanding pad, and then press the sandpaper firmly onto the pad. The adhesive spray will provide an extra layer of grip, ensuring that the sandpaper stays in place throughout the sanding process.
3. Choose the Right Sandpaper: Not all sandpapers are created equal, and using the wrong type of sandpaper can affect its adhesion to the sanding pad. Opt for sandpaper specifically designed for orbital sanders, as they usually feature hook-and-loop backing that makes it easier to attach and remove the sandpaper. Additionally, make sure that the sandpaper is the correct size for your sander to ensure a snug fit.

By following these tips, you can say goodbye to the frustration of sandpaper that doesn’t stick to your orbital sander. With a clean sanding pad, the right sandpaper, and the help of adhesive spray if needed, you’ll be able to achieve smooth and flawless finishes on all your woodworking projects.
Tips for Properly Attaching Sandpaper
Getting sandpaper to stick securely to your orbital sander is crucial for achieving smooth and consistent results. Here are some tips to help you properly attach sandpaper to your orbital sander:
1. Clean the sanding pad: Before attaching new sandpaper, make sure the sanding pad on the orbital sander is clean and free of debris. Wipe it down with a cloth or use compressed air to remove any dust or residue. A clean surface will allow the sandpaper to adhere better.
2. Choose the right size and type: Ensure that you are using sandpaper specifically designed for orbital sanders. Use the correct size that matches your sander’s pad. Sandpaper that is too large or too small may not stick properly and can cause inefficiencies during the sanding process.
3. Use adhesive or hook-and-loop backing: Most orbital sanders have either adhesive or hook-and-loop (Velcro-like) backing on the sanding pad. Make sure to use sandpaper with the corresponding backing. If your sander has adhesive backing, apply the sandpaper carefully, ensuring there are no wrinkles or air bubbles. For hook-and-loop backing, simply press the sandpaper firmly onto the pad to ensure a secure attachment.

4. Check for proper alignment: Pay attention to the alignment of the sandpaper with the pad. Make sure the edges of the sandpaper align with the edges of the pad to ensure even sanding and to prevent the sandpaper from quickly wearing out or tearing.
5. Replace as needed: Over time, sandpaper may become worn out or lose its adhesive properties. Replace the sandpaper when it becomes ineffective or no longer sticks properly to the sander. Regularly inspect the sandpaper during use to ensure it is securely attached and in good condition.
By following these tips, you can ensure that your sandpaper sticks securely to your orbital sander, allowing you to achieve the best possible sanding results.
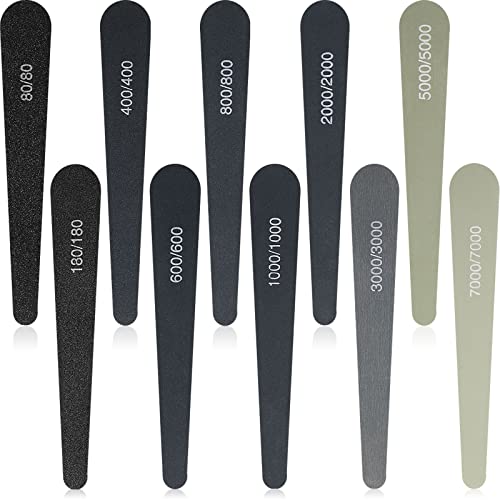
Choosing the Right Type of Sandpaper
When it comes to using an orbital sander, choosing the right type of sandpaper is crucial for achieving the desired results. There are several factors to consider before selecting the appropriate sandpaper for your project:
Grit: The grit level of sandpaper determines its coarseness or fineness. Higher grit numbers indicate finer sandpaper, while lower grit numbers represent coarser sandpaper. The choice of grit depends on the material you are working with and the level of smoothness you desire. For rough surfaces or heavy-duty sanding, lower grit sandpaper like 40 or 60 may be more suitable. Finer grit sandpaper such as 120 or 220 is ideal for achieving a smooth finish on finer surfaces.

Material: Different materials require different types of sandpaper. For wood surfaces, regular sandpaper will do the trick. However, for metal or auto bodywork, sandpaper with aluminum oxide or silicon carbide grit is recommended. These types of sandpaper are more durable and can withstand the high heat generated during sanding.
Backing: Sandpaper comes in different backing materials such as paper, cloth, or film. Paper backing is the most common and widely available option. It is suitable for most sanding tasks and is cost-effective. Cloth backing is more durable and tear-resistant, making it ideal for heavy-duty sanding. Film-backed sandpaper is the most durable and is often used in wet sanding applications.
Hook and Loop versus PSA: Orbital sanders typically come with either a hook and loop (Velcro) or a pressure-sensitive adhesive (PSA) system for attaching sandpaper. The choice between the two depends on personal preference. Hook and loop sandpaper allows for quick and easy changing of the sandpaper, while PSA sandpaper requires adhesive and can sometimes leave residue on the sander pad.
By considering these factors and selecting the right type of sandpaper for your orbital sander, you can achieve optimal results and ensure that the sandpaper sticks securely to the sander, allowing you to complete your sanding tasks effortlessly.
Preparing the Orbital Sander
Before you can begin using your sandpaper on your orbital sander, it’s important to properly prepare the tool.

Clean the Surface
The first step is to clean the sanding surface of your orbital sander. Use a brush or cloth to remove any debris or dust that may have accumulated. This will ensure that the sandpaper adheres properly and that you achieve a smooth finish.
Choose the Right Size Sandpaper
Next, select the appropriate size sandpaper for your specific project. The size of the sandpaper should match the size of the sanding pad on your orbital sander. Using the wrong size sandpaper can result in poor performance and a less-than-desirable finish.
Note: Some Orbital sanders come with a built-in clamping system that holds the sandpaper in place. If your sander has this feature, make sure to use it correctly according to the manufacturer’s instructions.
Attach the Sandpaper
Once you have chosen the correct size sandpaper, it’s time to attach it to the orbital sander. Most sanders have a Velcro or adhesive backing to secure the sandpaper. Simply press the sandpaper onto the pad, making sure it is centered and aligned properly.
Pro tip: If the sandpaper does not stick securely, you may need to clean the sanding pad to remove any debris or residue that could be interfering with the adhesive.

With these simple steps, you can properly prepare your orbital sander for use with sandpaper. Taking the time to prepare your tool will ensure that you achieve the best results in your sanding project.
Applying the Sandpaper to the Orbital Sander
When it comes to using an orbital sander, properly applying sandpaper is essential for achieving the desired results. Here are the steps to follow in order to effectively stick sandpaper to your orbital sander:
1. Prepare the Sandpaper: Start by selecting the appropriate grit sandpaper for your project. Ensure that the sandpaper is the correct size to fit your orbital sander. If necessary, cut it to the right dimensions using a pair of scissors.
2. Clean the Baseplate: Before applying the sandpaper, make sure the baseplate of your orbital sander is clean and free from any residue or debris. Wipe it down with a clean cloth or use a small brush to remove any particles.
3. Attach the Sandpaper: Depending on the type of orbital sander you have, there are two common methods for attaching the sandpaper:

a) Hook-and-loop system: If your orbital sander has a hook-and-loop system, simply line up the holes of the sandpaper with the corresponding hooks on the baseplate. Press firmly to attach the sandpaper securely.
b) Clamp system: If your orbital sander uses clamps to hold the sandpaper in place, place the sandpaper on the baseplate and position the clamps over the edges. Tighten the clamps securely to ensure the sandpaper is held firmly in place.
4. Smooth Out the Sandpaper: Once the sandpaper is attached, run your hand over it to ensure it is properly adhered to the baseplate. Smooth out any wrinkles or bubbles that may have formed during the attachment process.
5. Test the Sandpaper: Before starting your project, turn on the orbital sander for a brief moment to ensure the sandpaper is securely fastened and doesn’t come loose while in use.
By following these steps, you can ensure that the sandpaper sticks properly to your orbital sander, allowing for efficient and effective sanding.

Ensuring a Secure Attachment
When using an orbital sander, it is important to ensure that the sandpaper is securely attached. A loose attachment can cause the sandpaper to slip or fly off during use, posing a safety risk. Fortunately, there are a few simple steps you can take to ensure a secure attachment:
| Step 1: | Choose the right sandpaper grit for your project. Different grits are designed for different sanding tasks, and using the appropriate grit can help prevent premature wear or detachment of the sandpaper. |
| Step 2: | Clean the sanding pad of your orbital sander before attaching the sandpaper. Dust, dirt, and debris can create a barrier between the pad and the sandpaper, reducing its adhesion. Use a brush or a cloth to remove any residual particles. |
| Step 3: | Apply adhesive to the sanding pad. Some orbital sanders have a built-in adhesive system, while others require the use of adhesive-backed sandpaper. Follow the manufacturer’s instructions for the specific adhesive application method. |
| Step 4: | Attach the sandpaper to the sanding pad. Ensure that the sandpaper is aligned with the pad’s shape and size. Press firmly to ensure a strong bond between the sandpaper and the pad. |
| Step 5: | Inspect the attachment. Check for any visible gaps or loose areas between the sandpaper and the pad. If necessary, reapply adhesive or adjust the placement of the sandpaper to achieve a secure attachment. |
By following these steps, you can ensure that your sandpaper stays securely attached to your orbital sander, allowing you to sand more effectively and safely.
Questions and answers
How do I get sandpaper to stick to my orbital sander?
To get sandpaper to stick to your orbital sander, you can apply adhesive spray to the backing of the sandpaper or use adhesive-backed sandpaper. Another option is to use clamps or clips to secure the sandpaper to the sander.
Can I use any type of sandpaper with an orbital sander?
While you can use different types of sandpaper with an orbital sander, it is recommended to use specific sandpaper designed for this type of tool. These sandpapers are usually hook and loop, which makes it easier to attach and remove the sandpaper from the sander.
What should I do if the sandpaper keeps coming off my orbital sander?
If the sandpaper keeps coming off your orbital sander, you can try cleaning the sanding pad to remove any dust or debris that may be preventing the sandpaper from sticking. Additionally, you can apply adhesive spray to the backing of the sandpaper to enhance its adhesion.
Can I reuse sandpaper on an orbital sander?
It is not recommended to reuse sandpaper on an orbital sander, particularly if the sandpaper has worn down or lost its effectiveness. Reusing worn-out sandpaper can lead to less efficient sanding and may result in an uneven surface.
Is there a specific technique to ensure the sandpaper sticks securely to the orbital sander?
There is no specific technique, but make sure to clean the sanding pad before attaching the sandpaper. Press firmly and evenly on the sandpaper to ensure it adheres properly. Using adhesive-backed sandpaper or applying adhesive spray can also help improve the stickiness of the sandpaper.


Meet Harrison Clayton, a distinguished author and home remodeling enthusiast whose expertise in the realm of renovation is second to none. With a passion for transforming houses into inviting homes, Harrison's writing at https://thehuts-eastbourne.co.uk/ brings a breath of fresh inspiration to the world of home improvement. Whether you're looking to revamp a small corner of your abode or embark on a complete home transformation, Harrison's articles provide the essential expertise and creative flair to turn your visions into reality. So, dive into the captivating world of home remodeling with Harrison Clayton and unlock the full potential of your living space with every word he writes.

