How To Change Drive Belt Disc Belt Sander
Changing the drive belt on a disc belt sander is an important maintenance task that can help prolong the life of your tool and ensure that it continues to operate at peak performance. The drive belt is a crucial component of the sander that transfers power from the motor to the sanding disc, allowing it to rotate and sand materials effectively.
Over time, the drive belt can become worn or damaged, resulting in decreased performance or complete failure of the sander. Fortunately, replacing the drive belt is a fairly straightforward process that can be done with just a few simple steps.
Step 1: Begin by unplugging the sander from the power source to ensure your safety. It is also a good idea to wear protective gloves and eyewear during this process.
Step 2: Locate the access panel or cover on the side or bottom of the sander that gives you access to the drive belt. This may require removing screws or clips, depending on the model of your sander.
Step 3: Once you have removed the access panel, you should be able to see the drive belt. Take note of how the belt is threaded around the pulleys or rollers, as this will be important when installing the new belt.

Step 4: Carefully remove the old belt from the pulleys or rollers. You may need to use a flathead screwdriver or pliers to pry the belt off, depending on how tight it is.
Step 5: Take the new drive belt and thread it around the pulleys or rollers, following the same path as the old belt. Make sure the belt is properly aligned and seated on the pulleys or rollers to ensure smooth operation.
Step 6: Replace the access panel or cover, securing it with the appropriate screws or clips. Double-check that the belt is still properly seated on the pulleys or rollers before fully securing the panel.
Step 7: Plug the sander back into the power source and test the new drive belt by turning on the sander and checking that the sanding disc rotates smoothly and without any unusual noises. If everything looks and sounds good, you have successfully replaced the drive belt on your disc belt sander!
Remember to periodically inspect the drive belt on your sander for signs of wear or damage, and replace it as needed to keep your tool in top working condition. By following these simple steps, you can ensure that your disc belt sander continues to deliver excellent sanding results for years to come.

Overview of Drive Belt Disc Belt Sander
A drive belt disc belt sander is a power tool commonly used in woodworking and metalworking projects. It is designed to smooth and shape materials by removing excess material or rough surfaces. The sander consists of a motor that drives a belt that rotates at high speed, while another disc is mounted parallel to the belt for additional sanding options.
The drive belt in a disc belt sander is a crucial component that transfers power from the motor to the sanding belt. It is responsible for maintaining the tension and providing the necessary torque for sanding applications. Over time, the drive belt may wear out or become damaged, requiring replacement to ensure optimal performance of the sander.
To change the drive belt, you will need to follow a series of steps. Firstly, you must disconnect the power supply to the sander to avoid any accidental starts. Next, you will need to locate the access panel or cover that provides access to the drive belt mechanism. This panel is typically located on the side or back of the sander.
Step 1: Removing the Access Panel
Using a screwdriver or the appropriate tool, remove the screws or fasteners that secure the access panel. Carefully lift or slide the panel off to expose the drive belt mechanism.
Step 2: Loosening the Tension
Before removing the drive belt, you will need to release the tension. This can be done by adjusting the tensioning mechanism, which may involve turning a dial or loosening a tensioning lever. Once the tension is released, you can easily remove the old drive belt by lifting it off the pulleys.

Step 3: Installing the New Drive Belt
Take the new drive belt and position it over the pulleys, ensuring it is properly aligned and seated. Use the tensioning mechanism to apply tension to the belt, ensuring it is neither too loose nor too tight. Check the manufacturer’s instructions or refer to the sander’s manual for specific tensioning guidelines.
Finally, replace the access panel and secure it with the screws or fasteners. Reconnect the power supply and test the sander to ensure the new drive belt is functioning correctly.
Regular maintenance and inspection of the drive belt on your disc belt sander are recommended to prolong its lifespan and prevent any unexpected failures. By following these steps and paying attention to the manufacturer’s guidelines, you can easily change the drive belt and keep your sander in optimal working condition.
Importance of Changing Drive Belt
The drive belt of a disc belt sander plays a crucial role in the operation and performance of the tool. It is responsible for transmitting power from the motor to the sanding disc, allowing it to rotate and remove material effectively. Over time, the drive belt can wear out or become damaged, affecting the sander’s efficiency and potentially leading to more significant issues.
Regularly changing the drive belt is essential to maintain the optimal functioning of the disc belt sander. Here are a few reasons why this task should not be overlooked:

1. Efficient Material Removal:
A worn-out drive belt can slip or lose tension, resulting in reduced power transmission. This can lead to slower sanding speed and less effective material removal. By replacing the drive belt when necessary, you ensure that the sander operates at its peak performance, allowing for quicker and more efficient sanding.
2. Preventing Damage to the Motor:
A loose or damaged drive belt can put extra strain on the motor of the disc belt sander. This can lead to overheating, premature wear, and even motor failure. Regularly inspecting and replacing the drive belt can help avoid costly repairs and extend the lifespan of the tool.
3. Safety Precautions:
A worn-out drive belt can pose safety risks during operation. If the belt slips or fails while the sander is in use, it can cause the sanding disc to stop abruptly or create vibrations that may lead to accidents. By regularly changing the drive belt, you minimize the chances of such incidents and ensure a safer working environment.
It is advisable to consult the manufacturer’s guidelines or the user manual of your disc belt sander to determine the recommended interval for changing the drive belt. Regular inspection and timely replacement of the drive belt will help maintain the sander’s performance, protect the motor, and ensure the safety of both the operator and the equipment.
Step-by-Step Guide
Changing the drive belt of a disc belt sander can seem like a daunting task, but with the right tools and a step-by-step guide, it can be done with ease. Follow the instructions below to change the drive belt of your disc belt sander.
Step 1: Prepare the Work Area
Before starting any maintenance work on your power tools, it is important to prepare the work area properly. Clear any debris and ensure that there is enough space to comfortably work with the sander.
Step 2: Unplug the Sander
Always remember to unplug the sander from the power outlet before attempting any repairs or maintenance. This will prevent any accidental starts and ensure your safety.

Step 3: Remove the Sanding Belt
To access the drive belt, you will first need to remove the sanding belt from the sander. Follow the manufacturer’s instructions on how to properly remove and install the sanding belt.
Step 4: Loosen the Motor Assembly
Using the appropriate tools, loosen the motor assembly to create enough slack in the drive belt. This will allow you to remove the old belt and install the new one. Take note of the belt’s orientation before removing it.
Step 5: Remove the Old Belt
Gently remove the old belt from the sander, making sure not to damage any other components in the process. Dispose of the old belt properly.
Step 6: Install the New Belt
Take the new drive belt and carefully slide it onto the appropriate pulleys or wheels. Refer to the manufacturer’s instructions for the correct orientation and positioning of the belt. Ensure that the belt is aligned properly before moving on to the next step.
Step 7: Tighten the Motor Assembly
Using the same tools as before, tighten the motor assembly to create tension in the new drive belt. Ensure that the belt is tight enough to function properly without being too tight and causing unnecessary strain on the motor.
Step 8: Reinstall the Sanding Belt
With the new drive belt in place, follow the manufacturer’s instructions to reinstall the sanding belt onto the sander. Ensure that it is properly aligned and seated before continuing.
Step 9: Test the Sander
Plug the sander back into the power outlet and turn it on to test its functionality. Ensure that the sanding belt runs smoothly and that there are no abnormal vibrations or noises.
By following these step-by-step instructions, you can easily change the drive belt of your disc belt sander and keep it running smoothly for years to come. Always refer to the manufacturer’s instructions for specific details on your sander model.
Step 1: Safety Precautions
Before attempting to change the drive belt on a disc belt sander, it is important to take proper safety precautions to avoid any accidents or injuries. Follow these important steps to ensure your safety:
| 1. | Turn off and unplug the disc belt sander from the power source. This will prevent the risk of accidental startup while working on the drive belt. |
| 2. | Wear appropriate personal protective equipment (PPE), including safety glasses or goggles to protect your eyes from flying debris, and work gloves to protect your hands from sharp edges or pinch points. |
| 3. | Ensure that the disc belt sander is placed on a stable and level work surface. This will prevent any accidental movement or tipping while working on the drive belt. |
| 4. | Inspect the disc belt sander and the drive belt for any signs of damage or wear. If there are any visible issues, such as fraying or cracking, do not proceed with the belt change and replace the drive belt before continuing. |
| 5. | Read the manufacturer’s instructions and guidelines for changing the drive belt on your specific model of disc belt sander. Following the recommended steps will ensure that you perform the belt change correctly and safely. |
| 6. | Keep the work area clean and free of any clutter or debris. This will provide a clear workspace and minimize the risk of accidents or injuries. |
By taking these safety precautions, you will be better prepared to change the drive belt on your disc belt sander safely and efficiently.
Step 2: Removing the Old Drive Belt
Before you can install a new drive belt on your disc belt sander, you’ll need to remove the old one. Follow these steps to safely remove the old drive belt:
-
Disconnect the Power
Before working on any power tool, always make sure it is unplugged or the power switch is turned off. This will prevent accidental start-ups and keep you safe while working on the machine.
-
Position the Sander
Place the disc belt sander on a sturdy work surface, ensuring it is stable and won’t move during the belt removal process. This will allow you to work comfortably and minimize the risk of accidents.
-
Access the Drive Belt
Locate the housing or cover that provides access to the drive belt. This may require removing screws or other fasteners. Consult your sander’s user manual if you’re unsure of the exact steps.
-
Remove the Old Belt
Once you have access to the drive belt, carefully slide it off the pulleys. Depending on the design of your sander, you may need to loosen tensioning mechanisms or remove other components to fully release the belt. Take your time and be cautious not to damage any components.
-
Clean the Pulleys
After removing the old drive belt, inspect the pulleys for any debris or build-up. Use a clean cloth or brush to remove any dust or residue that may have accumulated. This will help ensure a smooth operation with the new belt.
Once you have successfully removed the old drive belt and cleaned the pulleys, you are ready to move on to the next step of installing the new belt.
Step 3: Installing the New Drive Belt
Once you have removed the old drive belt from your disc belt sander, you can now proceed to install the new one. Follow these steps:
1. Find the right replacement belt: Make sure you have the correct replacement drive belt for your specific disc belt sander model. Consult the manufacturer’s manual or website for the appropriate belt size and specifications.
2. Prepare the sander: Before installing the new drive belt, ensure that the sander is turned off and unplugged from the power source. This will prevent any accidents or injuries during the installation process.
3. Position the new belt: Place the new drive belt around the pulleys according to the instructions provided in the manual. Ensure that the belt is properly aligned and positioned on the pulleys for optimal performance.
4. Tension the belt: Use the tension adjustment mechanism or lever on your disc belt sander to tighten the drive belt. The belt should be snug but not overly tight. Adjust the tension as necessary to achieve the desired tightness.
5. Test the belt: Once the new drive belt is installed and tensioned, plug in the sander and turn it on. Check that the belt runs smoothly and without any slippage. If there are any issues, refer to the troubleshooting section of the manual or seek professional assistance.
6. Regular maintenance: After installing the new drive belt, it is important to regularly inspect and maintain it. Keep an eye out for any signs of wear or damage, and replace the belt if necessary. Lubricate the pulleys and other moving parts as recommended by the manufacturer to ensure maximum efficiency and longevity of the drive belt.
By following these steps, you can easily and safely install a new drive belt on your disc belt sander, ensuring smooth and efficient operation
Step 4: Testing and Adjusting
After installing the new drive belt on your disc belt sander, it’s important to test and adjust it to ensure proper operation. Follow these steps to complete this process:
-
Power on the Sander
Start by plugging in the sander and turning it on. Allow the motor to run for a few minutes to warm up.
-
Check for Alignment
Inspect the alignment between the drive belt and the sanding disc. The belt should be properly centered on the disc and running smoothly without any wobbling.
-
Tension Adjustment
Check the tension of the drive belt. It should be tight enough to prevent slipping but not too tight that it causes excessive strain on the motor or the belt itself.
Adjustment Method Instructions Tensioner Screw Rotate the tensioner screw clockwise to tighten the belt or counterclockwise to loosen it. Make small adjustments and test the tension after each adjustment. Spring or Lever If your sander has a spring or lever for tension adjustment, consult the user manual for specific instructions on how to adjust it properly. -
Test Run
With the drive belt properly aligned and tensioned, run the sander at various speeds and observe its performance. Ensure that the belt stays in place and does not slip during operation.
Additionally, pay attention to any unusual noises or vibrations that may indicate a problem with the drive belt or the sander itself.
By following these steps, you can test and adjust the new drive belt on your disc belt sander to ensure optimal performance and longevity. Regular maintenance and periodic inspections will help you identify any issues early on and prevent further damage to your sander.
Questions and answers
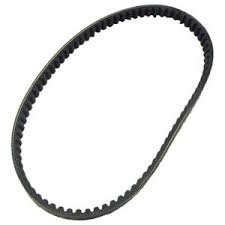
What type of drive belt does a disc belt sander use?
A disc belt sander typically uses a V-belt, which is a type of drive belt that has a V-shaped cross-section.
Is it difficult to change the drive belt on a disc belt sander?
Changing the drive belt on a disc belt sander is not difficult, but it does require some basic knowledge of the sander’s mechanics and a few simple tools.


Harrison Clayton
Meet Harrison Clayton, a distinguished author and home remodeling enthusiast whose expertise in the realm of renovation is second to none. With a passion for transforming houses into inviting homes, Harrison's writing at https://thehuts-eastbourne.co.uk/ brings a breath of fresh inspiration to the world of home improvement. Whether you're looking to revamp a small corner of your abode or embark on a complete home transformation, Harrison's articles provide the essential expertise and creative flair to turn your visions into reality. So, dive into the captivating world of home remodeling with Harrison Clayton and unlock the full potential of your living space with every word he writes.

