How To Build Drill Sander
If you enjoy woodworking and DIY projects, you know that having the right tools can make all the difference. One tool that can save you time and effort is a drill sander. A drill sander is a versatile attachment for your electric drill that allows you to sand surfaces with ease.
Building your own drill sander is not as difficult as it may seem. With a few basic materials and some simple steps, you can create a functional drill sander that will help you achieve professional-quality results.
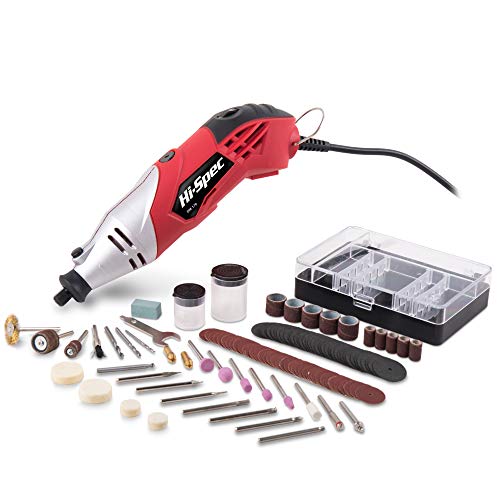
The first step in building a drill sander is to gather the necessary materials. You will need a dense foam pad, a piece of sturdy plywood, and a bolt that fits into the chuck of your drill. Additionally, you will need sandpaper with various grits to attach to the foam pad.
Once you have all the materials ready, the next step is to cut the plywood to the desired size for your drill sander. Make sure the plywood is thick enough to provide stability and support for the foam pad. Then, use a drill bit to create a hole in the center of the plywood, large enough to fit the bolt.
Choosing the Right Drill
When building a drill sander, it is important to choose the right drill for the job. Here are some factors to consider when selecting a drill:

Power
The power of the drill is an important consideration. The higher the power, the more quickly and efficiently the drill will be able to sand. It is recommended to choose a drill with at least 5 amps of power for a drill sander.
Variable Speed
A drill with variable speed settings is ideal for a drill sander. This allows you to adjust the speed based on the type of sanding you are doing. For rough sanding, a higher speed can be used, while finer sanding may require a slower speed.
Ergonomics
Considering the ergonomics of the drill is important for user comfort. Look for a drill with a comfortable grip that allows for easy handling and less fatigue during extended sanding sessions.
Chuck Size
The chuck size of the drill determines the size of the drill bit or sanding attachment that can be used. It is recommended to choose a drill with a 3/8-inch or 1/2-inch chuck size to accommodate a range of sanding attachments.
Brand and Warranty
Choosing a reputable brand with a good warranty can provide peace of mind and assurance of quality. Research different brands and read reviews to ensure that you are choosing a reliable drill for your drill sander.

| Factor | Considerations |
|---|---|
| Power | At least 5 amps |
| Variable Speed | Adjustable speed settings |
| Ergonomics | Comfortable grip |
| Chuck Size | 3/8-inch or 1/2-inch |
| Brand and Warranty | Reputable brand with good warranty |
Building the Base for the Sander
When building a drill sander, one of the most important components is the base. The base provides stability and support for the entire machine, ensuring accurate sanding and preventing any wobbling or movement during operation. Here are the steps to build a sturdy and reliable base for your drill sander:
1. Measure and cut the base material:
Start by measuring the dimensions of your drill sander, taking into account the size of the drill and the sanding disk. Once you have the measurements, transfer them onto a piece of solid plywood or any other sturdy material of your choice. Use a saw or a jigsaw to cut the base material according to the measurements.
2. Mark and drill holes for the drill:
Place the drill on the base material and mark the spots where the drill’s mounting holes are located. These holes will allow you to secure the drill to the base. Use a drill bit slightly larger than the diameter of the mounting holes and carefully drill through the marked spots on the base.

3. Attach the drill to the base:
Using bolts and nuts, secure the drill to the base by aligning the drill’s mounting holes with the holes on the base. Tighten the nuts securely to ensure that the drill is firmly attached to the base and doesn’t move during operation.
4. Mount the sanding disk:
Next, attach the sanding disk to the drill’s chuck. Make sure the sanding disk is centered and tightly secured. This will ensure smooth and accurate sanding.
5. Add additional support if necessary:

Depending on the size and weight of your drill sander, you may need to add additional support to the base. This can be done by attaching braces or supports to the sides or bottom of the base. This will help distribute the weight evenly and prevent any sagging or instability.
6. Test for stability:
Once the base is complete, place the drill sander on a flat surface and test its stability. Gently turn on the drill and make sure there is no wobbling or movement. If needed, adjust the bolts or add more support until the drill sander is stable and secure.
7. Finish the base:
If desired, you can sand and finish the base to give it a smooth and polished appearance. Apply a coat of paint or varnish to protect the base from moisture and wear.

By following these steps, you can build a solid and reliable base for your drill sander. Having a stable base will greatly improve the performance and accuracy of your sanding projects.
Attaching the Sanding Disc
To attach the sanding disc to the drill sander, follow these steps:
- Ensure that the drill is turned off and unplugged before starting.
- Choose a sanding disc with the appropriate grit for your intended task.
- Remove any debris or dust from the drill’s chuck using a clean cloth.
- Place the sanding disc over the drill’s chuck, ensuring that the holes on the disc align with the chucks’ jaws.
- Tighten the chuck by turning it clockwise using the chuck key or by hand, depending on the type of drill you have.
- Make sure that the sanding disc is securely attached to the drill and doesn’t wobble or shake.
- If needed, adjust the speed setting on the drill to your desired level.
- You are now ready to use your drill sander with the sanding disc attached.
Remember to always wear safety goggles and work in a well-ventilated area when using power tools.
Adding a Dust Collection System
When using a drill sander, it’s important to consider the dust that is generated from the sanding process. Inhaling dust particles can be harmful to your health and can also make a mess in your workshop. To mitigate these issues, it’s a good idea to add a dust collection system to your drill sander setup.
There are a few different options for implementing a dust collection system. One option is to attach a vacuum cleaner to the drill sander using a hose or adapter. This allows the vacuum cleaner to suck up the dust as you sand, keeping your workspace clean and minimizing dust in the air.

Materials Needed
- Drill sander
- Vacuum cleaner
- Hose or adapter
Steps to Add a Dust Collection System
- Ensure that your drill sander and vacuum cleaner are both turned off and unplugged.
- Attach a hose or adapter to the dust port on your drill sander. This may require a specific type of hose or adapter depending on the model of your drill sander.
- Connect the other end of the hose or adapter to the vacuum cleaner’s hose or attachment port.
- Turn on your vacuum cleaner and make sure it is set to the appropriate setting for dust collection.
- You are now ready to use your drill sander with the dust collection system. As you sand, the vacuum cleaner will suck up the dust, keeping your workspace clean and reducing the amount of dust in the air.
Adding a dust collection system to your drill sander setup can greatly improve the cleanliness of your workshop and the air quality while sanding. It’s a simple addition that can make a big difference in your overall woodworking experience.
Testing and Fine-Tuning the Sander
Once the drill sander has been constructed, it is important to test and fine-tune it to ensure optimal performance. Before using the sander on any workpiece, a series of tests should be conducted to ensure the sander operates smoothly and effectively.
Sander Functionality Test
Firstly, check if the drill sander is properly attached to the drill and secured in place. Turn on the drill at a low speed and observe if there are any wobbles or vibrations in the sander. The sander should run smoothly and without excessive noise. If there are any issues, adjust the attachment mechanism or tighten any loose parts.
Sanding Performance Test
Next, it is essential to test the sanding performance of the drill sander. Secure a scrap piece of the material you commonly work with onto a stable surface. Apply gentle pressure and slowly move the sander across the surface in a systematic manner. Observe the finish and gauge how effectively the sander removes material. Adjust the pressure and speed as necessary to achieve the desired result.
| Issue | Possible Solutions |
|---|---|
| Excessive material removal | Reduce pressure or speed, change to a finer sanding attachment |
| Ineffective material removal | Apply more pressure, increase speed, use a coarser sanding attachment |
| Uneven sanding | Ensure even pressure and consistent movement, adjust speed if necessary |
Note any issues encountered during the sanding performance test and refer to the table for possible solutions.

Once the drill sander is properly tested and fine-tuned, it is ready to be used for various sanding applications. Regular maintenance and inspection should be done to ensure the sander remains in optimal working condition.
Maintaining and Troubleshooting the Sander
Proper maintenance of your drill sander is essential to ensure it continues to perform at its best. Here are some tips to help you maintain your sander and troubleshoot any issues that may arise:
Cleaning
Regularly clean the sander to remove any dust or debris that may clog the motor or affect its performance. Use a soft cloth or brush to gently clean the exterior and make sure to access hard-to-reach areas. Avoid using water or any harsh chemicals that may damage the sander.
Lubrication
Apply a few drops of oil to the moving parts of the sander, such as the bearings, to ensure smooth operation. Follow the manufacturer’s instructions for the recommended type and frequency of lubrication.
Check for Wear and Tear
Inspect the sanding pad for any signs of wear or damage. If the pad is worn out or damaged, replace it with a new one to maintain optimal sanding performance. Additionally, check the power cord for any cuts or fraying that may pose a safety hazard.
Tip: It’s a good idea to keep a spare sanding pad and other commonly replaced parts on hand, as they may wear out over time.
Troubleshooting
If you encounter any issues with your drill sander, here are some common troubleshooting steps:
- No power: Check if the power cord is securely connected to both the sander and the power source. Also, ensure the power source is functional by testing with another device.
- Weak sanding performance: Make sure the sanding pad is securely attached to the sander. Adjust the speed settings if available. If the issue persists, the sandpaper may be worn out and requires replacement.
- Excessive vibration: Check if the sanding pad is unbalanced or installed incorrectly. Inspect the motor and bearings for any loose components. If the issue continues, seek professional assistance.
- Overheating: If the sander feels excessively hot, give it a break and allow it to cool down. Excessive heat can indicate a motor or bearing issue, which should be addressed by a professional.
- Unusual noises: If you hear any grinding or squeaking noises, inspect the components for any obstructions or damage. Lubricate the moving parts if necessary. If the noise persists, consult a professional.
By following these maintenance tips and troubleshooting steps, you can ensure your drill sander remains in good working condition and provides efficient and effective sanding results.
Questions and answers
What materials do I need to build a drill sander?
You will need a drill, sandpaper, a sanding pad, a dowel rod, and some strong adhesive.
Can I use any type of drill for this project?
Yes, you can use any drill that has a chuck that can hold the dowel rod securely.


Meet Harrison Clayton, a distinguished author and home remodeling enthusiast whose expertise in the realm of renovation is second to none. With a passion for transforming houses into inviting homes, Harrison's writing at https://thehuts-eastbourne.co.uk/ brings a breath of fresh inspiration to the world of home improvement. Whether you're looking to revamp a small corner of your abode or embark on a complete home transformation, Harrison's articles provide the essential expertise and creative flair to turn your visions into reality. So, dive into the captivating world of home remodeling with Harrison Clayton and unlock the full potential of your living space with every word he writes.

