Can You Use An Orbital Sander On Drywall
Have you ever wondered if it’s possible to use an orbital sander on drywall?
The answer is yes, you can use an orbital sander on drywall to achieve a smooth and even finish. An orbital sander is a versatile power tool that is primarily used for sanding wood, but it can also be used on other surfaces, including drywall.
Using an orbital sander on drywall can be an effective way to remove imperfections, such as bumps, ridges, or uneven texture.
However, it’s important to note that using an orbital sander on drywall requires some care and caution. Unlike wood, drywall is a soft and delicate material that can be easily damaged if not handled properly.
Before you start sanding, make sure to prepare the area by removing any loose or flaking paint, and filling in any cracks or holes with spackle or joint compound. This will ensure a smooth surface for sanding.

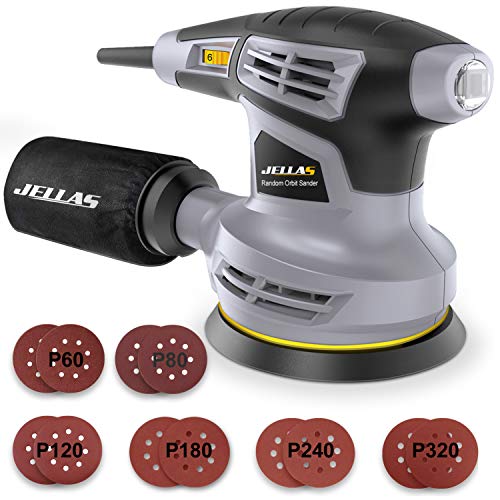
When using an orbital sander on drywall, it’s recommended to use a sanding pad with a lower grit sandpaper, such as 120-grit or 150-grit. This will help to remove any imperfections without causing too much damage to the surface.
It’s also important to keep the sander moving at all times to prevent creating uneven patches or gauges in the drywall.
After sanding, be sure to thoroughly clean the area to remove any dust or debris. This will ensure a smooth and clean surface for painting or further finishing.
In conclusion, an orbital sander can be used on drywall to achieve a smooth and even finish, but it requires care, caution, and the proper technique to avoid damaging the delicate surface.
The Benefits of Using an Orbital Sander on Drywall
Using an orbital sander on drywall can provide a variety of benefits for both professional contractors and DIY enthusiasts. Here are some of the key advantages:

1. Smooth and even finish: An orbital sander is designed to produce a smooth and even finish on surfaces, making it ideal for smoothing out drywall. With its random orbital motion, it eliminates the risk of leaving visible sanding marks and ensures a professional-looking result.
2. Time and energy-saving: Compared to manual sanding, using an orbital sander can significantly speed up the sanding process. The sander’s high-speed rotation allows for quick material removal, saving both time and physical effort.
3. Dust collection: Many orbital sanders come equipped with a built-in dust collection system, which helps to minimize the amount of dust generated during sanding. This not only promotes a cleaner working environment but also reduces the need for extensive clean-up afterwards.
4. Versatility: Orbital sanders are versatile tools that can be used for various applications. Apart from drywall, they can be used on wood, metal, and other surfaces, making them a valuable addition to any workshop.
5. Ease of use: Orbital sanders are generally easy to operate, even for those with limited experience. They are lightweight and ergonomically designed, providing better control and minimizing fatigue during extended use.

6. Cost-effective: While orbital sanders may require an initial investment, they offer long-term cost savings. Their efficiency and durability make them a cost-effective tool option for professionals and homeowners alike.
In conclusion, using an orbital sander on drywall has numerous advantages, including a smooth finish, time and energy-saving benefits, dust collection capabilities, versatility, ease of use, and cost-effectiveness. With these benefits in mind, it’s easy to see why an orbital sander is a valuable tool for any drywall project.
How to Properly Use an Orbital Sander on Drywall
Step 1: Prepare the Work Area
Before you start sanding your drywall with an orbital sander, make sure to take the necessary precautions to protect the surrounding area. Cover the floors and furniture with drop cloths or plastic sheets to prevent dust and debris from getting everywhere.
Step 2: Choose the Right Sandpaper Grit

Selecting the correct sandpaper grit is essential for achieving a smooth finish on your drywall. For initial sanding, start with a coarser grit, such as 80 or 120. As you progress and the surface becomes smoother, switch to a finer grit, like 220 or 320, to achieve a flawless finish.
Step 3: Attach Sandpaper to the Orbital Sander
Most orbital sanders come with a hook-and-loop system that allows for easy attachment and removal of sandpaper. Cut the sandpaper to fit the shape of the sander’s base, peel off the protective backing, and press it firmly onto the sanding pad.
Step 4: Start Sanding
Hold the orbital sander with both hands and switch it on. Move the sander in smooth, circular motions over the drywall surface, applying gentle pressure. Avoid staying in one spot for too long to prevent uneven sanding. Always keep the sander moving to achieve a consistent finish.

Step 5: Check Your Progress
Periodically stop sanding and examine the surface for any imperfections. If you notice any uneven areas or blemishes, mark them with a pencil. This will help guide your sanding process and ensure a more uniform finish.
Step 6: Clean Up Dust
Drywall sanding produces a significant amount of dust. Use a vacuum cleaner or a drywall sanding sponge to remove the dust from the surface periodically. Wipe down the walls with a damp cloth to remove any remaining dust particles.
Step 7: Apply Primer and Paint

After you have finished sanding the drywall, it’s time to apply a primer coat to seal the surface and prepare it for painting. Once the primer is dry, you can proceed with painting the wall to achieve the desired final look.
Remember to wear appropriate protective gear, such as a dust mask, safety goggles, and earplugs, when using an orbital sander on drywall. Take breaks as needed, and be patient throughout the process to ensure a professional-looking finish.
Common Mistakes to Avoid When Using an Orbital Sander on Drywall
Using an orbital sander on drywall can be a great way to achieve a smooth and polished finish. However, there are some common mistakes that beginners often make when using this tool. By avoiding these mistakes, you can ensure that your drywall is sanded correctly and without any damage. Here are some of the most common mistakes to avoid:
- Using too much pressure: One of the most common mistakes when using an orbital sander on drywall is applying too much pressure. It’s important to let the sander do the work and not force it onto the surface. Applying excessive pressure can result in uneven sanding and may even damage the surface of the drywall.
- Not using the right sandpaper grit: Another mistake is not using the correct sandpaper grit for the job. Using a sandpaper grit that is too coarse can result in excessive material removal and create grooves or scratches on the drywall. On the other hand, using a sandpaper grit that is too fine may not effectively remove imperfections. It’s important to choose the appropriate grit based on the condition of the drywall.
- Sanding in a circular motion: Many beginners make the mistake of sanding in a circular motion. This can lead to swirl marks and uneven sanding. Instead, it’s best to sand in straight lines or in a back-and-forth motion. This will help ensure a uniform finish and prevent any visible sanding patterns.
- Not using a dust collection system: Drywall dust can be a major nuisance and can affect the air quality in your workspace. It’s important to use a dust collection system or attach a vacuum to your orbital sander to minimize the amount of dust generated. Failing to do so can result in a messy workspace and may even pose health risks.
- Not wearing proper safety gear: When using an orbital sander on drywall, it’s crucial to wear the appropriate safety gear. This includes safety goggles to protect your eyes from dust and debris, as well as a dust mask to prevent inhalation of harmful particles. Additionally, it’s a good idea to wear ear protection, as orbital sanders can be quite loud.
By avoiding these common mistakes, you can ensure that you achieve a professional-looking finish when using an orbital sander on drywall. Take your time, use the right techniques, and always prioritize safety to get the best results.
Alternatives to Using an Orbital Sander on Drywall
If you’re looking for alternatives to using an orbital sander on drywall, there are a few options to consider:

1. Sanding block: A sanding block is a handheld tool that can be used to sand drywall. It allows for more control and precision compared to using a power sander. Make sure to use a fine-grit sandpaper to avoid damaging the drywall.
2. Sanding sponge: A sanding sponge is another handheld option that can be used for sanding drywall. It is designed to be more flexible and can conform to curved surfaces. Like the sanding block, using a fine-grit sandpaper is recommended.
3. Sandpaper sheets: If you prefer a more traditional approach, sandpaper sheets can be used to sand drywall. Simply fold the sandpaper in half and use it to sand the surface. Start with a coarse-grit sandpaper and gradually switch to a finer grit for a smooth finish.
4. Wet sanding: Wet sanding involves using water to lubricate the sandpaper and reduce dust. This method can be effective in minimizing dust particles and producing a smoother finish. However, it is important to let the drywall completely dry before applying any paint or primer.
5. Drywall sanding mesh: A drywall sanding mesh is a screen-like material that can be used for sanding drywall. It is designed to prevent clogging and is more durable than regular sandpaper. This option can be especially useful when dealing with larger areas of drywall.
Remember, regardless of the method you choose, it’s important to wear protective gear such as safety goggles and a dust mask to protect yourself from airborne particles. Always follow proper safety precautions when sanding drywall.
Questions and answers
Can I use an orbital sander on drywall?
Yes, you can use an orbital sander on drywall. It can be a great tool for smoothing out rough patches or removing old paint or texture.
What type of sandpaper should I use with an orbital sander on drywall?
When using an orbital sander on drywall, it is recommended to use sandpaper with a grit of 120 or higher. This will help to remove any imperfections in the drywall without causing damage.
Is it necessary to apply a primer after using an orbital sander on drywall?
Yes, it is recommended to apply a primer after using an orbital sander on drywall. This will help to seal the surface and create a smooth and even finish when applying paint.


Meet Harrison Clayton, a distinguished author and home remodeling enthusiast whose expertise in the realm of renovation is second to none. With a passion for transforming houses into inviting homes, Harrison's writing at https://thehuts-eastbourne.co.uk/ brings a breath of fresh inspiration to the world of home improvement. Whether you're looking to revamp a small corner of your abode or embark on a complete home transformation, Harrison's articles provide the essential expertise and creative flair to turn your visions into reality. So, dive into the captivating world of home remodeling with Harrison Clayton and unlock the full potential of your living space with every word he writes.

