Will Rotary Tool Cut Wheel Studs

Rotary tools are versatile power tools that are commonly used in various tasks, from cutting and shaping materials to grinding and polishing surfaces. These tools are well-known for their precision and efficiency in handling different kinds of projects. However, when it comes to cutting wheel studs, there are certain factors to consider before using a rotary tool.
Firstly, it is crucial to understand the properties of wheel studs. Wheel studs are typically made of hardened steel and play a vital role in securing the wheels of a vehicle. They need to have sufficient strength to withstand the weight and force exerted on them. Cutting wheel studs is a delicate process that should not be taken lightly as it can affect the safety and stability of the vehicle.
Secondly, while rotary tools are capable of cutting through various materials, they may not be the ideal tool for cutting wheel studs. Wheel studs have a high tensile strength, making them more difficult to cut compared to other materials. Using a rotary tool with an inappropriate cutting disc or incorrect technique may result in damage to the tool, the stud, or both.
Instead of using a rotary tool, it is recommended to use a specialized cutting tool specifically designed for cutting wheel studs. These tools are equipped with the necessary power and precision to cut through hardened steel without compromising its strength. They provide better control and reduce the risk of injury or damage.
In conclusion, while a rotary tool may be a useful tool for various projects, it is not the recommended tool for cutting wheel studs. It is essential to prioritize safety and choose the appropriate tool for the job. Using a specialized cutting tool will ensure a clean and precise cut on wheel studs without compromising their integrity.

The Ultimate Guide: What You Need to Know About Cutting Wheel Studs with a Rotary Tool
Wheel studs are an essential component of any vehicle’s wheel assembly. They securely hold the wheel and prevent it from detaching while the vehicle is in motion. However, there may be instances when you need to cut wheel studs, either for replacement or modification purposes. This is where a rotary tool comes in handy.
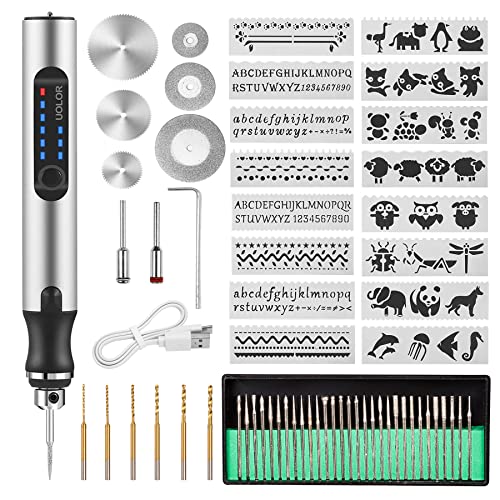
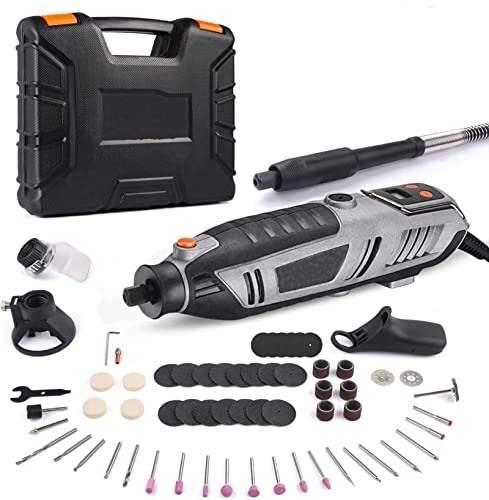
A rotary tool, such as a Dremel, is a versatile and powerful handheld tool that can be used for various cutting, grinding, and polishing applications. It is equipped with a high-speed rotating attachment, allowing it to cut through different materials with precision and ease.
Before you attempt to cut wheel studs with a rotary tool, there are a few things you need to consider:
| Safety Precautions |
| Always prioritize safety when working with power tools. Wear protective goggles, gloves, and a mask to shield yourself from flying sparks and debris. |
| Choose the Right Cutting Attachment |
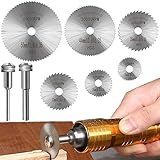
| There are various cutting attachments available for rotary tools, including cutting wheels, reinforced cut-off wheels, and carbide cutting bits. Select the appropriate attachment depending on the material of the wheel stud and the desired cutting method. |
| Measure and Mark |
| Before cutting, measure and mark the portion of the wheel stud that needs to be removed. Use a ruler or a measuring tape to ensure accuracy. |
| Secure the Wheel Stud |
| It’s crucial to securely clamp or secure the wheel stud before cutting. This will prevent it from spinning or moving during the cutting process and ensure a clean and accurate cut. |
| Start Cutting |
| Turn on the rotary tool and slowly guide the cutting attachment along the marked line. Apply gentle, consistent pressure to avoid overheating or damaging the tool. |
| Cooling and Finishing |
| After cutting, allow the wheel stud to cool down before handling. You can use a file or sandpaper to smoothen the edges and remove any burrs. |
| Verify Fitment |
| Once the cutting process is complete, make sure the wheel studs fit securely in the wheel assembly. Test them thoroughly to ensure proper installation. |
While a rotary tool can be a convenient tool for cutting wheel studs, it is essential to exercise caution and follow the necessary safety precautions. If you are unsure or inexperienced, it is advisable to seek professional assistance to avoid any accidents or damage to your vehicle.
Remember, proper tools, safety measures, and precision are key to successfully cutting wheel studs with a rotary tool. With the right approach, you can confidently modify or replace your wheel studs to meet your specific needs.

Safety First: Proper Precautions for Cutting Wheel Studs
When it comes to cutting wheel studs, it is important to take proper precautions to ensure your safety. Using a rotary tool for this task can be effective, but it is crucial to follow these safety guidelines:
- Put on protective gear: Before starting any work, make sure to wear safety goggles, gloves, and ear protection. This will help protect you from flying debris and any potential harm.
- Secure the vehicle: It is necessary to secure the vehicle properly before cutting any wheel studs. Use jack stands to support the vehicle and prevent any accidental movement.
- Prepare the work area: Clear the work area of any flammable materials or obstacles that may pose a hazard. Make sure the surrounding area is well-ventilated to prevent inhaling any fumes or dust.
- Choose the right cutting wheel: Select a cutting wheel suitable for the type of material you are working with. A diamond cutting wheel is recommended for cutting metal studs.
- Position the rotary tool correctly: Hold the rotary tool firmly with both hands and maintain a stable posture. Ensure that the cutting wheel is pointed away from yourself and others.
- Control the speed: Set the rotary tool to an appropriate speed for cutting wheel studs. High-speed settings can increase the risk of accidents, while low speeds may result in inefficient cutting.
- Make precise cuts: Slowly and steadily guide the cutting wheel along the wheel stud, applying even pressure. Avoid excessive force that may cause the cutting wheel to bind or kickback.
- Take breaks if needed: Cutting wheel studs can be a time-consuming task. If you feel fatigued or notice any signs of overheating in the rotary tool, take breaks to prevent accidents.
- Clean up after finishing: Once you have completed the cutting process, clean up any debris or dust that may have accumulated. Dispose of the waste material properly.
It is important to remember that cutting wheel studs can be a challenging and potentially dangerous task. If you are unsure about your ability to perform this task safely, it is highly recommended to seek professional assistance.
Understanding Wheel Studs: Materials and Construction
Wheel studs play a crucial role in the structural integrity of a vehicle’s wheels. They are responsible for securing the wheels to the hub assembly, ensuring a safe and reliable connection. Understanding the materials and construction of wheel studs can help car owners make informed decisions when it comes to maintenance and upgrades.
Materials
Wheel studs are typically made from high-strength alloy steel. This material provides the necessary strength and durability to handle the forces and loads exerted on the wheel. Alloy steel is known for its excellent tensile strength, which allows the studs to withstand extreme pressures without breaking or warping.
In some cases, wheel studs may also be made from stainless steel or heat-treated steel for enhanced corrosion resistance and durability. These materials provide an extra layer of protection against rust and wear, particularly in regions with harsh weather conditions or a high salt content on the roads.
Construction
Wheel studs are typically cylindrical in shape, with one end threaded to attach to the wheel and the other end inserted into the hub assembly. The threaded end ensures a secure fit, preventing the wheel from becoming loose or separated from the vehicle while in motion.
The unthreaded portion of the stud, also known as the shank, is designed to fit into the hub assembly. The length of the shank can vary depending on the vehicle’s make and model, as well as the type of wheels being used. It is crucial to choose the correct length of stud to ensure proper fitment and prevent any potential issues with wheel installation.
Wheel studs may also feature a spline or a knurled section in the center of the shank. This design provides additional grip and prevents the stud from rotating or loosening over time. The spline or knurling increases the friction between the stud and the hub assembly, enhancing the stability of the wheel connection.
When it comes to wheel studs, it is essential to use high-quality materials and ensure proper installation. Regular maintenance, such as inspections and torque checks, can help identify any issues early on and prevent potential accidents or wheel failure. By understanding the materials and construction of wheel studs, car owners can take the necessary steps to ensure a safe and reliable driving experience.
Choosing the Right Rotary Tool for Cutting Wheel Studs
When it comes to cutting wheel studs, using the right rotary tool is essential for a clean and precise cut. Here are some factors to consider when choosing the best tool for the job:

- Power: Look for a rotary tool with sufficient power to effectively cut through metal. A tool with a high RPM (revolutions per minute) rating is ideal for this task.
- Cutting Disc Compatibility: Ensure that the rotary tool you choose is compatible with cutting discs suitable for cutting metal. A tool with a spindle lock feature makes it easier to change the cutting disc.
- Size and Ergonomics: Consider the size and ergonomics of the rotary tool. A compact and lightweight tool is easier to handle and maneuver, especially when working in tight spaces.
- Variable Speed: A rotary tool with variable speed settings allows you to adjust the cutting speed based on the specific application and material.
- Safety Features: Look for safety features such as a secure grip handle, a lock-on button, and a guard to protect against sparks and debris during cutting.
- Brand and Reputation: Opt for a reputable brand known for producing high-quality rotary tools. Reading customer reviews can help you gauge the performance and reliability of different models.
Remember to always follow the manufacturer’s instructions and wear appropriate safety gear when using a rotary tool to cut wheel studs. With the right tool and proper technique, you can easily and safely cut wheel studs to the desired length.
Step-by-Step Guide: How to Cut Wheel Studs with a Rotary Tool
If you need to cut wheel studs for any reason, a rotary tool can be a handy tool to have. It provides a fast and efficient way to cut through metal, allowing you to remove or replace wheel studs as needed. Follow these step-by-step instructions to safely and effectively cut wheel studs with a rotary tool.
Tools and Materials You’ll Need:
| – Rotary tool with a cutting wheel attachment |
| – Safety goggles |
| – Gloves |
| – Ear protection |
| – Bench vise |
| – Pen or marker |
| – Measuring tape or ruler |
| – Hacksaw (optional) |
Step 1: Preparing the Work Area
Ensure that you have a clean and clutter-free work area. Place your vehicle on a level surface and engage the parking brake. Lift the wheel you want to work on using a jack and secure it with a jack stand.
Step 2: Marking the Stud
Use a pen or marker to mark the part of the wheel stud that you want to cut. Make sure the mark is visible and accurate, as this will guide your cutting.
Step 3: Securing the Stud
Secure the wheel stud in a bench vise, making sure it is held firmly in place. This will prevent any movement or vibration during the cutting process, ensuring a clean and accurate cut.

Step 4: Putting on Safety Gear
Prioritize your safety by wearing safety goggles to protect your eyes, gloves to protect your hands, and ear protection to reduce noise exposure.
Step 5: Cutting the Wheel Stud
Attach the cutting wheel attachment to your rotary tool. Ensure that the tool is turned off before attaching or removing any attachments. Following the marked line, slowly and steadily cut through the wheel stud. Use a back-and-forth motion to prevent the cutting wheel from overheating.
Step 6: Finishing Touches
After cutting through the wheel stud, inspect the cut to ensure it is clean and smooth. If necessary, use a file to remove any rough edges. Clean the area to remove any metal shavings or debris.
Step 7: Repeating the Process
If you need to cut multiple wheel studs, repeat the process for each one. Take breaks as needed to avoid overheating the cutting wheel or the rotary tool.
By following these step-by-step instructions, you can safely and effectively cut wheel studs with a rotary tool. Remember to prioritize safety and take necessary precautions throughout the process to minimize any risks or accidents.

Potential Challenges: Common Issues When Cutting Wheel Studs
While a rotary tool can be used to cut wheel studs, there are several potential challenges and common issues that may arise during the process. It is important to be aware of these challenges in order to minimize the risk of damage or injury.
1. Difficulty in accessing the studs
One major challenge when cutting wheel studs is the difficulty in accessing them. Wheel studs are typically located behind the brake rotor or drum, making it challenging to reach them with a rotary tool. This can require the removal of other components, such as the brake caliper or drum, to gain access to the studs.
Tip: Before attempting to cut wheel studs, ensure that you have the necessary tools and equipment to safely remove and reassemble the necessary components.
2. Risk of damage to the wheel hub
When using a rotary tool to cut wheel studs, there is a risk of damaging the wheel hub. This can happen if the cutting wheel comes into contact with the hub while cutting the studs. Damage to the wheel hub can lead to problems with wheel alignment and cause issues with vehicle handling.
Tip: Use caution when cutting wheel studs and ensure that the cutting wheel is positioned away from the wheel hub to avoid any damage.

Keep in mind that cutting wheel studs should only be done as a last resort when other methods, such as utilizing a stud remover tool, have failed. If you are unsure about how to properly cut wheel studs or encounter any issues during the process, it is recommended to seek professional assistance.
After Cutting: Post-Processing and Wheel Stud Replacement Options
Once the wheel studs have been cut using a rotary tool, there are a few important post-processing steps to take to ensure the safety and functionality of the cut studs.
First, it is essential to remove any burrs or rough edges that may have been left behind during the cutting process. This can be done using a file or sandpaper to smooth out the cut end of the stud. Care should be taken to remove any sharp edges that could potentially cause injury or damage to the wheel or hub.
Next, it is crucial to inspect the cut studs for any signs of damage or weakening. Rotary tools can generate a significant amount of heat during cutting, which can potentially affect the structural integrity of the studs. Look for any discoloration or signs of deformation, and replace any studs that show signs of damage.
Once the studs have been post-processed and deemed safe for use, it is essential to securely install them back onto the wheel hub. One option is to use a specialized press tool designed for installing wheel studs. These tools allow for precise and secure installation, ensuring that the studs are properly seated and tightened.
If a press tool is not available, an alternative method is to use a lug nut and a few washers to tighten the stud into place. Start by placing a washer onto the stud, followed by the lug nut. Gradually tighten the lug nut, using a torque wrench if possible, until the stud is securely fastened to the hub.
It is important to note that while a rotary tool can be used to cut wheel studs, this method may not be recommended by all manufacturers or automotive professionals. It is always advisable to consult the vehicle’s manual or seek professional guidance before attempting any modifications or repairs to critical components like wheel studs.
| Post-Processing Steps: | Replacement Options: |
|---|---|
| 1. Remove burrs and rough edges from the cut studs using a file or sandpaper. | – Use a specialized press tool for precise installation. |
| 2. Inspect the studs for signs of damage or weakening. | – Use a lug nut and washers to tighten the stud in absence of a press tool. |
| 3. Replace any studs that show signs of damage or deformation. | – Consult the vehicle’s manual and seek professional guidance. |
Questions and answers
Can a rotary tool cut wheel studs?
Yes, a rotary tool can cut wheel studs. However, it is not recommended as it may compromise the structural integrity of the wheel and pose a safety risk.
Is it safe to use a rotary tool to cut wheel studs?
Using a rotary tool to cut wheel studs is not recommended due to safety concerns. The rotary tool may not provide enough precision and control, and there is a risk of damaging the wheel or causing injury.


Harrison Clayton
Meet Harrison Clayton, a distinguished author and home remodeling enthusiast whose expertise in the realm of renovation is second to none. With a passion for transforming houses into inviting homes, Harrison's writing at https://thehuts-eastbourne.co.uk/ brings a breath of fresh inspiration to the world of home improvement. Whether you're looking to revamp a small corner of your abode or embark on a complete home transformation, Harrison's articles provide the essential expertise and creative flair to turn your visions into reality. So, dive into the captivating world of home remodeling with Harrison Clayton and unlock the full potential of your living space with every word he writes.