How To Engrave Glass With A Rotary Tool

Engraving glass can be a beautiful way to personalize gifts, create unique designs, or add a touch of elegance to your home decor. While it may seem daunting at first, with the right tools and techniques, you can easily achieve professional-looking results. One tool that is frequently used for glass engraving is a rotary tool.
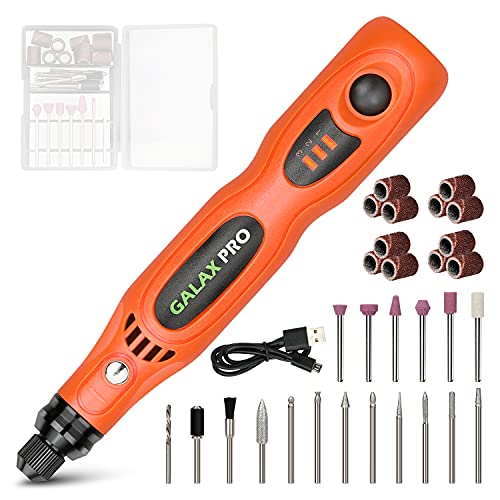
A rotary tool, such as a Dremel, is a versatile handheld device that can be used for a variety of tasks, including engraving. It features a small, high-speed rotating bit that can be fitted with different attachments depending on the desired effect. By using the appropriate attachments and following the correct steps, you can create intricate designs and patterns on glass surfaces.
Before you begin engraving, it is important to gather all the necessary materials. You will need a rotary tool with a glass engraving attachment, safety goggles to protect your eyes, a dust mask to prevent inhalation of glass particles, and a glass surface to engrave on. It is also recommended to have a steady hand, patience, and a bit of practice to perfect your engraving skills.
Once you have gathered your materials, start by thoroughly cleaning the glass surface to remove any dirt, dust, or fingerprints. This will ensure a smooth and clean engraving. Next, put on your safety goggles and dust mask to protect yourself from any potential hazards.
What is a Rotary Tool?
A rotary tool, also known as a rotary tool kit or a multi-tool, is a handheld power tool that is versatile and compact. It is designed for precision and detail work, making it ideal for a variety of DIY projects such as engraving, cutting, polishing, and grinding. A rotary tool typically consists of a motor, a variable speed control dial, and a collection of interchangeable accessories and attachments that can be used for different applications.

The motor of a rotary tool is usually electric, and it powers a spinning shaft that can rotate at high speeds. The variable speed control dial allows users to adjust the speed of the rotation, providing flexibility and control for different tasks. The accessories and attachments can be easily swapped out to accommodate different materials and techniques.
Some common accessories for a rotary tool include cutting wheels, sanding drums, grinding stones, engraving bits, and polishing pads. These accessories can be made from various materials such as high-speed steel, carbide, diamond, and abrasive compounds.
Due to its small size and lightweight design, a rotary tool can be easily maneuvered and used in tight spaces. It is portable and versatile, making it a popular tool choice for hobbyists, DIY enthusiasts, and professionals alike.
When using a rotary tool for glass engraving, it is important to use the appropriate accessories and follow proper safety procedures to prevent accidents and achieve the desired results.
Key Features of a Rotary Tool:

- Compact and portable
- Versatile and adjustable speed
- Interchangeable accessories and attachments
- Precision and control
- Can be used for a variety of tasks
Why Engrave Glass?
Glass engraving is a versatile and elegant way to add a personalized touch to various items. Whether you want to create unique gifts, commemorate a special occasion, or simply enhance the aesthetic appeal of glass objects, engraving can be a great option. Here are some reasons why you should consider engraving glass:
1. Personalization: Engraving glass allows you to create custom designs, names, dates, or messages to make an item truly one-of-a-kind. It adds a personal touch that cannot be achieved with standard printed or etched designs.
2. Gift-giving: Engraved glass items make thoughtful and memorable gifts for a wide range of occasions. From birthdays and anniversaries to weddings and graduations, an engraved glass gift is sure to stand out and be cherished for years to come.
3. Home decor: Engraving can transform plain glassware and home decor items into stunning and unique pieces. Engraved glass vases, candle holders, or even windows can add a touch of elegance and sophistication to any space.
4. Business promotions: Glass engraving offers an opportunity for businesses to promote their brand or leave a lasting impression. Whether it’s a logo, company name, or contact information, engraved glass items can be used as promotional giveaways, corporate gifts, or awards.

5. Artistic expression: Engraving glass allows artists to express their creativity and create intricate designs. From simple patterns and textures to elaborate scenes, the translucency of glass can enhance the beauty and impact of the engraved artwork.
Overall, glass engraving is a versatile and rewarding craft that can be enjoyed by beginners and experienced artists alike. With a rotary tool and some practice, you can turn ordinary glass objects into personalized works of art.
Steps to Engrave Glass with a Rotary Tool
Engraving glass with a rotary tool can be a fun and rewarding craft project. With a few simple steps, you can create beautiful designs on glass surfaces that can be used for home décor, personalized gifts, or even as a way to add a personal touch to your own glassware. Follow these step-by-step instructions to get started:
- Prepare your workspace: Find a clean and well-lit area to work in. Make sure you have a stable work surface and protect it with a soft cloth or a rubber mat to prevent the glass from sliding or scratching.
- Gather your materials: In addition to a rotary tool, you will need a diamond-tip engraving bit, a water-filled spray bottle, masking or painter’s tape, a stencil or design template, and safety goggles and gloves.
- Prepare the glass surface: Clean the glass thoroughly with soap and water to remove any dirt or oils. Dry it completely.
- Secure the stencil or design template: Tape the stencil or design template to the glass surface using masking or painter’s tape. Make sure it is firmly in place and centered on the area where you want the design to be engraved.
- Put on safety gear: Wear safety goggles and gloves to protect your eyes and hands from any flying glass fragments or debris.
- Start engraving: Hold the rotary tool like a pencil, with a light grip. Turn it on and slowly trace the design on the glass surface, using steady and even pressure. Let the tool do the work and avoid pressing too hard, as it may cause the glass to crack.
- Keep the glass wet: Spray water onto the glass surface as you work to keep it cool and prevent it from overheating. This will also help to wash away glass dust and debris.
- Clean and inspect: Periodically clean the glass surface with water to remove any dust or debris. Stop and inspect your work to ensure that the design is coming out as desired.
- Finish and protect: Once you have finished engraving the design, remove the stencil or design template carefully. Clean the glass one final time with water and dry it thoroughly. Consider applying a clear coat of protective varnish or sealant to preserve the design and add a glossy finish.
- Celebrate your masterpiece: Admire your engraved glass creation and show it off proudly! It can serve as a unique and personal decoration or a thoughtful gift for someone special.
Remember, practice makes perfect, so don’t be discouraged if your first attempts are not as perfect as you’d like them to be. With time and practice, you will become more skilled at engraving glass with a rotary tool, allowing you to create stunning designs that are sure to impress.
Step 1: Gather Materials
Before you begin engraving glass with a rotary tool, it’s important to gather the necessary materials. Here are the items you’ll need:

- Glass surface: Choose a smooth glass surface that you want to engrave. It can be a vase, wine glass, or any other glass object.
- Rotary tool: You’ll need a rotary tool with a diamond engraving bit or a carbide point for engraving glass.
- Safety goggles and gloves: To protect your eyes and hands from any potential hazards.
- Masking tape: Use masking tape to create a stencil or to cover areas that you don’t want to engrave.
- Design template: If you want to engrave a specific design, print or draw it on paper to use as a reference.
- Soft cloth: To clean the glass surface before engraving and to wipe away any debris.
- Water and spray bottle: Fill a spray bottle with water to keep the glass surface and engraving bit wet during the process.
Once you have gathered all these materials, you can move on to the next step of the glass engraving process.
Step 2: Prepare the Glass Surface
Before you can start engraving the glass, it is important to properly prepare the surface to ensure clean and precise results. Follow these steps to prepare the glass surface:
Gather Your Materials
Make sure you have all the necessary materials before you begin. Here’s what you’ll need:
- A rotary tool with a diamond-tipped engraving bit
- Masking tape
- Isopropyl alcohol or glass cleaner
- Cotton pads or soft cloth
Clean the Glass
Start by cleaning the glass to remove any dirt, fingerprints, or oils that may interfere with the engraving process. If necessary, wash the glass with warm soapy water and dry it thoroughly.
Next, apply a small amount of isopropyl alcohol or glass cleaner to a cotton pad or soft cloth. Gently wipe the entire surface of the glass to remove any remaining residue. This step will ensure that the engraving bit will have proper contact with the glass.

Secure the Glass
To prevent the glass from moving or slipping while you engrave, it is important to secure it in place. One way to do this is by attaching masking tape to the edges of the glass and sticking it down onto a flat work surface. The masking tape will provide stability and prevent the glass from sliding during the engraving process.
Protect Yourself
Engraving glass can create small glass shards or dust, so it’s important to protect yourself. Make sure to wear safety glasses and work in a well-ventilated area to avoid inhaling any particles. Additionally, it may be helpful to tape a plastic sheet or newspaper around your work area to catch any glass fragments.
Verify the Surface
Lastly, before you begin engraving, inspect the glass surface for any blemishes or imperfections. If you notice any scratches or cracks, it’s best to choose a different piece of glass to ensure a smooth engraving process.
Once you have efficiently prepared the glass surface, you are ready to move on to the next step: choosing and practicing your design.
Step 3: Choose a Design
Now that you have gathered all your tools and prepared your glass surface, it’s time to choose a design for your engraving. The options are limitless, so let your creativity flow!

Here are a few ideas to get you started:
1. Monograms or Initials:
Consider engraving your own initials or monogram onto the glass. This adds a personal touch and makes the item truly unique.
2. Patterns or Geometric Shapes:
If you prefer a more abstract design, consider engraving patterns or geometric shapes onto the glass surface. These designs can add a modern and stylish touch to any piece.
3. Nature or Floral Designs:
If you love nature, consider engraving floral designs, leaves, or even an intricate landscape onto the glass. These designs can create a stunning and visually appealing effect.
4. Quotes or Inspirational Messages:
If you want to add a meaningful touch to your engraved glass, consider engraving a favorite quote or an inspirational message. This can make the item more personal and meaningful.

Remember, the design you choose should complement the glass item and its purpose. Take your time to brainstorm and sketch out different ideas before settling on the final design.
Once you have decided on a design, you are ready to move on to the next step: transferring the design onto the glass surface.
Questions and answers
What is a rotary tool?
A rotary tool is a handheld power tool that spins a replaceable rotary bit at a high speed, allowing you to perform various tasks like drilling, sanding, polishing, and engraving.
Can I use a regular rotary tool to engrave glass?
Yes, you can use a regular rotary tool to engrave glass, but you will need a specific engraving bit designed for glass. Using the wrong bit or too much pressure can cause the glass to crack or break.
How do I choose the right engraving bit for glass?
When choosing an engraving bit for glass, look for a diamond or carbide tip. Diamond tips are more durable and work well for intricate designs, while carbide tips are more affordable and suitable for general engraving. Make sure the bit is compatible with your rotary tool.
What safety precautions should I take when engraving glass?
When engraving glass, it is important to wear safety goggles to protect your eyes from glass shards. You should also work in a well-ventilated area or use a dust mask to avoid inhaling glass particles. Additionally, be careful with the rotary tool to avoid slipping and injuring yourself.


Meet Harrison Clayton, a distinguished author and home remodeling enthusiast whose expertise in the realm of renovation is second to none. With a passion for transforming houses into inviting homes, Harrison's writing at https://thehuts-eastbourne.co.uk/ brings a breath of fresh inspiration to the world of home improvement. Whether you're looking to revamp a small corner of your abode or embark on a complete home transformation, Harrison's articles provide the essential expertise and creative flair to turn your visions into reality. So, dive into the captivating world of home remodeling with Harrison Clayton and unlock the full potential of your living space with every word he writes.