How To Use Pneumatic Nailer

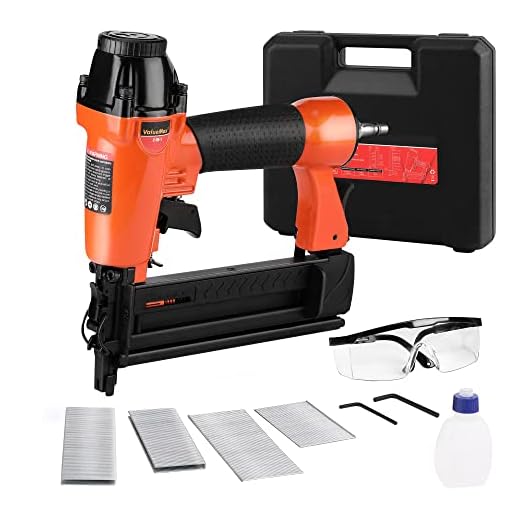
A pneumatic nailer, also known as an air nailer, is a powerful tool that uses compressed air to drive nails into various materials. It is an essential tool for construction, woodworking, and other DIY projects. If you are new to using a pneumatic nailer, it may seem intimidating at first, but with the right knowledge and practice, you can become proficient in no time.
Before you start using a pneumatic nailer, there are a few important steps to follow. First, ensure that you have the appropriate safety gear, such as safety glasses and ear protection. Next, inspect the nailer to make sure it is in good working condition and properly lubricated. Familiarize yourself with the different parts of the nailer, including the trigger, magazine, and depth adjustment settings.
Once you have prepared the nailer, it’s time to load the nails. Different nailers have different methods of loading nails, so consult the manufacturer’s instructions for your specific model. Typically, you will need to slide open the magazine, insert a strip of nails, and then close the magazine securely. Make sure the nails are loaded correctly and that they are the appropriate length for your project.
Tips for Efficient Use of Pneumatic Nailer
Using a pneumatic nailer can significantly speed up your carpentry and construction projects. To ensure the best results and maximize efficiency, here are some tips for proper usage:
- Choose the right nail size: Different projects require different nail sizes. Make sure to match the nail size to the materials you are working with. Using nails that are too short or too long can result in weak joints or damage to the material.
- Use the appropriate pressure: Check the recommended pressure range for your pneumatic nailer and adjust it accordingly. Using too much pressure can cause the nail to go too deep, while too little pressure may result in the nail not fully engaging with the material.
- Clean and lubricate regularly: Regularly clean and lubricate your pneumatic nailer to ensure smooth operation. Dust and debris can accumulate over time, leading to jams or misfires. Use compressed air to blow away any dirt and apply a few drops of oil to the nailer’s moving parts.
- Avoid overloading: Do not load too many nails into the nailer’s magazine at once. Overloading can cause jams and disrupt the feeding mechanism. Follow the manufacturer’s guidelines for the maximum nail capacity.
- Properly position the nailer: Position the nailer perpendicular to the material surface and firmly press it against the material before pulling the trigger. This will ensure the nail is driven straight and prevent it from bending or going off course.
- Practice safety measures: Always wear safety goggles and gloves when using a pneumatic nailer. Keep your fingers away from the trigger when not in use to prevent accidental firing. Be mindful of your surroundings and never aim the nailer at anyone.
By following these tips, you can improve your efficiency and achieve better results when using a pneumatic nailer. Remember to always read and follow the manufacturer’s instructions for your specific model to ensure safe and proper usage.

Safety Precautions when Operating a Pneumatic Nailer
When using a pneumatic nailer, it is important to prioritize safety to prevent accidents and injuries. Follow these precautions to ensure safe operation:
1. Wear Safety Gear: Always wear safety goggles or a face shield to protect your eyes from flying debris. Additionally, wear ear protection to guard against noise-induced hearing damage. Gloves will help protect your hands from splinters and potential injuries.
2. Familiarize Yourself with the Tool: Read and understand the user manual provided by the manufacturer. Ensure you are fully aware of how the pneumatic nailer functions and its safety features.
3. Inspect the Nailer: Before each use, inspect the nailer for any damage or wear. Ensure that all safety devices are in place and functioning correctly. If any issues are detected, do not use the nailer and have it repaired or replaced as needed.
4. Use the Correct Type of Nail: Always use the appropriate type and size of nail recommended by the manufacturer. Using the wrong size or type may lead to nail jams or other malfunctions.

5. Secure Your Workpiece: Before nailing, make sure your workpiece is properly secured to prevent it from moving or shifting during operation. This will help prevent accidental injury and ensure accurate nailing.
6. Keep Hands Clear: Keep your hands and fingers clear of the nailing area. Do not place your hand near the nailer’s tip or within the trajectory of the nails. Maintaining a safe distance will prevent injuries.
7. Disconnect Air Supply: When not in use, always disconnect the pneumatic nailer from the air supply. This will prevent accidental discharges and unauthorized use.
8. Store Safely: Store the nailer in a secure and dry place. Keep it away from children and unauthorized users.
9. Use a Secure Grip: Hold the nailer firmly and maintain a stable grip when operating. This will help you have better control over the tool and prevent accidents.

10. Follow Manufacturer’s Instructions: Lastly, always adhere to the manufacturer’s instructions and recommendations for safe and proper use of the pneumatic nailer.
By following these safety precautions, you can ensure safe operation and minimize the risk of accidents when using a pneumatic nailer.
Choosing the Right Nails for Your Pneumatic Nailer
When using a pneumatic nailer, it is crucial to select the right nails for the job. The type and size of nails you choose will depend on the project at hand and the material you are working with. Here are some factors to consider when selecting nails for your pneumatic nailer:
1. Nail Gauge
The gauge of a nail refers to its thickness. Gauge sizes typically range from 15 to 23, with lower numbers indicating thicker nails. Thicker nails provide more holding power and are suitable for heavy-duty applications, while thinner nails are better for lighter jobs. Choose a nail gauge that matches the strength requirements of your project.
2. Nail Length
The length of the nail is another important consideration. It is essential to choose a nail that is long enough to penetrate the material being fastened securely. Using nails that are too short may result in weak connections, while using nails that are too long may cause damage to the material or hinder the functionality of the nailer. Refer to the manufacturer’s recommendations or consult a professional to determine the appropriate nail length for your intended use.

3. Nail Type
There are various types of nails available for pneumatic nailers. Common types include framing nails, finish nails, brads, and staples. Each nail type is designed for specific applications. Framing nails, for example, are suitable for heavy-duty framing and construction work, while finish nails are better for trim work and delicate applications. Consider the nature of your project and choose nails that are appropriate for the task at hand.
Once you have considered the gauge, length, and type of nails needed, it is essential to ensure they are compatible with your specific pneumatic nailer. Consult the nailer’s user manual or contact the manufacturer for recommended nail specifications. Using the wrong nails can result in poor performance, damage to the nailer, or even safety hazards.
Remember to always wear safety goggles and follow proper safety precautions when using a pneumatic nailer. Choosing the right nails for your nailer ensures optimal performance and helps you achieve professional results in your woodworking or construction projects.
Proper Technique for Loading Nails into a Pneumatic Nailer
Using a pneumatic nailer can save you time and effort when it comes to securing materials together. However, it is essential to know the proper technique for loading nails into the nailer to ensure safe and efficient operation.
1. Choose the Correct Type and Size of Nails
Before loading nails into the pneumatic nailer, it is crucial to select the right type and size of nails for your project. Different nailers require different types of nails, so refer to the manufacturer’s instructions or the nailer’s packaging for guidance.
Ensure that the nails are compatible with your nailer’s magazine and have the appropriate length and gauge for the materials you are working with. Using incorrect nails can lead to jamming, misfires, or damage to the nailer.
2. Prepare the Nail Magazine
Start by disconnecting the nailer from the air supply to prevent accidental firing. Then, open the magazine by following the manufacturer’s instructions. Most nailers have a latch or release mechanism that allows you to access the nail magazine.
Check inside the magazine for any remaining nails, debris, or obstructions. Remove any foreign objects and ensure the magazine is clean and free from obstruction before loading new nails.
3. Load the Nails
Take a strip of nails and align them with the feeder spring inside the magazine. The feeder spring guides the nails towards the firing mechanism. Ensure that the nails are facing the correct direction, with the nail heads at the back and the pointed ends towards the front.
Gently push the nails into the magazine while applying slight downward pressure to keep them aligned with the spring. Continue loading the nails until the magazine is full or reaches the recommended capacity, as indicated by the manufacturer or the nailer’s packaging.

It is crucial not to overload the magazine, as doing so can jam the nailer or cause misfires. Too few nails in the magazine can also result in inconsistent firing and wasted time reloading.
4. Close the Magazine and Reconnect the Air Supply
Once the nails are loaded, close the magazine and make sure it latches securely. Double-check that no nails are protruding from the nailer’s tip, as this can cause damage or injuries during operation.
With the magazine closed, reconnect the pneumatic nailer to the air supply and ensure that the pressure is set according to the manufacturer’s recommendations.
Remember to wear appropriate safety gear, such as safety glasses and ear protection, before operating the pneumatic nailer.
By following these steps and using the proper technique for loading nails into a pneumatic nailer, you will be able to work efficiently and safely, making every task with the nailer a breeze.

Adjusting the Depth of Drive on a Pneumatic Nailer
A pneumatic nailer is a powerful tool that can be used for various construction and woodworking projects. One important feature of a pneumatic nailer is the ability to adjust the depth of drive. Adjusting the depth of drive allows you to control how deep the nails are driven into the material. This is crucial for ensuring that your nails are properly set without damaging the material.
To adjust the depth of drive on a pneumatic nailer, follow these steps:
| 1. | First, disconnect the nailer from the air supply to prevent any accidental firing. |
| 2. | Locate the depth adjustment dial or screw on your nailer. This could be located on the top or side of the nailer, depending on the model. |
| 3. | Using a screwdriver or your fingers, adjust the depth adjustment dial or screw. Turning it clockwise will increase the depth of drive, while turning it counterclockwise will decrease the depth of drive. |
| 4. | Test the depth of drive by firing a nail into a scrap piece of material. Check the depth of the nail and adjust accordingly if needed. |
| 5. | Once you have achieved the desired depth of drive, reattach the nailer to the air supply and continue using it for your project. |
When adjusting the depth of drive, it’s important to keep in mind the type and thickness of the material you are working with. Thicker materials may require a deeper depth of drive to ensure proper nail penetration, while softer materials may require a shallower depth to prevent overdriving the nails.
By properly adjusting the depth of drive on your pneumatic nailer, you can ensure that your nails are driven to the correct depth, resulting in a more professional and secure finish to your project.
Maintaining and Troubleshooting a Pneumatic Nailer
A pneumatic nailer is a valuable tool for any construction or woodworking project. However, like any tool, it requires regular maintenance to ensure it performs at its best. Here are some tips for maintaining and troubleshooting a pneumatic nailer:
Cleaning and Lubricating
To keep your pneumatic nailer in good working condition, clean it regularly and lubricate the moving parts. Start by disconnecting the tool from the air supply and releasing any remaining pressure. Use a soft brush or cloth to remove dirt, dust, and debris, paying attention to the magazine and nosepiece. Apply a few drops of pneumatic tool oil to the tool’s air inlet, following the manufacturer’s instructions. This will help lubricate the internal components and prevent rust.
Inspecting and Replacing Parts
Regularly inspect your pneumatic nailer for damaged or worn parts. Check the air hoses for cracks or leaks and replace them if necessary. Inspect the nail magazine and any additional parts such as the driver and bumper for signs of wear. Replace any damaged or worn parts to ensure the tool operates smoothly and safely.
Adjusting Air Pressure
In some cases, the air pressure supplied to the nailer may need adjustment. If the nails are not properly driven into the material or if there are frequent jams, you may need to adjust the air pressure. Consult the tool’s manual to determine the recommended pressure range and make the necessary adjustments using a pressure regulator.
Troubleshooting Common Issues
If you encounter problems with your pneumatic nailer, there are a few common issues you can troubleshoot. If the tool misfires or fails to cycle properly, check the depth adjustment and make sure it is set correctly. If the nailer is double firing, adjust the sequential trip mechanism to prevent multiple nails from being fired with one trigger pull. If the tool is jamming frequently, inspect the nails for bends or inconsistencies, and use the correct nail size and type for the intended application.
| Problem | Possible Cause | Solution |
|---|---|---|
| Misfires or failure to cycle | Incorrect depth adjustment | Adjust depth setting |
| Double firing | Improper sequential trip mechanism | Adjust mechanism to prevent double firing |
| Frequent jamming | Bent or incorrect nails | Inspect nails and use correct size and type |
Safe Usage and Storage
Always prioritize safety when using a pneumatic nailer. Wear appropriate safety gear, such as safety glasses and hearing protection. Keep your fingers away from the trigger and avoid pointing the tool at yourself or others. When not in use, store the nailer in a clean and dry place, away from extreme temperatures and moisture.
By following these maintenance and troubleshooting tips, you can ensure your pneumatic nailer remains in optimal condition and continues to deliver reliable performance on your projects.
Common Applications for a Pneumatic Nailer
A pneumatic nailer, also known as an air nailer, is a powerful tool that uses compressed air to drive nails into various materials with ease and precision. It is commonly used in construction, woodworking, and home improvement projects. Here are some of the common applications for a pneumatic nailer:
| Application | Description |
|---|---|
| 1. Framing | Pneumatic nailers are often used in framing projects to quickly and securely attach wooden studs, beams, and joists. The high-powered nailer can drive large framing nails into the wood, creating a strong and sturdy frame. |
| 2. Siding Installation | When installing siding, a pneumatic nailer can make the process much faster and more efficient. It can easily drive nails through the siding material and into the wall studs, ensuring a secure and professional-looking installation. |
| 3. Roofing | In roofing projects, pneumatic nailers are commonly used to attach shingles, tiles, or metal roofing panels to the roof surface. The nailer can quickly and accurately drive nails into the roofing material, providing a strong and weather-resistant roof. |
| 4. Flooring Installation | When installing hardwood, laminate, or engineered flooring, a pneumatic nailer is the tool of choice. It can drive nails at the perfect angle and depth to securely attach the flooring to the subfloor. This results in a professional-looking installation with minimal effort. |
| 5. Trim and Molding | Pneumatic nailers are also widely used for installing trim and molding in homes and buildings. The nailer can quickly and precisely drive nails into the trim and attach it to the walls or other surfaces, providing a clean and finished look. |
These are just a few examples of the common applications for a pneumatic nailer. With its power and efficiency, this versatile tool can greatly speed up the construction and installation process, saving time and effort for both professional contractors and DIY enthusiasts.
Questions and answers
What is a pneumatic nailer?
A pneumatic nailer is a type of tool that uses compressed air to drive nails into various materials, such as wood or metal. It is commonly used in construction and woodworking tasks.
How does a pneumatic nailer work?
A pneumatic nailer works by using compressed air to create a force that drives the nail into the material. When the trigger is pulled, the air pressure is released and forces the piston to move, which then drives the nail into the material. The process is quick and efficient.
What are the benefits of using a pneumatic nailer?
Using a pneumatic nailer has several benefits. Firstly, it allows for faster and more accurate nailing compared to using a hammer. It also reduces the risk of accidental damage to the material or injury to the user. Additionally, a pneumatic nailer provides consistent and even nailing pressure, resulting in a higher quality finish.
How do I choose the right pneumatic nailer for my project?
When choosing a pneumatic nailer, consider the type of project you will be undertaking and the size and type of nails you will be using. Different nailers are designed for specific purposes, such as framing, finishing, or roofing. It is important to choose one that suits your needs and has the necessary features and specifications for your project.
What are some safety tips for using a pneumatic nailer?
When using a pneumatic nailer, it is important to wear safety goggles and ear protection to protect yourself from flying debris and loud noises. Always keep your hands clear of the nailer’s striking zone and never point the nailer at yourself or others. Make sure to read and follow the manufacturer’s instructions for safe operation and maintenance of the tool.


Meet Harrison Clayton, a distinguished author and home remodeling enthusiast whose expertise in the realm of renovation is second to none. With a passion for transforming houses into inviting homes, Harrison's writing at https://thehuts-eastbourne.co.uk/ brings a breath of fresh inspiration to the world of home improvement. Whether you're looking to revamp a small corner of your abode or embark on a complete home transformation, Harrison's articles provide the essential expertise and creative flair to turn your visions into reality. So, dive into the captivating world of home remodeling with Harrison Clayton and unlock the full potential of your living space with every word he writes.


