How To Use A Nailer With An Air Compressor

If you’re a beginner in the world of DIY projects or woodworking, using a nailer with an air compressor may seem intimidating at first. However, once you understand the basics, it becomes an essential tool in your arsenal for accomplishing various tasks with ease and efficiency.
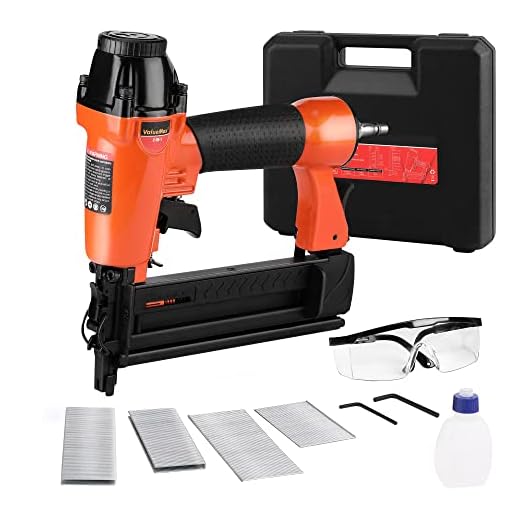
A nailer, also known as a nail gun, is a power tool that eliminates the need for hammering nails manually. It uses compressed air from an air compressor to drive nails into different materials, such as wood, plastic, or metal. By using a nailer, you can save time and effort, ensuring that your projects are completed quickly and professionally.
Before you start using a nailer with an air compressor, it’s crucial to familiarize yourself with the different types of nailers available. Brad nailers, finish nailers, and framing nailers are some common types, each designed for specific applications. Understanding which nailer to use for a particular project is essential for achieving the desired results.
Once you have selected the appropriate nailer, the next step is to connect it to an air compressor. Make sure to read the manufacturer’s instructions carefully to ensure proper setup and safety. Attach the nailer to the air compressor using the provided hose and fittings, ensuring a secure connection. Adjust the air pressure according to the recommendations for your specific nailer and project.
Now that your nailer is connected to the air compressor, it’s time to start using it. Place the tip of the nailer against the surface you want to nail and firmly press the trigger. The nailer will drive the nail into the material in a fraction of a second. Repeat the process for each nail, keeping a steady hand and maintaining proper positioning to ensure accuracy.

Remember to always wear safety goggles and gloves when using a nailer with an air compressor. This will protect you from any potential flying debris and ensure your safety throughout the project. Additionally, regularly clean and maintain your nailer and air compressor to keep them in optimal condition for efficient and reliable performance.
Using a nailer with an air compressor may seem daunting at first, but with practice and knowledge of the tool, it becomes an invaluable asset for any DIY enthusiast or professional. Whether you’re working on a small woodworking project or undertaking a larger construction task, a nailer with an air compressor will help you achieve precise and efficient results, making your projects a breeze.
What is a nailer with an air compressor?
A nailer with an air compressor is a powerful tool that is used to drive nails into various materials, such as wood or metal. The nailer is connected to an air compressor via a hose, which provides the pressure needed to drive the nails into the material. This type of nailer is also known as a pneumatic nailer or an air-powered nailer.
The air compressor generates compressed air which is stored in a tank. When the nailer is triggered, the compressed air is released in a controlled manner, pushing the nail into the material with great force. This makes the task of driving nails much easier and faster compared to using a manual hammer.
Nailers with air compressors are available in different sizes and styles, depending on the specific application. Some popular types include framing nailers, brad nailers, and finish nailers. Framing nailers are used for heavy-duty carpentry work, such as building frames or installing subfloors. Brad nailers are designed for smaller, more delicate tasks like attaching trim or molding. Finish nailers are commonly used for precision work, such as installing baseboards or crown molding.

Using a nailer with an air compressor offers several advantages over other types of nailers. The compressed air provides consistent power, allowing for precise control and placement of the nails. The force generated by the air compressor also allows for quick and efficient nailing, saving time and effort. Additionally, pneumatic nailers often have a larger magazine capacity, meaning they can hold more nails at once, further increasing productivity.
However, it’s important to note that using a nailer with an air compressor requires some knowledge and practice. Proper safety precautions must be followed, such as wearing protective goggles and ear protection. The air pressure should be adjusted accordingly based on the material being nailed and the specific nailer being used. Regular maintenance of the nailer and air compressor is also necessary to ensure optimal performance.
- Powerful tool used to drive nails into various materials
- Connected to an air compressor via a hose
- Compressed air is released to drive the nails
- Available in different sizes and styles for specific applications
- Offers consistent power and precise control
- Allows for quick and efficient nailing
- Requires knowledge, practice, and proper safety precautions
Choosing the right nailer
When it comes to using a nailer with an air compressor, choosing the right nailer for your project is crucial. There are several factors to consider when selecting a nailer, including the type of work you will be doing, the size of the nails you will be using, and the power source you prefer.
Type of work
The first thing to determine is the type of work you will be doing with the nailer. Different nailers are designed for specific applications, such as framing, finishing, or roofing. Each type of nailer has its own unique features and capabilities, so it’s important to choose one that is suited to the type of work you will be performing.
Nail size
The size of the nails you will be using is another important consideration. Nailers are typically compatible with a specific range of nail sizes, so be sure to choose one that supports the size you require for your project. Using the wrong size nails can result in improper nail placement or even damage to the tool.

Power source
There are two main types of nailers based on their power source: pneumatic nailers and cordless nailers. Pneumatic nailers rely on an air compressor to generate power, while cordless nailers are powered by batteries or fuel cells. Consider the portability, convenience, and cost factors when deciding between the two options.
In conclusion, choosing the right nailer is essential for successful and efficient use with an air compressor. By considering the type of work, nail size, and power source, you can select a nailer that is best suited for your project and achieve professional results.
Types of nailers
There are several types of nailers available on the market that can be used with an air compressor. Each type is designed for specific applications and offers its own set of advantages and disadvantages.
1. Brad nailer
A brad nailer is a versatile tool that is commonly used for delicate or detailed woodworking projects. It uses thin brad nails that leave smaller holes and reduce the risk of splitting the wood. Brad nailers are perfect for attaching trim, molding, and other similar materials.
2. Finish nailer
A finish nailer is a heavier-duty tool that is used for larger and more durable fastenings. It uses thicker finish nails that provide stronger hold and are suitable for attaching baseboards, crown molding, and other heavy-duty applications. Finish nailers are commonly used in construction and carpentry.

3. Framing nailer
A framing nailer is a powerful tool primarily used for building frames, constructing walls, and other heavy-duty tasks. It uses long and large nails called framing nails that offer maximum grip strength. Framing nailers are commonly used in construction and can drive nails into hard materials like a breeze.
Other types of nailers include flooring nailers, roofing nailers, and upholstery nailers, each designed for specific purposes. It is important to choose the right type of nailer for your project to ensure efficient and reliable fastening.
Remember to always follow the manufacturer’s instructions and safety guidelines when using a nailer with an air compressor. Proper safety precautions, such as wearing safety goggles and hearing protection, should be taken to avoid any accidents or injuries.
Setting up your air compressor
Before you can start using your nailer with an air compressor, you need to properly set up your compressor. Here are some steps to follow:
| Step | Description |
|---|---|
| 1 | Choose a suitable location for your air compressor. Ensure that it is placed on a stable surface and has enough space for ventilation. |
| 2 | Check the oil level in your compressor and add oil if necessary. This ensures proper lubrication for the compressor pump. |
| 3 | Connect the air hose to the compressor’s outlet port and make sure it is securely fastened. |
| 4 | Attach the other end of the air hose to the inlet port of your nailer. Again, ensure it is securely connected. |
| 5 | Plug in the power cord of your air compressor and turn it on. Allow the compressor to build up pressure. |
| 6 | Adjust the pressure regulator on the air compressor to the desired pressure for your nailer. Consult the nailer’s user manual for the recommended pressure range. |
| 7 | Make sure there are no leaks in the air hose connections. If you notice any leaks, tighten the connections or replace any damaged parts. |
| 8 | Once your air compressor is properly set up, you are ready to use your nailer. Remember to always wear safety goggles and follow the manufacturer’s instructions for operating the nailer safely. |
Following these steps will ensure that your air compressor is set up correctly and ready to use with your nailer. Taking the time to properly set up your equipment will help to prevent any potential issues and ensure optimal performance.

Connecting the nailer to the air compressor
Before you can start using your nailer with an air compressor, you need to properly connect the two together. Follow these steps to ensure a secure connection:
- Make sure the air compressor is turned off and disconnected from the power source.
- Locate the air inlet on your nailer. This may vary depending on the model, but it is usually located near the trigger or handle.
- Inspect the air inlet to ensure it is clean and free from debris. Use a small brush or compressed air to remove any dirt or dust.
- Take the air hose that is connected to your compressor and locate the quick-connect fitting. This is the part that will connect to the nailer.
- Hold the nailer and align the male end of the quick-connect fitting with the air inlet on the nailer.
- Push the two ends together and make sure they are securely connected. You should hear a click or feel a slight resistance when they lock into place.
- Once the connection is secure, turn on the air compressor and allow it to build up pressure.
- Adjust the air pressure on the compressor to the recommended level for your nailer. This information can usually be found in the user manual or on the manufacturer’s website.
With the nailer connected to the air compressor, you are now ready to start using it for your woodworking or construction projects. Remember to always follow safety guidelines and wear appropriate protective gear when operating power tools.
Using the nailer with an air compressor
Using a nailer with an air compressor can greatly simplify and expedite various woodworking and construction projects. The air compressor provides the necessary power to drive nails into different materials quickly and efficiently. Here are the steps to properly use a nailer with an air compressor:
1. Choose the appropriate nailer and compressor
The first step is to select the right nailer and compressor for the project at hand. Consider the size and type of nails needed, as well as the power requirements of the nailer. Ensure that the air compressor has the capacity to supply enough air pressure for the nailer to operate effectively.
2. Set up the air compressor
Before using the nailer, set up the air compressor by placing it on a stable surface and connecting it to a power source. Ensure that the compressor has enough oil and is properly lubricated, as this will prolong its lifespan and prevent any issues during operation. Adjust the air pressure according to the manufacturer’s recommendations for the nailer being used.
3. Attach the nailer to the air compressor
Next, attach the nailer to the air compressor by inserting the air hose into the designated connector on the nailer. Ensure that the connection is secure and tight to prevent any air leaks during operation. Check that the nailer’s safety features are properly functioning before moving on to the next step.
4. Load the nails into the nailer
Load the appropriate nails into the nailer’s magazine or chamber according to the manufacturer’s instructions. Make sure to use the proper size and type of nails for the project to achieve the desired results. Close and secure the nailer’s magazine or chamber, ensuring that the nails are held in place securely.
5. Test the nailer
Before using the nailer on the actual project, test it on a scrap piece of material to ensure that it is functioning properly. Adjust the air pressure if necessary to achieve the desired nail depth. Familiarize yourself with the nailer’s controls and safety features to ensure safe and accurate operation.
6. Begin nailing
Once the nailer has been tested and is ready to use, begin nailing by positioning the nailer over the area where the nail is to be driven. Apply firm pressure to the nailer and pull the trigger to release the compressed air and drive the nail into the material. Repeat this process as needed to complete the project.
| Tips and precautions: |
|---|
| – Always wear appropriate safety gear, including safety glasses and hearing protection, when operating a nailer with an air compressor. |
| – Keep your fingers clear of the nailer’s firing area to avoid injury. |
| – Regularly clean and maintain the nailer and air compressor to ensure their optimal performance and longevity. |

Proper technique for using a nailer
- Prepare the work area
- Choose the right nailer and nails
- Prepare the nailer and compressor
- Hold the nailer correctly
- Align the nail and aim
- Press the trigger and release
- Follow safety precautions
- Inspect and adjust as needed
Before using a nailer, ensure that the work area is clutter-free and well-lit. Clear any debris or objects that may obstruct your movement during the nailing process. It is also important to wear appropriate safety gear, including safety glasses and ear protection.
There are different types of nailers available, such as framing nailers, finish nailers, and brad nailers. Select the nailer that is suitable for the task at hand. Additionally, choose the right size and type of nails for your project, as different materials and applications may require different nail sizes.
Check that the nailer and air compressor are properly connected and in good working condition. Ensure that the air compressor is set to the recommended pressure for the nailer you are using. Refer to the manufacturer’s instructions for specific guidance.
Grip the nailer firmly but comfortably, ensuring that your hand is away from the trigger. Keep your fingers away from the contact tip to prevent accidental firing. Practice a steady and controlled hand position to maintain accuracy and reduce the risk of injury.
Position the nailer so that the contact tip is aligned with the desired location for the nail. Hold the nailer perpendicular to the surface and aim for the target by looking through the nailer’s sight or relying on your experience and judgment.
Once you have aimed and aligned the nailer, gently press the trigger to release a single nail. Maintain a consistent pressure on the trigger for a continuous nailing action, but be cautious not to apply too much force, as it may cause the nail to sink too deep or damage the material.
Always be mindful of your surroundings while using a nailer. Avoid pointing the nailer towards yourself or others. Keep your fingers away from the nailer’s contact tip and keep a safe distance from any obstructions. If using a pneumatic nailer, be cautious of the air hose to prevent tripping or entanglement.
Regularly check the nailer and nails for any damage or defects that may affect their performance or safety. If necessary, make any adjustments or repairs before continuing to use the nailer. Proper maintenance and care of your tools are essential to ensure optimal performance and safety.
By following these proper techniques, you can effectively and safely use a nailer with an air compressor for various projects. Remember to always consult the manufacturer’s instructions and exercise caution when operating power tools.
Questions and answers
What is a nailer?
A nailer is a power tool that is used to drive nails into various materials, such as wood or concrete. It is a convenient tool that saves time and effort compared to traditional hammering.
What is an air compressor and how does it work with a nailer?
An air compressor is a machine that converts power into potential energy stored in compressed air. It works with a nailer by providing the necessary air pressure to drive the nails. The compressor powers the nailer by delivering compressed air through a hose, which pushes the nailer’s piston and drives the nails into the material.


Meet Harrison Clayton, a distinguished author and home remodeling enthusiast whose expertise in the realm of renovation is second to none. With a passion for transforming houses into inviting homes, Harrison's writing at https://thehuts-eastbourne.co.uk/ brings a breath of fresh inspiration to the world of home improvement. Whether you're looking to revamp a small corner of your abode or embark on a complete home transformation, Harrison's articles provide the essential expertise and creative flair to turn your visions into reality. So, dive into the captivating world of home remodeling with Harrison Clayton and unlock the full potential of your living space with every word he writes.


