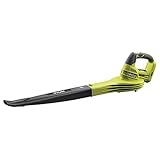
How To Load Ryobi Airstrike Finish Nailer

The Ryobi Airstrike Finish Nailer is a powerful tool that makes finishing carpentry projects a breeze. Whether you’re installing baseboards, crown molding, or trim, this nailer is perfect for the job. But before you can start nailing, you need to know how to properly load the tool.
First, make sure the nailer is turned off and disconnected from any power source. This is crucial for your safety. Next, locate the magazine release button on the back of the nailer. Press and hold the button to release the magazine. Pull the magazine out of the nailer and set it aside.
Now, it’s time to load the nails. Take a strip of compatible finish nails and align them with the magazine rails. The nails should be inserted with the heads facing up. Push the nails all the way into the magazine until they reach the end. Make sure they are snugly in place.
Once the nails are loaded, reattach the magazine to the nailer by sliding it back into place until it clicks. Give it a gentle pull to ensure it is securely attached. Now, you’re ready to start nailing! Just remember to always wear safety goggles and follow proper safety precautions when using any power tool.
The Complete Guide to Loading the Ryobi Airstrike Finish Nailer
The Ryobi Airstrike Finish Nailer is a versatile and powerful tool for all your finish nailing needs. It is important to properly load the nailer to ensure safe and efficient operation. Follow these steps to correctly load your Ryobi Airstrike Finish Nailer:

- Gather your supplies: Before you begin, make sure you have all the necessary supplies. This includes the Ryobi Airstrike Finish Nailer, nails compatible with the nailer, and safety glasses.
- Prepare the nailer: Ensure that the nailer is turned off and disconnected from any power source. This is crucial to prevent accidental firing during the loading process.
- Open the magazine: Locate the magazine release lever on the back of the nailer. Slide the lever down or push it in, depending on the model, to release the magazine. The magazine should now slide out easily.
- Prepare the nails: Take a strip of nails compatible with your nailer and orient them so that the nail heads face down. This will ensure that the nails will be properly fed into the nailer.
- Load the nails into the magazine: Place the strip of nails into the magazine, making sure that the heads of the nails are engaged with the feeder mechanism. Push the strip of nails all the way to the back of the magazine until it is snugly in place.
- Close the magazine: Slide the magazine back into the nailer until it locks into place. You may need to apply some pressure to ensure that it is securely attached.
- Test the nailer: With the magazine securely attached, turn on the nailer and engage the safety mechanism. Depress the contact trip, located near the tip of the nailer, against a solid surface. The nailer should fire a nail into the surface. If it does not, consult the user manual for troubleshooting tips.
- Proceed with caution: Remember to always wear safety glasses when operating the Ryobi Airstrike Finish Nailer. Keep your hands clear of the contact trip and never point the nailer at yourself or others.
By following these steps, you will be able to safely and effectively load your Ryobi Airstrike Finish Nailer. Always consult the user manual for specific instructions and safety guidelines for your particular model.
Unpack and Inspect the Nailer
Before you begin using your Ryobi Airstrike Finish Nailer, it is important to unpack and inspect the tool to ensure that everything is in proper working order. Follow these steps to get started:
- Remove the nailer from its packaging carefully.
- Inspect the tool for any visible damage or defects. Pay close attention to the handle, magazine, and trigger area.
- Check all the moving parts to make sure they are functioning properly, such as the depth adjustment dial and jam release lever.
- Ensure that the battery and fuel cell are properly inserted and secure.
- Examine the nails that came with the nailer. Make sure they are the correct size and in good condition.
If you notice any issues during the inspection, contact the manufacturer or retailer for further assistance. It is important to start with a properly functioning tool to ensure safe and efficient operation.
Prepare the Nailer for Loading
Before loading your Ryobi Airstrike Finish Nailer with nails, it’s important to ensure that the nailer is prepared correctly. Follow these steps:
- Turn off the nailer by switching the power button to the “Off” position.
- Disconnect the nailer from the air supply by removing the air hose.
- Check the magazine to ensure that it is empty and free from any nails or debris. If there are any nails or debris present, remove them carefully.
- Inspect the nailer for any signs of damage or wear. It’s important to replace any damaged or worn parts before loading the nailer.
- Clean the nailer by wiping it down with a clean cloth or brush to remove any dirt or dust that may interfere with the proper operation of the tool.
Once you have prepared the nailer following these steps, it will be ready to load with nails for your finishing projects.

Choose the Right Nail Type
When loading the Ryobi Airstrike Finish Nailer, it’s important to choose the correct nail type for your project. Different nail types are designed for specific applications and materials, so selecting the right one will ensure a successful and professional finish.
Here are some considerations to keep in mind when choosing the right nail type:
1. Length
The length of the nail should be appropriate for the thickness of the material you’re working with. If the nail is too short, it won’t hold securely. If it’s too long, it may damage the surface or protrude out the other side. Measure the thickness of the material and select a nail length that allows the nail to penetrate securely without going too deep or coming out the other side.
2. Gauge
The gauge of the nail refers to its diameter. Thicker gauges offer more holding power, but they may also be more visible. Thinner gauges are less noticeable but may not provide as much strength. Consider the strength requirements of your project and choose a nail gauge accordingly.
It’s important to note that not all nail types are compatible with the Ryobi Airstrike Finish Nailer. The recommended nail types for this tool include 15-gauge angled finish nails and 16-gauge straight finish nails. Using the wrong nail type can result in jams or improper firing.

Always refer to the manufacturer’s instructions and guidelines for specific recommendations on nail types for your Ryobi Airstrike Finish Nailer. Additionally, wearing appropriate safety gear, such as protective eyewear, is essential when working with power tools and nails.
Open the Nail Magazine
Before loading the Ryobi Airstrike Finish Nailer, you will need to open the nail magazine. The nail magazine is located at the bottom of the nailer and is where the nails are stored.
- Make sure that the nailer is turned off and disconnected from any power source.
- Locate the latch or release button on the nail magazine. This may vary depending on the model of the nailer.
- Press the latch or release button and slide it downward to open the nail magazine.
- Once the nail magazine is open, check for any remaining nails from previous use. Remove any leftover nails before proceeding.
- Inspect the nail magazine for any dust or debris. It is important to keep the magazine clean to avoid any potential jamming.
- Close the nail magazine by pushing it upward until it clicks into place. Ensure that it is securely closed.
Now that the nail magazine is open and inspected, you are ready to load the nails and start using the Ryobi Airstrike Finish Nailer.
Load the Nail Strip
To load the nail strip into the Ryobi Airstrike Finish Nailer, follow these steps:
- Make sure the nailer is turned off and disconnected from any power source.
- Locate the nail strip magazine on the nailer. It is located on the bottom of the tool.
- Push the magazine release lever to open the magazine.
- Insert the nail strip into the magazine with the nail heads facing down.
- Push the nail strip all the way to the back of the magazine until it cannot go any further.
- Close the magazine by pushing the magazine release lever back into place.
Now that you have successfully loaded the nail strip, you can turn on the nailer and begin using it for your finishing projects.
Test the Nailer and Start Nailing!
Before starting any nailing project, it’s important to test the Ryobi Airstrike Finish Nailer to ensure it’s working properly. Follow these steps to test and start nailing:
|
1. Load the Nailer: If you haven’t already, make sure the nail magazine is loaded with the correct size finish nails. |
2. Power on the Nailer: Turn on the power switch located on the handle of the nailer. You should see the indicator light turn on, indicating that the nailer is powered up. |
|
3. Adjust the Depth: Depending on your project, you may need to adjust the depth of the nailer. Use the depth adjustment wheel located near the nose of the nailer to set the appropriate depth. |
4. Position the Nailer: Hold the nailer securely with both hands, making sure your fingers are away from the nail magazine and the nose of the nailer. |
|
5. Press the Trigger: 
£29.99
3 new from £29.99
9 used from £23.44
as of February 15, 2024 8:26 pm
Amazon.co.uk
Gently press the trigger to test the nailer. You should hear a slight noise and see a nail being driven into your test material. |
6. Adjust as Needed: If the nail doesn’t go in all the way or if it sinks too deep, adjust the depth setting accordingly. |
|
7. Start Nailing: Once you’ve tested the nailer and made any necessary adjustments, you’re ready to start nailing! Position the nailer at a 90-degree angle to the surface and gently press the trigger to drive the nails into the material. 
£164.95
3 new from £164.95
2 used from £152.66
as of February 15, 2024 8:26 pm
Amazon.co.uk
|
|

Always wear appropriate safety gear, such as safety glasses and hearing protection, when using power tools. Follow all manufacturer’s guidelines and instructions for safe operation of the Ryobi Airstrike Finish Nailer.
Now that you know how to test the nailer and start nailing, you can confidently take on your finishing projects with the Ryobi Airstrike Finish Nailer!
Questions and answers
What is a Ryobi Airstrike Finish Nailer?
A Ryobi Airstrike Finish Nailer is a type of power tool that is used for driving nails into wood or other materials. It is cordless and operates using a rechargeable battery, making it convenient and portable.
How do I load nails into my Ryobi Airstrike Finish Nailer?
To load nails into your Ryobi Airstrike Finish Nailer, first, remove the battery from the tool. Then, locate the nail compartment on the side of the tool and open it. Insert the nails, making sure they are aligned properly. Close the nail compartment and reattach the battery. Your nailer is now loaded and ready to use.
Can I use any type of nails with my Ryobi Airstrike Finish Nailer?
No, you cannot use any type of nails with your Ryobi Airstrike Finish Nailer. It is designed to be used with 16-gauge straight finish nails that are between 3/4 inch and 2 1/2 inches in length. Using the wrong type or size of nails can result in damage to the nailer or a poor-quality finish.


Harrison Clayton
Meet Harrison Clayton, a distinguished author and home remodeling enthusiast whose expertise in the realm of renovation is second to none. With a passion for transforming houses into inviting homes, Harrison's writing at https://thehuts-eastbourne.co.uk/ brings a breath of fresh inspiration to the world of home improvement. Whether you're looking to revamp a small corner of your abode or embark on a complete home transformation, Harrison's articles provide the essential expertise and creative flair to turn your visions into reality. So, dive into the captivating world of home remodeling with Harrison Clayton and unlock the full potential of your living space with every word he writes.


