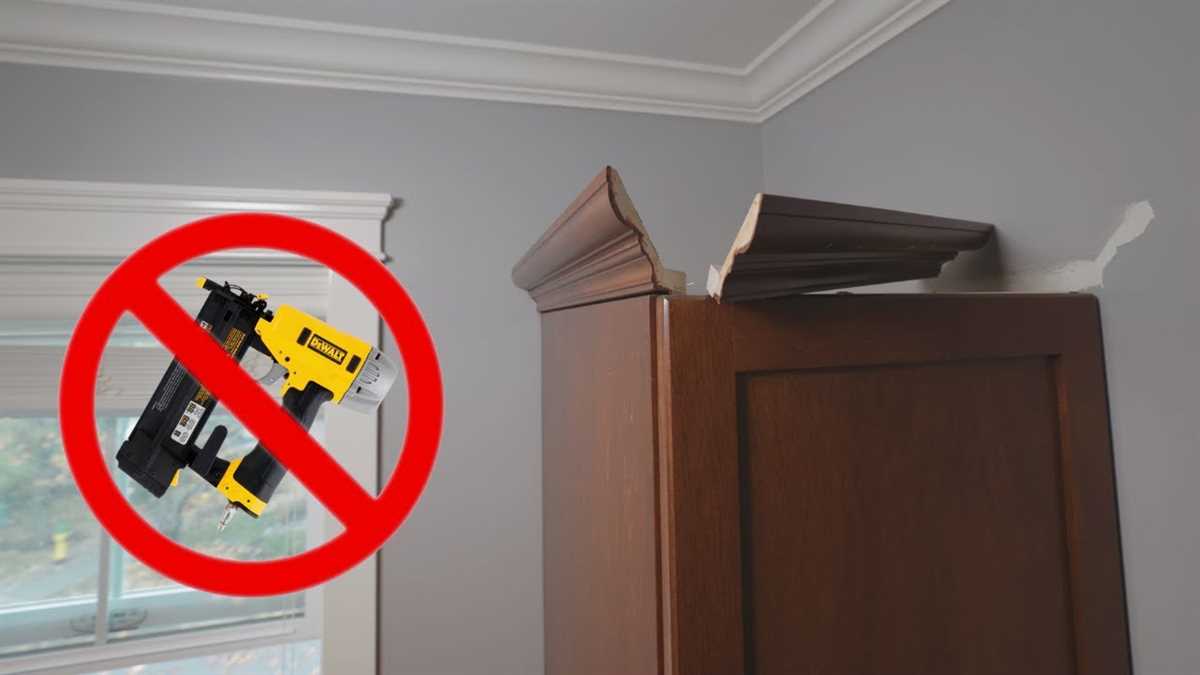
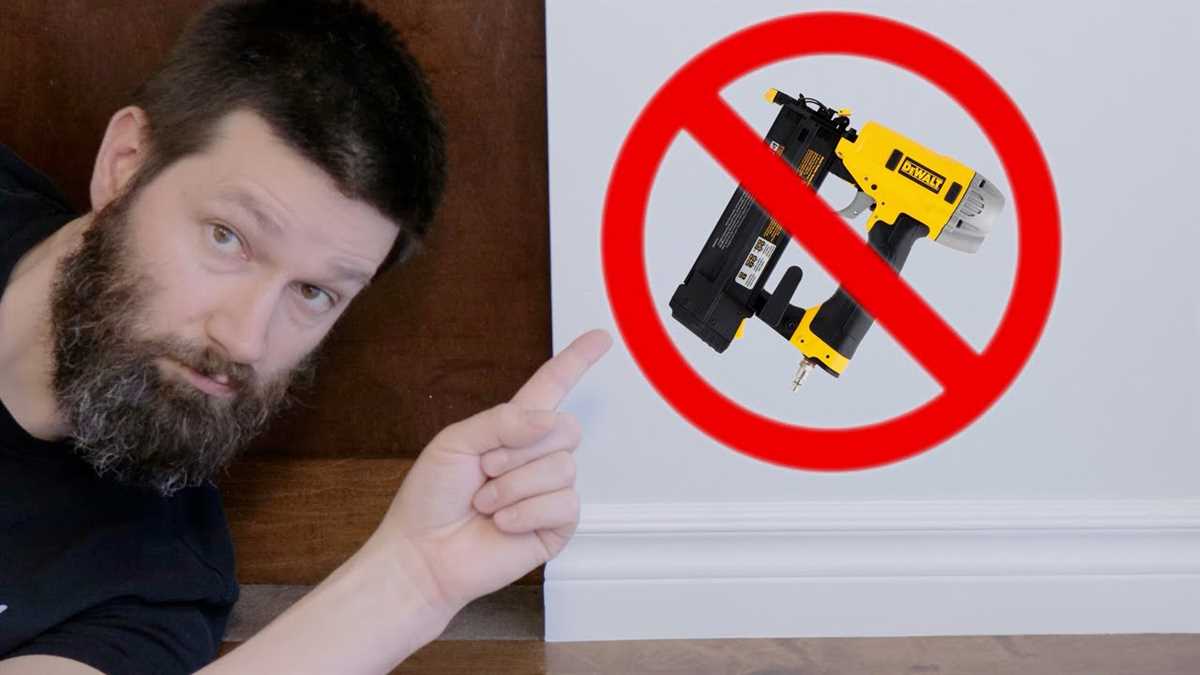
Step-by-Step Guide: Installing Trim Without a Nail Gun
Trim is an essential element when it comes to finishing off the look of a room. It adds a beautiful touch, hiding rough edges and gaps between walls, ceilings, and floors. Many people think that installing trim requires a nail gun, but that’s not necessarily the case. If you don’t have access to a nail gun, don’t worry! In this step-by-step guide, we’ll show you how to install trim without a nail gun, using alternative methods that are just as effective.
Before we dive into the installation process, it’s important to gather the necessary tools and materials. You’ll need a tape measure, miter saw or miter box, coping saw, hammer, nails, wood glue, sandpaper, and a level. Additionally, you’ll need the trim itself, which can be 1×4 or 1×6 boards, or you can opt for pre-made molding.
The first step in installing trim without a nail gun is to measure and cut the trim pieces to fit your walls. Use a tape measure to determine the length and height needed, and mark the measurements on the trim boards. Use a miter saw or miter box to make precise angle cuts for corners. If the corners are not 90 degrees, use a coping saw to cut along the profile of the trim. Sand the cut edges to smooth them out before installation.
Preparation and Tools
Before installing trim without a nail gun, it is important to gather all the necessary tools and materials. This will ensure that the project runs smoothly and efficiently. Here’s what you’ll need:

Tools:
- Measuring tape
- Miter saw or a hand saw with a miter box
- Coping saw
- Hammer
- Chisel
- Phillips screwdriver
- Putty knife
- Sanding block or sandpaper
- Caulking gun
- Paintbrush
Materials:
- Trim pieces
- Nails
- Wood glue
- Wood filler
- Caulk
- Primer
- Paint
Having these tools and materials on hand will make the installation process much easier and ensure that you have everything you need to complete the project. It’s always a good idea to double-check your inventory before starting to avoid any delays or interruptions during the installation.
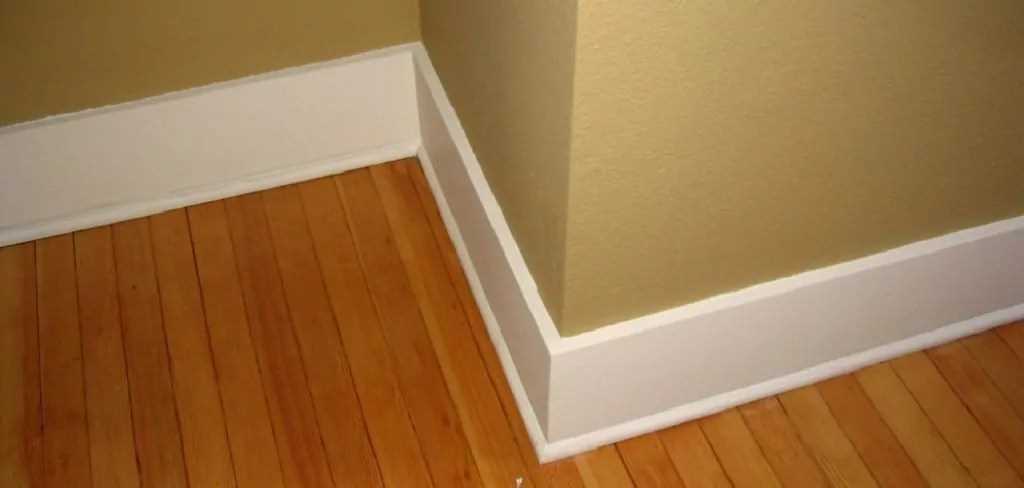
Measure and Cut the Trim

Before you start installing the trim, you need to accurately measure and cut it to the correct dimensions. Here’s how:
- Begin by measuring the length of the wall or surface where you plan to install the trim. Use a tape measure to get an accurate measurement from one end to the other.
- Next, transfer the measurement onto the trim. Use a pencil or marker to mark the length on the trim.
- Using a miter saw or a hand saw, cut the trim according to the marked measurement. Ensure that you cut it at a 90-degree angle, so it fits perfectly when installed.
- If you need to install trim around corners or angles, you’ll need to make miter cuts. Measure the angle using a protractor or a miter gauge and adjust the saw accordingly to make accurate cuts.
- Repeat the measuring and cutting process for each piece of trim you need to install. It’s always a good idea to measure twice before making any cuts to avoid any mistakes.
Once you have all the trim pieces cut to the correct dimensions, you can proceed to the next step of installing them without a nail gun.

Position the Trim
Begin by measuring and marking the desired placement of the trim. Use a tape measure to measure the length of the area where you will be installing the trim. Mark the measurement on the wall or surface where the trim will be positioned.
Next, take your trim piece and hold it up to the marked measurement on the wall. Align the edge of the trim with the mark and use a level to ensure it is perfectly straight. Adjust as necessary.
Using a pencil, lightly trace along the edge of the trim onto the wall to create a guideline for positioning the trim.
Repeat this process for all the trim pieces you will be installing.
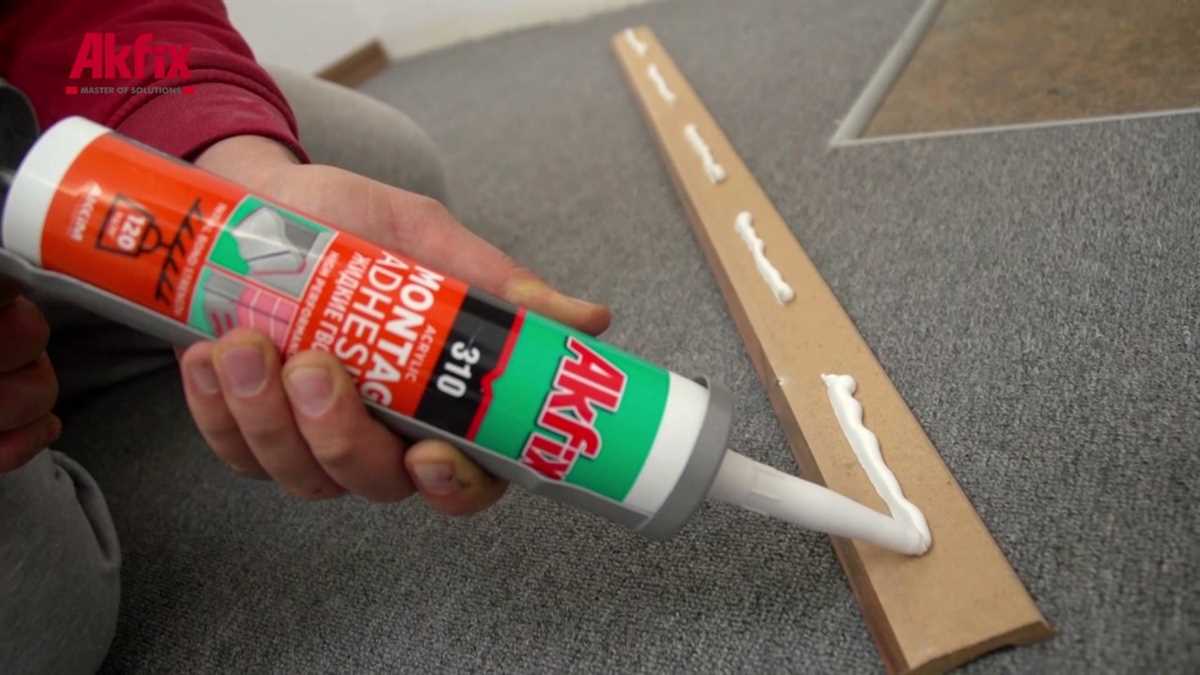
Apply Adhesive

Before attaching the trim to the wall, you’ll need to apply an adhesive to ensure a strong and lasting hold. There are a few different types of adhesive that you can use for this step:
- Construction adhesive: This is a popular choice for installing trim as it provides a strong bond and dries quickly. Apply the adhesive to the back of the trim in a zigzag pattern.
- Adhesive caulk: This type of adhesive is similar to construction adhesive but has a caulk-like consistency. It is great for filling small gaps and cracks between the trim and the wall.
- Adhesive tape: If you prefer a mess-free option, adhesive tape can be a good choice. Simply apply the tape to the back of the trim and press it firmly against the wall.
Regardless of the adhesive you choose, be sure to follow the manufacturer’s instructions for application and drying time. It’s also important to clean the surface of the wall before applying the adhesive to ensure a solid bond.
Tip: Apply the adhesive evenly and avoid using too much, as excess adhesive can cause the trim to warp or become misaligned.
Attach Trim with Screws
When installing trim without a nail gun, another option is to attach the trim using screws. This method can provide a strong and secure hold, especially for heavier pieces of trim.
Here is a step-by-step guide to attaching trim with screws:

- Preparation:
- Measure and cut the trim pieces to the desired length.
- Sand and finish the trim if necessary.
- Ensure that you have the following tools and materials: screws, drill/driver, screwdriver bit, pencil, measuring tape, and level.
- Marking the Trim:
- Hold the trim piece against the wall or surface where it will be installed.
- Use a pencil to mark the placement of the screws along the length of the trim. Aim for approximately 12-18 inches between each screw.
- Use a level to ensure that the trim is straight and aligned properly.
- Drilling Pilot Holes:
- Using a drill/driver with a drill bit slightly smaller than the screws you will be using, drill pilot holes at the marked screw locations on the trim.
- Make sure to drill the pilot holes deep enough to allow the screws to go in without splitting the trim.
- Securing the Trim:
- Hold the trim piece in place against the wall or surface.
- Using a screwdriver bit, drive screws through the pilot holes and into the wall or surface.
- Make sure to drive the screws flush with the surface of the trim, but be careful not to overtighten and damage the trim.
- Continue attaching the trim piece by driving screws into each pilot hole along its length.
- Finishing:
- Fill any screw holes with wood putty or filler, and sand it down to create a smooth surface.
- Apply any desired paint or finish to the trim to match the surrounding decor.
Attaching trim with screws can be a reliable alternative to using a nail gun. Just follow these step-by-step instructions, and you’ll have your trim securely installed without the need for a nail gun.
Fill Nail Holes
Once you have installed the trim using your chosen method, you will need to fill the nail holes for a finished look. Here is a step-by-step guide on how to fill nail holes:
- Start by gathering all the necessary materials. You will need wood putty or wood filler, a putty knife or a scraper, sandpaper, and a cloth.
- Using your putty knife or scraper, take a small amount of wood putty or wood filler and press it into the nail hole. Make sure to completely fill the hole and level it with the surface of the trim.
- Once the hole is filled, use the putty knife or scraper to smooth out the excess putty or filler. This will help create a seamless finish.
- Allow the putty or filler to dry according to the manufacturer’s instructions. This usually takes about 24 hours.
- Once the putty or filler is dry, use sandpaper to gently sand the area around the filled nail hole. This will help blend the patch with the rest of the trim.
- After sanding, wipe away any dust or debris with a cloth. This will ensure a clean surface for painting or staining.
Now that you have filled and sanded the nail holes, you are ready to paint or stain your trim to complete the installation process.
Sand and Paint
After installing the trim, the next step is to sand and paint it to achieve a smooth and finished look. Follow these steps to sand and paint your trim:
Materials You Will Need:
- Sandpaper (medium grit)
- Sandpaper (fine grit)
- Sanding block
- Paintbrush
- Paint
- Painter’s tape
- Drop cloth or newspaper
- Damp cloth
Step 1: Prepare the Work Area
Start by laying down a drop cloth or newspaper to protect the floor from paint splatters. If there are any delicate surfaces or nearby furniture, cover them with a drop cloth as well. Use painter’s tape to mask off any areas that you don’t want to paint, such as adjacent walls or windows.

Step 2: Sand the Trim
Take the medium-grit sandpaper and use it to sand down the trim. Sand in the direction of the wood grain, moving the sandpaper back and forth with firm, even pressure. Pay extra attention to any rough spots or imperfections, as the sanding will help smooth them out.
After you’ve gone over the entire trim with the medium-grit sandpaper, switch to the fine-grit sandpaper. This will help to further smooth the surface and create a better base for the paint.
Step 3: Clean the Trim
Use a damp cloth or sponge to remove any dust or debris from the sanding process. Wipe down the trim thoroughly, making sure to get into all the crevices and corners. Allow the trim to dry completely before proceeding to the next step.
Step 4: Apply a Primer (optional)
If you’re painting bare wood trim or if the existing paint is in poor condition, consider applying a coat of primer before proceeding to the final paint. The primer helps to seal the wood and provide a better surface for the paint to adhere to. Follow the manufacturer’s instructions for applying the primer and allow it to dry completely before moving on.
Step 5: Paint the Trim
Using a paintbrush, apply a thin, even coat of paint to the trim. Start from one end and work your way to the other, maintaining a wet edge as you go. This will help prevent visible brush strokes and ensure a smooth finish.
Allow the first coat of paint to dry completely, following the manufacturer’s instructions for drying time. Once dry, apply a second coat of paint if necessary to achieve the desired coverage and finish. Allow the paint to dry completely before removing the painter’s tape.
Cleaning Up:
Once you’ve finished painting the trim, clean your brushes and other tools with soap and water. Dispose of any unused paint or paint cans properly, following your local regulations.
Now that you’ve sanded and painted your trim, you can step back and admire the fresh, updated look it brings to your space. Well done!
Clean Up and Final Touches
Once all the trim has been installed and secured, it’s time to clean up any excess glue or caulking and put the finishing touches on your project.
Cleaning Up
- Use a damp cloth or sponge to wipe away any excess glue or caulking.
- If the glue or caulking is dried and hardened, gently scrape it off with a putty knife.
- Wipe down the area with a clean, dry cloth to remove any residue.
Touching Up
- Inspect the trim for any gaps or uneven edges.
- If you notice any gaps, fill them in with wood filler or caulking.
- Smooth out any rough edges with sandpaper.
- If desired, paint or stain the trim to match the surrounding walls or furniture.
Final Inspection
Once the trim has been cleaned and touched up, take a step back and inspect the overall appearance of the installation. Look for any imperfections or areas that may need additional attention.
Enjoy Your Finished Project
Congratulations! You have successfully installed trim without a nail gun. Take a moment to admire your handiwork and enjoy the upgraded look of your space.
FAQ
What is trim?
Trim refers to the decorative molding that is installed along the edges of walls, ceilings, windows, and doors to add a finished look to a room.
Do I need a nail gun to install trim?
No, you don’t necessarily need a nail gun to install trim. There are alternative methods that you can use, such as using a hammer and nails or using adhesive.
What are the advantages of installing trim without a nail gun?
Installing trim without a nail gun allows for a more versatile approach as you can use different installation methods depending on your preference or the materials you are working with. It also eliminates the need for a bulky and expensive tool.
How do I install trim without a nail gun?
There are a few different methods you can use. One option is to use a hammer and nails to secure the trim in place. Another option is to use adhesive, such as construction adhesive or caulk, to attach the trim to the wall. You can also use a combination of both methods, depending on the specific requirements of your project.
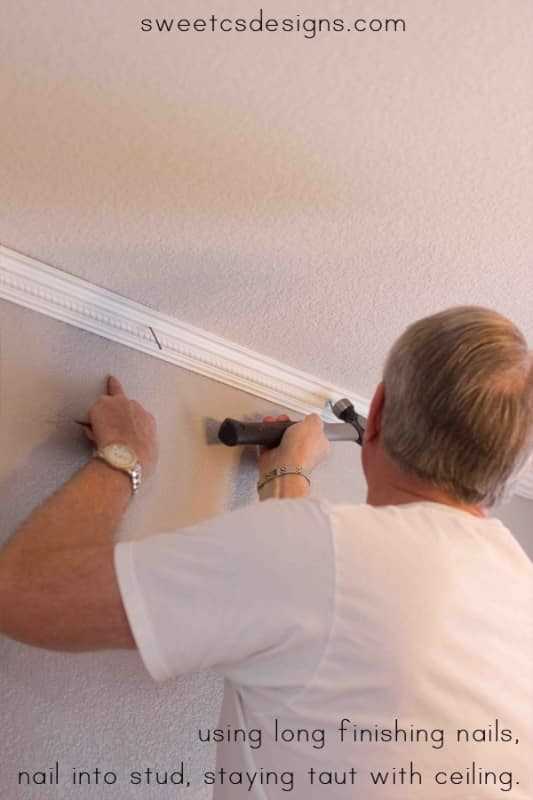
What type of nails should I use if I don’t have a nail gun?
If you are using a hammer to install trim, it is recommended to use finishing nails. These are small and have a thin head, making them less noticeable once the trim is painted or stained.
Can I still get a professional and polished look without a nail gun?
Yes, you can achieve a professional and polished look without a nail gun. The key is to take your time and pay attention to the details. Make sure the trim is properly aligned and flush with the wall, and use appropriate methods to secure it in place, such as using a hammer and nails or adhesive. Sand and paint the trim after installation to further enhance the finished look.
Are there any disadvantages to installing trim without a nail gun?
One potential disadvantage of installing trim without a nail gun is that it may take longer compared to using a nail gun. Additionally, the trim may not be as securely fastened as it would be with a nail gun, which could affect its durability over time. However, with proper installation techniques, these disadvantages can be minimized.
Video


Meet Harrison Clayton, a distinguished author and home remodeling enthusiast whose expertise in the realm of renovation is second to none. With a passion for transforming houses into inviting homes, Harrison's writing at https://thehuts-eastbourne.co.uk/ brings a breath of fresh inspiration to the world of home improvement. Whether you're looking to revamp a small corner of your abode or embark on a complete home transformation, Harrison's articles provide the essential expertise and creative flair to turn your visions into reality. So, dive into the captivating world of home remodeling with Harrison Clayton and unlock the full potential of your living space with every word he writes.