Step-by-Step Guide: How to Perfectly Install Baseboards with a Nail Gun

Baseboards are an essential finishing touch to any room, providing a polished and finished look. Installing baseboards can be a tedious task, but with the right tools and techniques, you can achieve professional-looking results. One of the best tools for the job is a nail gun, which can save you time and effort compared to hand nailing. In this step-by-step guide, we will walk you through the process of perfectly installing baseboards using a nail gun.
Before you begin, gather all the necessary tools and materials. You will need a tape measure, a miter saw, a nail gun, baseboard trim, construction adhesive, and finishing nails. Make sure to choose baseboard trim that matches the style and height you desire for your space.
Start by measuring the walls and determining the length of the baseboard trim needed. Use a miter saw to cut the baseboard trim at 45-degree angles for corners and 90-degree angles for straight walls. Remember to measure twice and cut once to ensure accuracy. Test-fit the pieces to ensure they fit snugly and make any necessary adjustments before proceeding.
Next, apply construction adhesive to the back of the baseboard trim where it will make contact with the wall. This will help provide additional stability and prevent any gaps. Align the trim with the wall and press firmly in place. Now, it’s time to grab your nail gun.
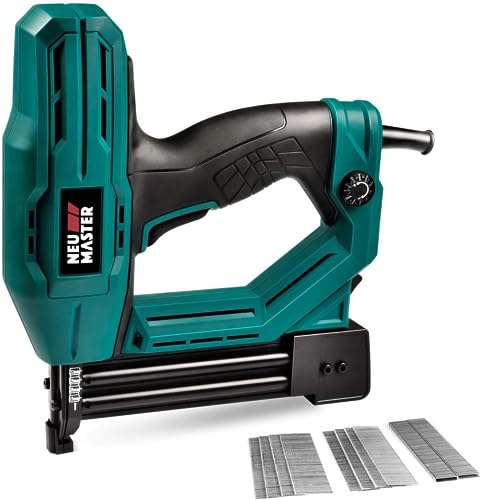
Pro Tip: It’s recommended to use a nail gun specifically designed for installing trim, as it will have the right size and power to ensure a secure hold without damaging the baseboard.
With your nail gun loaded, position the tip of the gun at the bottom edge of the baseboard trim. Angle the nail gun slightly towards the wall and pull the trigger. The nail gun will drive a nail into the trim and secure it to the wall. Place additional nails every 16 inches along the length of the baseboard to ensure a secure installation.

Continue this process for each section of baseboard trim, making sure to align the corners properly and secure them with nails. If you encounter any obstacles, such as electrical outlets or pipes, mark their location on the baseboard trim and carefully cut notches to accommodate them.
Once all the baseboard trim is installed, fill any nail holes with wood filler. Allow the filler to dry, then sand it smooth. Lastly, paint or stain the baseboard trim to match your desired finish.
By following this step-by-step guide and using a nail gun, you can achieve perfectly installed baseboards that enhance the look and feel of your space. Enjoy your newly finished room!
Prepare the Materials
Before you start installing baseboards with a nail gun, it’s important to make sure you have all the necessary materials. Here’s a checklist of what you’ll need:
- Baseboards: Measure the length of the walls where you want to install the baseboards and purchase enough baseboards to cover the entire area.
- Nail Gun: Use a finish nail gun with the appropriate size nails for your baseboards. Make sure it’s in good working condition and fully charged or connected to an air compressor.
- Nails: Purchase finish nails that are the correct length for your baseboards and compatible with your nail gun.
- Measuring Tape: Use a measuring tape to accurately measure the length of the walls and the size of the baseboards.
- Pencil: Mark the location where the baseboards will be installed on the walls.
- Miter Saw: If you need to make angled cuts for corners or joints, a miter saw will be necessary.
- Level: Use a level to ensure the baseboards are installed straight and level.
- Hammer and Nail Set: In case you need to make any adjustments or finish nails without a nail gun.
- Painter’s Tape: Use painter’s tape to mark where the baseboards will be installed on the walls.
- Safety Gear: Wear safety glasses and hearing protection while using the nail gun and other tools.
By gathering all the necessary materials beforehand, you can ensure a smooth and efficient installation process.

Measure and Mark the Walls
Before you start installing the baseboards, it’s important to accurately measure and mark the walls. This step will ensure that the baseboards are installed evenly and align with the walls.
Tools and Materials Needed:
- Tape measure
- Pencil
Follow these steps to measure and mark the walls:
- Start by measuring the length of each wall where the baseboards will be installed. Use a tape measure to measure from one corner of the wall to the other. Write down the measurement for each wall.
- Next, carefully mark the measured length on the wall using a pencil. Make sure the marks are clear and easily visible.
- If you have any outlets or other obstacles on the wall, measure and mark their locations as well. This will help you determine where to cut the baseboards to fit around these obstacles.
- Repeat the measuring and marking process for all the walls where you plan to install baseboards.
By measuring and marking the walls beforehand, you’ll have a clear guide to follow when it comes to cutting and installing the baseboards. This step will ensure a professional-looking finish and minimize the risk of errors during the installation process.
Cut the Baseboards
Before you begin installing baseboards, you’ll need to cut them to the appropriate length. Follow these steps to cut the baseboards:
- Measure the distance along the wall where you will be installing the baseboards. Take accurate measurements to ensure a proper fit.
- Transfer the measurements to the baseboards using a pencil or a marking tool. Make sure to mark both ends of the baseboards.
- Use a miter saw or a miter box and hand saw to make the necessary cuts. It’s important to make precise and clean cuts to ensure a professional-looking installation.
- If you need to make corner cuts to fit the baseboards around corners, use a miter saw or a coping saw to create mitered or coped joints.
- Measure, mark, and cut each individual piece of baseboard according to your measurements and the layout of the room.
- Double-check your measurements and cuts before proceeding to the installation process.
By carefully cutting the baseboards to the correct length, you will ensure a seamless and professional-looking installation.

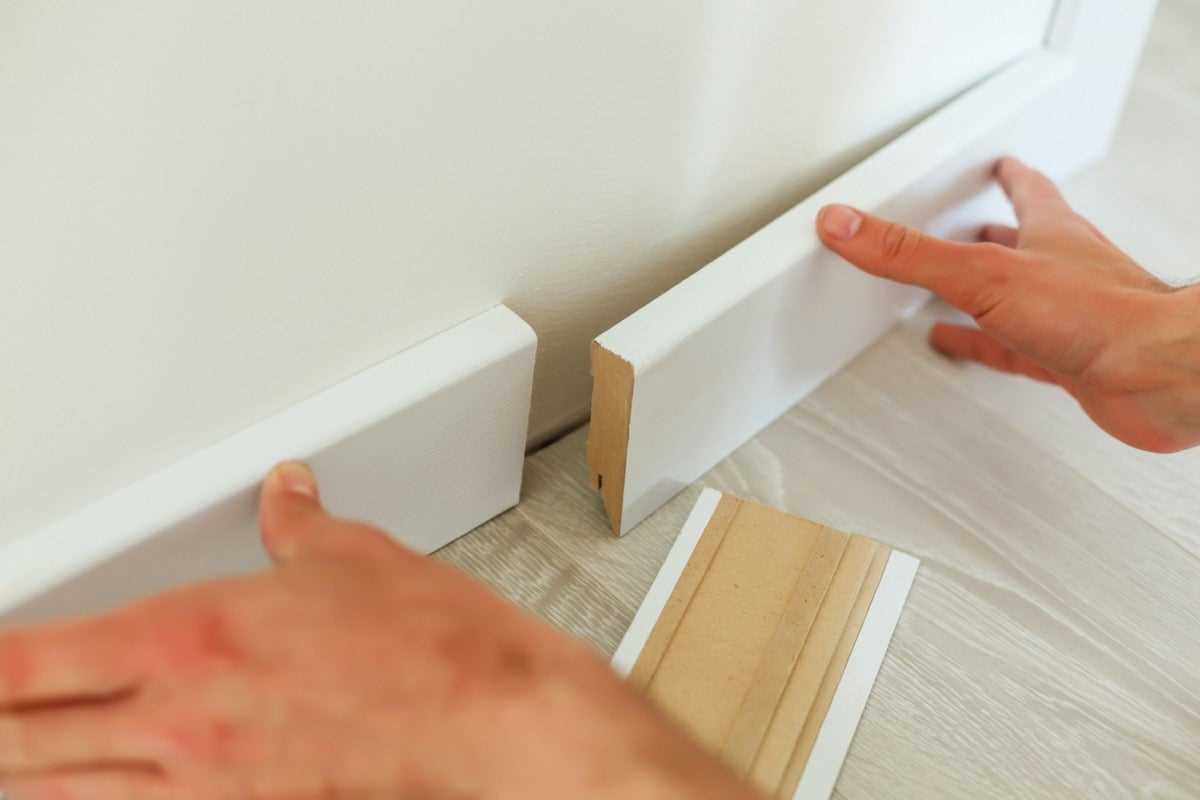
Test Fit the Baseboards
Before you begin installing the baseboards with a nail gun, it’s important to test fit them first to ensure they are the correct size and length. This step will help you identify any potential issues or adjustments that need to be made before permanently attaching the baseboards to the wall.
Here’s how to test fit the baseboards:
- Start by cutting a few baseboard pieces to the desired length. Measure the walls and mark the measurements on the baseboards using a pencil or marker.
- Take one of the baseboard pieces and hold it against the wall where you plan to install it. Make sure it lines up with the corners and edges of the wall. This will give you an idea of how well the baseboard fits and if any adjustments need to be made.
- If the baseboard is too long, use a saw to trim it down to the correct length. If it’s too short, you may need to cut a new piece or add an extension piece to ensure a proper fit.
- Once you are satisfied with the fit of the baseboard, mark the location of any electrical outlets or switches on the baseboard. This will help you later when it’s time to make cuts for these fixtures.
- Repeat this process for each section of baseboard that you plan to install.
Testing the fit of the baseboards before installation will save you time and frustration in the long run. It will ensure that the baseboards are the correct size and will fit well against the walls. With a proper fit, the installation process will be much smoother and the end result will be a professional-looking finish.
Secure the Baseboards in Place
Once you have positioned the baseboards in the desired location, it’s time to secure them in place using a nail gun. Follow these steps to ensure a secure and professional installation:
- Load the nail gun with the appropriate size and type of nails for your baseboards. It’s important to choose nails that are long enough to penetrate both the baseboard and the wall, but not too long that they will go through the other side.
- Hold the nail gun at a 45-degree angle to the baseboard, aiming towards the wall.
- Position the nail gun about 1 inch from the top of the baseboard.
- Press the nail gun firmly against the baseboard and pull the trigger to drive a nail into the baseboard and wall. Repeat this process every 12-18 inches along the entire length of the baseboard.
- Make sure the nails are driven flush with the surface of the baseboard. If any nails are sticking out, use a nail set to counter-sink them below the surface.
- Repeat the process for each baseboard, ensuring that they are all securely attached to the wall.
Once all the baseboards are securely nailed in place, take a step back and inspect the installation. Check for any gaps or unevenness that may need to be addressed. If necessary, use wood filler or caulk to fill in any gaps and create a seamless finish.

Congratulations! You have successfully secured the baseboards in place using a nail gun. The next step is to finish the installation by filling any gaps, sanding, and painting the baseboards to achieve the desired look.
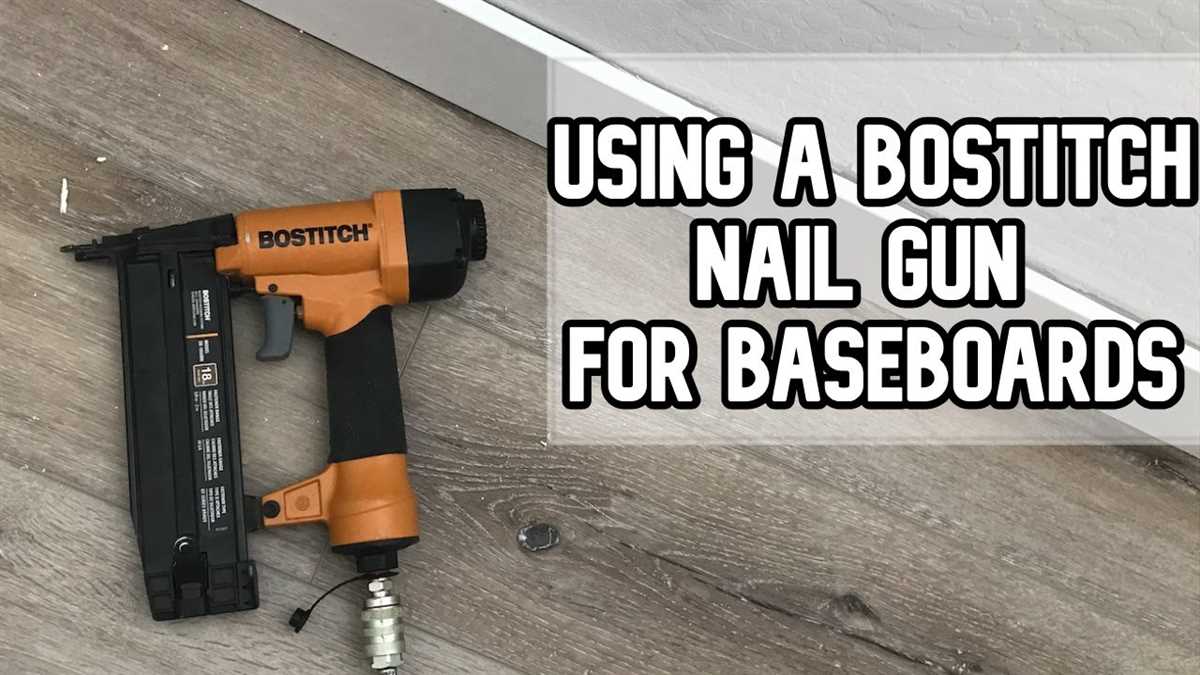
Use the Nail Gun for Installation
Once you have prepared the baseboards and gathered all the necessary tools, it’s time to start the installation process. The nail gun will be the main tool you’ll use to secure the baseboards to the wall. Follow these steps to effectively and safely use the nail gun:
Step 1: Load the Nail Gun

Ensure that the nail gun is not connected to the power source before loading it. Refer to the manufacturer’s instructions for the specific nail gun model you’re using to learn how to load nails into the gun. Typically, you’ll need to open a magazine or chamber on the nail gun and insert the nails in the correct orientation.
Step 2: Adjust the Nail Gun
Before you start nailing, it’s important to adjust the depth of the nail gun to ensure that the nails are properly countersunk into the baseboards. This will help achieve a clean and professional finish. Refer to the manufacturer’s instructions to learn how to adjust the depth setting on your nail gun.

Step 3: Position the Baseboards
Hold the baseboard against the wall in the desired position. Make sure it is level and aligned properly. Use a pencil to mark the wall where the top edge of the baseboard will be. This will help guide your nailing process and ensure that the baseboard is installed at the correct height.
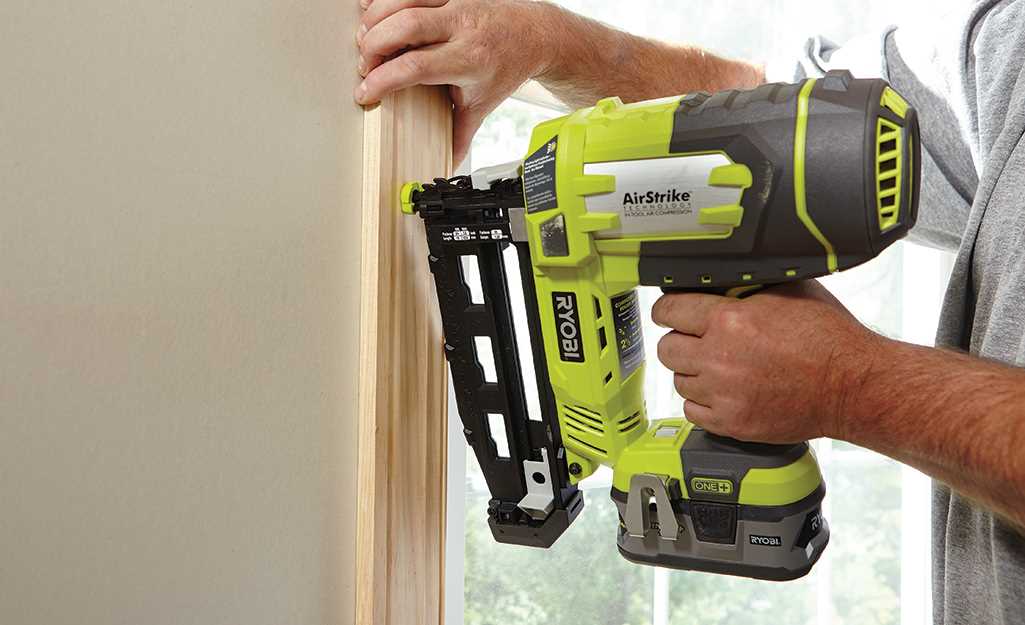
Step 4: Nail the Baseboard
Place the nail gun flush against the baseboard with the nozzle pointing towards the wall. Press the gun firmly but gently against the baseboard and pull the trigger to fire a nail into the wall. Repeat this process every 12-18 inches along the length of the baseboard, ensuring that each nail is driven straight into the wall and at a consistent depth.
Note: It’s recommended to use a stud finder or tap along the wall to locate and nail into the wall studs for extra support.
Step 5: Fill Nail Holes
Once all the baseboards are installed, inspect the surface for any nail holes. Using wood putty or a colored wood filler that matches the baseboard, fill in the nail holes and smooth the surface using a putty knife. Allow the filler to dry according to the manufacturer’s instructions, and then sand it gently to create a seamless finish.
Following these steps will help you effectively use a nail gun for installing baseboards. Always prioritize safety and read the manufacturer’s instructions before operating any power tools.
Fill Nail Holes and Sand the Baseboards
After nailing the baseboards in place, you may notice small nail holes that need to be filled. This step is important for achieving a seamless finished look. Here’s how to fill nail holes and sand the baseboards:
Materials You Will Need:
- Wood filler or putty
- Putty knife or a small spatula
- Sandpaper (medium grit)
Step 1: Prepare the Wood Filler
- Choose a wood filler or putty that matches the color of your baseboards.
- Squeeze a small amount of the wood filler onto a clean, disposable surface.
Step 2: Fill the Nail Holes
- Using a putty knife or a small spatula, scoop up a small amount of wood filler.
- Press the wood filler into each nail hole, ensuring it is fully filled.
- Smooth the surface of the filled holes with the putty knife or spatula, removing any excess filler.
- Repeat this process for all the nail holes in the baseboards.
Step 3: Let the Wood Filler Dry
Allow the wood filler to dry completely according to the manufacturer’s instructions. This usually takes a few hours.
Step 4: Sand the Baseboards
- Once the wood filler is dry, use medium-grit sandpaper to sand down the filled nail holes and the entire length of the baseboards.
- Sand in the direction of the wood grain to avoid creating scratches or marks.
- Continue sanding until the surface of the baseboards feels smooth and the filled nail holes are level with the rest of the baseboard.
- Wipe away any dust or debris with a clean cloth.
At this stage, your baseboards should be looking clean and seamless. You can proceed with the next steps in the installation process or move on to painting or staining your baseboards for a finished look.
Paint or Stain the Baseboards
Once the baseboards are installed, it’s time to paint or stain them to achieve the desired look. Follow these steps to ensure a perfect finish:
Step 1: Prepare the Baseboards
Start by cleaning the baseboards to remove any dust or dirt. Use a damp cloth or sponge to wipe them down thoroughly. Allow them to dry completely before moving on to the next step.
Step 2: Choose the Paint or Stain
Decide whether you want to paint or stain the baseboards. Consider the color scheme and style of the room when making your decision. If you choose to paint, select a high-quality paint that is suitable for trim and baseboards. If staining, choose a stain that complements the natural color of the wood.
Step 3: Prepare the Paint or Stain
If you opt to paint the baseboards, pour a small amount of paint into a paint tray. If staining, shake the stain can thoroughly to ensure an even color. You may also need to stir the stain gently if it has separated. Use a clean brush or sponge applicator for both painting and staining.
Step 4: Apply the Paint or Stain
Start by applying a thin coat of paint or stain to the baseboard. Use long, even strokes, following the direction of the wood grain. Work in small sections at a time to avoid streaks or drips. Allow each coat to dry completely before applying additional coats. Depending on the type of paint or stain, you may need to apply multiple coats to achieve the desired coverage and finish.
Step 5: Touch Up and Finishing
Once the final coat has dried, inspect the baseboards for any uneven spots or imperfections. Use a fine-grit sandpaper to gently sand out any rough areas. Wipe away any dust or debris with a clean cloth. If desired, apply a thin layer of clear protective coating to add durability and shine to the baseboards.
Congratulations! You have successfully painted or stained your baseboards.
FAQ
What tools do I need to install baseboards with a nail gun?
To install baseboards with a nail gun, you will need a few tools. These include a nail gun, a miter saw, a tape measure, a pencil, a level, a hammer, a chisel, and a putty knife.
What type of baseboards are recommended for installation with a nail gun?
There are several types of baseboards that are commonly used for installation with a nail gun. Some popular choices include MDF baseboards, pine baseboards, and PVC baseboards. It is important to choose a material that fits your personal preferences and budget.
Can I install baseboards without a nail gun? Is a nail gun necessary?
While it is possible to install baseboards without a nail gun, using a nail gun can greatly simplify the process and make it quicker and more efficient. A nail gun allows for precise placement of nails and helps to ensure a secure and professional-looking installation.
What is the recommended height for baseboards?
The recommended height for baseboards can vary depending on personal preference and the style of your home. In general, baseboards are typically between 3 and 5 inches in height. However, taller baseboards can create a more dramatic and elegant look.
How do I measure and cut the baseboards?
To measure and cut baseboards, start by measuring the length of each wall where the baseboards will be installed. Then, use a miter saw to make the necessary angled cuts at the corners. Remember to measure twice and cut once to ensure accurate and precise cuts.
What are some tips for achieving a professional-looking installation?
There are several tips to achieve a professional-looking installation. First, make sure to accurately measure and cut the baseboards. Second, use a level to ensure that the baseboards are straight and level during installation. Third, use a putty knife and wood filler to fill any nail holes or gaps. Lastly, take your time and pay attention to detail for the best results.
Video


Meet Harrison Clayton, a distinguished author and home remodeling enthusiast whose expertise in the realm of renovation is second to none. With a passion for transforming houses into inviting homes, Harrison's writing at https://thehuts-eastbourne.co.uk/ brings a breath of fresh inspiration to the world of home improvement. Whether you're looking to revamp a small corner of your abode or embark on a complete home transformation, Harrison's articles provide the essential expertise and creative flair to turn your visions into reality. So, dive into the captivating world of home remodeling with Harrison Clayton and unlock the full potential of your living space with every word he writes.