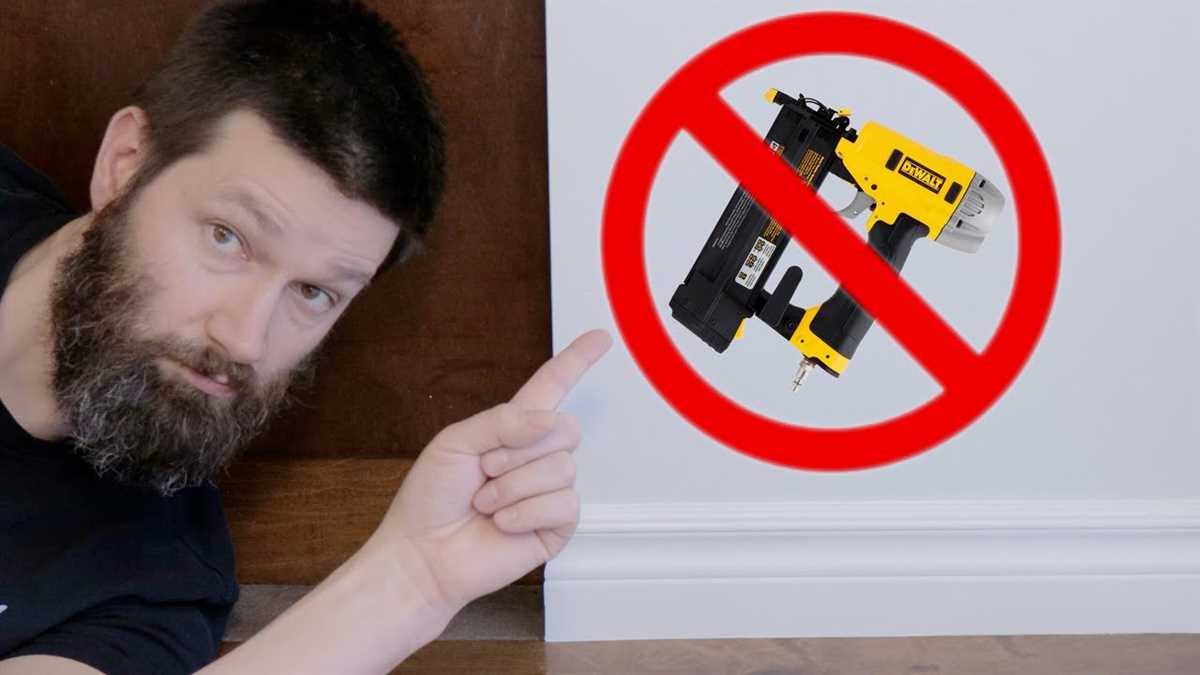
Step-by-Step Guide: How to Install Baseboard Trim Without a Nail Gun

If you’re looking to give your home a polished, finished look, installing baseboard trim is a great way to achieve that. However, the thought of using a nail gun can be intimidating for some, especially if you’ve never used one before. The good news is that you don’t actually need a nail gun to install baseboard trim! In this step-by-step guide, we’ll walk you through the process of installing baseboard trim without a nail gun.
Step 1: Measure and Cut the Baseboard Trim
Start by measuring the length of the wall where you’ll be installing the baseboard trim. Use a tape measure to get an accurate measurement. Once you have the measurement, transfer it to the baseboard trim and use a miter saw or a handsaw to make a straight cut. Repeat this process for all the walls where you’ll be installing the trim.
Step 2: Prepare the Baseboard Trim
Now that you have the baseboard trim cut to the correct length, it’s time to prepare it for installation. Start by sanding the edges of the trim to ensure they are smooth and free of any rough spots. You can use sandpaper or a sanding block for this. Next, apply a primer to the trim to help the paint adhere better. Allow the primer to dry completely before moving on to the next step.
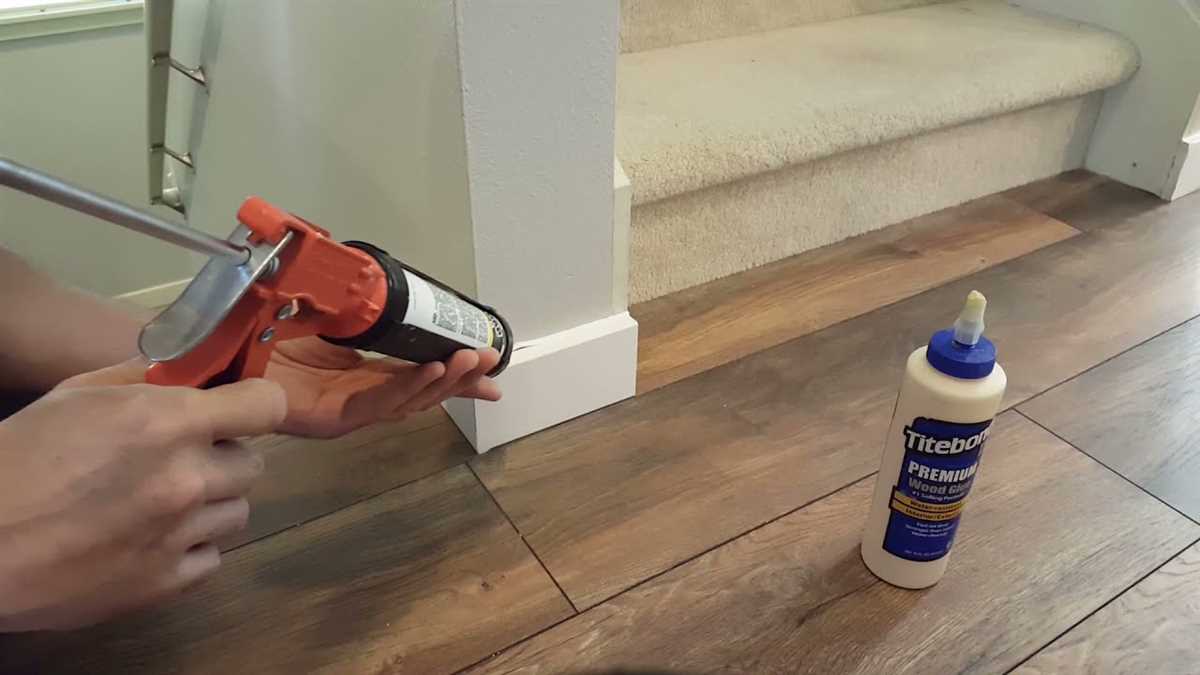
Step 3: Apply Construction Adhesive
In place of nails, we’ll be using construction adhesive to secure the baseboard trim to the wall. Apply a thin bead of construction adhesive along the back of the trim, making sure to cover the entire length. Don’t apply too much adhesive as it can ooze out when you press the trim against the wall.
Step 4: Install the Baseboard Trim

With the adhesive applied, it’s time to install the baseboard trim. Align the trim with the wall and press it firmly into place, making sure it is flush against the wall. Use a level to ensure the trim is straight. If needed, use painter’s tape to hold the trim in place while the adhesive sets. Repeat this process for all the trim pieces until the installation is complete.
By following these steps, you can install baseboard trim without a nail gun and still achieve professional-looking results. Remember to take your time and measure accurately to ensure a perfect fit. With a little patience and the right tools, you’ll have your baseboard trim installed in no time!
Step-by-Step Guide: Install Baseboard Trim Without a Nail Gun
Tools and Materials Needed:

- Baseboard Trim
- Measuring Tape
- Miter Saw
- Construction Adhesive
- Caulk Gun
- Sandpaper
- Pencil
- Hammer
- Finishing Nails
- Nail Set
- Wood Filler
- Paint or Stain
Step 1: Measure and Cut the Baseboard Trim
Begin by measuring the lengths of the walls where you will be installing the baseboard trim. Use a measuring tape to ensure accurate measurements. Mark the measurements on the baseboard trim using a pencil.
Next, use a miter saw to cut the baseboard trim at a 45-degree angle. Make sure to cut each end of the trim in the opposite direction so they fit together perfectly at the corners.

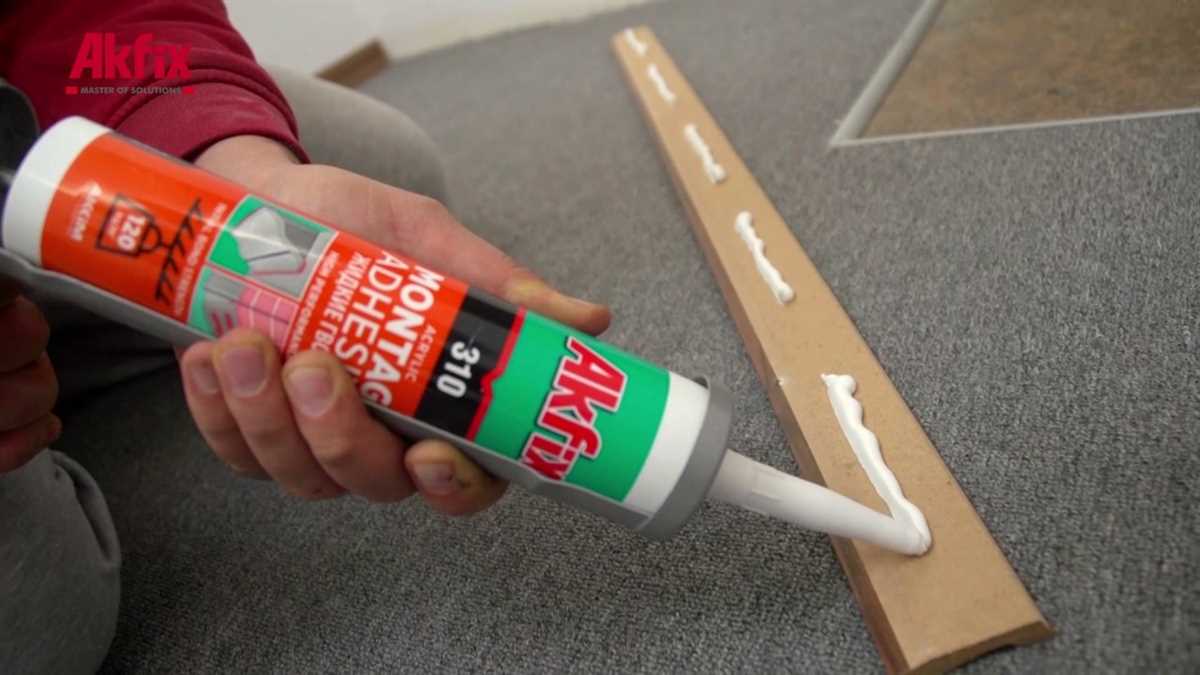
Step 2: Apply Construction Adhesive
Apply a generous amount of construction adhesive to the back of the baseboard trim. Be sure to apply the adhesive in a zigzag pattern to ensure strong adhesion. Press the baseboard trim to the wall, making sure it is flush with the floor.
Step 3: Secure the Baseboard Trim
If you do not have a nail gun, you can secure the baseboard trim using finishing nails and a hammer. Place a nail every 12-16 inches along the length of the trim. Use a nail set to countersink the nails slightly below the surface of the trim.
Step 4: Fill Nail Holes and Sand
Fill the nail holes with wood filler and allow it to dry. Once dry, sand the surface of the baseboard trim with sandpaper to ensure a smooth finish.
Step 5: Caulk the Seams

Use a caulk gun to apply a bead of caulk along the seams where the baseboard trim meets the wall and floor. Smooth the caulk with a caulk smoothing tool or your finger to create a seamless finish.
Step 6: Paint or Stain
If desired, paint or stain the baseboard trim to match your room’s décor. Apply multiple coats as needed, allowing each coat to dry before applying the next.
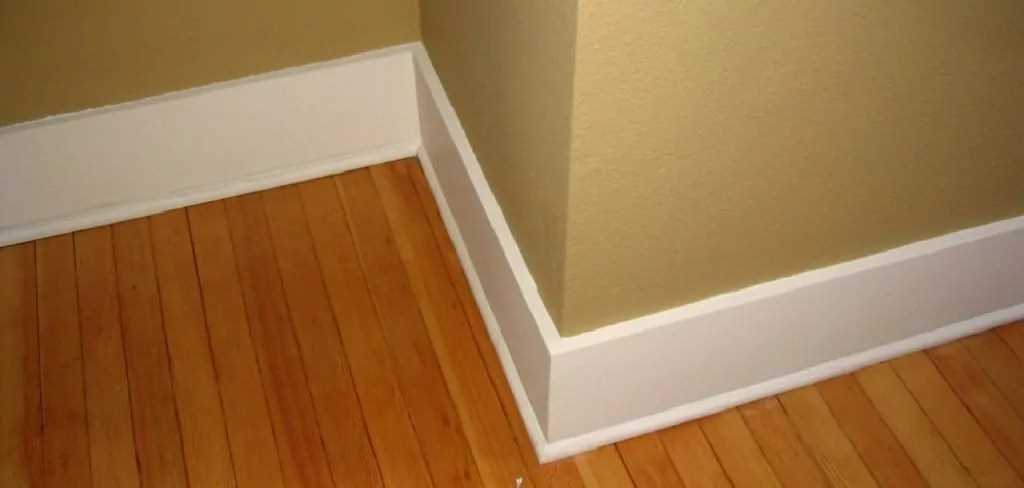
Step 7: Enjoy Your Finished Baseboard Trim
Once the paint or stain has dried, step back and admire your newly installed baseboard trim. It adds a finished and polished look to any room.
| Tip |
|---|
| For added durability, consider using a high-quality baseboard adhesive instead of construction adhesive. |
Gather the Necessary Tools
Before you begin installing baseboard trim without a nail gun, you’ll need to gather the necessary tools. Here’s a list of items you’ll need:

- A miter saw or a coping saw
- A tape measure
- A pencil
- A level
- A hammer
- An adhesive or construction adhesive
- A putty knife
- A finish nail set
- A coping saw
Make sure you have all these tools handy before you start the installation process. This will ensure that you have everything you need and won’t have to stop and search for tools in the middle of the project.
Measure and Mark the Baseboard Trim
Before you start installing the baseboard trim, it’s important to measure and mark the correct length for each piece. Here’s how to do it:
- Start by measuring the length of the wall where you’ll be installing the baseboard trim. Use a tape measure to accurately measure from one end of the wall to the other.
- Once you have the measurement, transfer it to the baseboard trim. Use a pencil or marker to make a small mark at the correct length.
- If you’re installing baseboard trim around corners or doorways, measure and mark the trim accordingly. Make sure to account for any angles or bevels that may be necessary for a proper fit.
- Repeat this process for each section of baseboard trim you’ll be installing.
Note: It’s always a good idea to add a little extra length to each piece of trim to account for any mistakes or discrepancies in the measurements. You can always trim the excess later if needed.
Cut the Baseboard Trim to Size
Before installing the baseboard trim, you need to measure and cut it to the appropriate size.
Materials you’ll need:

- Tape measure
- Miter saw or coping saw
- Pencil
- Safety goggles
Steps:
- Measure the length of the wall where you want to install the baseboard trim. Use a tape measure to get an accurate measurement.
- Mark the measurement on the back of the baseboard trim using a pencil. Make sure to mark both ends.
- Put on safety goggles to protect your eyes from any potential flying debris during the cutting process.
- If you are using a miter saw, set the saw to the appropriate angle. If not, proceed to the next step.
- Place the baseboard trim securely on the miter saw or another stable cutting surface.
- Align the pencil marks with the saw blade and carefully cut the baseboard trim to size. If you are using a coping saw, follow the necessary steps to cope the baseboard trim.
- Check the cut piece against the wall to ensure it fits properly.
- If the cut is not accurate or the trim is too long, trim it down further until it fits correctly.
- Repeat the process for any additional pieces of baseboard trim needed for the project.
Once you have cut the baseboard trim to size, you are now ready to proceed with the installation process.
Apply Adhesive to the Back of the Baseboard Trim
Before installing the baseboard trim without a nail gun, you will need to apply adhesive to the back of the trim. The adhesive will help to secure the trim in place.
- Clean the backside of the trim using a clean cloth to remove any dust or dirt. A clean surface will ensure proper adhesion.
- Apply a thin, even layer of construction adhesive along the back of the trim using a caulk gun. Be careful not to apply too much adhesive, as it can squeeze out when the trim is pressed against the wall.
- Spread the adhesive evenly along the back of the trim, ensuring it covers the entire surface.
- If the trim is longer than the wall length, apply adhesive to both ends of the trim as well.
- Once the adhesive is applied, press the trim firmly against the wall, making sure it is aligned properly.
- Use a level to ensure the trim is straight and adjust if necessary.
Allow the adhesive to dry according to the manufacturer’s instructions before proceeding with the next steps of the installation process.
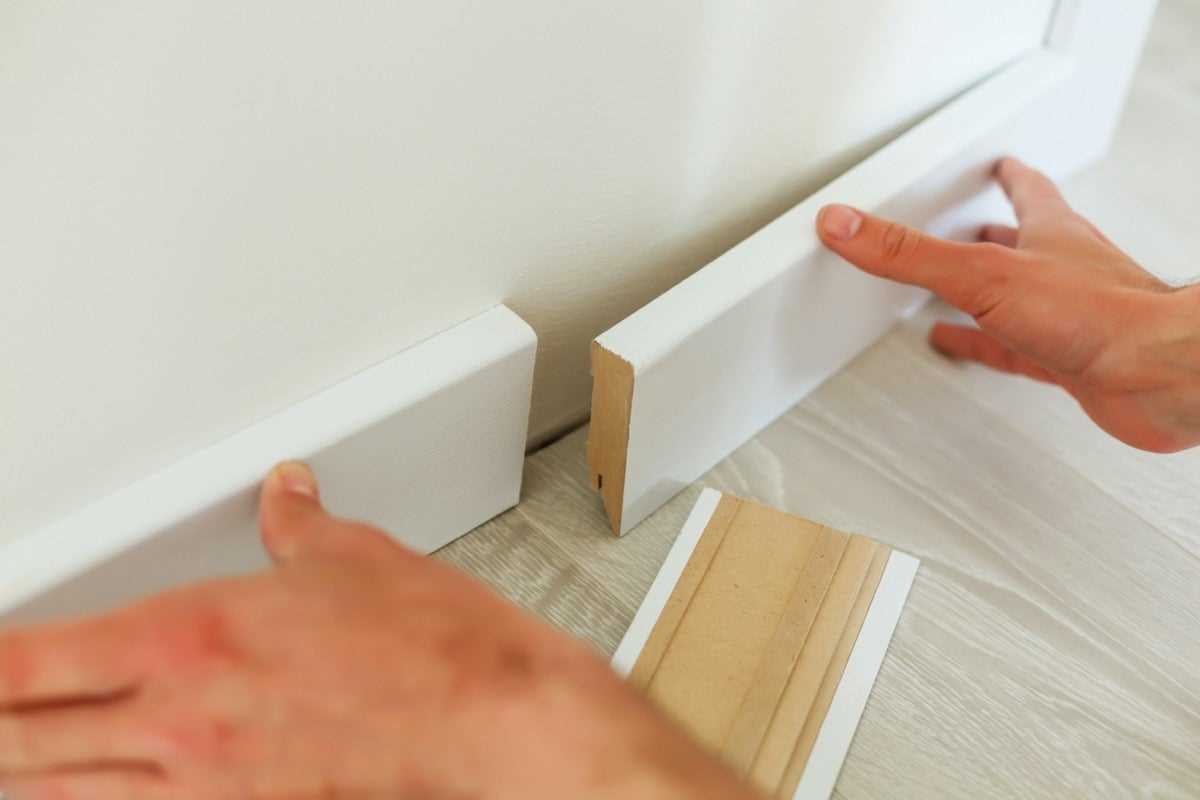
Position the Baseboard Trim on the Wall
Once you have measured and cut your baseboard trim pieces, it’s time to position them on the wall. Follow these steps to ensure the perfect placement:
- Start with one corner of the room and hold the baseboard trim piece against the wall, aligning it with the floor. Make sure the bottom edge of the baseboard trim is flush with the floor.
- Use a level to check that the baseboard trim is perfectly vertical. Adjust as necessary.
- If you are installing multiple pieces of baseboard trim in a row, make sure the edges of the pieces are tightly joined together. There should be no gaps or spaces between the pieces.
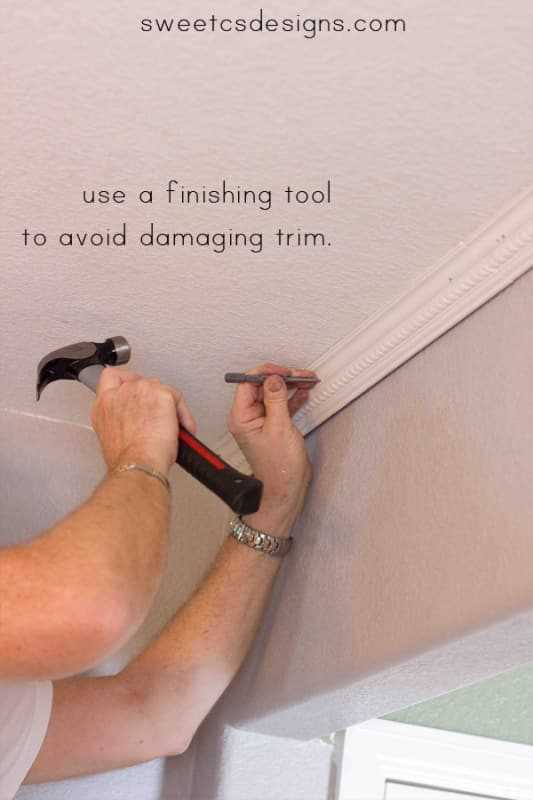
- Secure the baseboard trim to the wall by hammering nails into the studs. Place the nails about every 16 inches or so along the length of the baseboard trim.
- Continue positioning and securing the remaining baseboard trim pieces, following the same steps.
Remember to always double-check your measurements and alignment before securing the baseboard trim to the wall. Take your time and make any necessary adjustments to ensure a professional and polished result.
Secure the Baseboard Trim with Brad Nails

Once you have positioned and measured the baseboard trim, it’s time to secure it in place. While you don’t have a nail gun, you can still use brad nails to attach the trim. Follow these steps to secure the baseboard trim:
- Gather your tools: Before you begin, make sure you have all the necessary tools, including a hammer, brad nails, a nail set, and a putty knife.
- Position the baseboard trim: Place the baseboard trim in its intended position along the wall. Make sure it is flush against the floor and in line with the marks you made earlier.
- Start with the end: Begin by nailing the end of the baseboard trim. Position a brad nail at a 45-degree angle near the corner of the trim and the wall. Gently tap the nail into place using a hammer. Repeat this step for both ends of the trim.
- Secure the middle: Moving along the length of the baseboard trim, continue to use the same technique to secure the middle portion. Space the brad nails evenly, about every 12-16 inches, depending on the length of the trim.
- Countersink the nails: After you have secured the baseboard trim with brad nails, use a nail set to gently tap the nails below the surface of the trim. This will create a small hole that can be filled later with wood putty.
- Fill the holes: Once you have countersunk all the nails, use a putty knife to fill the holes with wood putty. Smooth out the putty and allow it to dry according to the manufacturer’s instructions.
By following these steps, you can effectively secure baseboard trim without the use of a nail gun. Remember to take your time and ensure that the baseboard trim is properly aligned and securely fastened.
Fill and Sand the Nail Holes
After you have secured the baseboard trim to the wall using adhesive, it’s time to fill in the nail holes. This step is essential for achieving a smooth and finished look.
- Start by gathering a tube of wood filler that matches the color of your baseboard trim. This will help to camouflage the filled nail holes.
- Using a putty knife or a similar tool, apply a small amount of wood filler into each nail hole. Be sure to press the wood filler firmly into the holes to ensure they are completely filled.
- Once all the nail holes have been filled, use the putty knife to smooth out the excess wood filler. This will create a flush surface with the surrounding baseboard trim.
- Allow the wood filler to dry completely according to the manufacturer’s instructions. This typically takes a few hours.
- Once the wood filler is dry, use a fine-grit sandpaper or a sanding block to gently sand down the filled nail holes. Sand in a circular motion until the wood filler is smooth and flush with the baseboard trim.
- Wipe away any dust or debris from the sanding using a clean cloth or a vacuum cleaner.
At this point, the nail holes should be filled and sanded, leaving you with a smooth and seamless baseboard trim installation. You can now proceed with any additional steps, such as priming and painting the trim, to complete the finishing touches.
Paint or Stain the Baseboard Trim
Before installing the baseboard trim, you’ll want to paint or stain it to match your desired finish. This step can be done before or after cutting the trim, depending on your preference.
If you’re painting the trim, follow these steps:
- Start by sanding the surface of the baseboard trim to ensure a smooth finish. Use a medium-grit sandpaper to remove any rough areas or imperfections.
- Wipe down the trim with a clean, dry cloth to remove any dust or debris.
- Apply a coat of primer to the trim using a paintbrush or roller. This will help the paint adhere better and provide a more even finish.
- Once the primer is dry, apply a coat of paint in your desired color. Use a brush or roller to evenly distribute the paint. Allow the paint to dry completely.
- If necessary, apply additional coats of paint until you achieve the desired coverage and finish. Allow each coat to dry before applying the next.
If you’re staining the trim, follow these steps:
- Start by sanding the surface of the baseboard trim to ensure a smooth finish. Use a medium-grit sandpaper to remove any rough areas or imperfections.
- Wipe down the trim with a clean, dry cloth to remove any dust or debris.
- Apply a coat of wood conditioner to the trim using a brush or cloth. This will help the stain go on more evenly and prevent blotching.
- Once the wood conditioner is dry, apply a coat of stain in your desired color. Use a brush or cloth to apply the stain, following the direction of the grain. Allow the stain to penetrate the wood for the recommended amount of time.
- Wipe off any excess stain with a clean cloth, following the direction of the grain. Allow the stain to dry completely.
- If desired, apply a clear topcoat or sealant to protect the stained trim and enhance its durability and appearance.
Once the paint or stain is dry, your baseboard trim is ready to be installed. Refer to the previous steps in this guide for how to measure, cut, and install the trim without a nail gun.
FAQ
What tools do I need to install baseboard trim without a nail gun?
To install baseboard trim without a nail gun, you will need a miter saw, coping saw, hammer, nails, measuring tape, level, and a caulk gun.
Is it difficult to install baseboard trim without a nail gun?
Installing baseboard trim without a nail gun can be a bit more time-consuming and labor-intensive compared to using a nail gun. However, with the right tools and a step-by-step guide, it is possible to achieve professional-looking results.
Can I use adhesive instead of nails when installing baseboard trim?
Yes, you can use adhesive in addition to nails to secure your baseboard trim. Apply a bead of adhesive along the back of the baseboard before nailing it in place for added stability.
What is the purpose of coping the inside corners when installing baseboard trim?
Coping the inside corners of baseboard trim helps create a seamless joint between two pieces of trim. By cutting away the back edge of one piece and fitting it around the profile of the other piece, you can ensure a tight and professional-looking corner.
What is the best method for painting baseboard trim after installation?
The best method for painting baseboard trim is to prime it first, allow it to dry, and then apply your desired paint color. Use a brush or roller for an even and smooth finish. Make sure to use painter’s tape to protect adjacent surfaces from accidental paint splatters.
Video


Meet Harrison Clayton, a distinguished author and home remodeling enthusiast whose expertise in the realm of renovation is second to none. With a passion for transforming houses into inviting homes, Harrison's writing at https://thehuts-eastbourne.co.uk/ brings a breath of fresh inspiration to the world of home improvement. Whether you're looking to revamp a small corner of your abode or embark on a complete home transformation, Harrison's articles provide the essential expertise and creative flair to turn your visions into reality. So, dive into the captivating world of home remodeling with Harrison Clayton and unlock the full potential of your living space with every word he writes.