How to Remove Nail Gun Nails – Step-by-Step Guide

If you have ever used a nail gun, you know how convenient and efficient it can be for woodworking and construction projects. However, there may come a time when you need to remove the nails that were fired from the nail gun. Whether you made a mistake and need to reposition or remove a piece, or you simply need to disassemble a project, knowing how to properly remove nail gun nails is essential.
Step 1: Unplug the Nail Gun
The first step in removing nail gun nails safely is to unplug the nail gun from the power source. This will prevent accidental firing or injury during the nail removal process. Additionally, it is important to wear protective gloves and goggles to safeguard yourself from any potential flying debris.
Step 2: Identify the Nails
Before attempting to remove the nails, it is important to identify their location. This can be done by carefully examining the surface or project where the nails are embedded. Pay close attention to any nail heads or protruding portions of the nails that may be visible.

Step 3: Use a Nail Puller or Pliers
Depending on the type of nail used by the nail gun, you will need either a nail puller or a pair of pliers to remove them. For nails with heads above the surface, a nail puller can be used by wedging it under the nail head and prying it upwards. If the nails are flush with the surface, then a pair of pliers can be used to grip the nail and pull it out.
Step 4: Fill and Sand
After removing the nail gun nails, you may be left with small holes or indentations in the wood or surface. To restore the smooth finish, use a wood filler or putty to fill in the holes. Once the filler is dry, sand the area until it is smooth and blend it with the surrounding surface.
Remember, safety is paramount when working with nail guns. Always follow the manufacturer’s guidelines and wear appropriate protective gear. If you are unsure about how to remove nail gun nails or encounter any difficulties, it is best to consult a professional.
By following these simple steps, you can safely and effectively remove nail gun nails with minimal damage to the project or surface. This will allow you to make any necessary adjustments or disassemble the project as needed, ensuring professional results and a successful outcome.

Safety Precautions for Removing Nail Gun Nails
When removing nail gun nails, it is important to follow certain safety precautions to minimize the risk of accidents or injuries. These precautions should be taken to ensure your personal safety and the safety of those around you. Here are some important safety measures to remember:
1. Wear Protective Gear
Always wear the appropriate protective gear when removing nail gun nails. This includes safety goggles to protect your eyes from flying debris, ear protection to prevent damage from loud noise, and gloves to protect your hands from sharp edges and splinters.
2. Disconnect the Power
Before attempting to remove nail gun nails, make sure to disconnect the power source to prevent accidental firing. This can be done by unplugging the nail gun or removing the battery, depending on the type of nail gun you are using.
3. Clear the Work Area
Clear the work area of any unnecessary objects or debris that may obstruct your movement or cause tripping hazards. Ensure that there is ample space to maneuver around the nail gun and work safely.

4. Identify the Types of Nails
Before removing nail gun nails, it is important to know the types of nails you are dealing with. Different types of nails may require different removal techniques. Identify whether the nails are straight, angled, or clipped head nails, and determine the appropriate removal method.
5. Proceed with Caution
When removing nail gun nails, always proceed with caution. Use steady and controlled movements to avoid accidents or injury. Apply gentle pressure and avoid excessive force that could cause the nail to splinter or break, potentially causing injury.
6. Use the Right Tools
Ensure that you have the right tools for removing nail gun nails. This may include a pry bar, hammer, or nail gun nail removal tool. Using the correct tools will make the removal process easier and safer.
7. Store Tools Properly
After removing nail gun nails, make sure to store your tools properly. This includes safely securing the tools in a designated area to prevent accidents or injuries. Keep tools out of reach of children and ensure they are stored in a dry and secure location.
8. Dispose of Nails Safely
Properly dispose of the removed nail gun nails. Place them in a sturdy container or disposal bag to prevent injuries from sharp edges. Do not toss them into general waste bins where they can pose a threat to sanitation workers or cause other accidents.

By following these safety precautions, you can remove nail gun nails safely and efficiently, minimizing the risk of accidents or injuries. Always prioritize safety when working with power tools and exercise caution throughout the removal process.
Tools and Materials Needed
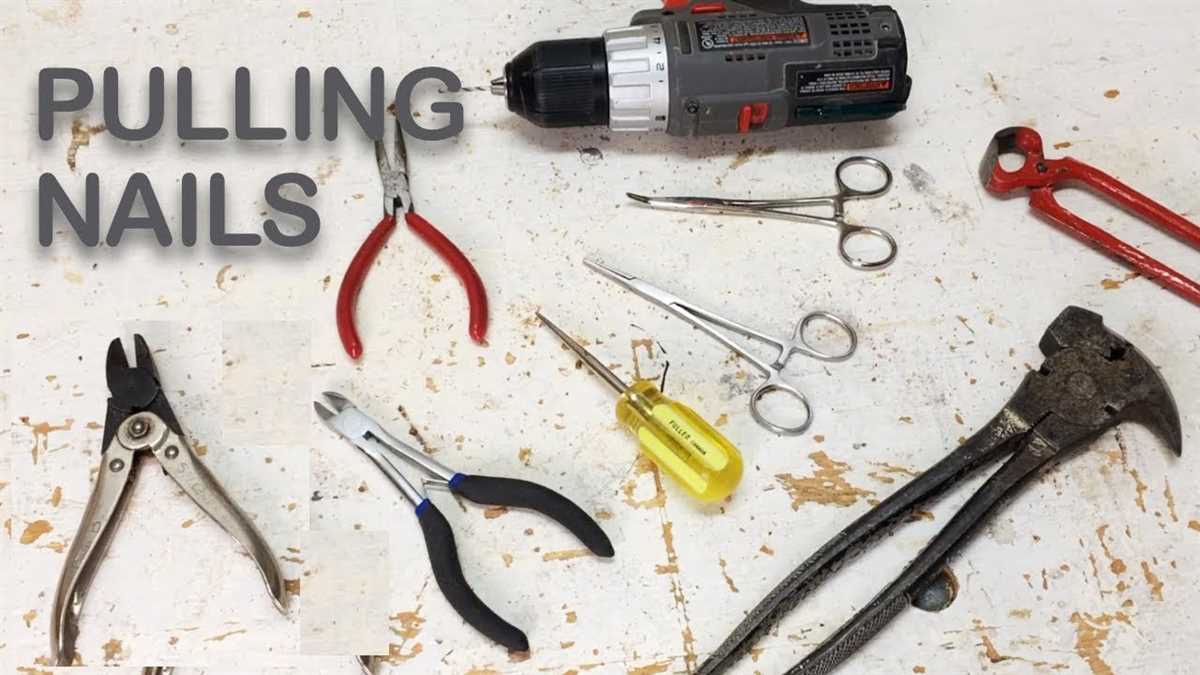
Removing nail gun nails requires a few specific tools and materials to ensure a safe and efficient process. Before you start, make sure you have the following items on hand:
- Nail puller or pry bar
- Needle-nose pliers
- Hammer
- Protective gloves
- Safety goggles
- Workbench or sturdy surface
- Plywood or scrap wood
A nail puller or pry bar is essential for loosening and removing the nails from the surface. Needle-nose pliers are useful for gripping and extracting nails that may be difficult to reach with the nail puller. A hammer can be used to tap the nail puller or pry bar gently to loosen the nails.
It is important to wear protective gloves and safety goggles while removing nails to avoid injury. The gloves will protect your hands from sharp edges, and the goggles will shield your eyes from flying debris.

A workbench or sturdy surface is necessary for stability during the removal process. Placing plywood or scrap wood underneath the surface being worked on can provide extra support and prevent damage.
By gathering these tools and materials before beginning the nail removal process, you will have everything you need to successfully and safely remove nail gun nails.
Step 1: Disconnect the Nail Gun from Power Source
Before attempting to remove nail gun nails, it is important to ensure the nail gun is disconnected from its power source. This is a crucial safety measure to prevent any accidental firing of nails during the removal process.
To disconnect the nail gun from its power source:
- Switch off the nail gun.
- If the nail gun is corded, unplug it from the power outlet.
- If the nail gun is battery-powered, remove the battery pack from the nail gun.
Make sure to always follow the manufacturer’s instructions for disconnecting the nail gun from its power source, as different models may have specific steps or requirements.
Once the nail gun is safely disconnected from its power source, you can proceed with the nail removal process.
Step 2: Inspect the Nail Gun for Any Remaining Nails
After removing the nail strip or magazine from the nail gun, it is important to inspect the gun for any remaining nails. Even if you have emptied the magazine, there may still be nails lodged inside the gun’s firing mechanism or other parts of the tool.
To inspect the nail gun for any remaining nails, follow these steps:
- Disconnect the nail gun from the power source: Before inspecting the tool, make sure it is unplugged or the battery is removed to prevent accidental activation.
- Open the nail gun: Depending on the model, the nail gun may have a latch or screws that hold the housing together. Use a screwdriver or follow the manufacturer’s instructions to open the gun.
- Remove any lodged nails: Carefully examine the interior of the nail gun and look for any nails that may be stuck. Use a pair of needle-nose pliers or tweezers to gently remove any nails you find.
- Clean the nail gun: Once you have removed any remaining nails, use a soft brush or compressed air to clean out any dust, debris, or residue that may have accumulated in the gun.
Note: If you encounter any difficulties while inspecting or removing nails from the nail gun, it is recommended to consult the tool’s user manual or contact the manufacturer for assistance.
Step 3: Release the Magazine and Remove Any Remaining Nails
Once you have disconnected the nail gun from the power source and removed any nails from the work surface, it is time to release the magazine and remove any remaining nails. Here’s how you can do it:
- First, locate the magazine release button or lever on your nail gun. This is usually located near the nail gun’s handle or on the side of the magazine itself.
- Press or slide the magazine release button or lever to release the magazine. This will free the magazine from the nail gun.
- Once the magazine is released, carefully remove it from the nail gun. Be mindful of any nails that may still be loaded in the magazine.
- If there are any nails remaining in the magazine, carefully push them out one by one. Use caution and make sure to keep your hands and fingers clear of the nail ejection area to prevent any injuries.
- Place the removed nails in a safe container or dispose of them properly.
By releasing the magazine and removing any remaining nails, you ensure that the nail gun is empty and safe to handle. This step should always be done before storing or transporting the nail gun to prevent any accidents or damage.
Step 4: Locate the Nail Gun Nail Jam
Once you have successfully removed any nails that were causing a jam, you’ll want to inspect the nail gun to locate the particular nail jam that is causing the issue. Follow these steps to locate the nail gun nail jam:
- Disconnect the nail gun from the power source: Before proceeding, it is important to ensure that the nail gun is disconnected from any power source to avoid accidental firing of nails.
- Open the magazine: Most nail guns have a magazine that holds the nails. Look for the latch or release mechanism on the magazine and open it to expose the inside of the magazine.
- Inspect the magazine: Take a close look at the inside of the magazine to locate any nails that are stuck or jammed. Look for nails that may be at odd angles or overlapping each other.
- Remove the jammed nail(s): Using a pair of pliers or needle-nose pliers, carefully remove any jammed nail(s) from the magazine. It’s important to exercise caution while removing the jammed nail to avoid any potential injuries.
- Clear any debris: After removing the jammed nail(s), inspect the magazine for any debris or residue that may have contributed to the nail jam. Use a clean cloth or compressed air to remove any debris.
- Close the magazine: Once the jammed nail(s) have been removed and the magazine is clear of debris, close the magazine securely. Ensure that the latch or release mechanism is properly engaged to prevent any accidental discharge of nails.
By following these steps, you will be able to locate and remove any nail gun nail jams that may be causing your nail gun to malfunction.
Step 5: Use a Nail Punch to Remove Jammed Nail Gun Nail
Using a nail punch is an effective method to remove a jammed nail from a nail gun. This tool allows you to safely and easily push the nail back through the material it is stuck in, freeing up the nail gun for further use.
Here are the steps to use a nail punch to remove a jammed nail:
- Prepare the nail punch: Select a nail punch that is the appropriate size for the nail you are trying to remove. The nail punch should fit snuggly over the head of the nail. Make sure the tip of the nail punch is sharp and in good condition.
- Secure the material: If the material with the jammed nail is not already secured, use clamps or another method to hold it in place. This will prevent any movement when applying pressure with the nail punch.
- Position the nail punch: Place the tip of the nail punch onto the head of the jammed nail. Make sure the nail punch is aligned properly and centered over the nail head.
- Apply pressure: Using a hammer or mallet, gently tap the nail punch to drive the jammed nail back through the material. Start with light taps and gradually increase the force until the nail is flush with the surface or comes out completely.
- Inspect the nail: Once the jammed nail is removed, inspect it for any damage or signs of bending. If the nail appears damaged, dispose of it properly and use a new nail for future tasks.
The use of a nail punch helps prevent damage to the nail gun and the material it is being used on. Always exercise caution when using tools and wear appropriate safety equipment to protect yourself from any potential hazards.
Step 6: Reassemble the Nail Gun
Once you have removed all the nails and completed the necessary maintenance or repairs, it is time to reassemble the nail gun. Follow these steps to put the nail gun back together:
- Start by placing the nail strip into the magazine, making sure the nails are positioned correctly.
- Carefully align the magazine with the rest of the gun and slide it back into place. You should hear a click or feel it lock into position.
- Next, reattach any safety mechanisms that were removed during disassembly. This may include the trigger safety or depth adjustment lever.
- Double-check that all screws and bolts are tightened properly, ensuring that the nail gun is secure and safe to use.
It’s always a good idea to consult the manufacturer’s manual for specific reassembly instructions, as different nail gun models may have slight variations in the reassembly process. Following the manual will help ensure that you put the nail gun back together correctly.
After reassembly, perform a safety check by pressing the nose of the nail gun against a piece of scrap material and pulling the trigger. This will verify that the nail gun is functioning correctly and that the nails are being driven cleanly. If there are any issues or malfunctions, disassemble the nail gun again and troubleshoot the problem or consult a professional.
With the nail gun reassembled and checked for safety, you can now resume your nailing tasks with confidence. Remember to always wear appropriate safety gear and follow all safety precautions when using a nail gun.
FAQ
What is a nail gun?
A nail gun is a power tool used to drive nails into various materials, such as wood or concrete, with the help of compressed air or electromagnetism.
Why would I need to remove nail gun nails?
You may need to remove nail gun nails in order to replace damaged or misaligned nails, disassemble a structure, or make repairs.
What tools do I need to remove nail gun nails?
You will need a few tools to remove nail gun nails, including a nail puller or pry bar, a hammer, and possibly pliers or wire cutters depending on the type of nails being used.
Can I reuse the nails after removing them?
In most cases, you should not reuse nail gun nails after removing them. The nails are usually damaged or bent during removal, and it is best to use new nails for any future applications.
Video


Meet Harrison Clayton, a distinguished author and home remodeling enthusiast whose expertise in the realm of renovation is second to none. With a passion for transforming houses into inviting homes, Harrison's writing at https://thehuts-eastbourne.co.uk/ brings a breath of fresh inspiration to the world of home improvement. Whether you're looking to revamp a small corner of your abode or embark on a complete home transformation, Harrison's articles provide the essential expertise and creative flair to turn your visions into reality. So, dive into the captivating world of home remodeling with Harrison Clayton and unlock the full potential of your living space with every word he writes.