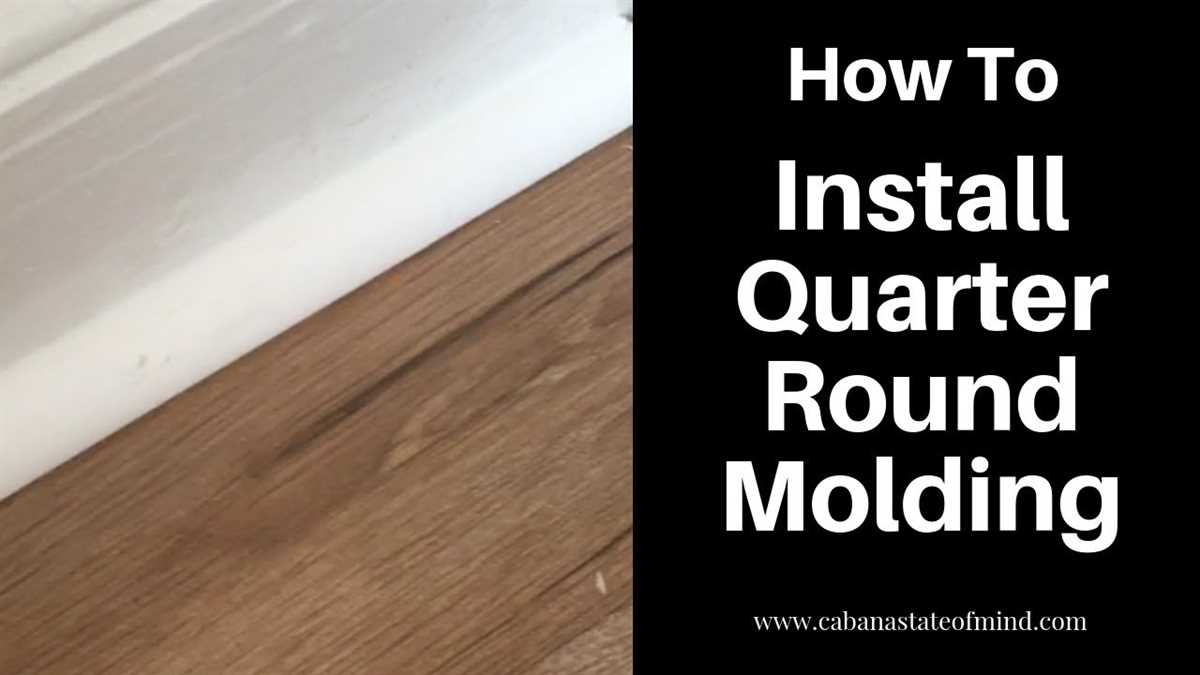
How to Install Quarter Round Without a Nail Gun: Step-by-Step Guide

Installing quarter round without a nail gun can be a challenging task, but with the right tools and techniques, it can be done efficiently and effectively. Whether you’re a beginner or a seasoned DIY enthusiast, this step-by-step guide will walk you through the process of installing quarter round without a nail gun.
First, gather all the necessary tools and materials needed for the project. This includes a miter saw, measuring tape, pencil, coping saw, hammer, finishing nails, wood glue, and a putty knife. It’s important to have these tools on hand before starting the installation process.
Next, measure the length of the wall where the quarter round will be installed. Use a measuring tape to accurately measure the length and mark it with a pencil. Make sure to account for any corners or doorways that may require additional cuts.
Once all the measurements have been taken, use a miter saw to cut the quarter round at a 45-degree angle. This will ensure a tight and seamless fit against the wall. Remember to always wear protective eyewear and gloves when operating power tools.
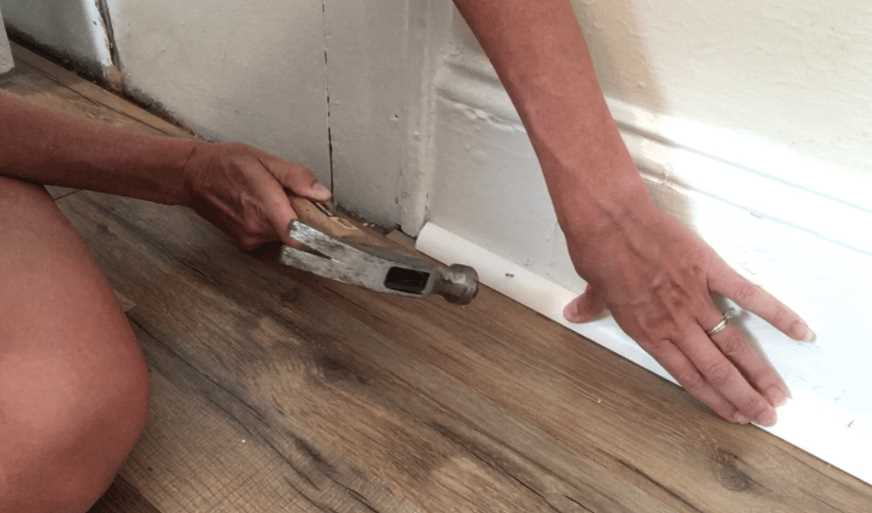
Once the quarter round has been cut to size, apply a small amount of wood glue to the backside of the quarter round. Press it firmly against the wall, making sure it is aligned with the pencil markings. Use a hammer to gently tap finishing nails into the quarter round to secure it in place.

If any gaps or uneven edges appear during the installation process, use a coping saw to carefully shape the quarter round to fit properly. This tool allows for precise cuts, making it easier to create a seamless finish.
Once all the quarter round has been installed, use a putty knife to fill in any nail holes or gaps with wood putty. This will create a smooth and seamless finish, enhancing the overall look of the quarter round.
In conclusion, installing quarter round without a nail gun is possible with the right tools and techniques. By following this step-by-step guide, you can achieve a professional-looking installation without the need for a nail gun. Remember to take your time, measure accurately, and use caution when working with power tools.
What is a quarter round?
A quarter round is a type of molding that is typically used to cover the gap between a baseboard and a surface such as a wall or floor. It is named for its cross-sectional shape, which resembles a quarter of a cylinder.
The quarter round molding is usually made from wood, although it can also be made from other materials such as plastic or composite. It is commonly used in home improvement and construction projects to provide a finished look and to hide any gaps or uneven edges.

The quarter round molding is installed along the perimeter of a room or around objects such as cabinets, countertops, or doors. It is commonly used in areas where the baseboard and the floor or wall do not meet at a perfect 90-degree angle. The quarter round molding helps to create a clean and seamless transition between these surfaces.
Quarter round can be installed using either nails or adhesive. Nailing the quarter round into place is the traditional method and provides a secure and durable installation. However, if you do not have access to a nail gun, you can still install quarter round without one by using adhesive.
Why would you want to install quarter round without a nail gun?
There are several reasons why you might want to install quarter round without a nail gun:
- Cost: Using a nail gun can be expensive, especially if you don’t already own one. By installing quarter round without a nail gun, you can save money on purchasing or renting a nail gun.
- Convenience: If you only have a small amount of quarter round to install or if you don’t have easy access to a nail gun, it can be more convenient to install it without one.
- Noise: Nail guns can be loud, and if you’re working in a residential area or a place where noise is a concern, installing quarter round without a nail gun can be a quieter option.
- Flexibility: By installing quarter round without a nail gun, you have more flexibility in terms of placement and adjustments. You can easily make changes or remove the quarter round if needed without having to deal with the nails.
While using a nail gun can be faster and more efficient for installing quarter round, there are valid reasons why someone might choose to install it without one. It ultimately depends on the specific circumstances and preferences of the individual.
Step 1: Choose the right tools:

Before starting the installation of quarter round without a nail gun, it is important to gather the necessary tools. Here are the tools you will need:
-
Measuring tape: This tool is essential for taking accurate measurements of the area where the quarter round will be installed. Make sure to measure twice to ensure precision.
-
Miter saw: A miter saw will be required to cut the quarter round at the appropriate angles. This tool will help achieve clean and precise cuts.
-
Power drill: A power drill will come in handy for pre-drilling holes in the quarter round and the baseboard. It will make the installation process easier and prevent splitting of the wood.
-
Wood glue: Wood glue will be used to secure the quarter round in place. Make sure to choose a high-quality wood glue that will provide a strong bond.
-
Clamps: Clamps will help hold the quarter round in place while the glue sets. They will ensure a tight and secure fit.
-
Finishing nails: Even though a nail gun is not being used, finishing nails can still be utilized for additional reinforcement. These nails will help secure the quarter round in place.
-
Safety equipment: To protect yourself during the installation process, it is important to wear safety glasses and gloves. These will help prevent any accidents or injuries.
Once you have gathered all the necessary tools, you will be ready to move on to the next step in the installation process.
Gather the necessary materials
Before installing quarter round without a nail gun, you will need to gather the necessary materials. Here is a list of what you will need:
- Quarter round molding
- Measuring tape
- Miter saw or coping saw
- Pencil
- Sandpaper
- Wood glue
- Clamps
- Finishing nails
- Hammer or nail punch
- Paint or stain (optional)
- Paintbrush or rag (if painting or staining)
Make sure you have all of these materials ready before you begin installation. This will ensure a smooth and efficient process.
Prepare the tools you will need
Before you start installing quarter round without a nail gun, make sure you have the following tools at hand:

- A tape measure to accurately measure the length of the quarter round.
- A miter saw or box for cutting the quarter round at the appropriate angles.
- A coping saw or jigsaw for making any necessary curved cuts.
- A utility knife to score and cut the quarter round during installation.
- A hammer or rubber mallet to gently tap the quarter round into place.
- A pry bar or putty knife to remove any existing quarter round or baseboards.
- A caulk gun for applying caulk between the quarter round and the baseboard or wall.
- Sandpaper or a sanding block to smooth any rough edges or imperfections.
- A pencil or marker to mark the cutting lines on the quarter round.
- A safety mask or goggles to protect your eyes and lungs from dust and debris.
Having these tools ready before you begin will ensure a smooth and efficient installation process.
Step 2: Measure and prepare:
Before you start installing the quarter round, it’s important to measure the length of each wall where the quarter round will be installed. This will help you determine how much quarter round you will need and how many cuts you will have to make.
Tools and materials you will need:
- Measuring tape
- Pencil
- Miter saw or a coping saw
Measuring the walls:
Start by measuring the length of each wall where the quarter round will be installed. Use a measuring tape to measure from one corner to another, and make sure to measure both the length and the height of each wall. Write down the measurements for reference.
Determining the amount of quarter round needed:
Now that you have the measurements, you can calculate the amount of quarter round you will need. Measure the length of each wall and add up all the measurements. It’s a good idea to buy a little extra quarter round to account for any mistakes or miscalculations.
Preparing the quarter round:

Using a miter saw or a coping saw, cut the quarter round to the appropriate length for each wall. Make sure to cut the ends at a 45-degree angle for a neat and professional-looking finish. It’s important to wear safety goggles and follow the manufacturer’s instructions when using power tools.
Once you have measured and prepared the quarter round, you’re ready to move on to the next step: installing the quarter round.
Take accurate measurements of the area
Before installing quarter round without a nail gun, it is important to take accurate measurements of the area where the quarter round will be installed. This will ensure that you purchase the correct amount of quarter round and that it fits properly. Follow these steps to take accurate measurements:
- Measure the length of the wall: Use a tape measure to measure the length of the wall where the quarter round will be installed. Start from one corner and measure to the opposite corner, or from one end to the other if the wall is not a complete rectangle.
- Measure the height of the baseboard: Measure the height of the baseboard that the quarter round will be covering. This will help you determine the height of the quarter round pieces that you need to cut.
- Measure any corners or transitions: If there are any corners or transitions where the quarter round will need to be mitered or cut at an angle, measure the angles or shapes of these areas. This will help you accurately cut the quarter round pieces to fit these areas.
Once you have taken accurate measurements of the area, you can use these measurements to purchase the correct amount of quarter round and cut the pieces to the appropriate sizes for installation.
Prepare the quarter round for installation
Before you begin installing the quarter round, there are a few steps you need to take to prepare it:
- Measure and cut the quarter round: Start by measuring the length of the wall where the quarter round will be installed. Use a tape measure to get an accurate measurement. Once you have the measurement, use a miter saw or a coping saw to cut the quarter round to the correct length.
- Sand the edges: After cutting the quarter round, use sandpaper or a sanding block to smooth out any rough edges. This will help ensure a clean and professional-looking installation.
- Paint or stain the quarter round: If desired, now is the time to paint or stain the quarter round to match your trim or flooring. Make sure to use a paint or stain that is suitable for the material of the quarter round.
By following these steps, you will have a properly prepared quarter round that is ready for installation.
Step 3: Place the quarter round:
Now that you have cut your quarter round molding and prepared the surface, it’s time to start placing the molding in the desired area. Follow these steps:
- Start from one corner: Begin by placing the first piece of quarter round molding in one corner of the room. Make sure the end of the molding is flush against the corner.
- Align the molding: Use a level or a straight edge to ensure that the molding is straight and aligned with the baseboard or the wall. Adjust if necessary to maintain a straight line.
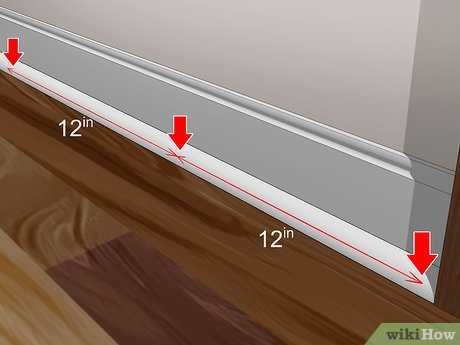
- Measure and cut: Measure the length needed for the next piece of quarter round molding. Use a miter saw to make a 45-degree angle cut on one end of the molding, matching the angle of the previously installed molding. Ensure the other end is straight and flush against the wall.
- Attach the molding: Apply a small amount of wood glue to the back of the molding, and then press it firmly against the wall. Make sure it is aligned with the previous piece and secure it in place.
- Continue the process: Repeat steps 3 and 4 for the remaining sections of quarter round molding, working your way around the room until all the gaps between the baseboard and the floor are covered.
- Fill the nail holes: Once all the quarter round molding is in place, use wood putty to fill any nail holes or gaps. Allow the putty to dry, and then sand it down to create a smooth, seamless finish.
Now that you have successfully placed the quarter round molding, you can move on to the next step of finishing and painting the molding to complete the installation process.
Start at one corner
The first step in installing quarter round without a nail gun is to start at one corner of the room. Choose a corner where you will begin the installation process. It is recommended to start at a corner that is not very visible, such as behind a piece of furniture or in a less noticeable area of the room.
Materials you will need:
- Quarter round molding
- Miter saw or coping saw
- Measuring tape
- Pencil
- Wood glue or adhesive caulk
- Hammer
- Finishing nails
- Putty or wood filler
- Sandpaper
- Paint or stain (optional)
Steps:
- Measure and cut the first piece: Measure the length from the starting corner to the next corner where the quarter round will end. Add a few inches to the measurement for waste. Use a miter saw or coping saw to cut the first piece of quarter round at a 45-degree angle at one end.
- Apply adhesive: Apply a small amount of wood glue or adhesive caulk to the back of the quarter round molding.
- Position the quarter round: Press the quarter round molding against the wall and align it with the corner. Make sure the 45-degree cut end is facing towards the corner.
- Secure the quarter round: Use a hammer to gently tap finishing nails into the quarter round molding. Space the nails evenly along the length of the molding. Be careful not to over-hammer and damage the molding or the wall.
- Fill nail holes: Use putty or wood filler to fill the nail holes. Allow the filler to dry according to the manufacturer’s instructions.
- Sand and finish: Once the putty or wood filler is dry, use sandpaper to smooth out any rough patches or excess filler. If desired, you can also paint or stain the quarter round to match the existing trim or decor in the room.
Continue these steps to install the rest of the quarter round molding around the room. Remember to measure and cut each piece as needed. When you reach the last piece, measure and cut it to fit snugly against the wall and the adjacent piece of molding. Make sure all the quarter round pieces are securely attached and the nail holes are filled before finishing the installation.
FAQ
What is quarter round? Can you explain it?
Quarter round is a type of molding that is used to cover the gap between the baseboard and the floor. It is typically made from wood or composite material and is often used to give a finished look to a room. The name “quarter round” comes from the fact that it is typically a quarter of a circle in shape.
Do I need a nail gun to install quarter round? Is there an alternative?
No, you do not need a nail gun to install quarter round. While a nail gun can make the installation process quicker and easier, it is not the only option. You can also use a hammer and finish nails to secure the quarter round to the baseboard and floor.
What tools will I need to install quarter round without a nail gun?
To install quarter round without a nail gun, you will need a few basic tools. These include a hammer, finish nails, a measuring tape, a miter saw or miter box, a coping saw, a pencil, and a caulk gun.
Video


Meet Harrison Clayton, a distinguished author and home remodeling enthusiast whose expertise in the realm of renovation is second to none. With a passion for transforming houses into inviting homes, Harrison's writing at https://thehuts-eastbourne.co.uk/ brings a breath of fresh inspiration to the world of home improvement. Whether you're looking to revamp a small corner of your abode or embark on a complete home transformation, Harrison's articles provide the essential expertise and creative flair to turn your visions into reality. So, dive into the captivating world of home remodeling with Harrison Clayton and unlock the full potential of your living space with every word he writes.