How to Easily Fix a Nail Gun: Step-by-Step Guide

If you are a DIY enthusiast or a professional carpenter, having a nail gun is an essential tool for all your construction projects. However, like any other mechanical device, nail guns can sometimes break down or malfunction. Instead of rushing to buy a new one, it’s worth trying to fix the issue yourself. In this step-by-step guide, we will walk you through the process of easily fixing a nail gun.
Before we begin, it’s important to note that working with power tools can be dangerous, and it’s always recommended to consult the manufacturer’s instructions and use proper safety equipment. Additionally, if you are unsure about any part of the repair process, it’s best to seek professional assistance.
The first step in fixing a nail gun is to diagnose the problem. Common issues include jams, misfires, and air leaks. By identifying the specific issue, you can determine the appropriate solution. In some cases, a simple cleaning or lubrication may be enough to solve the problem, while other issues might require replacement of certain components.
Once you have identified the problem, you can proceed to disassemble the nail gun. Start by unplugging the tool or removing its battery. Carefully remove any nails from the magazine and open the housing to access the internal components. Take pictures or make notes to ensure proper reassembly later. Pay attention to any damaged or worn-out parts that need replacement.
Identify the Issue
Before you can fix a nail gun, you need to identify the issue that is causing it to malfunction. Here are some common issues you may encounter:

- No power: If your nail gun is not receiving power, it may be due to a faulty power cord or a blown fuse. Check the power cord for any damage and replace it if necessary. Also, check the fuse box and replace any blown fuses.
- No air pressure: If your nail gun is not delivering enough air pressure, it may be due to a clogged air hose or a problem with the air compressor. Check the air hose for any obstructions and clean it if necessary. Also, check the air compressor and make sure it is running properly.
- Jammed nails: If your nail gun is jamming nails, it may be due to a misaligned nail magazine or a worn-out driver blade. Remove the nail magazine and realign it if necessary. Also, inspect the driver blade for any signs of wear and replace it if needed.
- Not firing nails: If your nail gun is not firing nails, it may be due to a faulty trigger mechanism or a problem with the firing pin. Check the trigger mechanism for any damage and replace it if necessary. Also, inspect the firing pin and make sure it is not stuck or damaged.
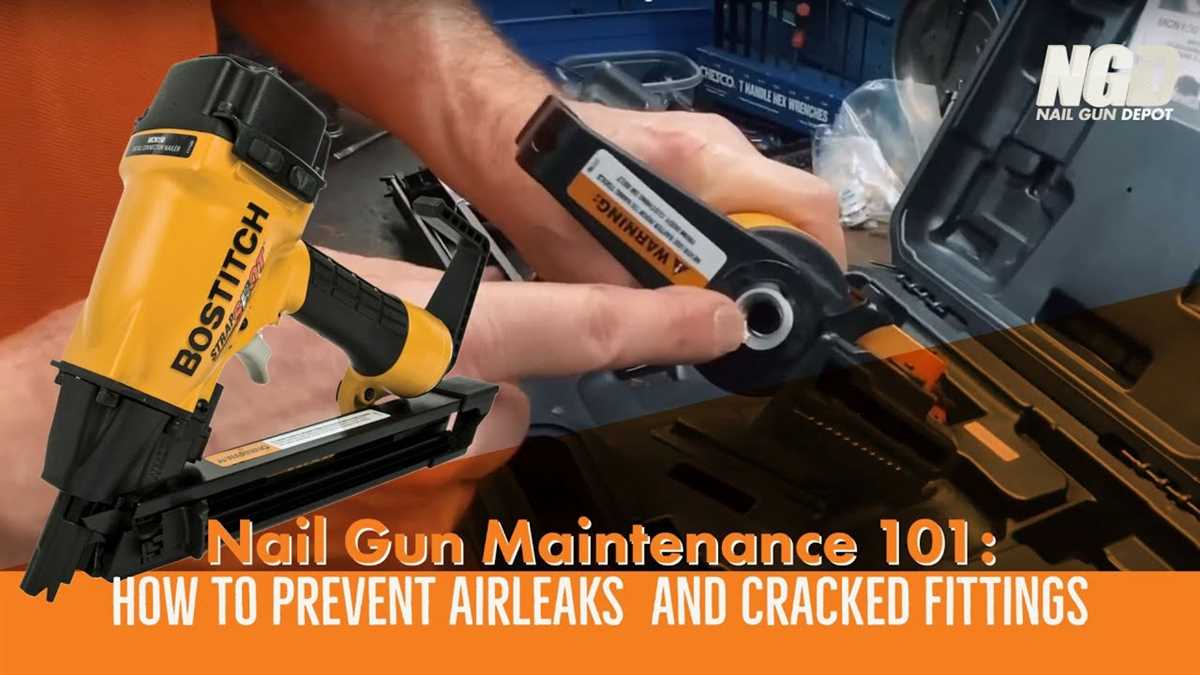
- Leaks air: If your nail gun is leaking air, it may be due to a worn-out O-ring or a loose connection. Inspect the O-rings and replace any that are worn or damaged. Also, check all the connections and tighten them if needed.
Once you have identified the specific issue with your nail gun, you can move on to the next step of the troubleshooting process.
Gather the Necessary Tools

Before you begin fixing your nail gun, it is important to gather all the necessary tools. Having the right tools on hand will make the repair process much easier. Here is a list of tools you will need:
- Screwdriver (both flathead and Phillips)
- Allen wrench set
- Needle-nose pliers
- Wire cutters
- Hammer
- Clean cloth or rag
- Replacement parts (such as O-rings or springs) specific to your nail gun model
These tools will help you disassemble the nail gun, diagnose the problem, and make the necessary repairs. Make sure you have all the tools handy before you get started.
Disassemble the Nail Gun
The first step in fixing a nail gun is to disassemble it. This will allow you to access the internal components and identify any issues that need to be resolved. Follow these steps to disassemble a nail gun:

- Gather the necessary tools: Before starting the disassembly process, make sure you have the required tools such as a screwdriver, pliers, and a wrench.
- Disconnect the nail gun: Ensure that the nail gun is disconnected from any power source or air supply before proceeding with the disassembly.
- Remove the magazine: Many nail guns have a magazine that holds the nails. Remove the magazine by releasing any latches or screws that are holding it in place.
- Take apart the nosepiece: The nosepiece is the front part of the nail gun that comes into contact with the surface being nailed. Look for any screws or latches that secure the nosepiece and remove them to detach it from the nail gun.
- Separate the handle and trigger assembly: Locate the screws or bolts that hold the handle and trigger assembly in place and use the appropriate tool to remove them. Once loosened, you can separate the handle and trigger assembly from the main body of the nail gun.
- Remove the housing: The housing is the outer casing of the nail gun. Look for any screws or latches that are holding it in place and remove them. Gently lift off the housing to expose the internal components such as the motor and the firing mechanism.
Once you have successfully disassembled the nail gun, you can proceed with identifying and fixing any issues that you have identified. It is important to handle the internal components with care and keep track of any screws or parts that you remove so that you can easily reassemble the nail gun once the repair is complete.
Inspect and Clean the Components
Inspecting and cleaning the components of your nail gun is an important step in fixing any issues that may arise. By doing so, you can identify any damaged or worn-out parts and replace them if necessary. Here are the steps to inspect and clean the components of your nail gun:
- Switch off and unplug the nail gun: Before inspecting the components, make sure the nail gun is switched off and unplugged to avoid any accidents.
- Remove the nails and air supply: Empty the nail magazine by removing any remaining nails. Also, disconnect the air supply to ensure safety during the inspection.
- Inspect the nail gun body: Examine the body of the nail gun for any signs of damage, such as cracks or breakages. If you notice any issues, it may be necessary to replace the body of the nail gun.
- Check the trigger mechanism: Inspect the trigger mechanism to ensure it is functioning properly. Test the trigger to see if it moves smoothly and if it engages and disengages correctly.
- Clean the nail gun: Using a clean, soft cloth, wipe down the entire nail gun to remove any dirt, debris, or excess oil. Pay special attention to the air vents and the area around the firing nozzle.
- Inspect the feeder mechanism: Check the feeder mechanism for any jammed nails or debris. Clear out any obstructions and make sure the feeder is moving freely.
- Inspect the firing mechanism: Examine the firing mechanism to ensure it is clean and properly aligned. Clean any buildup of dirt or debris and adjust any misaligned parts.
- Inspect the driver blade: Check the driver blade for any signs of damage or wear. Replace it if necessary.
- Inspect the magazine: Carefully inspect the nail magazine for any bent or damaged parts. Replace any faulty components to ensure smooth nail feeding.
- Identify the damaged parts: Inspect your nail gun and identify which parts are damaged or not working correctly. This may include components such as the trigger, piston, driver blade, or O-rings.
- Order replacement parts: Once you have identified the damaged parts, check the manufacturer’s website or contact their customer service to order the necessary replacement parts. Make sure to provide the specific model and serial number of your nail gun to ensure the correct parts are ordered.
- Gather the necessary tools: Before you begin replacing the damaged parts, gather the tools you will need for the job. This may include a screwdriver, pliers, wrench, or Allen wrench set. Refer to the manufacturer’s instructions or a repair manual for the recommended tools.
- Disconnect the nail gun: For safety reasons, disconnect the nail gun from any power source and remove any nails from the magazine. This will help prevent accidental discharge or injury during the repair process.
- Follow the manufacturer’s instructions: Each nail gun model may have slightly different steps for replacing damaged parts. Refer to the manufacturer’s instructions or a repair manual to ensure you follow the correct procedure. This may involve removing screws, disconnecting wires, or loosening nuts and bolts.
- Replace the damaged parts: Carefully remove the damaged parts from your nail gun and replace them with the new ones. Take note of how the original parts were installed to ensure proper assembly. Use the appropriate tools to secure the new parts in place.
- Test the nail gun: After replacing the damaged parts, reconnect the nail gun to a power source (if applicable) and test it to ensure it is functioning properly. Load a few nails into the magazine and fire the nail gun into a safe target to confirm that the repairs were successful.
- Gather all the parts: Make sure you have all the parts that you took out during the disassembly process. It’s important not to miss any parts, as they are all necessary for the proper functioning of the nail gun.
- Refer to the manufacturer’s manual: If you are not familiar with the reassembly process, it would be helpful to consult the manufacturer’s manual for your nail gun model. The manual will provide detailed instructions and diagrams to guide you through the reassembly process.
- Clean the parts: Before reassembling the nail gun, take the time to clean any parts that may have accumulated dirt or debris. Wipe down the components with a clean cloth and ensure they are dry before moving on to the next step.
- Identify the correct order: Examine the parts and identify their correct order of assembly. The manufacturer’s manual should provide a guide for the proper sequence of reassembly.
- Begin reassembling: Start by placing the main body of the nail gun on a flat surface. Carefully attach the various components, ensuring they fit together snugly. Use the necessary screws or fasteners to secure the parts in place.
- Tighten the screws: As you reassemble the nail gun, make sure to tighten all the screws securely. This will prevent any loose parts that may affect the performance of the tool.
- Check for proper alignment: Once you have reassembled the nail gun, check that all the parts are aligned correctly. Ensure that there are no gaps between components and that everything is fitting together smoothly.
- Test the nail gun: Before using the nail gun, it is essential to test its functionality. Insert a few nails into the magazine and connect the power source. Fire a few nails into a scrap piece of material to ensure that the nail gun is working correctly.
- Place a scrap piece of wood on a stable surface, ensuring it is securely held in place.
- Hold the nail gun firmly with both hands and position the nose of the gun against the wood.
- Press the trigger to fire a nail into the wood.
- Observe the nail’s penetration depth and angle. Ensure it is consistent and meets your desired specifications.
- Repeat this test multiple times to ensure consistency.
Once you have completed the inspection and cleaning process, you can reassemble the nail gun and test it to see if the issues have been resolved. If the problems persist, you may need to consult a professional or contact the manufacturer for further assistance.
Replace any Damaged Parts
If you have identified specific parts that are damaged or not functioning properly, it may be necessary to replace them in order to fix your nail gun. Here is a step-by-step guide on how to replace any damaged parts:
If you are unsure or uncomfortable performing the repair yourself, it is recommended to consult a professional or contact the manufacturer for assistance. Improper repairs or incorrect assembly can lead to further damage or injury.

Lubricate the Moving Parts
Regular lubrication of the moving parts is crucial to keep your nail gun in good working condition. Over time, dust, debris, and general wear and tear can cause the moving parts to become stiff or squeaky. By lubricating these parts, you will not only improve their overall performance but also extend the lifespan of your nail gun.
Step 1: Preparation
Before you start lubricating your nail gun, make sure it is disconnected from any power source and that there are no nails loaded in the magazine.
Step 2: Identify the Moving Parts
Take a moment to identify the different moving parts of your nail gun. These might include the piston, driver blade, cylinder, and other movable components.
Step 3: Clean the Parts

Using a clean, dry cloth or a brush, carefully remove any dirt, dust, or debris from the moving parts. This will help ensure that the lubricant can penetrate the parts effectively.
Step 4: Apply Lubricant
Using a manufacturer-recommended lubricant, apply a small amount to each of the moving parts. Be careful not to overapply, as excessive lubrication can attract more dirt and debris.
Step 5: Distribute the Lubricant
Gently move the parts back and forth to distribute the lubricant evenly. This will help ensure that all moving parts are properly lubricated.
Step 6: Wipe off Excess Lubricant
After distributing the lubricant, use a clean, dry cloth to remove any excess lubricant from the surface of the moving parts. This will prevent any unwanted buildup.
Step 7: Reassemble and Test

Once you’ve wiped off the excess lubricant, reassemble the nail gun and test its functionality. If everything moves smoothly and without any issues, you have successfully lubricated the moving parts.
Remember to lubricate your nail gun periodically, especially if you notice any increased resistance or unusual noises during operation. Regular maintenance will keep your nail gun performing at its best and prevent any potential malfunctions.
Reassemble the Nail Gun
Once you have successfully fixed the issue with your nail gun, it’s time to reassemble the parts and get the tool back to its working condition. Follow these step-by-step instructions to reassemble your nail gun:
By following these steps, you should be able to successfully reassemble your nail gun and have it ready for use again. Remember to always exercise caution when working with power tools and refer to the manufacturer’s manual for specific instructions related to your model.
Test and Adjust the Nail Gun
Step 1: Make sure the nail gun is unplugged and disconnected from the air supply
Before performing any tests or adjustments, it’s important to ensure the nail gun is completely powered off. This means disconnecting it from any power sources and releasing any compressed air.
Step 2: Inspect the nail gun for any visible damage or debris
Before testing or making any adjustments, carefully inspect the nail gun for any visible damage or debris. Look for any bent or broken parts, loose screws, or excessive dirt or sawdust buildup. Cleaning or repairing any visible issues may fix the problem.
Step 3: Load the nail gun with test nails
If the nail gun is not loaded, insert a few test nails into the magazine. Make sure the nails are properly aligned and secured in place.
Step 4: Connect the nail gun to the air supply

Attach the nail gun to the air supply using a compatible air hose. Ensure the connection is secure and properly tightened.
Step 5: Test the nail gun on a scrap piece of wood
Step 6: Adjust the depth or angle if necessary
If the nail gun is not firing nails with the desired penetration depth or angle, adjustments may be necessary. Refer to the nail gun’s manual for instructions on how to adjust these settings. Typically, depth adjustment can be made using a depth adjustment wheel or knob, while angle adjustment may require loosening and repositioning a guide or bumper.
Step 7: Repeat the test firing
After making any adjustments, repeat the test firing process described in Step 5. Check if the nail gun is now performing as desired. If not, further adjustments or repairs may be needed.
Step 8: Clean and lubricate the nail gun
Regular maintenance of the nail gun is important to ensure its proper functioning. Clean any dirt or debris and lubricate the moving parts as recommended by the manufacturer. This will help to prevent future issues and keep the nail gun in optimal condition.
Step 9: Final test and troubleshooting
Once the nail gun has been adjusted and maintained, perform a final test on a scrap piece of wood to ensure it is working properly. If any issues persist, it may be necessary to consult a professional or the manufacturer for further troubleshooting and repair.
FAQ
What are the common issues with nail guns?
Common issues with nail guns include jammed nails, misfiring, air leaks, and a lack of power.
How can I fix a nail gun that is jammed?
To fix a jammed nail gun, first disconnect the power source, and then remove any nails from the magazine. Use pliers or a screwdriver to clear any jammed nails or debris from the nail gun. Make sure to lubricate the moving parts before reconnecting the power source and testing the nail gun.
Why is my nail gun misfiring?
If your nail gun is misfiring, it is likely due to a problem with the firing pin or the trigger. To fix this issue, disassemble the nail gun and clean any debris or corrosion from these parts. If necessary, replace the firing pin or trigger mechanism to ensure proper functioning.
What should I do if my nail gun is leaking air?
If your nail gun is leaking air, first check the air hose connections for any loose or damaged parts. Tighten or replace the connections as necessary. If the leak persists, inspect the O-rings and seals for signs of damage and replace them if needed.
How can I fix a nail gun that lacks power?
If your nail gun lacks power, it may be due to a problem with the compressor or the air pressure. First, check the compressor to ensure it is properly maintained and functioning. Adjust the air pressure settings on the nail gun according to the manufacturer’s guidelines. If the problem continues, consult a professional for further assistance.
Can I fix a nail gun myself or should I hire a professional?
You can often fix a nail gun yourself by following a step-by-step guide and troubleshooting common issues. However, if you are unsure about the problem or do not have the necessary tools and knowledge, it is recommended to hire a professional to avoid any potential damage or injury.
Video

Meet Harrison Clayton, a distinguished author and home remodeling enthusiast whose expertise in the realm of renovation is second to none. With a passion for transforming houses into inviting homes, Harrison's writing at https://thehuts-eastbourne.co.uk/ brings a breath of fresh inspiration to the world of home improvement. Whether you're looking to revamp a small corner of your abode or embark on a complete home transformation, Harrison's articles provide the essential expertise and creative flair to turn your visions into reality. So, dive into the captivating world of home remodeling with Harrison Clayton and unlock the full potential of your living space with every word he writes.