Essential Tips for Nailing Quarter Round with a Nail Gun

If you’re looking to add a finishing touch to your home’s baseboards and flooring, quarter round is the way to go. Quarter round is a small, decorative molding that covers the joint between the baseboard and the floor, creating a clean and polished look. When it comes to nailing quarter round, using a nail gun can be a quick and efficient method. However, there are a few essential tips to keep in mind to ensure that your quarter round installation is successful and secure.
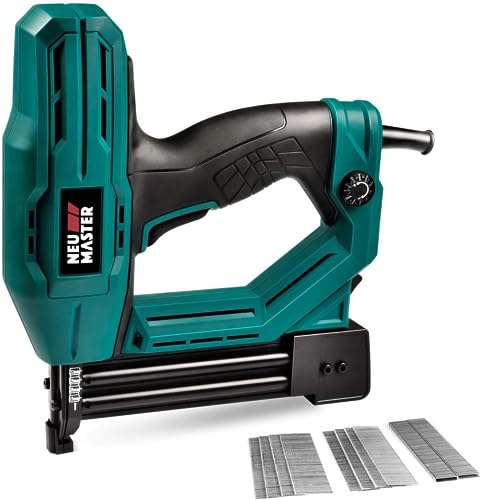
1. Choose the right nail gun: Not all nail guns are created equal, and it’s important to choose the right one for the job. Look for a finish nail gun that is designed for trim work and has a narrow nose, as this will allow you to easily access tight spaces and corners. Additionally, make sure the nail gun is compatible with the size of nails you plan to use for the quarter round.
2. Measure and mark: Before nailing the quarter round, take accurate measurements of the space where it will be installed. Mark the locations where the nails will go, ensuring that they are evenly spaced and positioned to secure the quarter round firmly to the baseboard and the floor. Use a straight edge or level to guide your markings for a professional finish.
3. Use the right nails: To ensure a secure and durable installation, it’s important to use the right nails for nailing quarter round. Choose finish nails that are the appropriate length for your quarter round and baseboard. It’s also a good idea to use galvanized nails, as they are resistant to rust and corrosion, providing long-lasting strength.
4. Practice safety precautions: When using a nail gun, safety should always be a top priority. Make sure to wear protective eyewear to shield your eyes from any flying debris. Additionally, keep your hands and fingers away from the nail gun’s trigger when not in use, and always handle the nail gun with care to prevent accidental firing.

By following these essential tips, you can confidently nail quarter round with a nail gun and achieve a professional-looking finish. Enjoy the clean and polished result that quarter round adds to your home’s baseboards and flooring.
The Best Techniques for Perfectly Attaching Quarter Round using a Nail Gun
1. Preparation
Before you start attaching the quarter round with a nail gun, it is important to properly prepare the area. Make sure the surface you are working on is clean and free of any debris or dust. This will ensure a smooth and secure attachment of the quarter round.
2. Measuring and Cutting
Accurate measurements are crucial for a professional-looking finish. Use a tape measure to determine the length of the quarter round needed for each section. Mark the measurements on the quarter round and use a miter saw to make precise cuts at a 45-degree angle. Take care to cut each piece of quarter round to the correct length and angle to ensure a seamless fit around corners and edges.
3. Positioning
Once you have your quarter round pieces cut to size, position them around the edges of the room to ensure proper fit and alignment. Make any necessary adjustments before attaching them with the nail gun.
4. Nail Size and Placement
Choose the appropriate nail size for the quarter round and the material it is being attached to. Typically, 1-inch or 1.25-inch finishing nails are suitable for most quarter round applications. Space the nails evenly along the length of the quarter round, placing them approximately 1 to 2 inches from the top edge. This will help prevent splitting and ensure a secure attachment.
5. Nail Gun Technique
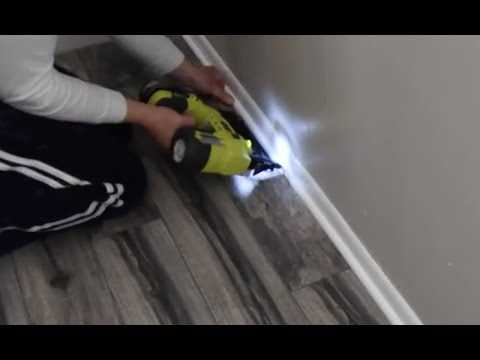
When using a nail gun, hold it at a slight angle to prevent the nails from going in too deep and splitting the quarter round. Position the gun slightly above the quarter round and press the trigger to drive the nail into the baseboard or wall. Take caution not to apply excessive force, as this can damage the quarter round or the surface it is being attached to. Repeat this process for each nail along the length of the quarter round.

6. Finishing Touches

After all the quarter round pieces are securely attached, use a putty or wood filler to fill in any nail holes or gaps. Smooth out the filler with a putty knife and let it dry. Once dry, lightly sand the filled areas to create a seamless finish. You can then paint or stain the quarter round to match the surrounding baseboard or trim, completing the installation process.
By following these techniques, you can ensure a professional and secure attachment of quarter round using a nail gun. Whether you are a DIY enthusiast or a professional carpenter, these tips will help you achieve a flawless finish in your project.
Preparing your work area
Before you start nailing quarter round with a nail gun, it’s important to properly prepare your work area. This will help ensure a smooth and efficient installation process. Here are some essential tips for preparing your work area:
Clean the area
Begin by cleaning the area where you will be installing the quarter round. Remove any debris, dust, or loose materials from the floor or baseboard. This will provide a clean surface for the quarter round to adhere to and ensure a secure installation.

Measure and cut the quarter round
Before you begin nailing, make sure to measure and cut the quarter round to the correct length. Use a tape measure to accurately measure the distance between the two points where the quarter round will be installed. Then, use a miter saw or a coping saw to cut the quarter round at a 45-degree angle for each corner. Make sure to double-check your measurements to ensure a precise fit.
Gather tools and materials
Next, gather all the necessary tools and materials for the installation. This may include a nail gun, nails, quarter round trim, a miter saw or coping saw, a tape measure, a pencil, safety goggles, and ear protection. Having everything ready before you start nailing will help streamline the process and prevent unnecessary delays.
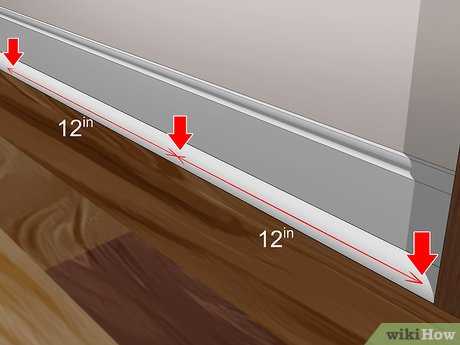
Plan your nailing pattern
Before you start nailing, it’s important to plan your nailing pattern. Determine where you will place the nails along the quarter round trim to ensure a secure and even installation. Generally, it’s recommended to place nails every 12 inches along the length of the quarter round.
Protect the surrounding surfaces
Lastly, protect the surrounding surfaces to prevent any damage during the nailing process. You can use painter’s tape or adhesive-backed protective film to cover the adjacent walls, baseboards, or flooring. This will help protect them from any accidental scratches or marks that may occur while nailing the quarter round.
By following these steps to prepare your work area, you’ll be well-equipped to nail quarter round with a nail gun effectively and efficiently.

Choosing the right tools for the job
1. Nail Gun
A nail gun is an essential tool for nailing quarter round successfully. When choosing a nail gun, consider the following factors:
- Type: There are different types of nail guns available, such as brad nailers, finish nailers, and framing nailers. For quarter round installation, a brad nailer or a finish nailer would be suitable.
- Nail Size: Make sure the nail gun you choose is compatible with the size of nails required for quarter round installation.
- Power Source: Nail guns can be powered by electricity, compressed air, or gas. Choose a power source that is convenient for your project.
2. Nails
Choosing the right nails is crucial for ensuring a proper quarter round installation. Consider the following factors when selecting nails:
- Length: The length of the nails should be appropriate for the thickness of the quarter round and the material it will be installed on.
- Material: Nails for quarter round can be made of various materials, including stainless steel, galvanized steel, or coated steel. Choose nails that are suitable for the specific installation environment.
- Gauge: The gauge of the nails determines their thickness. Make sure to choose nails with the right gauge for your project.
3. Safety Equipment
Always prioritize safety when working with a nail gun. Here are some essential safety equipment to consider:
- Safety Glasses: Protect your eyes from flying debris or accidentally fired nails.
- Ear Protection: Nail guns can be loud, so wearing ear protection can help prevent hearing damage.
- Work Gloves: Gloves provide protection and better grip when handling the nail gun and quarter round.
4. Additional Tools

In addition to the nail gun and nails, several other tools can aid in the quarter round installation process:
- Tape Measure: Use a tape measure to accurately measure the length of quarter round needed and ensure precise cuts.
- Miter Saw or Miter Box: A miter saw or miter box can be used to make angled cuts for corners or joints in the quarter round.
- Finishing Nailer: A finishing nailer can be used for smaller or harder-to-reach areas where a regular nail gun may not fit.
By choosing the right tools for the job, you can ensure a successful and efficient quarter round installation with a nail gun. Remember to prioritize safety and follow proper procedures when using the nail gun and handling the quarter round.
Measuring and cutting the quarter round
Before you start nailing the quarter round in place, it’s important to measure and cut each piece accurately. Here are some steps to follow:
- Measure the length: Use a tape measure to determine the length of the wall or surface where you will be installing the quarter round. Make sure to account for any corners or angles where the quarter round will need to be cut.
- Transfer the measurements: Use a pencil to mark the measurements on the quarter round. Make sure to transfer the measurements accurately, ensuring that each piece will fit properly.
- Prepare the saw: Set up a miter saw or a coping saw on a stable surface. If using a miter saw, adjust the angle and direction of the cut according to the corner or angle where the quarter round will be installed.
- Cut the quarter round: Place the marked quarter round on the saw and carefully cut along the marked line. Take your time and make precise cuts to ensure a clean and accurate fit.
- Check the fit: After cutting the quarter round, hold it up against the wall or surface to check the fit. Make any necessary adjustments, such as trimming off small amounts from the edges, to ensure a snug fit.
Remember, it’s always better to measure twice and cut once to avoid any mistakes and unnecessary wastage of materials. Taking the time to properly measure and cut the quarter round will result in a professional-looking installation.
Positioning the quarter round
Properly positioning the quarter round is crucial for achieving a professional-looking finish. Here are some essential tips to consider:
1. Measure and mark
- Start by measuring the length of the wall where the quarter round will be installed. Use a measuring tape and mark the length on the quarter round with a pencil.
- Make sure to account for any corners or angles, as these will require special cutting and positioning.
2. Cutting the quarter round
- Use a miter saw or hand saw to cut the quarter round to the desired length.
- If you need to cut the quarter round at an angle for corners or angles, use a miter saw to make precise cuts.
- Remember to wear safety goggles and follow the manufacturer’s instructions when using power tools.
3. Dry fit the quarter round
- Before nailing the quarter round in place, it’s important to do a dry fit. Lay the quarter round along the wall and check for any gaps or uneven areas.
- Make any necessary adjustments to ensure a tight fit and seamless look.
4. Apply adhesive (optional)
- If desired, you can apply a small amount of adhesive to the back of the quarter round before nailing it in place.
- This will provide extra stability and prevent the quarter round from shifting over time.
- Be careful not to use too much adhesive, as it may cause the quarter round to warp or buckle.
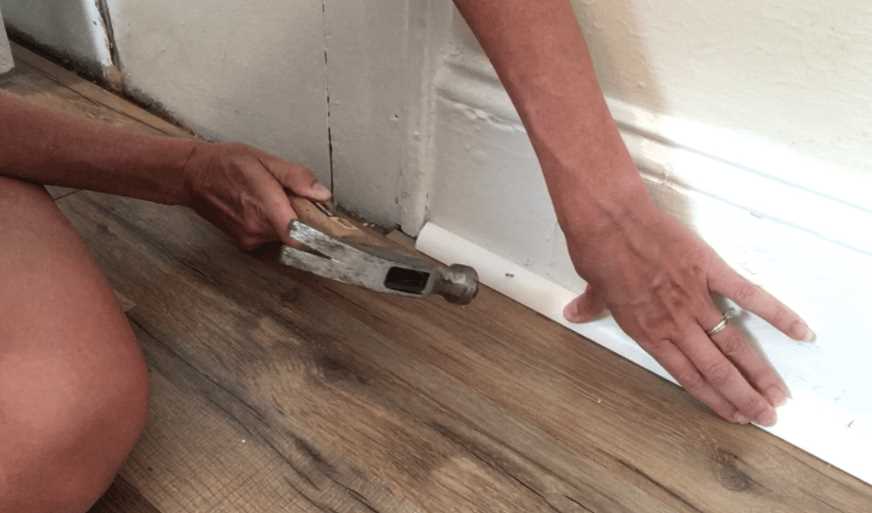
5. Nail the quarter round
- Using a nail gun, start at one end of the quarter round and nail it into place. Space the nails evenly along the length of the quarter round.
- Be sure to aim the nails towards the wall to avoid damaging the visible face of the quarter round.
- Repeat this process for each piece of quarter round, securing it firmly to the wall.
Following these tips will help you properly position the quarter round and achieve a polished finish. Remember to always use caution when working with power tools and wear appropriate safety gear.
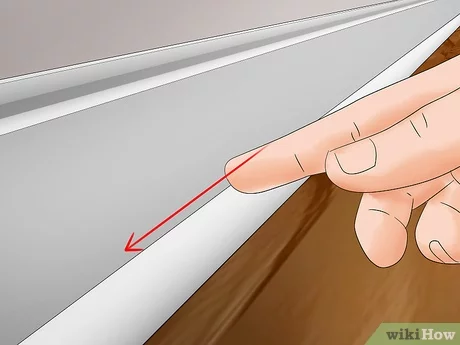
Ensuring a secure and flush fit
1. Measure and cut accurately
Before you start nailing quarter round with a nail gun, it is crucial to measure and cut the pieces accurately. Use a measuring tape to determine the length needed for the quarter round, ensuring it fits perfectly against the baseboard and the floor. Use a miter saw or a miter box with a handsaw to make precise angled cuts at the corners.
2. Use an appropriate nail gun
Choose a nail gun that is suitable for your project. The most common types for quarter round installation are brad nailers and finish nailers. Brad nailers use thinner nails with smaller heads, which are less likely to split the wood. Finish nailers, on the other hand, are more powerful and suitable for longer pieces of quarter round.
3. Pre-drill pilot holes
To prevent the quarter round from splitting when nailing, it is a good practice to pre-drill pilot holes. Use a drill bit that is slightly smaller than the nails you are using. Place the quarter round in position and drill a hole through it and into the baseboard or the wall. This will guide the nail and ensure a more secure fit.
4. Position the quarter round properly
When positioning the quarter round, make sure it is aligned flush against the baseboard and the floor. Use a level to ensure it is straight and adjust if necessary. Proper positioning will not only improve the appearance but also provide a better fit and reduce the risk of the quarter round coming loose over time.
5. Nail at the appropriate intervals
When nailing the quarter round, it is important to place the nails at the appropriate intervals. Generally, nails should be placed every 10-12 inches along the length of the quarter round. This will provide sufficient support and ensure a secure fit. However, avoid nailing too close to the ends, as this can cause splitting.
6. Fill and sand the nail holes
After nailing the quarter round, use a wood filler to fill the nail holes. Choose a filler that matches the color of the quarter round. Apply the filler using a putty knife and smooth it out. Once the filler is dry, sand the area with fine-grit sandpaper until it is smooth and flush with the surface of the quarter round.
7. Finishing touches
Finally, apply a finish or paint to the quarter round to protect it and enhance its appearance. Choose a finish that matches the existing trim or flooring, or opt for a contrasting color to create a bold statement. Allow the finish to dry completely before moving furniture or allowing foot traffic in the area.
By following these tips, you can ensure a secure and flush fit when nailing quarter round with a nail gun. Remember to always wear appropriate safety gear, such as safety glasses and ear protection, when using power tools. With proper installation, your quarter round will not only provide a finished look to your baseboards but also protect them from damage.
Handling the nail gun safely
Nail guns are powerful tools that can greatly increase efficiency and productivity when working with quarter round. However, it is essential to handle the nail gun safely to prevent accidents and injuries. Here are some important tips to keep in mind:
1. Read the manual
Before using the nail gun, carefully read and understand the manufacturer’s manual. Familiarize yourself with the specific model you are using and follow all the safety guidelines and instructions provided.
2. Wear protective gear
Always wear appropriate personal protective equipment (PPE) when using a nail gun. This typically includes safety glasses, ear protection, and work gloves to protect your eyes, ears, and hands from flying debris or accidental firing.
3. Maintain a safe work area
Clear the work area of any obstacles or hazards before using the nail gun. Ensure that there are no people or pets in the vicinity who could accidentally get hit by a nail. Keep the work area clean and organized to prevent tripping hazards.
4. Use the proper technique
Hold the nail gun firmly and securely with both hands. Keep your fingers away from the trigger until you are ready to fire. Avoid placing your hand or any body part in front of the nail gun’s muzzle. Always point the nail gun away from yourself and others.
5. Check the nail gun condition
Before each use, inspect the nail gun for any damage or defects. Ensure that the tool is clean and properly lubricated. Do not use a nail gun that is malfunctioning or damaged, as it can increase the risk of accidents.
6. Disconnect the power source
When not in use or during maintenance, disconnect the nail gun from its power source. This can be done by removing the battery or unplugging the tool. This will prevent accidental discharge of nails and reduce the risk of injuries.
7. Store the nail gun safely
When finished using the nail gun, store it in a locked toolbox or secure location out of reach of unauthorized individuals, especially children. Keep the nail gun away from moisture or extreme temperatures that can affect its performance.
By following these safety tips, you can ensure that you handle the nail gun safely while working with quarter round. Always prioritize safety and take necessary precautions to prevent accidents or injuries.
Properly loading and operating the nail gun
Using a nail gun can be a time-saving and efficient way to install quarter round trim. However, it is important to properly load and operate the nail gun to ensure safety and accuracy. Here are some tips to help you do it correctly:
1. Read the instructions
Before operating the nail gun, it is crucial to read and understand the manufacturer’s instructions. Each nail gun may have specific loading and operating instructions, so familiarize yourself with them to ensure proper use.
2. Use the correct size and type of nails
Make sure you are using the appropriate size and type of nails for your quarter round trim. Using the wrong size nails can result in the trim not being securely attached or even splitting. Check the manufacturer’s recommendations for the proper nail size and type.
3. Load the nails carefully
When loading the nails into the nail gun, be sure to follow the instructions provided by the manufacturer. Generally, this involves pulling back the magazine spring, sliding the nails into the magazine, and releasing the spring to secure the nails in place. Make sure the nails are aligned properly to prevent jams.
4. Adjust the depth settings
Most nail guns have depth adjustment settings that control how far the nails are driven into the wood. To ensure that the nails are driven at the correct depth, adjust the depth settings according to the thickness of your quarter round trim. Test the depth on a scrap piece of trim before proceeding to the actual installation.
5. Hold the nail gun correctly
When operating the nail gun, hold it firmly with both hands and maintain a stable grip. Keep your fingers away from the trigger until you are ready to fire the nail gun. Position the nail gun perpendicular to the trim at the desired angle for accurate and secure nailing.
6. Practice on scrap pieces
If you are new to using a nail gun, it may be helpful to practice on scrap pieces of quarter round trim before installing the actual trim. This will allow you to get a feel for the nail gun and adjust to its power and recoil.
7. Follow proper safety precautions
Always wear safety goggles to protect your eyes from flying debris. Additionally, wear hearing protection to minimize noise exposure. Keep your fingers clear of the nail gun’s firing line to prevent accidental injury. Before starting any project, ensure that the work area is clear of any obstructions or trip hazards.
By following these tips and taking the necessary precautions, you can properly load and operate a nail gun to effectively install quarter round trim.
Finishing touches and clean up
1. Fill nail holes
After nailing the quarter round in place, you may notice small nail holes on the surface. To ensure a clean and professional finish, fill these holes with wood filler or putty. Use a putty knife to spread the filler into the holes, making sure to smooth it flush with the surface of the quarter round.
2. Sand and smooth
Once the filler has dried, use a fine-grit sandpaper to sand the surface of the quarter round. This will remove any excess filler and create a smooth finish. Be careful not to sand too aggressively, as you don’t want to damage the quarter round or the surrounding surfaces.
3. Paint or stain
If desired, you can now paint or stain the quarter round to match your existing trim or flooring. Use a brush or roller to apply an even coat of paint or stain, following the manufacturer’s instructions. Allow the paint or stain to dry completely before proceeding.
4. Clean up
Once you have finished installing and finishing the quarter round, it’s important to clean up any debris or dust that may have accumulated during the process. Use a broom, vacuum, or damp cloth to remove any excess sawdust or dirt from the area.
5. Inspect and make adjustments
Before considering the project complete, take a moment to inspect the quarter round and make any necessary adjustments. Ensure that all nails are properly sunk into the quarter round and that there are no visible gaps or uneven areas. Make any required adjustments or touch-ups as needed.
6. Dispose of materials responsibly
Properly dispose of any leftover materials, such as excess quarter round pieces or packaging. Depending on your location, you may need to follow specific guidelines for recycling or disposing of these materials. Check with your local waste management facility for guidance.
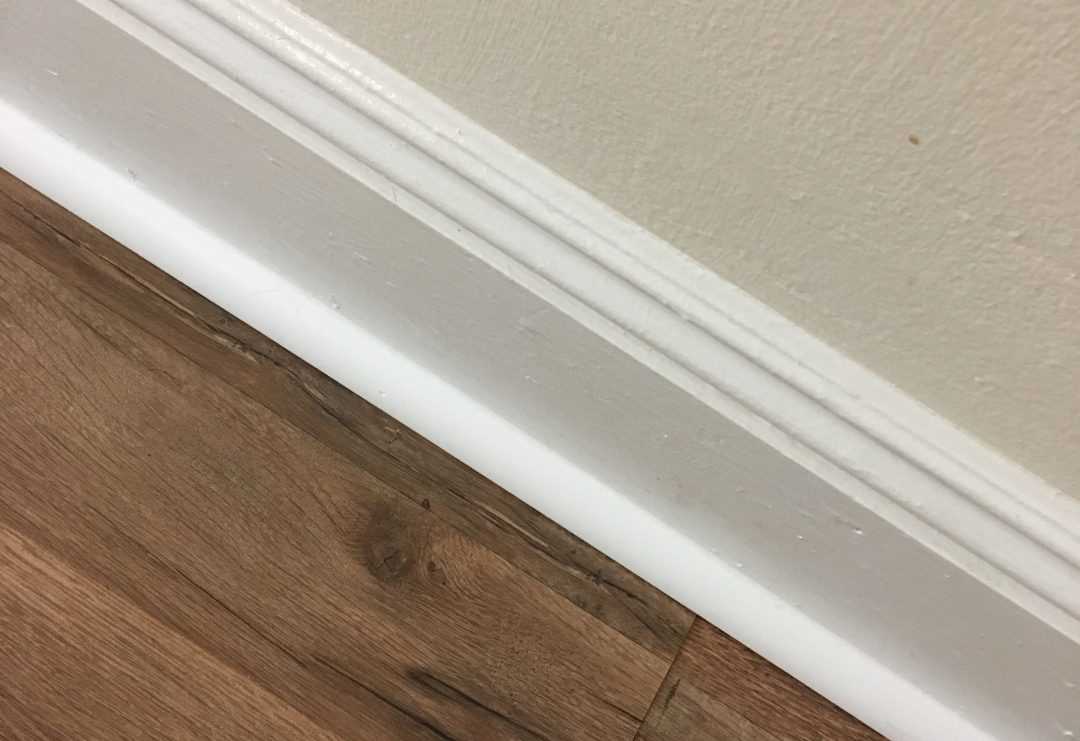
7. Enjoy your professionally finished quarter round!
With your quarter round properly installed and finished, take a moment to step back and admire the clean and polished look it adds to your space. Enjoy the professional and seamless transition between your baseboards or trim and your flooring.
FAQ
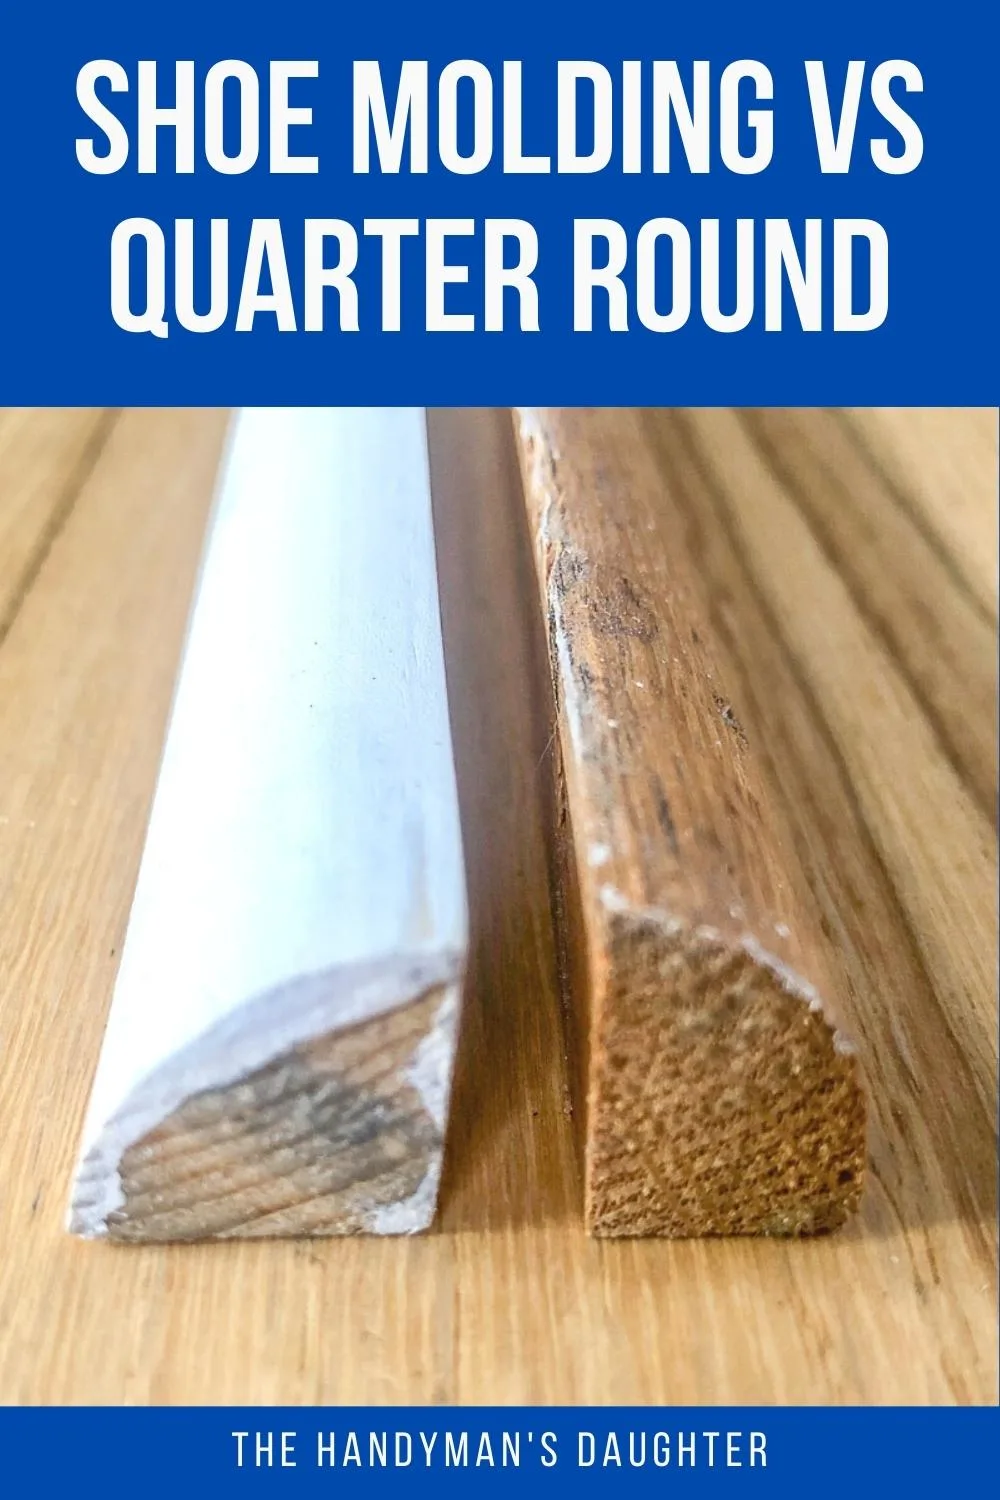
What is a quarter round?
A quarter round is a type of molding that is commonly used to cover the gap between the baseboard and the floor.
Why should I use a nail gun to install quarter round?
Using a nail gun to install quarter round can save you time and provide a more secure and professional-looking result compared to using a hammer and nails.
What type of nail gun should I use for installing quarter round?
For installing quarter round, it is recommended to use a finish nail gun, such as a brad nailer or a pin nailer, which is designed to make small, discreet holes that are easily filled and painted over.
How do I choose the right size of nails for quarter round installation?
The size of nails you should use for quarter round installation will depend on the thickness of the quarter round and the material you are nailing into. Generally, 1 1/4-inch to 1 1/2-inch nails are suitable for most quarter round installations.
Can I use a nail gun to install quarter round over a concrete floor?
Yes, you can use a nail gun to install quarter round over a concrete floor. However, you will need to use a specially designed concrete nail gun, such as a powder-actuated nail gun or a concrete nailer, which is capable of driving nails into concrete surfaces.
What safety precautions should I take when using a nail gun?
When using a nail gun, it is important to wear safety glasses to protect your eyes from flying debris. It is also recommended to wear ear protection to reduce noise exposure. Additionally, make sure to follow the manufacturer’s instructions and practice proper handling and storage of the nail gun.
Are there any alternative methods for installing quarter round without using a nail gun?
Yes, if you do not have a nail gun or prefer not to use one, you can also install quarter round using a hammer and finishing nails. However, using a nail gun can make the installation process faster and easier.
Video


Meet Harrison Clayton, a distinguished author and home remodeling enthusiast whose expertise in the realm of renovation is second to none. With a passion for transforming houses into inviting homes, Harrison's writing at https://thehuts-eastbourne.co.uk/ brings a breath of fresh inspiration to the world of home improvement. Whether you're looking to revamp a small corner of your abode or embark on a complete home transformation, Harrison's articles provide the essential expertise and creative flair to turn your visions into reality. So, dive into the captivating world of home remodeling with Harrison Clayton and unlock the full potential of your living space with every word he writes.