Woodworking tips: How to turn wood without a lathe

Woodturning is a popular technique used in woodworking to create cylindrical shapes out of wood. Traditionally, a lathe is used for this purpose, but what if you don’t have access to a lathe? Fear not, because there are alternative methods that allow you to turn wood without a lathe.
One method is called “Power Sanding”. Instead of using a lathe, you can use a power sander to shape and smooth the wood. You will need a disc sander and a bandsaw to cut the wood into roughly the desired shape. Then, attach the wood to the disc sander and start shaping it by rotating the piece against the spinning sanding disc. This method requires some practice and patience, but it can produce great results.
Another technique is called “Hand Turning”. This method involves using hand tools such as gouges, chisels, and scrapers to shape the wood. Start by securing the wood in a vice or clamp, then carefully carve away the excess material to create the desired shape. Hand turning requires a steady hand and precise control, but it can be a rewarding and meditative process.
Lastly, a method called “Bodging” can be used to turn wood without a lathe. Bodging is an old-fashioned technique that involves using a spring pole attached to the workpiece to rotate it while you shape it with hand tools. This method requires more setup and preparation, but it can be a fun and unique way to turn wood.
While these methods may not give you the same precision and speed as a lathe, they offer alternative options for woodturning enthusiasts who don’t have access to one. Experiment with these techniques, and you may discover a new way to explore your woodworking skills.

Woodworking tips
Tip 1: Safety first
Before starting any woodworking project, it is important to prioritize safety. Always wear protective gear such as safety glasses, gloves, and a dust mask. Ensure that your work area is well-ventilated and free from clutter. Keep your tools in good condition and use them correctly to avoid accidents.
Tip 2: Measure twice, cut once
Accurate measurements are crucial when working with wood. Take the time to measure your pieces carefully before making any cuts. Use a quality measuring tape or ruler and double-check your measurements to avoid any mistakes. Remember the old adage: “Measure twice, cut once.”
Tip 3: Choose the right wood for your project
The type of wood you choose for your woodworking project can greatly affect the end result. Consider factors such as the wood’s strength, durability, and appearance. Some popular types of wood for woodworking include oak, maple, pine, and walnut. Research the properties of different wood species and choose the one that is best suited for your project.
Tip 4: Use clamps for stability
When working with wood, having stability is key. Make use of clamps to secure your pieces together and provide stability while working. Clamps can help prevent pieces from shifting or moving, allowing for precise and clean cuts.

Tip 5: Sanding is essential
Sanding is an important step in the woodworking process that should not be overlooked. Use sandpaper or a sanding block to smooth out rough edges, remove imperfections, and achieve a smooth surface. Start with coarser grit sandpaper and gradually work your way to a finer grit for the best results.
Tip 6: Practice proper tool maintenance

Regular tool maintenance is crucial for ensuring their longevity and functionality. Keep your tools clean and free from dirt and debris. Sharpen blades regularly and lubricate moving parts to keep them in good working condition. Proper maintenance will not only extend the life of your tools but also help you achieve better results in your woodworking projects.
Tip 7: Learn from others
Woodworking is a craft that can always be improved upon. Take the time to learn from more experienced woodworkers or seek inspiration from woodworking communities. Watch tutorial videos, read books or join woodworking forums to gain new insights, techniques, and ideas. Learning from others in the field can help you grow and develop your woodworking skills.
Tip 8: Take your time
Patience is key in the woodworking process. Take your time with each step, from planning to cutting to finishing. Rushing through a project can lead to mistakes and unsatisfactory results. Enjoy the process and remember that woodworking is a craft that requires attention to detail and precision.

Tip 9: Embrace imperfections
Woodworking is a unique craft that celebrates the natural beauty of wood. Embrace the unique grain patterns, knots, and imperfections that make each piece of wood special. These characteristics add character and charm to your finished project. Embracing imperfections can also help alleviate unnecessary stress and allow you to focus on the craftsmanship and enjoyment of woodworking.
Tip 10: Have fun!
Above all, woodworking is meant to be enjoyable. Have fun with your projects and embrace the creative process. Don’t be afraid to experiment, try new techniques, and challenge yourself. Enjoy the satisfaction of seeing your ideas come to life and creating something beautiful with your own hands.
Learn the basics of woodworking
1. Safety first
Before you start any woodworking project, it’s important to prioritize safety. Always wear appropriate safety equipment, such as safety glasses or goggles, hearing protection, and a dust mask. Make sure you have a clean and organized workspace, free from clutter or hazards. Familiarize yourself with the tools you will be using and follow proper safety guidelines for each tool.
2. Understand the different types of wood
Woodworking involves working with different types of wood, each with its own characteristics and uses. Some common types of wood include pine, oak, maple, and mahogany. Learn about the properties of each type of wood, such as its hardness, grain pattern, and durability. This will help you choose the right type of wood for your project and understand how it will behave when cutting, shaping, or finishing.
3. Get to know the essential tools
Woodworking requires a variety of tools, both hand tools and power tools. Some essential tools for a beginner include a handsaw, chisels, a hammer, a tape measure, a square, and a set of different-sized screwdrivers. As you gain more experience, you may want to invest in additional tools such as a table saw, a router, or a drill press. Start with the basics and gradually build up your tool collection as you progress.

4. Learn basic joinery techniques
Joinery is the process of connecting two pieces of wood together to create a sturdy and functional structure. There are various joinery techniques used in woodworking, including butt joints, miter joints, dovetail joints, and mortise and tenon joints. Take the time to learn and practice these techniques to improve the strength and aesthetics of your woodworking projects.
5. Practice measuring and marking accurately
Precision is key in woodworking, and accurate measurements and markings are crucial for successful projects. Invest in a good quality tape measure and learn how to use it correctly. Use a marking gauge or a sharp pencil to make precise markings on the wood before cutting or drilling. Practice measuring and marking accurately to ensure your woodworking projects fit together perfectly.
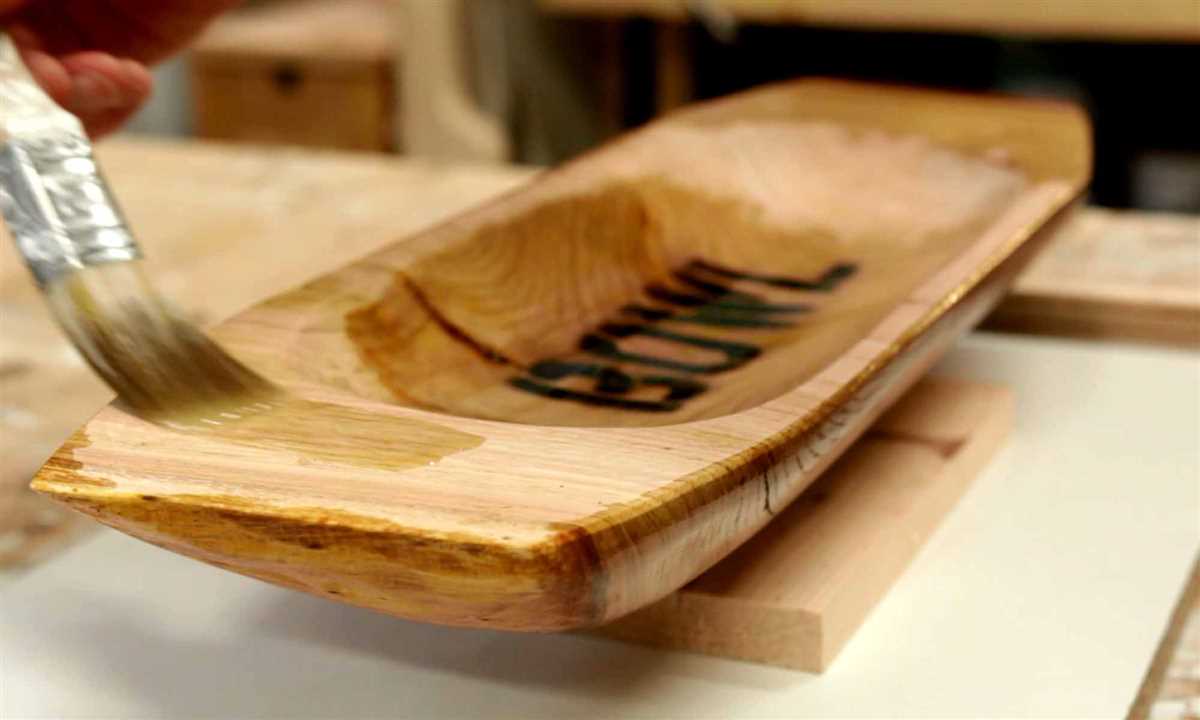
6. Get comfortable with different finishing techniques
Finishing is the final step in a woodworking project, where you apply a protective coating or enhance the appearance of the wood. There are various finishing techniques, including staining, varnishing, and painting. Learn about different types of finishes and experiment with different techniques to achieve the desired look for your projects.
7. Join a woodworking community
Woodworking is a skill that can always be improved, and joining a woodworking community can provide valuable insights and inspiration. Look for local woodworking clubs or online forums where you can connect with other woodworkers, share tips and ideas, and learn from their experiences. It’s a great way to expand your knowledge and network with like-minded individuals.

Remember, woodworking is a skill that takes time and practice to master. Start with small projects and gradually challenge yourself with more complex ones. Don’t be afraid to make mistakes, as they are opportunities for learning and growth. Enjoy the process and have fun creating beautiful and functional pieces with your woodworking skills!
Explore alternative ways to turn wood
- Use a drill: One way to turn wood without a lathe is by using a drill. Attach a piece of wood to a clamp or vise and secure it in place. Then, use the drill with a carving or shaping attachment to rotate the wood while you shape it with the appropriate tools.
- Bow lathe: A bow lathe is a simple method of turning wood that has been used for centuries. It consists of a wooden bow with a string and a flywheel. By pulling and releasing the bow, you can create rotational movement in the wood, allowing you to shape it with various tools.
- Handheld turning tools: Another alternative to using a lathe involves using handheld turning tools. This method works well for smaller projects and can be done by hand or with a power tool. By carefully carving and shaping the wood with these tools, you can achieve a similar result to turning on a lathe.
- Faceplate turning: Faceplate turning involves securing the wood to a faceplate, which is then attached to a rotating spindle. This method allows you to shape the wood using handheld carving tools or a power carver while the wood rotates. It is a versatile and efficient way to turn wood without a lathe.
- Table saw method: For certain types of woodturning projects, a table saw can be a useful alternative. By creating specific jigs and setups, you can replicate some of the turning techniques typically done on a lathe. However, caution should be exercised when using a table saw for this purpose, as it can be dangerous.
These alternative methods offer creative solutions for turning wood without the need for a lathe. Whether you prefer using handheld tools, power tools, or traditional methods like a bow lathe, there are options available for every woodworker. Experiment with different techniques to find the method that works best for your woodworking projects.
Consider using a DIY method
If you don’t have access to a lathe or are looking for a more budget-friendly option, you can consider using a DIY method to turn wood. While it may not produce the same level of precision and smoothness as a lathe, it can still be a fun and effective way to create unique wooden pieces.
1. Hand carving
Hand carving is one of the oldest and simplest methods of shaping wood. To do this, you will need a set of carving tools such as gouges, chisels, and knives. Begin by marking out the shape you want to carve on the wood, then gradually remove material using your carving tools. Keep in mind that hand carving requires practice and patience to achieve the desired results.
2. Power drill with a rotary tool
If you have a power drill and a rotary tool attachment, you can turn it into a makeshift lathe. Attach the rotary tool to the drill chuck, and secure the wood piece to a stable surface. Turn on the drill at a low speed and bring the rotary tool into contact with the wood, allowing it to shape the wood as it spins. This method allows for more control and precision compared to hand carving.
3. Table saw method

Another DIY method involves using a table saw to achieve a turning effect. Start by making a diagonal cut on one corner of the wood piece using the table saw. This will create a flat spot. Then, keep rotating the wood against the table saw blade while making multiple diagonal cuts. This process will gradually shape the wood into a cylindrical form. This method requires caution and adherence to safety practices when using a table saw.
4. Sanding drum attachment
If you have a handheld drill, you can also consider using a sanding drum attachment. Attach the sanding drum and secure the wood piece to a stable surface. Turn on the drill at a low speed and bring the sanding drum into contact with the wood, allowing it to shape the wood as it spins. This method is suitable for smaller, intricate projects and can provide a smooth finish.
While these DIY methods may not replicate the precision and versatility of a lathe, they can still be effective for smaller projects or for those who are just starting out in woodworking. Remember to take necessary safety precautions and practice proper woodworking techniques when using these methods.
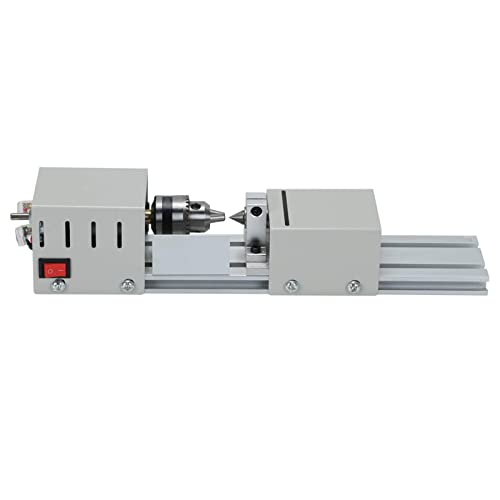
Use a hand drill as a makeshift lathe
If you don’t have a lathe but still want to turn wood, you can use a hand drill as a makeshift lathe. While it may not provide the same precision as a dedicated lathe, it can still be a useful alternative for smaller projects.
Materials Needed:
- Wooden block or dowel
- Hand drill
- Chisel or gouge
- Sandpaper
- Clamps
Step-by-Step Guide:
- Choose a wooden block or dowel that you want to turn. Make sure it is securely clamped to a workbench or another stable surface.
- Attach a chisel or gouge to the hand drill. Make sure it is securely tightened.
- Turn on the hand drill and position the chisel or gouge against the wooden block or dowel. Apply gentle pressure to start removing material and shaping the wood.
- Move the hand drill in a smooth and controlled motion along the length of the wood, allowing the chisel or gouge to shape the wood as it spins.
- Periodically stop and check the progress, making adjustments as needed. Continue shaping the wood until you achieve the desired form.
- Once the shaping is complete, switch to sandpaper to smooth the surface of the wood. Use incrementally finer grits of sandpaper to achieve a polished finish.
- Remove any dust or debris from the wood and admire your handiwork!
Remember to always wear appropriate safety gear, such as goggles and gloves, when working with wood and power tools. Additionally, take extra caution when using a hand drill as a make-shift lathe, as it may not provide the same level of control as a dedicated lathe.
Try using a woodturning jig
If you don’t have a lathe but still want to create turned wood projects, consider using a woodturning jig. A woodturning jig is a device that helps you hold and rotate your workpiece while you shape it with hand tools. It allows you to mimic the movements and control of a lathe, giving you the ability to turn wood without the need for expensive machinery.
Here are a few popular types of woodturning jigs:
- Homemade Jigs: Many woodworkers create their own jigs using scrap materials. These jigs can be customized to fit your specific needs and can be a cost-effective solution if you’re on a budget.
- Skateboard Wheels Jig: This type of jig uses skateboard wheels to hold and rotate the workpiece. It’s a simple and affordable option that provides smooth rotation and stability.
- Drill Press Jig: If you have a drill press, you can use it as a makeshift lathe by attaching a woodturning attachment. This allows you to rotate your workpiece while using handheld tools to shape the wood.
When using a woodturning jig, it’s important to secure your workpiece properly to prevent any accidental movement. You can use clamps or screws to hold the wood securely in place. Additionally, make sure to wear proper safety gear, such as gloves and eye protection, when working with hand tools.
While a woodturning jig can provide a great alternative to a lathe, it’s worth noting that it may come with a learning curve. Practice is key, and it may take some time to get used to the movements and techniques required for turning wood without a lathe.
In summary, using a woodturning jig can be a practical and cost-effective solution if you don’t have a lathe. It allows you to create turned wood projects using hand tools and mimicking the movements of a lathe. Whether you choose to make your own jig or use a commercially available one, make sure to follow proper safety precautions and practice to achieve the best results.
Experiment with a router and a spiral cutter
If you don’t have a lathe, you can still create interesting shapes and designs in wood by experimenting with a router and a spiral cutter. This technique allows you to remove material from the wood while it spins, similar to the action of a lathe.
1. Choose the right router bit
For this technique, you’ll need a router with a spiral cutter bit. This type of bit has a spiral-shaped cutting edge that allows for smoother cutting and chip removal. Make sure to choose a bit with the appropriate size and shape for the design you want to create.
2. Secure the wood
Before you start, make sure to secure the wood firmly in place. You can use clamps or a vise to hold it steady while you work. This is important to ensure your safety and to prevent the wood from slipping or moving while you’re using the router.
3. Start the router
Once the wood is secured, turn on the router and let it reach its maximum speed. This will help ensure a smooth and even cut. Make sure to hold the router firmly and position it in a way that allows you to have full control over its movement.
4. Shape the wood

To shape the wood, slowly and carefully move the router along the surface of the wood. You can experiment with different depths and angles to create different shapes and designs. Take your time and make small adjustments as needed to achieve the desired result.
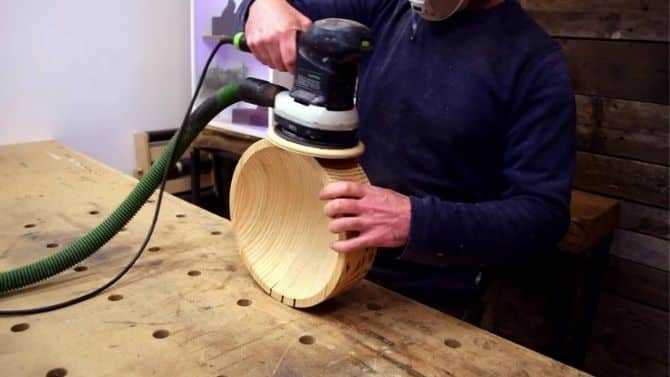
5. Sand and finish
Once you’ve finished shaping the wood, it’s time to sand and finish it. Use sandpaper or a sanding block to smooth out any rough edges or surfaces. Apply a finish of your choice, such as varnish or oil, to protect the wood and enhance its appearance.
By experimenting with a router and a spiral cutter, you can create unique and intricate designs in wood without the need for a lathe. Practice and patience are key to mastering this technique, so don’t be afraid to try different approaches and see what works best for you.
Utilize a drill press with a sanding drum attachment
If you don’t have access to a lathe but still want to turn wood, you can use a drill press with a sanding drum attachment to achieve similar results. While this method may not be as precise as using a lathe, it can still be an effective way to shape and smooth wooden pieces.
To get started, you will need a drill press and a sanding drum attachment. These attachments are typically cone-shaped with abrasive sandpaper on the surface. They can be found at most hardware stores or online.
Step 1: Secure the wood
Begin by securely clamping your piece of wood onto your workbench or another stable surface. This will help prevent any movement or slipping while you work.
Step 2: Set up the drill press
Install the sanding drum attachment into your drill press. Make sure it is securely attached and aligned properly.
Step 3: Adjust the speed and height
Before turning on the drill press, adjust the speed and height according to your desired results. Higher speeds will remove wood more quickly, while lower speeds will allow for more control and precision.
Step 4: Begin sanding
Turn on the drill press and bring the sanding drum into contact with the wood. Gently move the drum back and forth along the surface of the wood, applying even pressure. Be sure to wear safety goggles and work gloves for protection.
Continue sanding until you achieve the desired shape and smoothness. Take breaks to check your progress and make any necessary adjustments.
Step 5: Sand in different directions
To achieve a more uniform shape and smooth finish, sand the wood in different directions. This will help remove any irregularities and create a more polished look.
Step 6: Final touches
Once you are satisfied with the shape and smoothness of the wood, you can finish your piece by sanding it by hand or applying a wood finish or polish.
While using a drill press with a sanding drum attachment may not be as precise as using a lathe, it can still be a useful alternative for turning wood. With some practice and patience, you can achieve impressive results and create unique wooden pieces.
Enhance your skills with practice and patience
Woodworking is a craft that requires time, effort, and dedication to master. Whether you are a beginner or an experienced woodworker, enhancing your skills is an ongoing process that requires practice and patience.
1. Practice, practice, practice
The key to becoming a skilled woodworker is to practice regularly. The more you work with wood, the better you will become at using different tools, techniques, and materials. Start with simple projects and gradually move on to more complex ones as you gain confidence and experience. Don’t be afraid to make mistakes; they are an essential part of the learning process.
2. Learn from others
Woodworking is a craft that has been passed down through generations, and there is a wealth of knowledge and expertise available from experienced woodworkers. Seek out mentorship or take woodworking classes to learn from professionals. Additionally, online forums, blogs, and videos can provide valuable insights and tips from fellow woodworkers. Learning from others will help you avoid common mistakes and learn new techniques.
3. Develop a plan
Before starting a woodworking project, it’s crucial to have a well-thought-out plan. This includes choosing the right wood, selecting the appropriate tools, and understanding the steps involved. Take the time to measure, mark, and plan each step of the project to avoid errors and ensure accuracy. Proper planning will save you time and frustration in the long run.
4. Be patient
Woodworking requires patience and attention to detail. Rushing through a project can lead to mistakes and unsatisfactory results. Take your time, double-check measurements, and work carefully. Enjoy the process and embrace the satisfaction that comes with creating something with your own hands. Remember, every project is an opportunity to learn and grow as a woodworker.
5. Safety first
Woodworking can be a hazardous activity, so it’s essential to prioritize safety. Always wear appropriate protective gear, such as safety goggles and gloves, when working with tools. Familiarize yourself with the proper use of each tool and follow safety guidelines. Keep your workspace clean and organized to minimize the risk of accidents. Taking safety precautions will ensure that you can enjoy woodworking for years to come.
Enhancing your woodworking skills is a journey that requires dedication and continuous learning. By practicing regularly, seeking guidance, planning effectively, and being patient and safe, you can enhance your skills and create beautiful projects that showcase your craftsmanship.
FAQ
Can I turn wood without a lathe?
Yes, it is possible to turn wood without a lathe using alternative methods.
What are some alternative methods to turning wood without a lathe?
Some alternative methods to turning wood without a lathe include using a drill press, a hand drill, or a spindle-turning jig.
How can I turn wood using a drill press?
To turn wood using a drill press, you can attach a spindle-turning jig to the drill press table and use it to secure the wood. Then, you can rotate the wood against the drill bit to shape it.
Is it possible to turn small pieces of wood without a lathe?
Yes, it is possible to turn small pieces of wood without a lathe using a hand drill and a spindle-turning jig. This method allows for more control and precision when shaping smaller pieces of wood.
How can I create decorative woodturning without a lathe?
To create decorative woodturning without a lathe, you can use a rotary tool with a cutting bit or sanding drum to shape the wood. This method requires patience and careful hand movements to achieve the desired results.
Are there any limitations to turning wood without a lathe?
Turning wood without a lathe may have limitations in terms of the size and shape of the wood that can be turned. Additionally, it may require more effort and time compared to using a lathe.
What are some safety precautions to take when turning wood without a lathe?
When turning wood without a lathe, it is important to wear safety glasses and gloves to protect yourself from flying wood chips and splinters. It is also recommended to secure the wood properly to prevent it from moving or slipping during the turning process.
Video

Harrison Clayton
Meet Harrison Clayton, a distinguished author and home remodeling enthusiast whose expertise in the realm of renovation is second to none. With a passion for transforming houses into inviting homes, Harrison's writing at https://thehuts-eastbourne.co.uk/ brings a breath of fresh inspiration to the world of home improvement. Whether you're looking to revamp a small corner of your abode or embark on a complete home transformation, Harrison's articles provide the essential expertise and creative flair to turn your visions into reality. So, dive into the captivating world of home remodeling with Harrison Clayton and unlock the full potential of your living space with every word he writes.