Wood Lathe Accessories: How to Make and Use Them – Your Ultimate Guide
Woodworking enthusiasts know that having the right tools and accessories can make a world of difference in their craft. When it comes to woodturning, a wood lathe is the centerpiece of any workshop. However, to truly elevate your woodturning projects, you’ll need to explore the world of wood lathe accessories.
In this ultimate guide, we will walk you through everything you need to know about wood lathe accessories, from how to make them to how to use them effectively. Whether you’re a beginner looking to enhance your skills or a seasoned woodturning expert searching for new ideas, this guide has got you covered.
We will delve into the different types of wood lathe accessories, including chucks, centers, faceplates, and steady rests, and explain how each one can expand your project possibilities. We’ll cover the basics of making your own accessories, from choosing the right materials to working with various tools and techniques.
Additionally, we’ll provide step-by-step instructions on how to properly use these accessories and highlight some expert tips and tricks along the way. From mounting your wood blank to achieving perfect symmetry in your turning, you’ll learn all the secrets to maximize your woodturning potential.
Wood Lathe Accessories
Wood lathes are versatile machines that can be used to create a wide variety of woodturning projects. To enhance the functionality and precision of your wood lathe, there are several essential accessories you should consider acquiring.

1. Lathe Chucks
A lathe chuck is a crucial accessory that allows you to securely hold your workpiece while it’s being turned. Chucks usually have jaws that can be adjusted to accommodate different sizes and shapes of workpieces. They provide excellent gripping power and stability, ensuring safe and accurate turning.
2. Faceplates
Faceplates are another essential accessory for a wood lathe. They serve as a mounting point for irregularly shaped workpieces that cannot be held by a lathe chuck. Faceplates are typically attached to the headstock of the lathe using screws or other securing mechanisms, providing a stable platform for turning.
3. Tool Rests
Tool rests are used to support woodturning tools while you’re working on your lathe. They provide stability and control, allowing you to produce more precise and accurate cuts. Tool rests come in various lengths and shapes to accommodate different woodworking techniques and projects.
4. Live Centers and Drive Centers
Live centers and drive centers are accessories that are used to support and rotate the opposite end of the workpiece. Live centers have bearings that provide smooth rotation, while drive centers have spurs that penetrate the wood for added grip. These accessories are crucial for reducing vibrations and ensuring stable turning.
5. Steady Rests
If you’re working on long, slender workpieces, a steady rest can be a valuable accessory. A steady rest is designed to support and stabilize the workpiece while you’re turning it. This helps prevent vibration and flexing, resulting in smoother and more accurate cuts.

6. Sanding and Polishing Accessories
For achieving a smooth and refined finish on your turned projects, sanding and polishing accessories like sanding pads, discs, and mandrels are essential. These accessories attach to your lathe and allow you to sand and polish your workpiece while it’s still spinning. They help remove imperfections and bring out the natural beauty of the wood.
7. Tool Storage and Organization
To keep your woodturning tools organized and easily accessible, consider investing in tool storage and organization accessories. These can include tool racks, wall-mounted holders, or toolboxes specifically designed for woodturning tools. Having a well-organized workspace increases efficiency and safety while working on your lathe.
8. Safety Accessories
Lastly, don’t forget about safety accessories. This can include items like face shields, safety glasses, dust masks, and hearing protection. Woodturning can create wood chips, debris, and noise that can be potentially harmful, so it’s essential to prioritize your safety while using a wood lathe.
By investing in these wood lathe accessories, you can enhance your woodturning experience and expand your capabilities as a woodworker. Whether you’re a beginner or an experienced woodturner, having the right accessories can make a significant difference in the quality of your projects.
Must-Have Accessories for Wood Lathe
1. Cutting Tools
One of the most essential accessories for a wood lathe is a set of high-quality cutting tools. These tools, typically made of High-Speed Steel (HSS) or carbide, allow you to shape and refine your woodturning projects with precision and control. There are various types of cutting tools available, including gouges, scrapers, and parting tools, each designed for different purposes.

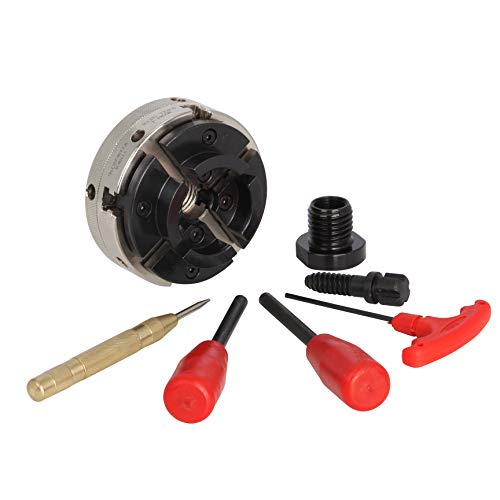
2. Chuck
A chuck is a key accessory that allows you to securely hold your workpiece on the lathe spindle. It provides a firm grip, ensuring the safety of both the woodworker and the project. Chucks come in various sizes and designs, such as scroll chucks and four-jaw chucks, offering versatility in holding different shapes and sizes of wood.
3. Faceplate
A faceplate is another must-have accessory for wood lathe work. It is essentially a flat metal plate that attaches to the headstock of the lathe. Faceplates have holes or slots where you can screw or bolt your workpiece directly onto them. This allows you to turn irregularly shaped or large-sized wood pieces that cannot be held by a chuck.
4. Mandrel
A mandrel is a useful accessory for turning projects such as pens, bottle stoppers, and other small, cylindrical objects. It consists of a metal rod with various bushings that help guide and support your workpiece. Mandrels allow you to easily turn and shape these objects with precision, ensuring consistent dimensions and smooth finishes.
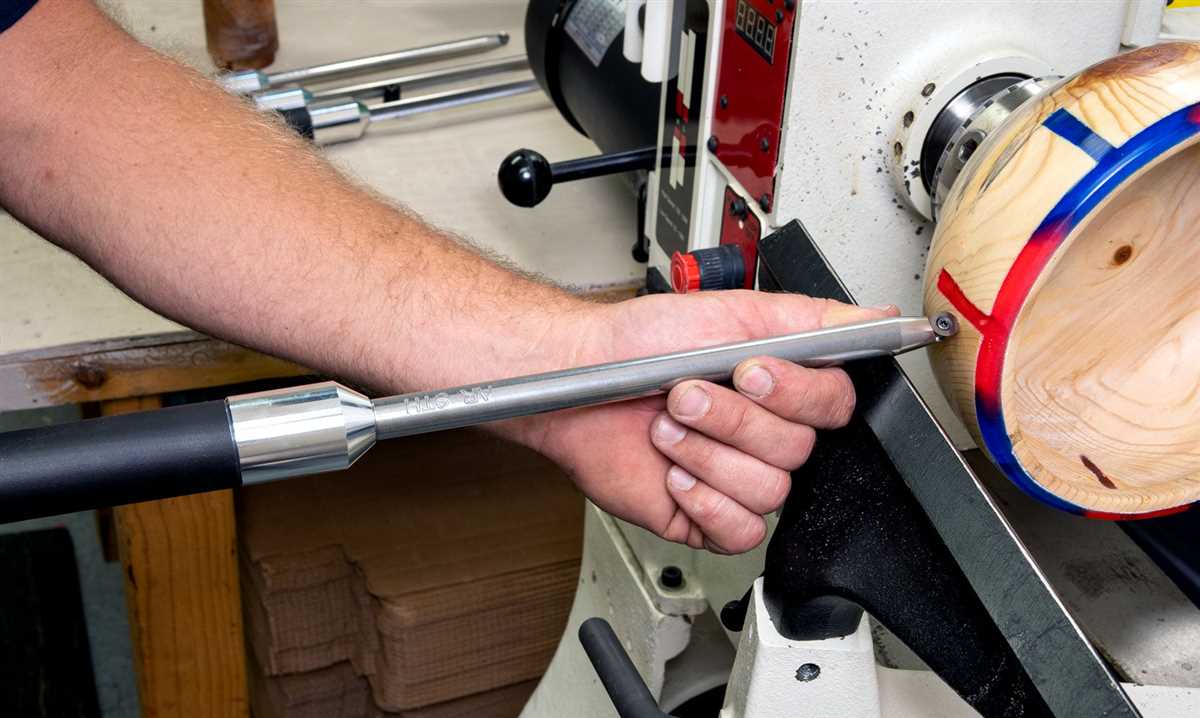
5. Live Center
A live center, also known as a revolving center, is an accessory that provides support for the tailstock end of the workpiece. It has a pointed metal tip that rotates with the workpiece, minimizing friction and allowing for more efficient turning. Live centers come in different configurations, including standard pointed tips, cup centers for hollow forms, and cone centers for delicate workpieces.

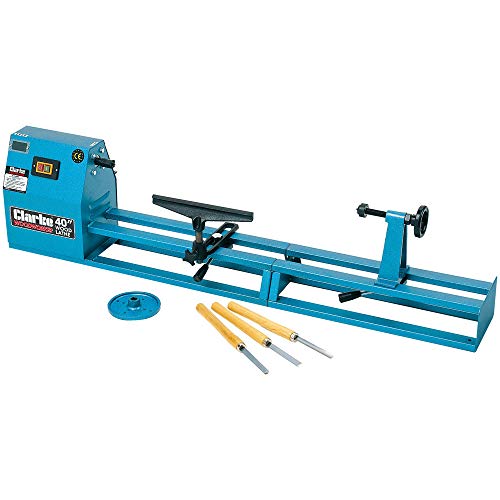
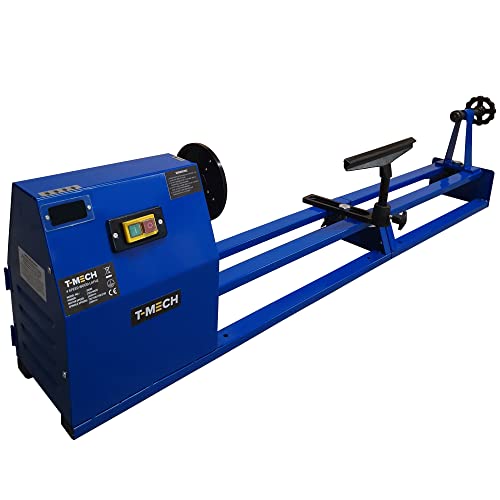
6. Lathe Stand
A sturdy and stable lathe stand is essential for the proper operation and safety of your wood lathe. It provides a solid foundation and minimizes vibrations, allowing for smoother turning. Look for a stand that is specifically designed for your lathe model and can accommodate its size and weight.
7. Dust Collection System
Woodturning produces a significant amount of wood chips, dust, and shavings. To keep your workspace clean and safe, a dust collection system is a must-have accessory. It helps capture and remove the debris generated during turning, preventing it from accumulating on the lathe and in the air. A combination of a powerful shop vacuum, dust hood, and flexible tubing is often used for effective dust collection.
8. Safety Equipment

Wood lathe work involves sharp tools and rotating machinery, making safety equipment crucial. Essential safety accessories include safety glasses or goggles, a dust mask or respirator, and hearing protection. Additionally, it is important to wear clothing that covers your arms and legs, as well as secure long hair and remove any jewelry that could get caught in the lathe.
9. Tool Rest
A tool rest is an accessory that provides support for your cutting tools during turning. It is typically made of metal and attaches to the lathe’s banjo or tool rest base. The tool rest allows you to position your tools at the correct height and angle, providing stability and control while shaping and cutting wood.

10. Woodturning Books and Magazines

While not a physical accessory, educational resources such as woodturning books and magazines are invaluable for expanding your knowledge and skills. They provide guidance, inspiration, and tips from experienced woodturners, helping you improve your techniques and explore new projects.
Conclusion
These must-have accessories for wood lathe work enhance your capabilities, safety, and enjoyment of woodturning. From cutting tools and chucks to safety equipment and educational resources, investing in these accessories will help you create beautifully turned wood projects and enhance your overall woodturning experience.
How to Make a Wood Lathe Faceplate
When working with a wood lathe, having the right accessories can greatly enhance your woodworking experience. One essential accessory is a wood lathe faceplate, which is used to secure and hold your workpiece in place while it is being turned. In this guide, we will show you how to make your own wood lathe faceplate.
Materials Needed:
- Hardwood block (such as maple or oak)
- Wood lathe chuck
- Drill press or hand drill
- Forstner bit
- Screws
- Wood glue
- Coping saw or jigsaw
- Sandpaper
Step 1: Prepare the Hardwood Block
Start by selecting a hardwood block that is suitable for your project. The block should be large enough to accommodate the size of your workpiece and have a flat surface for mounting the lathe chuck.
Step 2: Mark and Drill Holes
Using a drill press or hand drill, mark the center of the hardwood block and drill a hole with a forstner bit that matches the size of your wood lathe chuck. Make sure to drill the hole deep enough to securely hold the chuck.
Step 3: Cut the Faceplate Shape
Using a coping saw or jigsaw, carefully cut the shape of the faceplate around the drilled hole. The shape can be circular or any other design that suits your needs. Take your time and make smooth, precise cuts.
Step 4: Sand and Finish
Once you have cut the faceplate shape, use sandpaper to smooth out any rough edges and make the surface even. You can also apply a finish or sealant to protect the wood and give it a polished look.
Step 5: Mount the Faceplate
Apply a thin layer of wood glue to the back of the faceplate and attach it to the lathe chuck. Make sure it is aligned properly and securely tighten the chuck to hold the faceplate in place. Let the glue dry completely before using the faceplate.
Tips and Safety Precautions:
- Choose a hardwood block that is durable and stable, as it will be subjected to a lot of pressure and force during turning.
- Wear safety goggles and a dust mask to protect yourself from wood chips and dust while using power tools.
- Always read and follow the safety instructions provided by the manufacturer for your specific wood lathe.
By following these steps, you can easily make your own wood lathe faceplate and enhance your woodworking capabilities. Remember to take your time and work safely to achieve the best results. Happy turning!
Essential Tools for Wood Lathe Turning
1. Lathe Chuck
A lathe chuck is an essential tool for wood lathe turning. It is used to hold the wood securely in place while it is being turned. The chuck typically has four jaws that grip the wood from different sides to ensure stability. It is important to choose a high-quality lathe chuck that is compatible with your lathe and provides a strong and secure grip on the wood.
2. Turning Tools
There are various types of turning tools that are used in wood lathe turning. Some of the essential tools include:
- Gouge: Used for shaping the wood and creating smooth curves.
- Skew Chisel: Used for cutting and shaping the wood at various angles.
- Parting Tool: Used for cutting and separating the wood into different sections.
- Spindle Gouge: Used for shaping the wood on the lathe’s spindle.
- Bowl Gouge: Used for hollowing out bowls and other similar projects.
3. Live Center
A live center is another important tool for wood lathe turning. It is a type of rotating center that supports the wood from the opposite end as the lathe chuck. The live center helps to reduce vibration and allows for smoother and more precise turning. It is typically used in conjunction with the lathe chuck to ensure stability and accuracy during the turning process.
4. Faceplate
A faceplate is a flat metal or wooden disc that is attached to the headstock of the lathe. It provides a larger surface area for mounting the wood and allows for the turning of larger and more complex projects. The faceplate is secured to the wood using screws or other fasteners, providing a secure hold while the wood is being turned.
5. Calipers
Calipers are measuring tools that are used to ensure precision in wood lathe turning. They are used to measure the diameter and thickness of the wood, as well as to check the dimensions and symmetry of the turned piece. Calipers come in various shapes and sizes, but the most commonly used ones in wood lathe turning are the inside and outside calipers.
6. Sanding Tools
Sanding is an important step in wood lathe turning to achieve a smooth and polished finish. Some of the essential sanding tools for wood lathe turning include sandpaper, sanding pads, sanding discs, and sanding sealer. These tools help to remove any rough spots or imperfections on the wood surface and prepare it for the final finish.
7. Safety Equipment
Safety should always be a top priority when working with wood lathe turning. Some essential safety equipment includes safety glasses or goggles, dust masks or respirators, ear protection, and a good quality face shield. These tools help to protect your eyes, lungs, and ears from any potential hazards associated with wood lathe turning.
These are just some of the essential tools that are commonly used in wood lathe turning. Depending on the specific project and personal preferences, there may be additional tools that are useful. It is important to invest in high-quality tools and ensure they are properly maintained and used safely to get the best results in wood lathe turning.
How to Make a Wood Lathe Center Finder
Materials Needed
- Wood block (2 inches square and 12 inches long)
- Drill press
- Drill bits (3/8 inch and 1/4 inch)
- Wood glue
- Sandpaper (medium and fine grit)
Instructions

- Start by cutting the wood block to the desired length of 12 inches using a saw.
- Mark the center of the wood block on both ends using a ruler.
- Using a drill press and a 3/8 inch drill bit, create a hole at one end of the wood block at the marked center point.
- Flip the wood block over and repeat the process to create a hole at the other end of the block.
- Next, switch to a 1/4 inch drill bit and drill a hole about 1 inch deep in the center of the block on one side.
- Apply wood glue to the 1 inch deep hole and insert a 1/4 inch dowel into it. Allow the glue to dry completely.
- Once the glue is dry, use sandpaper to smooth out any rough edges and to give the center finder a polished finish.
How to Use a Wood Lathe Center Finder
To use the wood lathe center finder, follow these steps:
- Place the center finder on the lathe bed or table.
- Align the lathe’s live center with the hole on one end of the center finder.
- Place the workpiece on the lathe with the end in contact with the center finder.
- Adjust the position of the workpiece until the live center fits snugly into the hole on the center finder.
- Lock the workpiece into place and begin your woodturning project.
Conclusion
By making your own wood lathe center finder, you can ensure that you have a reliable tool for accurately centering your workpieces on the lathe. This simple and cost-effective project can be completed in just a few steps, and the resulting center finder will make your woodturning projects easier and more precise. So why not give it a try and improve your wood lathe setup today!
Safety Tips for Using Wood Lathe Accessories
- Always wear safety goggles or a face shield to protect your eyes from flying wood chips or debris.
- Wear hearing protection, such as earmuffs or earplugs, to guard against the loud noise produced by turning wood on a lathe.
- Use a dust mask or respirator to prevent breathing in fine wood dust particles, which can be harmful to your respiratory system.
- Ensure that the lathe and accessories are securely fastened to the workbench or stand to prevent any movement or vibration while in operation.
- Keep your hands and fingers away from the rotating workpiece and cutting tools. Use a lathe tool rest to provide support and control.
- Never wear loose clothing, jewelry, or gloves while operating the lathe, as they can get entangled in the rotating parts and cause serious injury.
- Avoid wearing long sleeves or loose-fitting clothes that can easily catch on the lathe or accessories.
- Keep the lathe and work area clean and free of clutter to prevent any accidents from tripping or slipping.
- Always use sharp and properly maintained cutting tools. Dull or improperly sharpened tools can cause the wood to splinter or kickback unexpectedly.
- Take your time and work at a comfortable pace. Rushing can lead to mistakes and accidents.
- Always follow the manufacturer’s instructions and recommendations for the specific wood lathe accessories you are using.
Remember, safety should always be your top priority when using wood lathe accessories. By following these tips, you can enjoy your woodworking projects while minimizing the risk of accidents or injuries.
How to Make a Wood Lathe Steady Rest
When turning smaller or longer pieces of wood on a lathe, it’s often necessary to use a steady rest to support the workpiece and prevent it from vibrating or flexing during the turning process. A steady rest is a device that clamps onto the lathe bed and provides additional support for the workpiece.
Materials Needed:
- 1-inch thick hardwood board
- Wood screws
- Wood glue
- Bolts, nuts, and washers
- Wood dowels or metal rods
Instructions:
- Measure the width and length of your lathe bed. Use these measurements to cut a hardwood board that will fit snugly across the bed.
- Drill pilot holes in the hardwood board and attach it to the lathe bed using wood screws.
- Next, cut three smaller pieces of hardwood to serve as the support arms for the steady rest.
- Attach the support arms to the hardwood board using wood screws and wood glue for added strength.
- Drill holes in the support arms near the outer edges for the dowels or metal rods.
- If using wood dowels, cut them to the desired length and insert them into the holes in the support arms. If using metal rods, cut them to the desired length and secure them with bolts, nuts, and washers.
- Adjust the position and tightness of the dowels or metal rods to provide the necessary support for your workpiece.
Tips:
- Ensure that the steady rest is properly aligned with the lathe bed to avoid any interference with the turning process.
- Make sure the support arms are securely attached to the hardwood board to prevent any wobbling or movement during use.
- Test the steady rest with a scrap piece of wood before using it on a valuable workpiece to ensure it provides the necessary support.
By following these instructions, you can easily make your own wood lathe steady rest. This accessory will help you turn smoother and more precise pieces on your lathe, especially when working with longer or delicate workpieces.
Top Wood Lathe Chisels to Enhance Your Turning Experience
1. Spindle Gouge
The spindle gouge is one of the most versatile and commonly used chisels in woodturning. It has a long, shallow flute that allows for easy shaping and smoothing of spindle work. This chisel is ideal for creating coves, beads, and other decorative details on your turned pieces.
2. Bowl Gouge
The bowl gouge is specifically designed for turning bowls and other hollow forms. It has a deep flute and a thicker shaft, which provides stability and control when removing material from the inside of a bowl. This chisel is essential for shaping the walls and creating smooth curves in your turned bowls.
3. Skew Chisel
The skew chisel is a versatile tool that can be used for a variety of woodturning tasks. It has a flat, beveled edge that can be used for smoothing, shaping, and refining details on spindle work. The skew chisel can also be used for making straight cuts, V-cuts, and even decorative spirals on your turned pieces.
4. Parting Tool
The parting tool is a narrow chisel with a straight cutting edge that is used for cutting deep grooves and parting off sections of wood. It is commonly used for separating a turned piece from the waste material or for creating small details such as beads and fillets. The parting tool is an essential tool for dividing your work into separate sections.
5. Scraper
The scraper is a versatile chisel with a flat or curved cutting edge that is used for smoothing and refining the surface of your turned pieces. It is particularly useful for removing tool marks and tearout on end-grain and difficult-to-reach areas. The scraper can also be used for creating decorative patterns and adding texture to your turned work.
6. Hollowing Tool
The hollowing tool is specifically designed for removing material from the inside of hollow forms, such as vases and bowls. It has a long, narrow shaft with a curved cutting edge that allows for precise control and maneuverability. The hollowing tool is essential for creating the internal shape and walls of your hollow forms.
7. Beading and Parting Tool
The beading and parting tool is a specialized chisel that is designed for creating decorative beads and parting off sections of wood. It has a pointed cutting edge with a small, round profile that allows for precise detail work. This chisel is ideal for adding decorative elements and dividing your turned pieces into distinct sections.
8. Skew Scraper
The skew scraper is a hybrid tool that combines the cutting edge of a skew chisel with the scraping action of a scraper. It has a beveled edge that allows for scraping cuts, which are useful for refining the surface of your turned pieces. This chisel is particularly effective for creating smooth, flat surfaces and removing tearout.
9. Diamond Parting Tool
The diamond parting tool is a specialized chisel that has a diamond-shaped cutting edge. It is used for creating decorative V-cuts and incised lines on your turned pieces. This chisel allows for precise detail work and is commonly used for adding texture and visual interest to your turned work.
10. Sizing Tools
In addition to the main chisels mentioned above, there are also various sizing tools available for woodturning. These tools, such as calipers and templates, are used for measuring and sizing your turned pieces. They are essential for ensuring accuracy and consistency in your woodturning projects.
By having a variety of wood lathe chisels in your arsenal, you can enhance your turning experience and create a wide range of shapes, details, and textures on your turned pieces. Each chisel has its own unique purpose and characteristics, so it’s important to experiment and practice with different chisels to discover your preferred techniques and achieve the desired results in your woodturning projects.
How to Use a Wood Lathe Bowl Chuck
A wood lathe bowl chuck is a versatile tool that allows woodturners to securely hold a bowl blank while it is being turned on a lathe. The chuck provides a solid grip on the wood, allowing the turner to shape and hollow out the bowl without the risk of it flying off the lathe.
Step 1: Mounting the Chuck
To use a wood lathe bowl chuck, start by mounting it on the lathe spindle. Attach the chuck to the spindle using the provided screws or other fastening mechanism. Make sure it is securely tightened to prevent any wobbling or movement during the turning process.
Step 2: Preparing the Bowl Blank
Next, prepare the bowl blank by flattening one side using a bandsaw or a hand saw. This will create a stable base for the chuck to grip onto. Make sure the surface is smooth and even to ensure a secure fit in the chuck.
Step 3: Attaching the Bowl Blank
Place the bowl blank on the lathe bed, with the flat side facing the headstock. Position the bowl blank in the chuck jaws, making sure it is centered and aligned with the lathe axis. Slowly tighten the chuck to secure the bowl blank in place. Use a chuck key or the lathe’s indexing feature to ensure an even grip.
Step 4: Turning the Bowl
Once the bowl blank is securely attached to the chuck, you can begin turning the bowl. Use the appropriate lathe tools to shape the outside of the bowl, gradually working towards the desired form. Take your time and make small cuts to avoid putting too much stress on the wood or the chuck.
Step 5: Hollowing Out the Bowl
After shaping the outside, use a different set of lathe tools to hollow out the bowl. Start by making a shallow cut near the center and gradually widen the cut as you work towards the edges. Take extra care when reaching the bottom of the bowl to avoid any catch or tear out.
Step 6: Finishing Touches
Once the bowl is hollowed out, sand the inside and outside surfaces to achieve a smooth finish. You can use sandpaper or sanding pads to remove any tool marks and achieve the desired level of smoothness. Finish the bowl with a food-safe finish or your preferred wood finish.
Step 7: Removing the Bowl
When you are finished turning and finishing the bowl, you can remove it from the chuck. Loosen the chuck and gently tap the bowl blank to release it from the jaws. Carefully lift the bowl off the lathe bed and inspect it for any remaining rough spots or imperfections.
Using a wood lathe bowl chuck allows you to safely and efficiently turn bowls on a lathe. By following these steps and using proper techniques, you can create beautiful and functional wooden bowls for your enjoyment.
FAQ
What are some common wood lathe accessories?
Some common wood lathe accessories include chisels, gauges, faceplates, chuck jaws, and lathe centers. These accessories are designed to help the woodworker shape and manipulate wood on the lathe.
Can I make my own wood lathe accessories?
Yes, you can make your own wood lathe accessories. In fact, many woodworkers enjoy the process of creating their own custom accessories to suit their specific needs. There are numerous resources available online and in woodworking books that provide instructions and ideas for making your own accessories.
How do I use a faceplate on a wood lathe?
To use a faceplate on a wood lathe, first, secure it onto the headstock spindle. Then, mount the piece of wood you want to work on onto the faceplate using screws or other fasteners. Once the piece is securely attached, you can shape and turn the wood using the lathe’s various tools.
What is a lathe chuck and how do I use it?
A lathe chuck is an accessory that is used to hold the piece of wood being worked on securely in place on the lathe. It typically has multiple jaws that can be adjusted to grip the wood tightly. To use a lathe chuck, simply attach it to the lathe’s spindle and adjust the jaws to hold the wood securely. The chuck allows for easy and precise turning of the wood.
Video


Meet Harrison Clayton, a distinguished author and home remodeling enthusiast whose expertise in the realm of renovation is second to none. With a passion for transforming houses into inviting homes, Harrison's writing at https://thehuts-eastbourne.co.uk/ brings a breath of fresh inspiration to the world of home improvement. Whether you're looking to revamp a small corner of your abode or embark on a complete home transformation, Harrison's articles provide the essential expertise and creative flair to turn your visions into reality. So, dive into the captivating world of home remodeling with Harrison Clayton and unlock the full potential of your living space with every word he writes.