Step-By-Step Guide: How to Thread a Barrel Without a Lathe

Threading a barrel is an essential skill for gun enthusiasts, but not everyone has access to a lathe. Luckily, there are ways to thread a barrel without a lathe, using simple tools and techniques. In this step-by-step guide, we will walk you through the process of threading a barrel without a lathe, so you can customize your firearms to your liking.
Step 1: Prepare the Barrel
Before you begin threading the barrel, it is important to ensure that it is properly prepared. Start by cleaning the barrel thoroughly to remove any dirt, debris, or oil that may be present. This will help create a clean surface for threading and ensure that the threads are cut accurately.
Tip: Use a solvent and a bore brush to clean the barrel. Scrub the inside of the barrel thoroughly, and then use a patch to remove any remaining residue.
Step 2: Determine the Thread Pitch

Next, you will need to determine the thread pitch of your barrel. The thread pitch refers to the distance between each thread and is typically measured in threads per inch (TPI). This information can usually be found in the user manual for your firearm, or you can measure it yourself using a thread pitch gauge.
Tip: If you are unsure about the thread pitch, consult a gunsmith or contact the firearm manufacturer for assistance.
Quote: “Threading a barrel without a lathe requires patience and precision. It is important to take your time and double-check your measurements at each step of the process.” – Gunsmith’s Tip
Step-by-Step Guide: Threading a Barrel Without a Lathe
Introduction
Threading a barrel is an essential skill for gunsmiths and gun enthusiasts. While a lathe is often used for this task, it is still possible to thread a barrel without one. This step-by-step guide will walk you through the process of threading a barrel without a lathe, using some common tools and techniques.
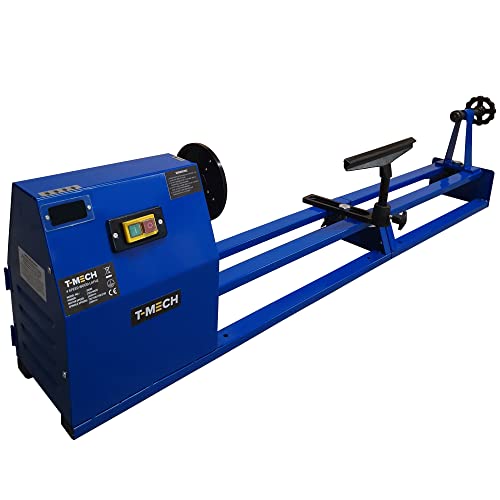
Tools and Materials Needed
- A barrel vise
- A hacksaw or a Dremel tool
- A piloted chamber reamer
- A tap wrench
- A thread die
- Thread cutting oil
- Calipers or a thread pitch gauge
- Files
Step 1: Preparation
Before starting the threading process, ensure that the barrel is securely mounted in a barrel vise to prevent any movement or rotation. This will guarantee accurate thread cutting.
Step 2: Marking the Thread Start
Use a caliper or a thread pitch gauge to measure the diameter of the barrel and determine the correct thread size. Mark the desired starting point for the threads with a center punch or a scribe.

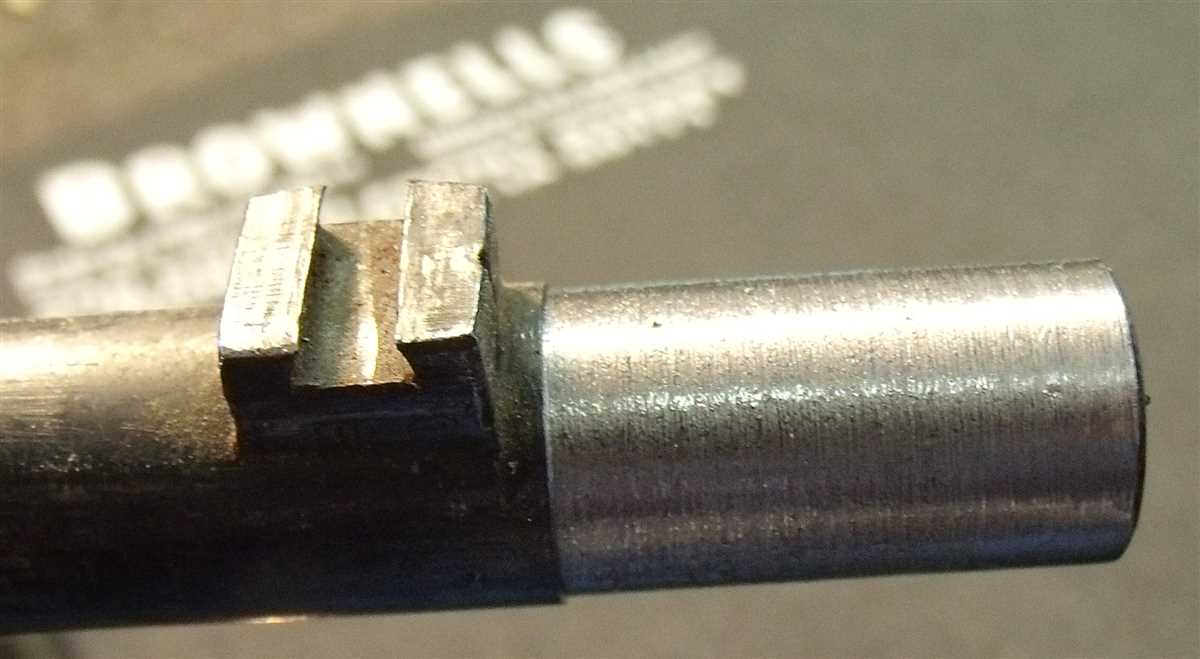
Step 3: Cutting the Initial Grooves
Using a hacksaw or a Dremel tool and a steady hand, carefully cut four equally spaced grooves around the barrel at the marked starting point. These grooves will serve as a guide for the chamber reamer and the tap.
Step 4: Chamber Reaming
Insert the piloted chamber reamer into the barrel and guide it through the initial grooves. Rotate the reamer clockwise with steady pressure until it reaches the desired depth. Remove the reamer and clean any metal shavings.
Step 5: Tapping the Barrel
Select the appropriate tap size for the desired thread pitch and use a tap wrench to slowly thread the tap into the barrel. Apply thread cutting oil to lubricate the process and prevent damage to the tap or the barrel.

Step 6: Finalizing the Threads
Once the tap has reached the desired depth, reverse it carefully to remove any metal shavings. Use a thread die to clean up and refine the threads. Apply thread cutting oil as needed to ensure smooth cutting.
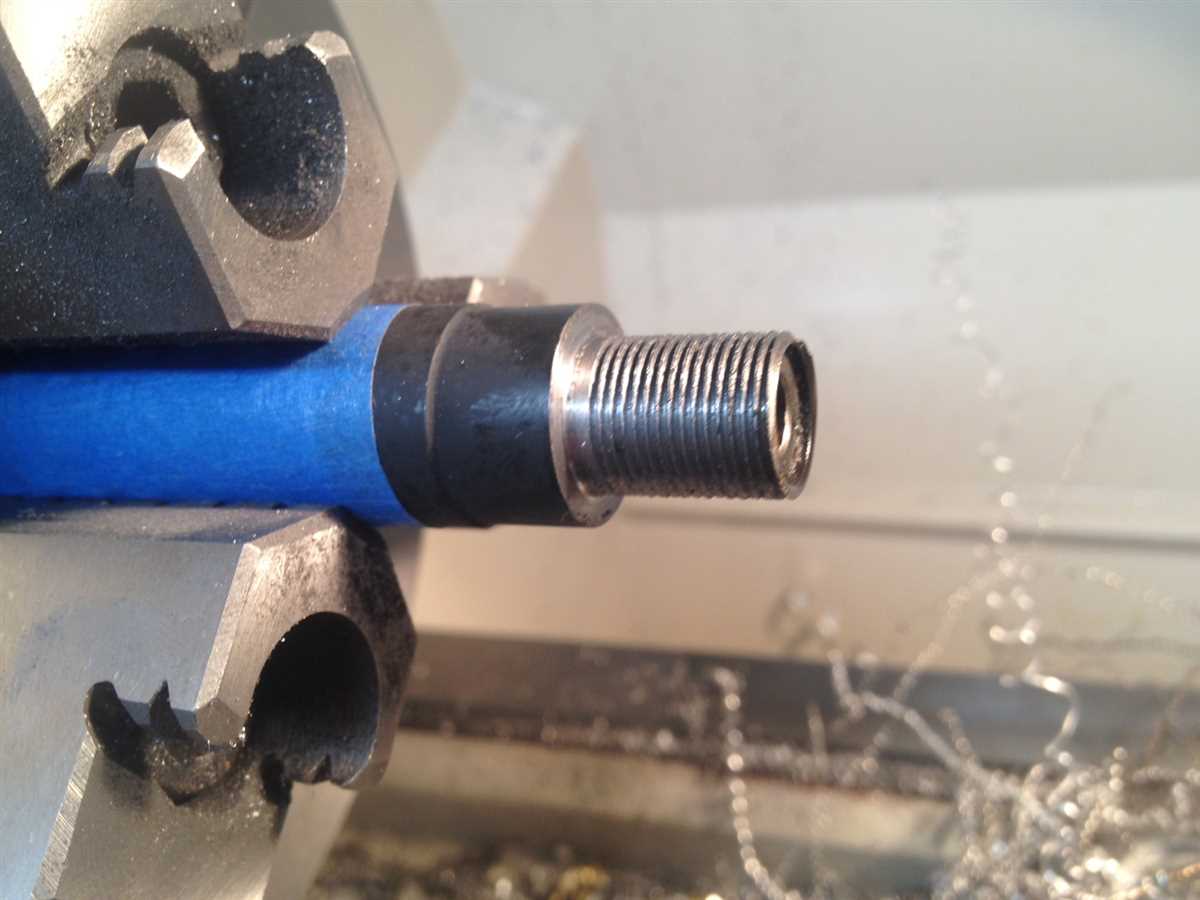
Step 7: Checking the Threads
After completing the threading process, use a thread pitch gauge or a caliper to verify the accuracy of the threads. Ensure that the threads match the desired pitch and depth without any errors or irregularities.
Step 8: Deburring and Finishing
Use files and sandpaper to remove any burrs or sharp edges on the newly threaded portion of the barrel. This will ensure a clean and professional finish.
Conclusion
Threading a barrel without a lathe may require a bit more time and effort, but with the right tools and careful attention to detail, it is definitely possible to achieve accurate and functional threads. Remember to always prioritize safety and take your time throughout the process.

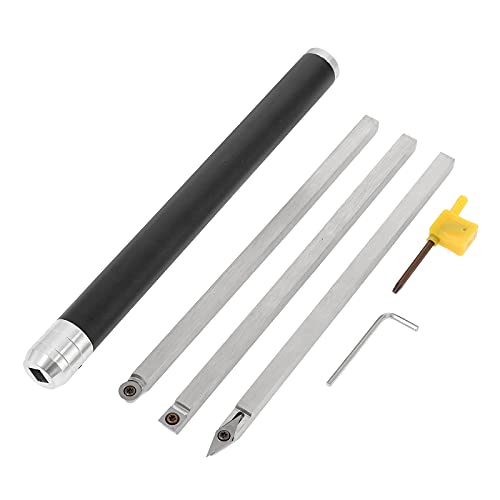
Choosing the Right Tools
When threading a barrel without a lathe, it’s important to have the right tools on hand. Here are the essential tools you’ll need:
- Die Stock: A die stock is a tool used to hold the die (threading tool) securely in place during the threading process.
- Threading Die: This is the main tool used to cut the threads on the barrel. Make sure to choose a threading die that matches the desired thread pitch and diameter.
- Thread Cutting Oil: Using thread cutting oil during the threading process helps lubricate the die and reduce friction, making it easier to cut clean and precise threads.
- Tap Wrench: A tap wrench is used to securely hold the threading die in place and apply the necessary rotational force during the cutting process.
- Calipers: Calipers are essential for measuring the barrel’s diameter before and after threading to ensure the correct thread dimensions are achieved.
- Deburring Tool: After threading, a deburring tool is used to remove any burrs or sharp edges left on the threads, ensuring a smooth and clean finish.
- Workbench or Vice: Having a sturdy workbench or vice is crucial for securely clamping the barrel during the threading process, providing stability and control.
- Safety Equipment: Finally, don’t forget to wear safety goggles and gloves to protect yourself from any potential injuries during the threading process.
By having these tools ready, you’ll be able to thread a barrel without a lathe safely and effectively.
Preparing the Barrel
Gather the necessary tools and materials
- Barrel blank
- Thread die to match the desired thread pitch
- Thread cutting oil
- Barrel vise
- Barrel wrench
- Measuring tools (calipers, ruler)
- Marker or pencil
- Safety goggles
- Protective gloves
Secure the barrel in a vise
Before starting the threading process, it is important to secure the barrel in a vise to prevent it from moving during the operation. Make sure the vise is tight enough to securely hold the barrel, but not so tight that it damages the barrel surface.
Measure and mark the barrel
Using measuring tools, determine the length of the barrel that will be threaded. Mark this length using a marker or pencil on the barrel. It is important to be precise in measuring and marking to ensure accurate threading.

Apply thread cutting oil
Apply a liberal amount of thread cutting oil to the area of the barrel that will be threaded. The oil helps lubricate the cutting process and reduces the risk of damaging the barrel or the thread die.
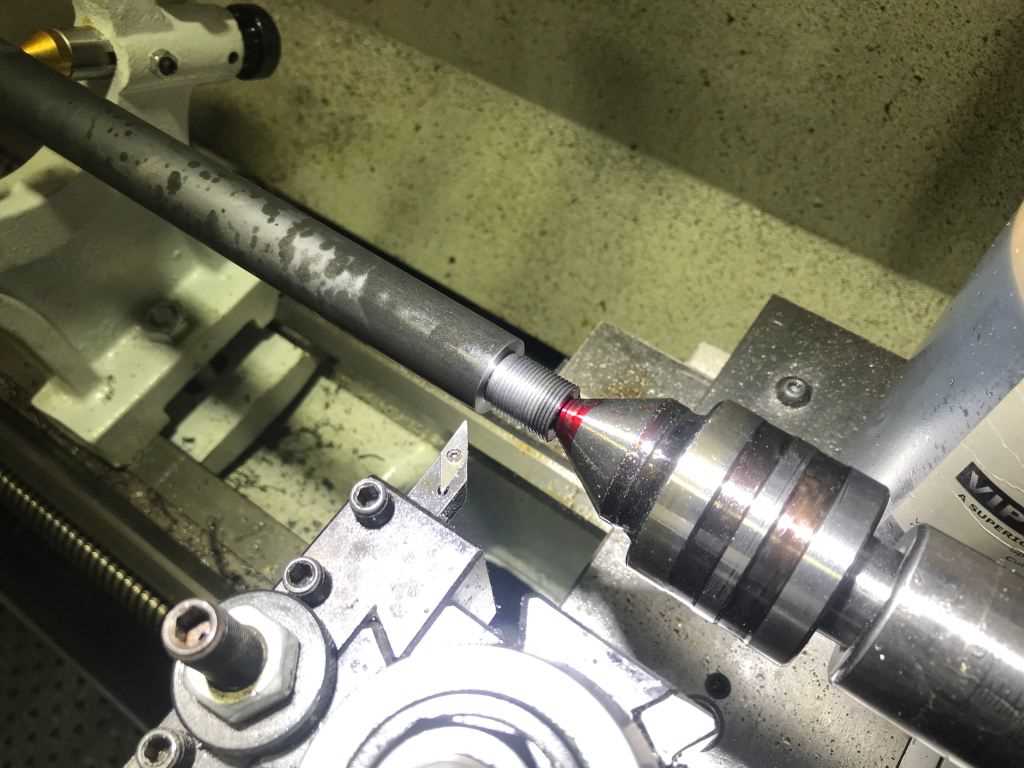
Mount the thread die on the barrel
Place the thread die on the marked area of the barrel, making sure it aligns properly with the barrel axis. Hold the thread die firmly in place using a barrel wrench.
Start the threading process
With the thread die securely mounted on the barrel, start turning the barrel slowly while applying steady pressure. Continue turning until the desired thread depth is achieved. It is important to maintain a constant speed and pressure to ensure uniform threading.
Inspect the threaded barrel
After completing the threading process, carefully remove the thread die from the barrel. Inspect the threaded area to ensure the threads are clean, complete, and free from damage. Touch up any imperfections if necessary.

Clean the barrel

Remove any excess thread cutting oil from the barrel using a clean cloth. This will help prevent oil buildup and maintain the integrity of the threaded area.
Measuring and Marking the Thread
Before you start threading the barrel, you need to measure and mark the area where the thread will be cut. This step is crucial to ensure that the thread is properly aligned and fits correctly.
Here are the steps to measure and mark the thread:
- Measure the diameter of the barrel: Use a caliper or tape measure to determine the diameter of the barrel. This measurement will help you determine the size of the thread tap you will need.
- Choose the appropriate thread tap: Once you know the diameter of the barrel, use a thread pitch gauge or refer to a thread chart to identify the appropriate thread tap size. The thread tap should match the size and pitch of the existing thread if your barrel already has threads.
- Mark the starting point: Use a center punch or a sharp tool to mark the starting point of the thread. This will help you align the thread tap correctly.
- Measure the thread length: Decide on the length of the thread you want to cut. This will depend on the purpose of the barrel and the type of thread engagement required.
- Mark the thread length: Use a ruler or a tape measure to mark the desired length of the thread on the barrel. Make sure to mark the thread length symmetrically on opposite sides of the barrel.
By following these steps to measure and mark the thread, you will ensure that the thread is accurately positioned and aligned. This will make the threading process smoother and increase the chances of achieving a precise thread fit.

Creating a Thread Cutting Template
Before starting the thread cutting process, it is important to create a cutting template. This template will help guide the thread cutting tool and ensure accuracy and consistency throughout the process.
Materials Needed:
- A piece of wood or metal
- Ruler or measuring tape
- Marker or pencil
- Drill
- Thread cutting tool
Step 1: Measure the Diameter of the Barrel
Using a ruler or measuring tape, measure the diameter of the barrel where the thread will be cut. Write down this measurement as it will be used later in the process.
Step 2: Mark the Center of the Template
Take the piece of wood or metal and mark the center using a marker or pencil. This will serve as a reference point for aligning the thread cutting tool.
Step 3: Drill a Hole
Using a drill, create a hole at the marked center point. The size of the hole should be slightly larger than the diameter of the barrel. This will allow the thread cutting tool to fit through while providing stability.
Step 4: Align the Template
Align the template with the barrel by inserting the thread cutting tool into the hole. Ensure that the template is aligned properly and securely held in place.
Step 5: Start Cutting the Thread
With the thread cutting tool in the template and aligned with the barrel, start the cutting process. Slowly rotate the thread cutting tool while applying pressure until the desired thread depth is achieved.
Step 6: Test the Thread
Once the thread cutting process is complete, remove the template from the barrel. Test the thread by screwing a suitable nut or bolt onto it. Ensure that the thread is strong and fits properly.
Step 7: Fine-tune if Necessary
If the thread does not fit properly or is not strong enough, adjustments may be needed. Repeat the thread cutting process, making any necessary modifications to the template.
By creating a thread cutting template, you can ensure accuracy and consistency when threading a barrel without a lathe. This template will serve as a guide throughout the cutting process and allow for fine-tuning if needed.
Setting Up the Barrel for Threading
Before you begin threading a barrel without a lathe, it’s essential to properly set up the barrel to ensure accurate and precise results. The following steps will guide you through the process:
1. Inspect the Barrel

Before starting any work, carefully examine the barrel for any defects or damage. Check for any dents, gouges, or visible imperfections that could affect the threading process.
2. Clean the Barrel
Thoroughly clean the barrel using an appropriate cleaning brush and solvent. Make sure to remove any debris, oils, or residue that may be present on the surface. This step is crucial as it helps to achieve a clean and smooth threading process.
3. Secure the Barrel
Once the barrel is clean, secure it in a sturdy vice or barrel clamp. Ensure that it is tightly fastened and positioned firmly to prevent any movement during the threading process. This will help maintain stability and accuracy while threading.
4. Center the Barrel
Using a center finder tool or a dial indicator, carefully align the barrel in the center of the vice or barrel clamp. This step is important to ensure that the threading is done straight and centered. A misaligned barrel may result in uneven or inaccurate threading.
5. Mark the Starting Point
Using a marker or scribe, mark a clear starting point on the barrel where the threading will begin. This mark will serve as a guide throughout the threading process and help you maintain the correct alignment.
6. Prepare the Cutting Tool
Get the appropriate cutting tool for the threading job and ensure that it is sharp and in good condition. A dull or worn-out cutting tool can lead to poor quality threading and may damage the barrel.
7. Lubricate the Barrel
Apply a thin coat of cutting oil or lubricant to the barrel surface. This lubrication will help reduce friction and heat build-up during the threading process, resulting in smoother and cleaner threads.
By following these steps, you can properly set up the barrel for threading without a lathe. Remember to take your time and double-check your setup before beginning the threading process to achieve the best results.
Applying Cutting Oil
Applying cutting oil is an important step when threading a barrel without a lathe. The cutting oil helps to reduce friction and heat generated during the cutting process, which can help extend the life of your cutting tool and produce a cleaner cut.
Here are the steps to apply cutting oil:
- Choose the right cutting oil: Select a cutting oil that is suitable for the material you are threading. Different types of cutting oils are designed for use with specific materials, such as aluminum, steel, or stainless steel. Consult the manufacturer’s recommendations or a knowledgeable professional to determine the appropriate cutting oil for your application.
- Prepare the work area: Ensure that your work area is clean and clear of any debris or obstructions. This will help prevent any accidents or damage to your workpiece.
- Apply the cutting oil: Dip a rag or brush into the cutting oil and apply a generous amount to the area of the barrel that you will be threading. It is important to evenly coat the surface to ensure proper lubrication.
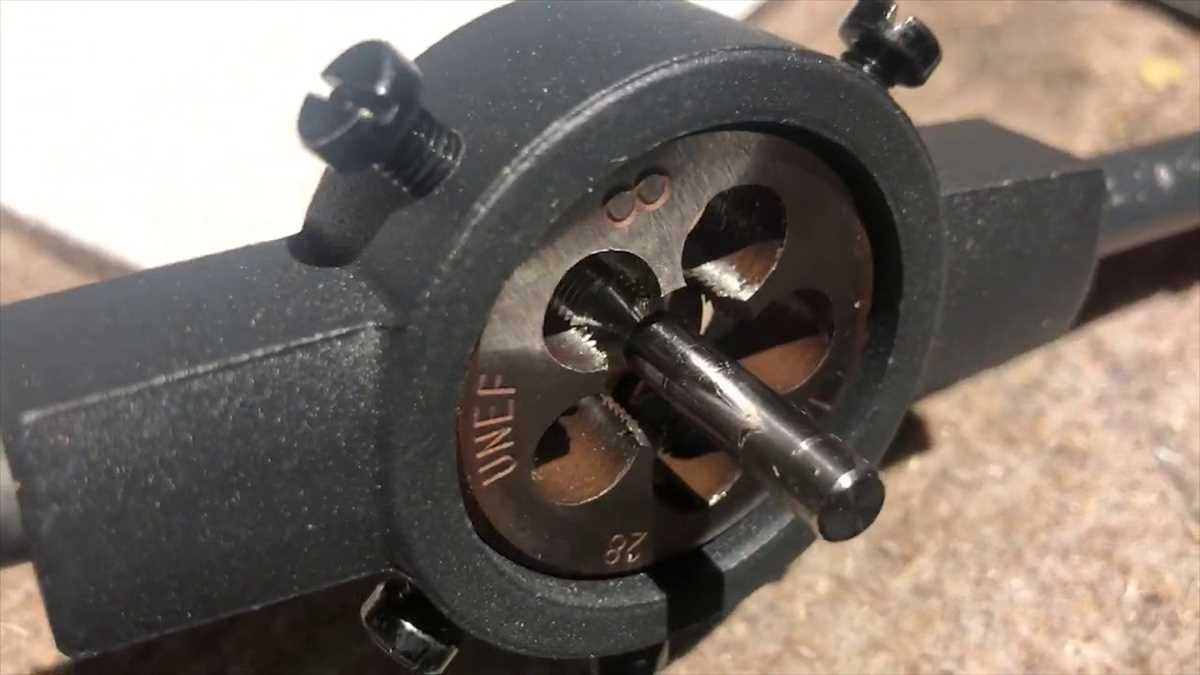
- Start threading: Begin the threading process by carefully turning the die onto the barrel. The cutting oil will help lubricate the cutting edges of the die, reducing friction and allowing for easier and smoother cutting.
- Monitor the cutting oil: As you continue to thread the barrel, periodically check the cutting oil to ensure that it has not dried up or become contaminated. If necessary, apply more cutting oil to keep the threading process lubricated.
- Clean up: After you have finished threading the barrel, it is important to clean up any excess cutting oil. Use a clean rag or paper towels to wipe away any residue from the barrel and surrounding area.
By properly applying cutting oil during the threading process, you can help ensure a smoother, cleaner cut and prolong the life of your cutting tool.
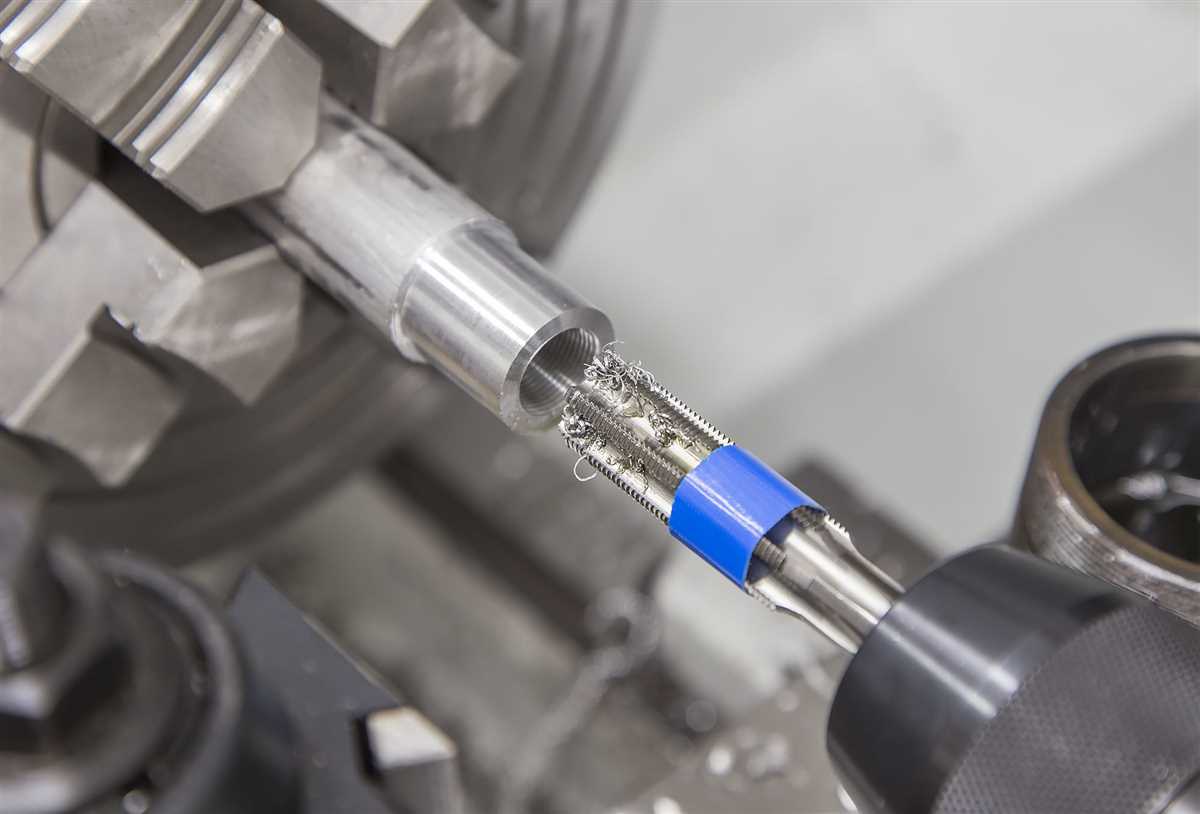
Cutting the Thread
Once you have prepared the barrel for threading, it is time to start cutting the thread. Follow these steps:
- 1. Set up the threading tool: Attach the die head to the threading tool or die stock, ensuring that it is securely in place.
- 2. Apply cutting oil: Apply cutting oil to the barrel and the threading tool. This will help lubricate the process and make it easier to cut the thread.
- 3. Align the threading tool: Position the threading tool perpendicular to the barrel, ensuring that it is aligned properly.
- 4. Start cutting: Begin cutting the thread by turning the threading tool clockwise. Apply steady pressure and keep the tool perpendicular to the barrel to maintain accuracy.
- 5. Check the thread: Periodically stop cutting and check the thread with a thread gauge. This will ensure that you are cutting the correct thread pitch and diameter.
- 6. Continue cutting: If the thread is correct, continue cutting until you reach the desired depth. Make sure to maintain proper alignment and apply cutting oil as needed.
- 7. Clean the barrel: Once you have finished cutting the thread, clean the barrel thoroughly to remove any chips or debris.
By following these steps, you can successfully cut the thread on a barrel without using a lathe. Make sure to take your time and double-check your work to ensure accuracy.
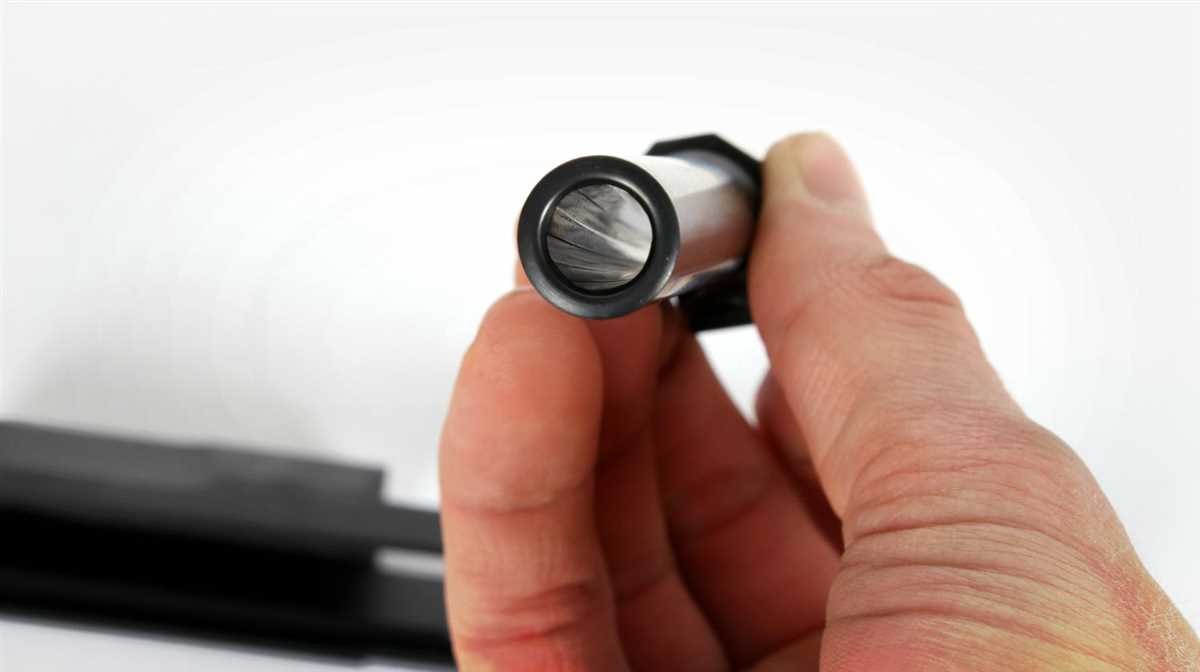
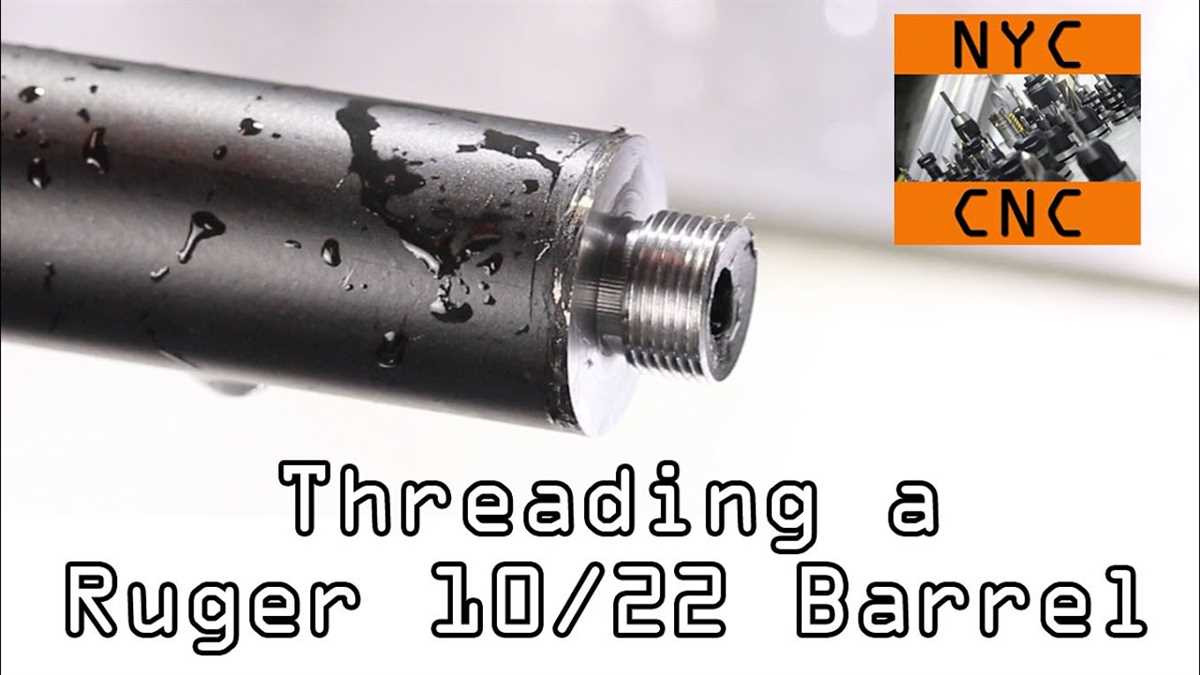
Finishing and Testing the Threaded Barrel
Once you have successfully threaded the barrel of your firearm without a lathe, it is important to finish and test the threaded portion to ensure its functionality and safety. Follow these steps to complete the process:
- Clean and deburr the threads: Use a wire brush and a lubricant to remove any debris and burrs from the threaded area. This will ensure smooth operation and prevent any potential malfunctions.
- Apply thread locking compound: To secure the threaded barrel properly, apply a thread locking compound to the threads. This will prevent the barrel from loosening during use and help maintain its stability.
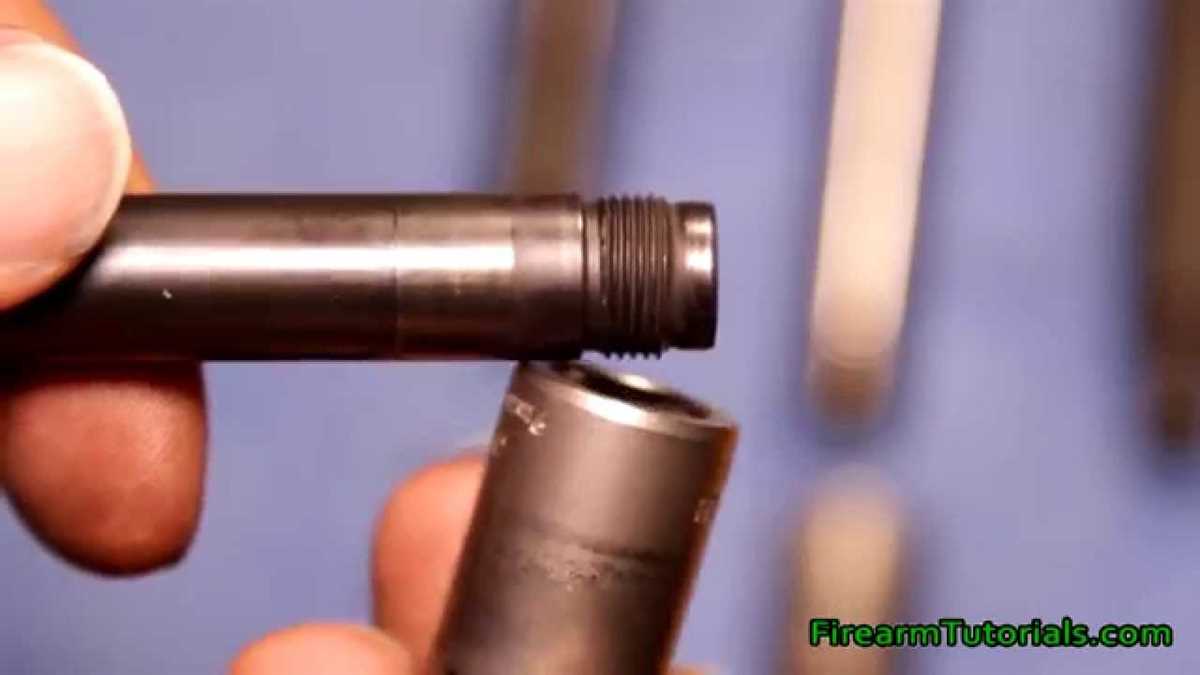
- Hand tighten the muzzle device: Take the muzzle device that you intend to attach to the barrel and hand tighten it onto the threaded portion. Make sure it is evenly aligned and centered.
- Use a torque wrench: To ensure the muzzle device is properly secured, use a torque wrench to tighten it to the manufacturer’s recommended specifications. This will ensure a safe and reliable attachment.
- Inspect for alignment: After the muzzle device has been tightened, visually inspect it to ensure that it is properly aligned with the barrel. It should be centered and not tilted or crooked.
- Function testing: Once the barrel is threaded and the muzzle device is attached, perform a function test to check for any issues. This may involve manually cycling the firearm and ensuring that everything operates smoothly.
- Range testing: Take your firearm to a shooting range and test its performance with the newly threaded barrel. Pay attention to accuracy, recoil, and any abnormalities during firing.
Remember to always prioritize safety when working with firearms. If you are unsure about any step of the threading process or if you encounter any issues, it is recommended to seek assistance from a professional gunsmith or a knowledgeable individual.
FAQ
Why is it important to thread a barrel without a lathe?
Threading a barrel without a lathe can be important for those who don’t have access to a lathe or don’t want to invest in one. It allows individuals to thread their barrels for various purposes such as attaching muzzle devices or suppressors.
What tools will I need to thread a barrel without a lathe?
To thread a barrel without a lathe, you will need some essential tools such as a thread chasing file, a center punch, a tap for the specific thread pattern, a drill, and cutting oil.
Is it possible to thread a barrel without damaging the existing finish?
Yes, it is possible to thread a barrel without damaging the existing finish. By using cutting oil and working carefully, you can minimize the risk of damaging the finish. However, it is always recommended to take precautions and test on a small inconspicuous area before proceeding with the threading process.
Can I thread a barrel without any prior experience?
While it is possible to thread a barrel without any prior experience, it is strongly recommended to have some knowledge or guidance before attempting it. Threading a barrel requires precision and careful handling of tools, so it is best to seek assistance if you are unsure about the process.
Are there any safety precautions I should take while threading a barrel without a lathe?
Yes, there are several safety precautions you should take while threading a barrel without a lathe. These include wearing safety glasses to protect your eyes from metal shavings, using cutting oil to reduce heat and prevent the metal from seizing, and securing the barrel properly to prevent accidents or slippage.
What are some common mistakes to avoid while threading a barrel without a lathe?
Some common mistakes to avoid while threading a barrel without a lathe include not using enough cutting oil, applying too much pressure during the threading process, using the wrong tap size or thread pattern, and not properly securing the barrel. These mistakes can lead to damaged threads or an improperly threaded barrel.
Can I thread barrels of different materials without a lathe?
Yes, you can thread barrels of different materials without a lathe. However, it is important to select the appropriate cutting tools and cutting oil for the specific material you are working with. For example, stainless steel barrels may require different tools and lubricants compared to carbon steel barrels or aluminum barrels.
Video


Meet Harrison Clayton, a distinguished author and home remodeling enthusiast whose expertise in the realm of renovation is second to none. With a passion for transforming houses into inviting homes, Harrison's writing at https://thehuts-eastbourne.co.uk/ brings a breath of fresh inspiration to the world of home improvement. Whether you're looking to revamp a small corner of your abode or embark on a complete home transformation, Harrison's articles provide the essential expertise and creative flair to turn your visions into reality. So, dive into the captivating world of home remodeling with Harrison Clayton and unlock the full potential of your living space with every word he writes.