How to Shave a Bat Without a Lathe | Step-by-Step Guide

If you enjoy playing baseball or softball, you know how important it is to have a properly shaved bat. Shaving a bat can improve its performance by increasing its hitting power and reducing its weight. While many professional bat shavers use a lathe to achieve the desired results, you can still get a great shave without one. In this step-by-step guide, we will walk you through the process of shaving a bat without a lathe, so you can swing like a pro.
Step 1: Gather the necessary materials
Before you begin, make sure you have all the required materials. This includes a bat, a bat shaving kit (which typically includes a bat roller, a bat shaving barrel, and sandpaper), a heat gun or hairdryer, and a flat surface to work on.
Step 2: Prep the bat
Start by removing the bat’s grip tape and cleaning the barrel with a damp cloth. Then, use sandpaper to rough up the surface of the barrel. This will help the bat roller grip the bat and prevent it from slipping during the shaving process.

Step 3: Heat the barrel
Using a heat gun or hairdryer, heat the barrel of the bat for about 30 seconds. This will soften the resin and adhesive used to secure the bat’s fibers. Be careful not to overheat the bat, as it can damage the bat’s structure.
Step 4: Shave the bat
Take the bat shaving barrel and place it over the heated barrel of the bat. Using the bat roller, apply even and consistent pressure as you roll the barrel from end to end. This will shave off layers of the bat’s fibers, making it thinner and increasing its hitting power.
Step 5: Repeat as necessary

After each pass with the bat roller, check the thickness of the barrel with a caliper. If the desired thickness has not been achieved, repeat the shaving process until you reach the desired result. Be careful not to remove too much material, as it can weaken the bat.
Step 6: Finish the bat
Once you have achieved the desired shave, clean the barrel of the bat with a damp cloth to remove any excess debris. Then, apply a new grip tape to the bat’s handle for a comfortable grip. Your bat is now ready for action!
Shaving a bat without a lathe may require more time and effort, but it can be a rewarding experience. Just remember to take your time, follow the steps carefully, and prioritize safety. Now, go out there and show off your shaved bat skills on the field!
Why Shave a Bat Without a Lathe is Possible?
Shaving a bat without a lathe is possible for a variety of reasons. While a lathe is commonly used to shave a bat, it is not the only method available. Shaving a bat without a lathe can be done using alternative tools and techniques.

One reason why shaving a bat without a lathe is possible is accessibility. Not everyone has access to a lathe, as it is a specialized tool often found in professional or well-equipped workshops. Shaving a bat without a lathe allows individuals to modify their bats at home using more readily available tools.
Another reason is cost. Lathes can be expensive, and not everyone wants to invest in a lathe solely for the purpose of shaving bats. Shaving a bat without a lathe can be a more cost-effective option, as it utilizes tools that many people already have or can easily obtain.
Shaving a bat without a lathe also allows for more flexibility and customization. With a lathe, the bat is secured in place and rotated while the shaving tool is applied. Without a lathe, individuals have the freedom to shave the bat in different areas and angles, allowing for more precise and targeted modifications.
While shaving a bat without a lathe may require more time and effort, it is a viable option for those who are looking to modify their bats without the use of specialized equipment. By using alternative tools and techniques, individuals can achieve similar results to those obtained with a lathe.
Benefits of Shaving a Bat Without a Lathe

Shaving a bat without a lathe has several benefits that make it a popular choice for many baseball and softball players. Let’s take a closer look at the advantages of this method:
1. Cost-effective
Shaving a bat without a lathe can save you a significant amount of money compared to using a lathe. Lathe machines can be expensive and require regular maintenance. By choosing the alternative method, you can achieve similar results without the need for a lathe machine.
2. Accessibility
Not everyone has access to a lathe machine, especially casual players or those who don’t have a professional baseball or softball facility nearby. Shaving a bat without a lathe allows anyone to perform the process using simple tools and materials that are readily available.
3. DIY Capability
Shaving a bat without a lathe is a do-it-yourself (DIY) process that allows players to have more control over the outcome. You can perform the shave at home or in your own workshop, giving you the freedom to experiment and customize the bat to your specific preferences.
4. Time-efficient
Using a lathe machine for bat shaving can be a time-consuming process. On the other hand, shaving a bat without a lathe can be done relatively quickly, especially if you have experience with the process. This makes it a convenient option for players who need their bats shaved on short notice.

5. Portable
Since shaving a bat without a lathe requires only basic tools, it is a portable method. You can take the necessary tools with you wherever you go, allowing you to shave bats on the spot during tournaments, away games, or practice sessions.
6. Versatility
The method of shaving a bat without a lathe allows for versatility in terms of the bats that can be shaved. While a lathe machine may have limitations in terms of the bat size or shape it can accommodate, the alternative method can be used on a wide range of baseball and softball bats.
7. Safety
Shaving a bat without a lathe is generally considered safer compared to using a lathe machine. This is because the lathe machine involves rotating parts that can be potentially dangerous if not handled properly. Shaving a bat manually eliminates the risk of accidents associated with the use of machinery.
In conclusion, shaving a bat without a lathe offers several benefits, including cost-effectiveness, accessibility, DIY capability, time efficiency, portability, versatility, and safety. By choosing this method, players can achieve the desired bat performance without the need for expensive equipment or professional assistance.
Materials Needed to Shave a Bat Without a Lathe
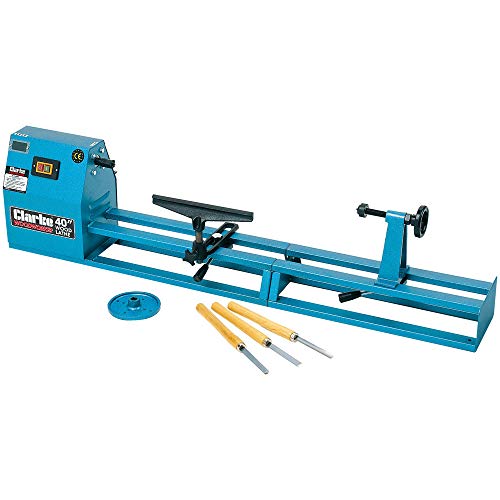
- A cricket or baseball bat
- A bat shaving service or access to a bat shaving machine
- Bat shaving clamps
- A vice or bat shaving stand
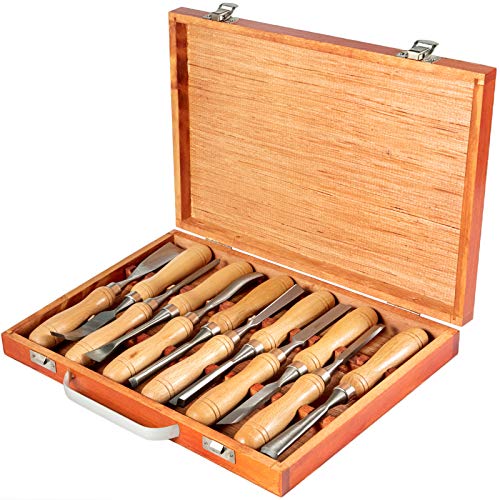
- Bat shaving equipment (e.g., bat roller, bat shaving brush)
- Protective gloves
- Eye protection goggles
- Bat shaving lubricant or shaving cream
- A bat weight scale (optional)
When it comes to shaving a bat without a lathe, you will need some specific materials to ensure a smooth and successful process. While the exact materials may vary depending on the specific bat shaving method you choose, here are some essentials:
- A cricket or baseball bat: Choose a bat that you want to shave. Make sure it is a legal bat suitable for the sport you are playing.
- A bat shaving service or access to a bat shaving machine: If you don’t own a bat shaving machine, you will need to either find a professional bat shaving service or gain access to a bat shaving machine.
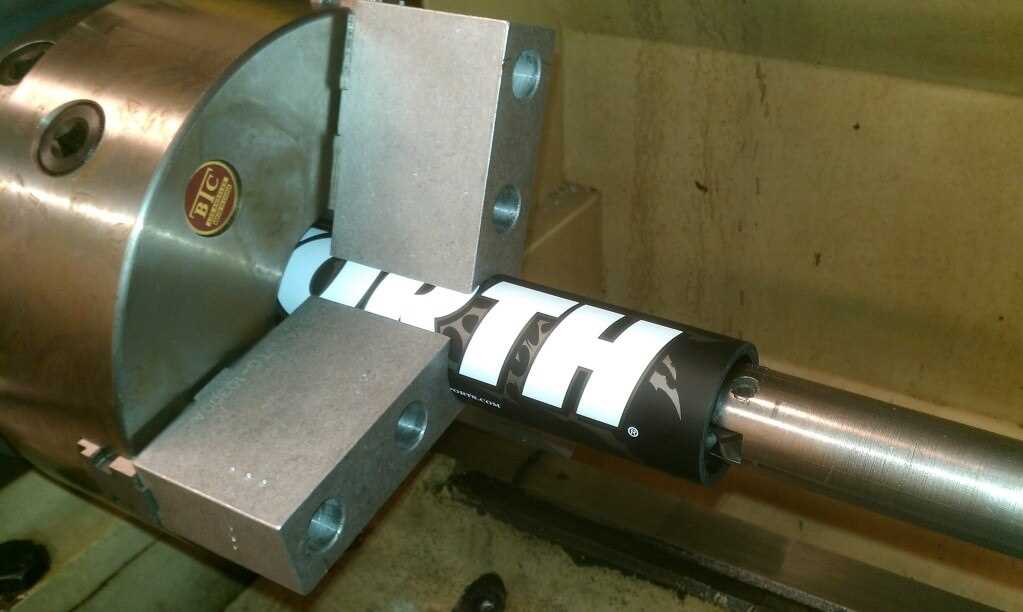
- Bat shaving clamps: These clamps secure the bat during the shaving process, providing stability and safety.
- A vice or bat shaving stand: A vice or bat shaving stand is used to secure the bat in place while you work on it.
- Bat shaving equipment: This includes tools like a bat roller and a bat shaving brush to perform the actual shaving process.
- Protective gloves: It is important to wear gloves to protect your hands during the shaving process.
- Eye protection goggles: Safety goggles are necessary to protect your eyes from any flying debris or accidental contact.
- Bat shaving lubricant or shaving cream: A lubricant or shaving cream is used to reduce friction and facilitate the shaving process.
- A bat weight scale (optional): If you want to measure the weight of the bat before and after shaving, a bat weight scale may come in handy.
| Item | Purpose |
|---|---|
| A cricket or baseball bat | Main material to be shaved |
| A bat shaving service or access to a bat shaving machine | To perform the shaving process |
| Bat shaving clamps | To secure the bat during shaving |
| A vice or bat shaving stand | To hold the bat in place for shaving |
| Bat shaving equipment (e.g., bat roller, bat shaving brush) | To perform the actual shaving process |
| Protective gloves | To protect hands during shaving |
| Eye protection goggles | To protect eyes during shaving |
| Bat shaving lubricant or shaving cream | To facilitate the shaving process |
| A bat weight scale (optional) | To measure the weight of the bat before and after shaving |
Safety Precautions Before Shaving a Bat Without a Lathe
Before attempting to shave a bat without a lathe, it is important to take the necessary safety precautions. Shaving a bat can be a dangerous process if not done correctly, so it is essential to follow these guidelines to ensure your safety:
1. Wear Protective Gear
Always wear protective gear when working with bats and shaving equipment. This should include safety glasses or goggles to protect your eyes from flying debris, as well as gloves to protect your hands from potential cuts or nicks.
2. Choose a Safe Working Area
Select an appropriate location for shaving the bat. It is recommended to work in a well-ventilated area with plenty of space around you. Ensure that there are no flammable materials nearby and keep children and pets away from the workspace to prevent accidents.
3. Secure the Bat Properly
Before starting the shaving process, make sure the bat is securely mounted or clamped in place. This will prevent it from moving or slipping during the shaving process, reducing the risk of accidents or injuries.
4. Use Sharp and Proper Tools
Ensure that you have the correct tools for the shaving process, such as a bat shaving tool or a carefully selected alternative. Make sure your tools are sharp and in good condition, as dull or damaged tools can increase the risk of accidents.
5. Work Slowly and Carefully
Take your time when shaving the bat and work at a slow and controlled pace. Rushing the process can lead to mistakes and increase the risk of accidents. Always pay close attention to what you are doing and avoid any distractions.
6. Clean Up Properly
After shaving the bat, make sure to clean up the workspace properly. Remove any leftover shavings or debris and store all tools in a safe and secure manner to prevent injuries.
7. Seek Professional Help If Needed
If you are unsure about the shaving process or do not feel confident in doing it yourself, it is always best to seek professional help. They have the expertise and equipment to safely shave the bat without causing any harm.
By following these safety precautions, you can significantly reduce the risk of accidents or injuries when shaving a bat without a lathe. Remember, safety should always be your top priority when working with potentially dangerous equipment.
Step 1: Preparing the Bat for Shaving
Gather the necessary materials
Before you begin shaving the bat, make sure you have all the necessary materials on hand. This will include:
- A cricket bat
- A bat shaver or bat mallet
- A bat shaving vice or a workbench with a vice grip
- Sandpaper or a sanding block
- A marker or tape
- A safety mask and goggles
- A work area with good ventilation
Mark the desired area to be shaved
Using a marker or tape, mark the area of the cricket bat that you want to shave. This will typically be higher up on the face of the bat, away from the toe. The exact position will depend on your personal preference and playing style.
Note: Make sure to follow any rules or regulations set by your cricket league or organization regarding bat shaving.
Secure the bat in the vice grip
If you have a bat shaving vice, follow the manufacturer’s instructions to secure the bat in place. If you don’t have a bat shaving vice, you can use a regular workbench with a vice grip. Make sure the bat is tightly secured and won’t move during the shaving process.
Sand the marked area
Use sandpaper or a sanding block to gently sand the marked area of the bat. This will help remove any protective coatings and prepare the surface for shaving. Sand in the direction of the wood grain, using light pressure.
- Start with a coarse-grit sandpaper to remove the top layer of the bat.
- Switch to a finer-grit sandpaper to smooth out the surface.
- Wipe away any dust or debris with a clean cloth.
Put on safety gear
Before you begin shaving the bat, it’s important to put on a safety mask and goggles to protect yourself from any wood particles or debris that may be generated during the process. Make sure the area you are working in is well-ventilated.
Proceed to the next step
Once you have prepared the bat for shaving, you are ready to proceed to the next step of the process. This will involve using a bat mallet or bat shaver to gradually thin out the marked area and improve the bat’s performance. Continue following the step-by-step guide for more detailed instructions.
Step 2: Using a Razor Blade to Shave the Bat
Now that you have prepared the necessary materials and set up your work area, it’s time to start shaving the bat. Follow these steps to shave the bat using a razor blade:
1. Secure the bat
Place the bat securely in a vice grip or clamp to ensure it doesn’t move while you are shaving it. Make sure the barrel of the bat is securely held in place to prevent any accidents.
2. Start shaving
Hold the razor blade firmly in your dominant hand and begin shaving the outer layer of the bat. Start near the handle and work your way towards the barrel. Apply steady and even pressure to remove thin layers of the wood at a time.
3. Shave evenly
It’s important to shave the bat evenly to maintain its balance and performance. Avoid shaving too much wood from one area, as it can make the bat unbalanced or weak. Take your time and make small, controlled movements to achieve the desired effect.
4. Check for uniformity
Occasionally stop and inspect the bat to ensure you are shaving it evenly. Examine the surface for any inconsistencies or areas where more wood needs to be shaved. Adjust your technique accordingly to achieve a smooth and uniform surface.
5. Gradually shave the entire barrel
Continue shaving the bat, gradually working your way along the entire barrel. Take breaks as needed to rest your arm and check your progress. Remember to maintain a steady and controlled motion to avoid any mistakes or accidents.
6. Test the bat
Once you have finished shaving the bat, remove it from the vice grip or clamp and give it a test swing. Pay attention to how it feels and performs. If necessary, make further adjustments by shaving more wood or smoothing out any rough spots.
7. Clean up
After you are satisfied with the shaved bat, clean up your work area and dispose of any wood shavings properly. Store your razor blade in a safe place and ensure the bat is securely stored until you are ready to use it for practice or a game.
Remember, shaving a bat can affect its integrity and may be against the rules in certain leagues or organizations. Before shaving a bat, make sure to familiarize yourself with the rules and regulations governing its use.
Step 3: Sanding and Finishing the Shaved Bat
Once you have successfully shaved your bat, it is important to sand and finish it properly to ensure optimal performance and longevity. Follow these steps to complete the process:
- Gather the necessary materials: You will need sandpaper (in varying grits), a sanding block or power sander, a clean cloth, and a wood finishing product of your choice.
- Sand the bat: Start by using a coarse grit sandpaper to remove any rough edges, excess material, or remaining lacquer. Use even strokes and apply uniform pressure while sanding. Then, gradually switch to finer grit sandpapers to smoothen the surface of the bat. This will help remove any imperfections and make the bat ready for finishing. Be sure to sand along the length of the bat, following the wood grain.
- Remove excess dust: After sanding, wipe the bat clean using a dry cloth to remove any dust or debris left behind by the sanding process. This step is crucial to ensure a smooth and polished finish.
- Apply wood finish: Choose a wood finishing product that suits your personal preferences and follow the manufacturer’s instructions for application. This may involve using a brush, cloth, or spray depending on the type of finish you are using. Apply an even coat of finish to the bat, making sure to cover all surfaces. Allow the finish to dry according to the manufacturer’s recommended drying time.
- Sand between coats (optional): If desired, you can sand lightly between coats of finish to achieve an even smoother and more polished surface. Use a fine grit sandpaper and be gentle to avoid removing too much finish.
- Apply additional coats (optional): Depending on the desired look and level of protection, you may choose to apply multiple coats of finish. Allow each coat to dry completely before applying the next one, and follow the manufacturer’s instructions for drying times and re-coating.
- Inspect and touch-up: Once the final coat of finish has dried, inspect the bat for any imperfections or areas that may need touch-up. Use a fine grit sandpaper to lightly sand those areas and reapply the finish as needed.
Following these steps will ensure that you have properly sanded and finished your shaved bat, allowing for optimal performance and protection. Remember to always prioritize safety and follow all manufacturer’s instructions when using tools and finishing products.
Common Mistakes to Avoid When Shaving a Bat Without a Lathe
- Using the wrong tools: One of the most common mistakes people make when shaving a bat without a lathe is using the wrong tools. It is important to use the right equipment, such as a shaving cream, a razor, and sandpaper, to achieve the desired result.
- Not following the proper technique: Shaving a bat without a lathe requires a specific technique to ensure an even and smooth shave. It is crucial to follow the correct steps and techniques to avoid damaging the bat or compromising its performance.
- Over-shaving the bat: Shaving too much material off the bat can weaken its structure and affect its performance. It is important to shave the bat conservatively and test it after each shave to ensure the desired level of performance is achieved.
- Not sanding the bat properly: Sanding the bat after each shave is essential to smooth out any rough edges and to achieve a consistent finish. Neglecting to sand the bat properly can result in an uneven surface and affect the bat’s performance.
- Not using protective gear: Shaving a bat can create a lot of dust and debris, which can be harmful when inhaled. It is vital to wear protective gear, such as a mask and goggles, to protect yourself from the dust and particles generated during the process.
- Skipping the break-in process: After shaving a bat without a lathe, it is important to go through a break-in process before using it in a game or practice. Skipping this step can affect the bat’s performance and durability.
Tips and Tricks for Shaving a Bat Without a Lathe
1. Use a Bat Rolling Machine
If you don’t have access to a lathe, a bat rolling machine can be a useful alternative. These machines apply pressure to the bat in a rolling motion, helping to compress the fibers and increase performance. While it doesn’t offer the same level of customization as shaving with a lathe, a bat rolling machine can still improve the bat’s performance.
2. Choose the Right Shaving Technique
Without a lathe, it’s important to choose the right technique for shaving your bat. One popular method is the “progressive” or “layered” shaving technique. This involves shaving off thin layers of material at a time, gradually increasing the performance of the bat. Another technique is the “end-loaded” shaving technique, where extra material is removed from the end of the barrel, shifting the weight balance towards the handle.
3. Use Heat Gun or Hair Dryer
Applying heat to the bat barrel can help soften the composite material, making it easier to shave. Use a heat gun or hairdryer to heat the barrel evenly before shaving. Be cautious not to overheat the bat, as this can cause damage to the composite material.
4. Use Sharp Blades
To achieve clean and precise cuts, make sure to use sharp blades when shaving the bat. Dull blades can cause jagged edges and can even damage the bat. Replace blades regularly to ensure smooth and efficient shaving.
5. Test and Adjust
After each shaving session, it’s essential to test the bat’s performance. Use a bat compression tester to measure the bat’s compression and make adjustments as needed. This will help you find the optimal level of shaving for your bat.
6. Take Safety Precautions
Shaving a bat without a lathe can be potentially dangerous, so it’s crucial to take safety precautions. Always wear protective gloves, goggles, and a mask to prevent injuries. Work in a well-ventilated area to avoid inhaling harmful dust or vapors.
7. Seek Professional Help if Needed
If you’re unsure about shaving a bat without a lathe or don’t have the necessary tools, it’s best to seek professional help. There are many bat shaving services available that can assist in optimizing your bat’s performance safely and efficiently.
8. Follow the Rules and Regulations
Before you shave a bat, be sure to familiarize yourself with the rules and regulations of the league or organization you’ll be using the bat in. Some leagues may have restrictions on shaved bats or certain modifications, so it’s crucial to follow the guidelines to avoid penalties or disqualification.
Conclusion
Shaving a bat without a lathe requires careful technique and attention to detail. By following these tips and tricks, you can enhance the performance of your bat and optimize your hitting capabilities. Remember to prioritize safety and always comply with the rules and regulations of your league or organization.
FAQ
What is a bat shaving?
Bat shaving is a process of removing the inner layers of a baseball or softball bat to increase its flexibility and performance.
Why would someone want to shave a bat?
Shaving a bat can improve its performance by increasing the trampoline effect, making the ball come off the bat faster and with more power.
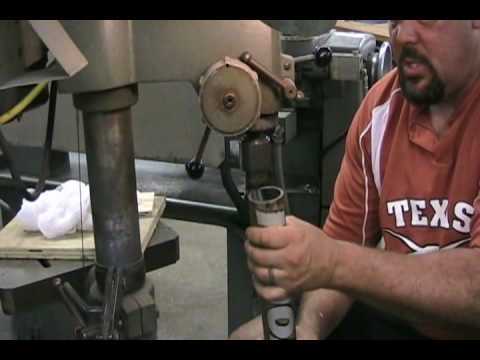
Do I need a lathe to shave a bat?
No, you don’t necessarily need a lathe to shave a bat. There are alternative methods that can be used, such as using a drill or a rod as a makeshift lathe.
What materials do I need to shave a bat without a lathe?
You will need a bat shaving kit, which typically includes a bat rolling machine, a bat shaving machine, and sandpaper. You will also need a heat gun, a drill or rod, and a vice or clamp to secure the bat.
Is it safe to shave a bat without a lathe?
Shaving a bat without a lathe can be done safely if proper precautions are taken. It is important to follow the instructions carefully and wear protective gear, such as goggles and gloves, to prevent any accidents.
How long does it take to shave a bat without a lathe?
The time it takes to shave a bat without a lathe can vary depending on the individual and their experience. It can take anywhere from a couple of hours to several hours to complete the process.
Can I shave any type of bat without a lathe?
Not all bats can be shaved without a lathe. It is recommended to check the specific guidelines and recommendations for the type of bat you have before attempting to shave it without a lathe.
Video


Meet Harrison Clayton, a distinguished author and home remodeling enthusiast whose expertise in the realm of renovation is second to none. With a passion for transforming houses into inviting homes, Harrison's writing at https://thehuts-eastbourne.co.uk/ brings a breath of fresh inspiration to the world of home improvement. Whether you're looking to revamp a small corner of your abode or embark on a complete home transformation, Harrison's articles provide the essential expertise and creative flair to turn your visions into reality. So, dive into the captivating world of home remodeling with Harrison Clayton and unlock the full potential of your living space with every word he writes.