How to Make a Lathe Out of a Drill: A Step-by-Step Guide

Are you interested in woodworking or DIY projects? Have you ever wanted to try your hand at turning wood but don’t have access to a lathe? Well, we have a solution for you! In this step-by-step guide, we will show you how to transform a simple drill into a makeshift lathe, allowing you to create beautiful turned wood pieces without breaking the bank.
To start off, you’ll need a few basic materials. Of course, the most important item is a power drill. Make sure you have a drill with a chuck that can hold larger pieces of wood securely. You’ll also need a sturdy workbench or table to attach the drill to, as well as some screws or clamps to secure it in place.

Next, gather the necessary tools. You’ll need a few drill bits, ranging in size from small to large, depending on the project you’re working on. You’ll also need a set of turning chisels, which can be purchased at most hardware stores. These chisels are specifically designed for shaping and smoothing wood on a lathe.
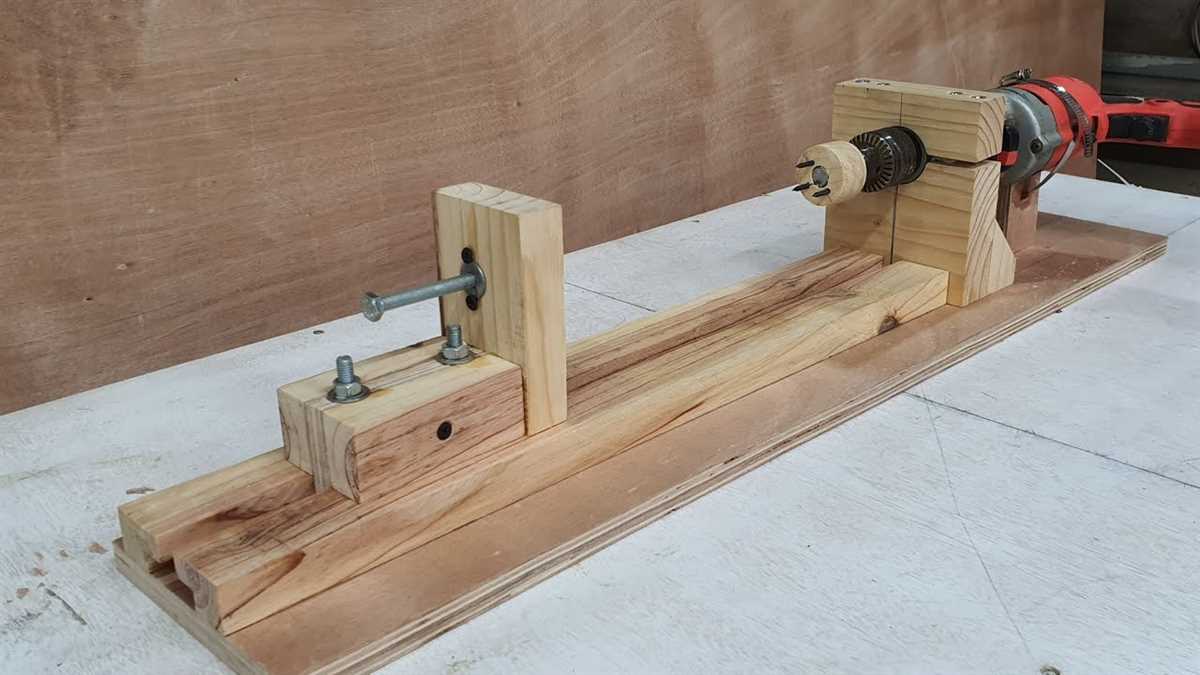
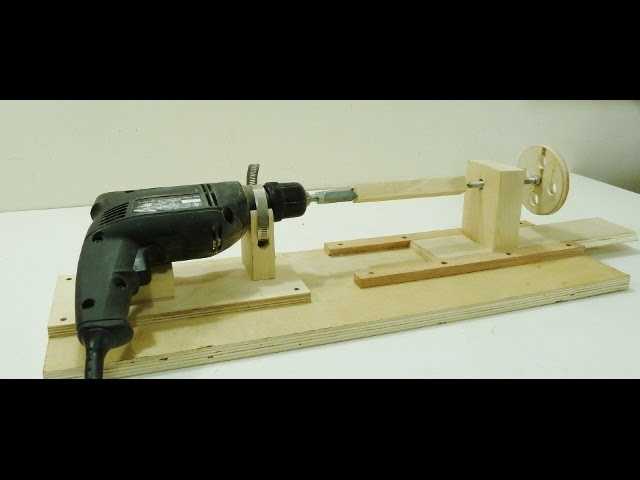
Now it’s time to assemble your makeshift lathe. Start by attaching the drill to the workbench or table, making sure it is tightly secured. Use screws or clamps to ensure the drill won’t move during use. Next, insert a drill bit into the chuck of the drill, making sure it is centered and locked in place.
Once your lathe is assembled, you can start turning wood! Begin by selecting a piece of wood to work with. Make sure it is securely fastened to the lathe using a centering tool or faceplate. Then, turn on the drill and adjust the speed to a comfortable level. Slowly guide the chisel along the wood, shaping and smoothing it as desired. Remember to take your time and work carefully to achieve the best results.
Remember, safety is important when working with power tools. Always wear protective goggles and gloves, and be mindful of your surroundings. If you’re new to woodworking, it may be helpful to seek guidance from an experienced woodturner.
By following this step-by-step guide, you can create stunning turned wood pieces using a makeshift lathe made from a drill. Whether you’re a seasoned woodworker looking for a new challenge or a beginner wanting to try your hand at turning wood, this DIY project is a great way to get started. So grab your drill, gather your materials, and start crafting beautiful wooden creations today!

What is a Lathe?
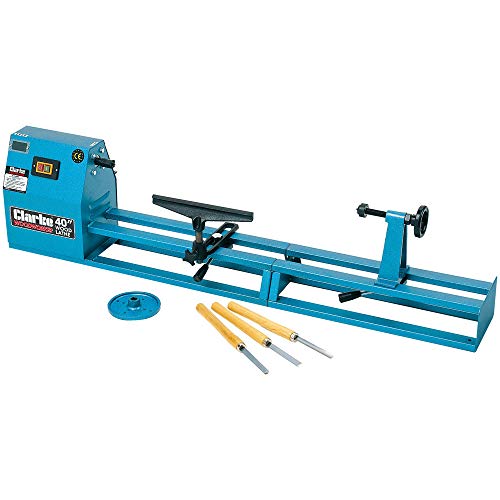
A lathe is a machine tool that is used to rotate a workpiece around a fixed axis in order to perform various operations such as cutting, drilling, sanding, knurling, or deformation. It is commonly used in metalworking, but can also be used for woodworking and other materials.
A lathe consists of several key components:
- Bed: The bed is the base of the lathe and provides a solid foundation for the other components.
- Headstock: The headstock is located at one end of the lathe and contains the motor, pulleys, and gears that drive the rotation of the workpiece.
- Tailstock: The tailstock is located at the other end of the lathe and is used to support the workpiece and apply pressure as needed.
- Carriage: The carriage is mounted on the bed and holds various tools that are used to perform operations on the workpiece.
- Toolpost: The toolpost is mounted on the carriage and holds the cutting tool or other tooling that is used to shape the workpiece.
Lathe operations typically involve fixing the workpiece between the headstock and tailstock, and then using the carriage and toolpost to move the cutting tool across the workpiece to shape it as desired. The rotation of the workpiece allows for precise and symmetrical cuts to be made.
There are many types of lathes, including engine lathes, turret lathes, and CNC lathes. Each type has its own specific features and capabilities, but they all operate on the same basic principle of rotating the workpiece to perform operations.

Lathes are widely used in manufacturing and machining industries, as well as by hobbyists and DIY enthusiasts. They are versatile machines that can be used to create a wide range of intricate shapes and designs.
| Advantages | Explanation |
|---|---|
| Ability to shape complex parts | Lathe machines can create intricate shapes and designs with high precision. |
| Versatility | Can be used for various operations such as cutting, drilling, sanding, etc. on different materials. |
| Efficiency | Can quickly and accurately remove material from a workpiece. |
| Precision | Allows for precise and symmetrical cuts to be made, resulting in high-quality finished products. |
Overall, lathes are essential machines in many industries and offer a wide range of capabilities for shaping and manipulating materials.
Materials Needed
- A power drill
- A drill press vise
- A metal rod or pipe
- A hacksaw
- A file or sandpaper
- A drill bit set
- A lathe chuck
- A lathe tool set
- Safety goggles and gloves
In order to make a lathe out of a drill, you will need several materials. The most important one is, of course, a power drill. Make sure it is working properly and has enough power to handle the tasks you will be performing.
A drill press vise is also necessary to secure your workpiece in place. This will ensure that it remains stable and steady during the lathe turning process.

You will also need a metal rod or pipe that will serve as the spindle for your lathe. This should be sturdy and able to withstand the pressure and vibrations caused by the spinning drill.
A hacksaw will be used to cut the metal rod or pipe to the desired length. Make sure to wear safety goggles and gloves while working with the saw to protect yourself from any flying debris.
After cutting the spindle, you may need to file or sand the ends to create a smooth surface. This will help the lathe chuck grip the spindle securely.
A drill bit set is essential for creating holes in the workpiece. Make sure you have a variety of sizes to accommodate different projects.
In order to attach the workpiece to the lathe, you will need a lathe chuck. This can be purchased separately or as part of a lathe attachment kit.

Lastly, a lathe tool set will be needed for shaping, cutting, and finishing the workpiece. This set usually includes different types of cutting tools and chisels.
Remember to always prioritize safety when working with power tools. Wear safety goggles and gloves to protect yourself from any potential injuries.
Required Tools
- Drill – You will need a power drill with a chuck that can hold bits up to the size you plan to work with.
- Wood – A solid piece of wood is necessary to create the base and headstock of the lathe. The size of the wood depends on the desired dimensions of the lathe.
- Wood screws – These are required to attach the components of the lathe together.
- Metal rod – The metal rod will act as the spindle for the lathe. It should be made of a solid and sturdy material such as steel.
- Chisels – Chisels are essential for shaping and woodturning. You will need a variety of sizes and shapes to achieve different cuts and designs.
- Faceplate – The faceplate is a disc-shaped tool that is attached to the headstock for securing the workpiece. Make sure the faceplate is compatible with your drill and spindle size.
- Clamps – Clamps are used to hold the lathe components securely in place while working.
- Protective gear – Safety glasses or goggles are essential to protect your eyes from flying debris. It is also recommended to wear a dust mask to prevent inhaling wood particles.
- Measuring tools – A tape measure, ruler, or calipers are necessary to measure and mark the dimensions accurately.
- Sandpaper – Sandpaper is used to smoothen the wood surface and remove any rough edges.
Needed Supplies
- Drill: You will need a standard power drill that can rotate at high speeds. Make sure it has a chuck that can hold the materials you will be using.
- Chuck Key: A chuck key is used to tighten and loosen the chuck on the drill. Make sure you have the appropriate chuck key for your drill.
- Workbench or Table: You will need a sturdy workbench or table to mount the drill on. It should be able to withstand the vibrations and pressures of the lathe operation.
- Supporting Blocks: You will need a set of sturdy wooden blocks or supports to elevate and stabilize the workpiece on the workbench.
- Wood or Metal Materials: Depending on your project, you will need the appropriate wood or metal materials to shape and work on.
- Clamps: You will need clamps to secure the materials onto the workbench or table. Make sure they are strong enough to hold the materials firmly in place.
- Drill Bits: You will need a variety of drill bits to create different sized holes and shapes in the materials.
- Sandpaper and Files: Sandpaper and files are essential for smoothing and shaping the materials after they have been worked on.
- Safety Equipment: Always wear safety goggles or glasses to protect your eyes from flying debris. It is also recommended to use a dust mask to protect against inhaling dust particles.
Step 1: Prepare the Drill
To make a lathe out of a drill, you will first need to prepare the drill for use in the lathe setup. Follow these steps to get started:
1. Gather the necessary materials
Before you begin, make sure you have all the materials you will need. This includes:
- A power drill with a chuck key
- A sturdy workbench or table
- A piece of scrap wood or metal to attach to the drill
- Safety goggles and gloves
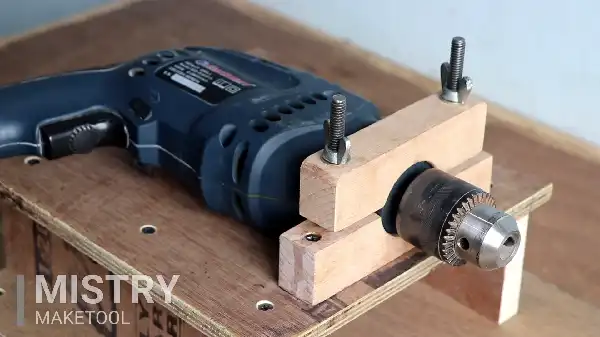
2. Secure the drill to the workbench

Next, secure the drill to the workbench or table using clamps or screws. You want to make sure the drill is stable and will not move during operation.
Place the drill on the edge of the workbench with the drill bit facing downwards. Use clamps or screws to fasten the drill to the workbench, ensuring that it is securely attached.
3. Attach the scrap wood or metal
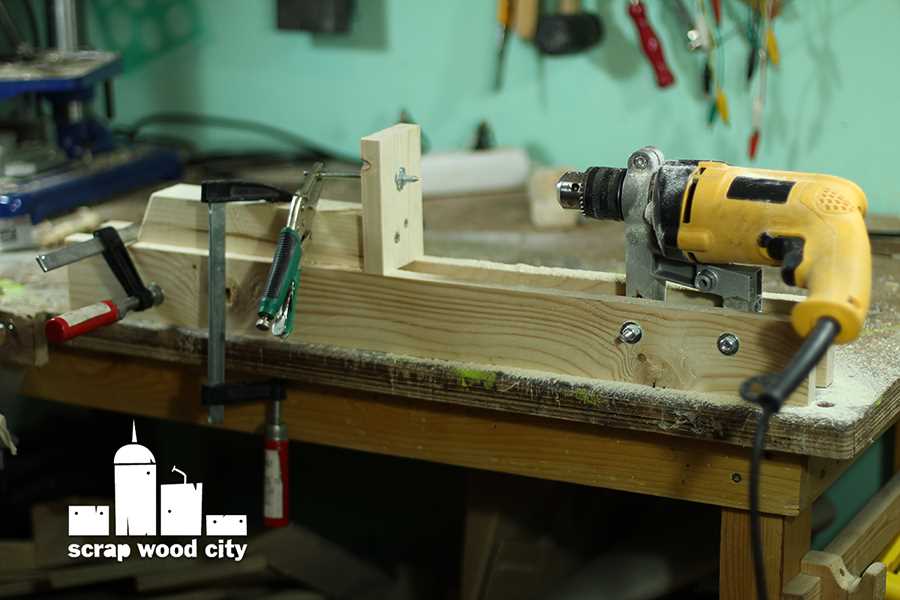
Take the piece of scrap wood or metal and attach it to the chuck of the drill. Use the chuck key to tighten the chuck around the wood or metal, making sure it is held securely in place.
4. Adjust the height and angle
Once the scrap wood or metal is attached, adjust the height and angle of the drill to your desired specifications. You may need to loosen the clamps or screws holding the drill in place to make these adjustments, and then tighten them again once you have found the desired settings.
5. Test for stability
Before using the drill as a lathe, test for stability. Turn on the drill and check that everything is securely in place, and that the drill does not wobble or move excessively. This will ensure safe and accurate operation.
By following these steps, you will have successfully prepared the drill for use as a lathe. Now you can move on to the next steps in the process.
Remove Chuck and Drill Bit
Before you can begin making a lathe out of a drill, you’ll need to remove the chuck and drill bit from the drill. This will allow you to attach the necessary components for transforming it into a lathe.
To remove the chuck and drill bit:
- Unplug the drill from the power source for safety.
- Locate the chuck at the front of the drill.
- If your drill has a keyless chuck, hold the drill body firmly and turn the chuck counterclockwise by hand until it loosens. Continue turning until the chuck is completely unscrewed and can be removed from the drill.
- If your drill has a keyed chuck, insert the chuck key into one of the three holes located on the sides of the chuck. Rotate the key counterclockwise to loosen the chuck. Once loosened, continue turning the chuck by hand until it is completely removed from the drill.
- After removing the chuck, you will see the drill bit at the end of the motor shaft.
- If the drill bit is stuck or difficult to remove, use a pair of pliers or a wrench to grip the drill bit and turn it counterclockwise to loosen and remove it.
Once the chuck and drill bit have been removed, you can proceed with attaching the necessary components to create your homemade lathe.
Attach Lathe Chuck
Attaching a lathe chuck to your homemade lathe is an essential step in transforming your drill into a functional lathe. The lathe chuck will hold the workpiece securely in place and allow you to shape, cut, and polish it with precision.
- Start by turning off and unplugging your drill to ensure safety.
- Select a lathe chuck that is compatible with your drill. Check the chuck’s specifications and make sure it fits the threaded spindle on your drill.
- Remove the drill bit or any other attachment from the drill’s spindle.
- Insert the lathe chuck onto the drill’s spindle. Make sure it fits snugly and aligns with the spindle correctly. You may need to use a chuck key or other tools to tighten the chuck securely.
- Once the lathe chuck is attached, give it a gentle spin by hand to ensure it rotates smoothly.
Now that the lathe chuck is securely attached to your drill, you are ready to start using your homemade lathe. Remember to always follow safety precautions and wear appropriate protective gear when operating any machinery.
Step 2: Build the Lathe Base
Gather the Materials
Before you can start building the lathe base, you will need to gather the following materials:
- 4 pieces of wood, each measuring 12 inches in length
- 2 pieces of wood, each measuring 8 inches in length
- Wood screws
- Drill
- Wood glue
- Measuring tape
Measure and Cut the Wood
Using a measuring tape, measure and mark the 12-inch pieces of wood at the halfway point. Cut each piece of wood in half to create 8-inch pieces. These 8-inch pieces will serve as the legs of the lathe base.
Assemble the Base Frame
Take two of the 12-inch pieces of wood and place them parallel to each other. Place the two 8-inch pieces of wood between the longer pieces, placing them at the ends to create a rectangular frame. Secure the pieces together using wood screws.
Attach the Remaining Legs
Take the remaining two 12-inch pieces of wood and attach them perpendicular to the longer pieces of the frame. Use wood screws to secure them in place.
Reinforce with Wood Glue
To strengthen the base, apply wood glue to the joints of the frame. This will provide extra stability and durability to the lathe base.
Allow the Glue to Dry
After applying the wood glue, allow it to dry according to the manufacturer’s instructions. This may take several hours, so be sure to leave enough time for the glue to fully set before moving on to the next step.
Check for Stability
Once the glue has dried, check the stability of the lathe base. Make sure all joints are secure and that the base does not wobble or shift when pressure is applied. If necessary, reinforce any weak areas or tighten any loose screws.
Summary
In this step, you have built the lathe base using wood and screws. You have also reinforced it with wood glue for added stability. The lathe base is now ready to be assembled and used in the next steps of the process.
Measure and Cut Wood Pieces
Before you begin building your lathe, you will need to measure and cut the wood pieces that will make up the frame and other important components. Follow these steps to ensure accurate measurements and clean cuts:
-
Gather the necessary tools: You will need a tape measure, a pencil, a miter saw or circular saw, and a clamp to hold the wood securely in place while cutting.
-
Measure and mark the lengths: Use the tape measure to accurately measure the required lengths for each wood piece. Mark these measurements with a pencil on the wood to ensure accurate cuts.
-
Set up the cutting area: Find a secure and stable surface to set up your saw. Ensure that the area is well-lit and clear of any obstacles.
-
Make the cuts: Using the miter saw or circular saw, carefully cut along the marked lines. Take your time and ensure that the wood is securely clamped in place before making any cuts.
-
Double-check your measurements: Once all the pieces are cut, double-check the lengths to ensure accuracy. Make any necessary adjustments or recut any pieces that may be incorrect.
By measuring and cutting the wood pieces accurately, you will lay the foundation for a sturdy and functional lathe. Take your time during this step to ensure the best results for your DIY lathe project.
Assemble the Base
Before you can start turning your drill into a lathe, you’ll need to assemble the base. The base is the foundation of your lathe and will provide stability and support throughout the project.
To assemble the base, follow the steps below:
- Start by gathering all the necessary materials and tools. You will need a sturdy workbench or table, a drill, a piece of plywood or MDF board, screws, and a power strip.
- Position the plywood or MDF board on your workbench or table. Make sure it is placed securely and won’t move during operation.
- Measure and mark the locations for the four corners of your drill on the plywood or MDF board. These marks will serve as the reference points for mounting your drill.
- Using a drill bit slightly smaller than the diameter of your screws, drill pilot holes at each of the marked locations.
- Place your drill on top of the plywood or MDF board, aligning the drill’s base with the pilot holes you just drilled.
- Securely fasten the drill to the board using screws, making sure the drill is level and firmly attached.
- Attach a power strip to your workbench or table near the base of the lathe. This will provide a convenient power source for your drill and any additional tools you may need.
Once you have successfully assembled the base, you can move on to the next step of transforming your drill into a functioning lathe.
FAQ
What materials do I need to make a lathe out of a drill?
To make a lathe out of a drill, you will need a power drill, a sturdy base, a piece of plywood or metal plate, a drill chuck, a tool rest, and various cutting tools.
Is it difficult to make a lathe out of a drill?
While it requires some basic woodworking and metalworking skills, making a lathe out of a drill is not overly difficult. With the right tools and materials, as well as following a step-by-step guide, you can successfully create your own lathe.
What are the benefits of making a lathe out of a drill?
Making a lathe out of a drill allows you to have a multi-purpose tool without the need to purchase a separate lathe. It can save you money and space in your workshop. Additionally, it provides a hands-on learning experience and the opportunity to customize the lathe to fit your specific needs.
Can I use any type of drill to make a lathe?
In theory, you can use any type of power drill to make a lathe. However, it is recommended to use a drill with higher power and torque for better results. A drill with variable speed control is also beneficial for different types of turning operations.
Are there any safety precautions I should take when using a homemade lathe?
Yes, there are several safety precautions you should take when using a homemade lathe. Always wear safety glasses or goggles to protect your eyes from flying debris. Keep your hands and fingers away from the rotating parts and cutting tools. Make sure the tool rest is securely attached and positioned properly for stability. Finally, be cautious and aware of the potential risks and hazards associated with using a homemade lathe.
What are some projects I can do with a lathe made from a drill?
With a lathe made from a drill, you can create a variety of projects such as wooden bowls, candle holders, pens, tool handles, and decorative pieces. The possibilities are endless and limited only by your imagination and skill level.
Video

How many hz in a mega hz

Meet Harrison Clayton, a distinguished author and home remodeling enthusiast whose expertise in the realm of renovation is second to none. With a passion for transforming houses into inviting homes, Harrison's writing at https://thehuts-eastbourne.co.uk/ brings a breath of fresh inspiration to the world of home improvement. Whether you're looking to revamp a small corner of your abode or embark on a complete home transformation, Harrison's articles provide the essential expertise and creative flair to turn your visions into reality. So, dive into the captivating world of home remodeling with Harrison Clayton and unlock the full potential of your living space with every word he writes.