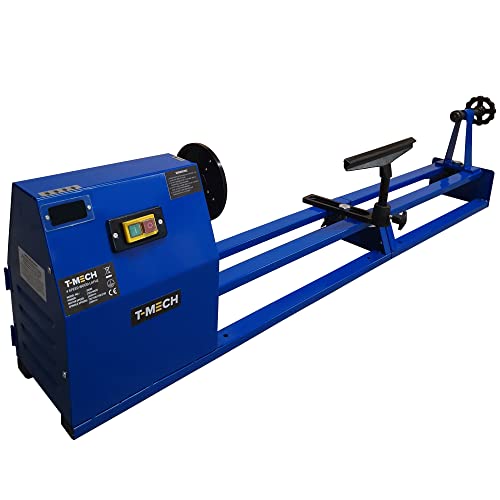
DIY Guide: How to Make a Wood Lathe with a Drill

Woodworking can be a rewarding and fulfilling hobby, but it often requires specialized tools that can be quite expensive. However, with a little creativity and ingenuity, you can create your own wood lathe using a simple drill and some basic materials. In this DIY guide, we will walk you through the step-by-step process of building your own wood lathe, allowing you to turn wooden objects to your heart’s content without breaking the bank.
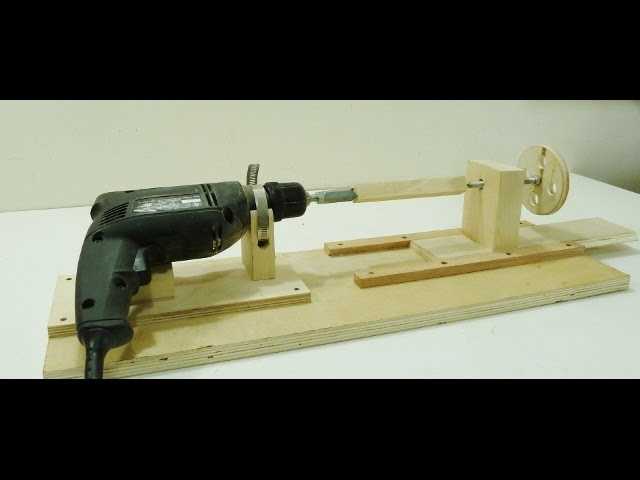
One of the key components of a wood lathe is the spindle, which holds the piece of wood being turned. For this project, you will need a sturdy steel rod that is long enough to accommodate the size of the wood you plan to work with. You will also need to create a headstock and a tailstock to support the other end of the rod. These can be made from scrap wood or other materials you have lying around.
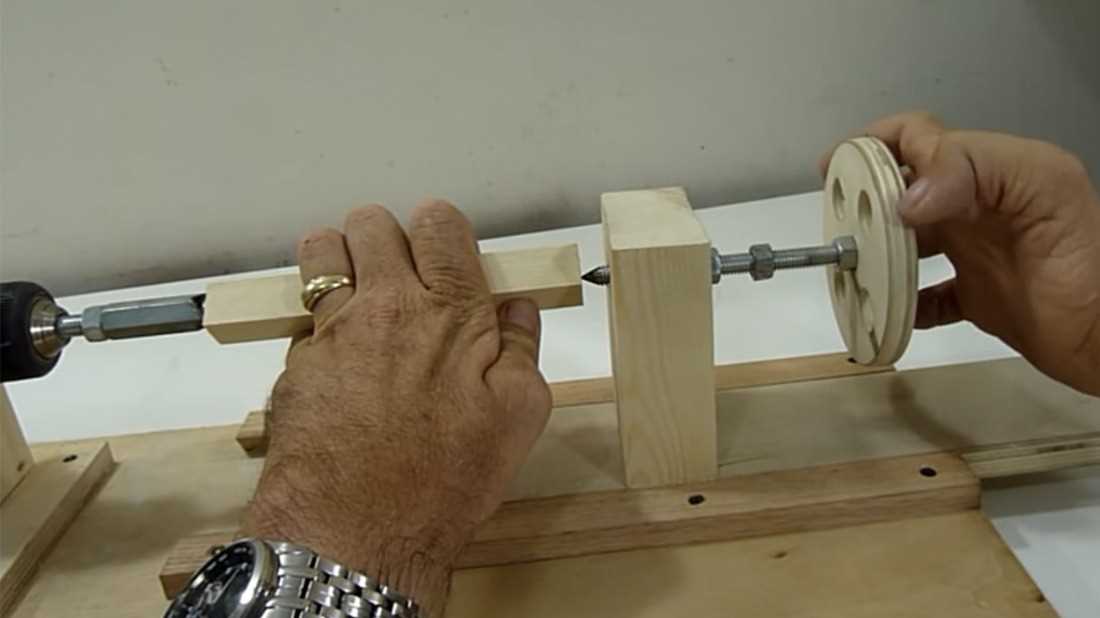
Once you have assembled the main components of the lathe, you will need to attach your drill to the headstock. This will serve as the motor that powers the lathe. Make sure to securely fasten the drill in place, ensuring that it is aligned with the spindle. You may need to use clamps or other fasteners to keep everything in place.
With your wood lathe assembled and the drill securely attached, you are now ready to start turning wood. Begin by mounting a piece of wood on the spindle, making sure it is centered and secure. Turn on the drill and slowly adjust the speed to find a comfortable working pace. Use a set of chisels or gouges to shape the wood as it spins, creating intricate designs and smooth finishes.
Building your own wood lathe can be a fun and fulfilling project, allowing you to explore your creativity and learn new woodworking skills. With just a few basic materials and some patience, you can create a functional tool that will bring your woodworking projects to life.

Materials Needed
- A sturdy workbench or table
- A drill press with adjustable table height
- A drill chuck that fits your drill press
- A piece of wood for the lathe bed, at least 2 feet long and 4 inches wide
- Two pieces of wood for the lathe head and tailstock, each at least 1 foot long and 4 inches wide
- A metal rod or pipe, around 1 inch in diameter and 2 feet long, for the tool rest
- A faceplate for attaching wood blanks to the lathe
- A drive center and live center for supporting the wood while turning
- A set of lathe chisels
- A drill and bits for drilling holes in the wood
- Sandpaper of various grits for sanding the turned wood
- Wood glue for joining the components together
- Screws or nails for securing the components
Step 1: Choose the Right Drill
Choosing the right drill is crucial when making a wood lathe with a drill. You need a drill that is powerful enough to handle the load and capable of rotating at high speeds consistently.
Considerations:
- Power: Look for a drill with a high horsepower rating. Higher power means it will be able to handle the load and spin the lathe with ease.
- Speed: Check the drill’s speed range. Ideally, you want a drill that can rotate at variable speeds, allowing you to adjust the lathe’s speed as needed.
- Chuck Size: Consider the chuck size of the drill. A larger chuck size will allow you to use larger bits and accessories for your wood lathe.
- Stability: Look for a drill that is sturdy and stable when mounted. This will ensure smooth and precise operation when using the wood lathe.
Recommended Models:
| Brand | Model | Power (HP) | Speed Range (RPM) | Chuck Size (inches) |
|---|---|---|---|---|
| Brand A | Model X | 0.5 | 500-2500 | 1/2 |
| Brand B | Model Y | 0.75 | 1000-3000 | 5/8 |
| Brand C | Model Z | 1.0 | 1500-3500 | 3/4 |
These models are just recommendations, and you should choose a drill that meets your specific requirements and budget. Make sure to read customer reviews and product specifications before making a final decision.
Step 2: Prepare the Base
Once you have gathered all the necessary materials and tools, it’s time to prepare the base for your wood lathe. The base will serve as the foundation for the lathe, providing stability and support during operation.
Here is a step-by-step guide on how to prepare the base:
- Start by selecting a sturdy and flat surface for your base. This could be a workbench or a table.
- Measure the dimensions of your drill to determine the size of the base. It should be slightly larger than the dimensions of the drill.
- Using a saw or a circular saw, cut a piece of plywood or MDF (medium-density fiberboard) to the desired size for your base. Make sure it’s smooth and free from any rough edges.
- Next, mark the spots where you will be attaching the drill and other components. This will vary depending on the design of your lathe, so refer to your plans or measurements for guidance.
- Drill pilot holes for the screws or bolts that will secure the drill to the base. Make sure the holes are smaller than the diameter of the screws or bolts to ensure a secure fit.
- Attach the drill to the base using the screws or bolts. Make sure it’s tightly secured and doesn’t wobble.
- Finally, check the stability of the base by giving it a gentle shake. If it feels sturdy and doesn’t move, your base is ready for the next step.
Remember, the base is an essential part of your wood lathe, so take your time to ensure it’s well-built and stable. Once you have completed this step, you’re ready to move on to the next phase of building your wood lathe.

Step 3: Attach the Drill
Now that you have prepared the base and built the frame for your wood lathe, it is time to attach the drill. The drill will serve as the power source for your lathe, allowing you to rotate the piece of wood and shape it as desired.
Here’s how to attach the drill:
- Place the drill on the mount you have created on the frame. Make sure the drill is aligned properly and securely attach it using clamps or screws to hold it in place.
- Adjust the height of the drill so that the bit is centered and level with the center of the base. This will ensure smooth and even rotation of the wood piece.
- Attach a pulley or chuck to the drill’s spindle. This will allow you to secure and rotate the wood piece while shaping it.
It is essential to ensure that the drill is securely attached to the frame and that all connections are tightened properly. This will prevent any accidents and ensure the stability of your wood lathe.
Once you have successfully attached the drill, you are ready to move on to the next step of setting up your wood lathe and starting your woodworking project.
Step 4: Create the Tool Rest
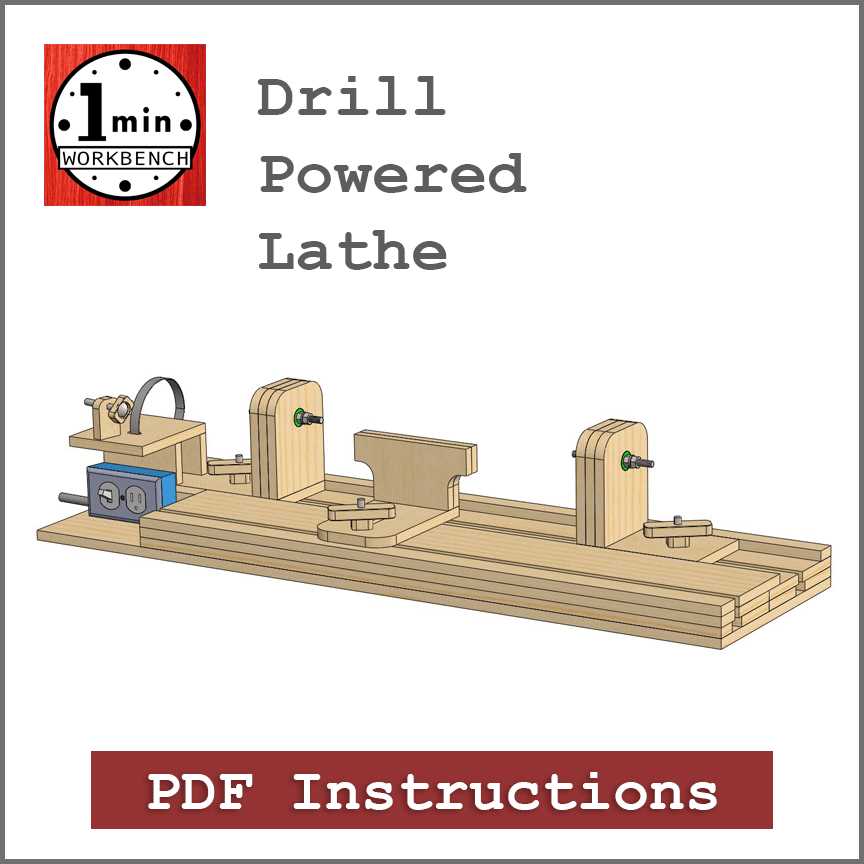

The tool rest is an important component of a wood lathe as it provides a stable support for your cutting tools. In this step, we will show you how to create a simple and effective tool rest for your DIY wood lathe using common materials.
Materials you’ll need:
- Scrap piece of wood (approximately 12 inches long)
- Wood screws
- Drill
- Drill bits
- Saw
- Screwdriver
Instructions:
- Start by measuring the height of your lathe bed. This will determine the height of your tool rest. Make sure to leave enough clearance for your turning workpiece.
- Using a saw, cut a piece of scrap wood to the desired length for your tool rest.
- Decide on the width of your tool rest. This will depend on the size of your turning tools. Mark the width on the piece of wood.
- Using a drill and an appropriate drill bit, create holes on both ends of the wood piece. These holes will be used to attach the tool rest to your lathe bed.
- Position the tool rest on your lathe bed, aligning the holes with the holes on the lathe bed.
- Secure the tool rest to the lathe bed using wood screws and a screwdriver.
- Once the tool rest is securely attached, adjust its height if needed to match the height of your lathe bed.
Now you have a functional tool rest for your DIY wood lathe. The tool rest will provide stability and support for your cutting tools, allowing you to create smooth and precise turning projects.
Step 5: Install the Tailstock
Once you have finished constructing the lathe bed and mounting the headstock, it’s time to install the tailstock. The tailstock is an important component of the wood lathe as it provides support to the other end of the workpiece.

To install the tailstock, follow these steps:
- Position the tailstock on the lathe bed, aligning it with the centerline of the lathe bed.
- Tighten the tailstock clamp to secure it in place.
- Adjust the tailstock alignment by loosening the alignment screws and moving it until it is parallel to the lathe bed.
- Once the tailstock is aligned, tighten the alignment screws to secure it in place.
- Ensure that the tailstock quill is locked in position and does not move during operation.
After installing the tailstock, you can now adjust the position of the tailstock quill according to the length of the workpiece. This can be done by loosening the quill lock and sliding the quill in or out.
The tailstock is an essential part of the wood lathe, as it allows you to support long workpieces and adds stability to the overall turning process. Make sure to properly install and align the tailstock to ensure accurate and safe operations.
Step 6: Use Safety Precautions
When working with power tools, it is important to prioritize safety. Here are some precautions you should take when using the wood lathe made with a drill:
- Wear safety goggles: Protect your eyes from flying wood chips and debris by wearing safety goggles. This will prevent any potential eye injuries.
- Use ear protection: The wood lathe can be quite loud, so you should wear ear protection such as earplugs or earmuffs to prevent hearing damage.
- Avoid loose clothing and accessories: Tie back long hair and remove any loose clothing, jewelry, or accessories that could get caught in the lathe’s moving parts.
- Secure the workpiece: Ensure that the workpiece is securely fastened to the lathe before turning it on. This will prevent any accidents or injuries caused by a loose workpiece.
- Keep fingers and hands away from the spinning wood: Never try to touch or stop the spinning wood with your fingers or hands. This can lead to serious injuries. Instead, use appropriate tools such as chisels or gouges to shape the wood.
- Take breaks: Woodworking can be a physically demanding activity. Be sure to take regular breaks to prevent fatigue and maintain focus.
- Read the drill’s manual: Familiarize yourself with the instructions and safety guidelines in the drill’s manual. This will help you understand the specific safety features and precautions that apply to your drill model.
By following these safety precautions, you can enjoy using your homemade wood lathe while minimizing the risk of accidents or injuries.

FAQ
What materials do I need to make a wood lathe with a drill?
To make a wood lathe with a drill, you will need the following materials: a sturdy table or workbench, a power drill, a piece of plywood or metal for the base, a piece of threaded rod, nuts and washers, a chuck or drill bit holder, and some screws or bolts to secure the parts together.
Is it difficult to make a wood lathe with a drill?
Making a wood lathe with a drill is not overly difficult, but it does require some basic woodworking skills and knowledge of how a lathe works. It also requires some tools and materials that you may not already have on hand. However, with some patience and determination, it is definitely possible for a DIY enthusiast to construct their own wood lathe.
Can I use any type of drill for this project?
Generally, any power drill should work for making a wood lathe. However, it is important to consider the power and torque of your drill. A more powerful drill will be able to handle larger and harder pieces of wood, while a less powerful drill may struggle with larger or denser materials. Additionally, if you plan on doing a lot of woodturning, you may want to invest in a more powerful drill to ensure optimal performance.
What are the advantages of making a wood lathe with a drill?
There are several advantages to making a wood lathe with a drill. First and foremost, it is a cost-effective option compared to purchasing a ready-made lathe. By using materials that you may already have on hand or can easily acquire, you can save a significant amount of money. Additionally, making your own lathe allows you to customize it to your specific needs and preferences. You can choose the size, shape, and design that works best for you. Finally, building your own lathe can be a fun and rewarding DIY project that allows you to learn new skills and gain a sense of accomplishment.
Video

Meet Harrison Clayton, a distinguished author and home remodeling enthusiast whose expertise in the realm of renovation is second to none. With a passion for transforming houses into inviting homes, Harrison's writing at https://thehuts-eastbourne.co.uk/ brings a breath of fresh inspiration to the world of home improvement. Whether you're looking to revamp a small corner of your abode or embark on a complete home transformation, Harrison's articles provide the essential expertise and creative flair to turn your visions into reality. So, dive into the captivating world of home remodeling with Harrison Clayton and unlock the full potential of your living space with every word he writes.