How to strip a door with a heat gun

When it comes to home improvement projects, refinishing a door can make a big impact on the overall look and feel of your space. However, removing old paint or varnish from a door can be a tedious and time-consuming task. Luckily, there is a tool that can make this process much easier – a heat gun.
A heat gun is a versatile tool that emits hot air, which can help soften and remove layers of paint or varnish from a door. Using a heat gun can be a safer and more efficient alternative to other stripping methods like using chemical strippers or sanding.
Before you begin, it’s important to take safety precautions. Make sure you are in a well-ventilated area and wear protective gear such as goggles, gloves, and a face mask. Also, ensure that you have a fire extinguisher nearby, just in case.
To strip a door with a heat gun, start by setting the heat gun to a medium or high setting, depending on the thickness of the paint or varnish. Hold the heat gun about 2-3 inches away from the surface of the door and move it in a back-and-forth motion, evenly heating the area that you want to strip.
As the paint or varnish begins to soften, you can use a scraper or putty knife to gently scrape away the loosened layers. Be careful not to apply too much pressure, as you don’t want to damage the door. Repeat this process until all the paint or varnish has been removed.
Once you have stripped the door, it’s important to clean the surface to remove any remaining residue. You can use a paint stripper wash, which is specifically designed to remove any traces of paint or varnish. After cleaning, allow the door to dry completely before applying a new coat of paint or varnish.
Using a heat gun to strip a door can save you time and effort, allowing you to achieve a smooth and professional-looking finish. Just remember to follow safety guidelines and take your time to ensure a successful project.
What You Need to Know About Stripping a Door with a Heat Gun
If you want to refresh the look of your door or remove old paint and varnish, using a heat gun can be an effective method. Stripping a door with a heat gun requires some preparation and careful execution to ensure the desired results. Here are a few things you need to know before you start:
1. Safety First
Working with a heat gun can be hazardous, so it’s important to prioritize safety. Make sure you are in a well-ventilated area to avoid inhaling any fumes. Wear protective goggles and gloves to shield your eyes and hands from potential burns. Additionally, have a fire extinguisher nearby, just in case.
2. Choose the Right Temperature
A heat gun typically comes with adjustable temperature settings. Before you start stripping, it’s important to select the appropriate temperature for your project. Test different settings on a small inconspicuous area of the door to find the one that effectively softens the paint or varnish without scorching the wood.
3. Maintain Proper Distance
Keep a consistent distance between the heat gun nozzle and the door surface throughout the stripping process. This will help prevent overheating or damaging the wood. Generally, a 2 to 4-inch distance works well, but it may vary depending on the heat gun and the door material.
Pro tip: Use a scrap piece of wood to practice your technique before you begin working on the actual door.
4. Scrape Gently
As the paint or varnish softens, use a scraper or putty knife to gently remove it from the door. Avoid applying excessive force or using sharp tools that may scratch or gouge the wood. It’s better to work patiently and make several passes to completely remove all layers.
5. Clean Up Properly
After stripping the door, it’s essential to remove any residue left behind. Use a clean cloth or brush to wipe away the softened paint or varnish. If necessary, you can also use a mild solvent or paint stripper for further cleaning. Make sure to follow the manufacturer’s instructions and wear protective equipment.
Remember: Properly dispose of any paint or varnish remnants following local regulations.
By following these tips, you can successfully strip a door using a heat gun and achieve a clean and smooth surface for refinishing or repainting. Just remember to exercise caution, take your time, and enjoy the process!
Safety Precautions for Using a Heat Gun
When using a heat gun to strip a door, it is important to follow certain safety precautions to ensure your well-being and the safety of those around you. Failure to do so can lead to serious injuries or accidents. Here are some guidelines to keep in mind:
1. Proper Ventilation: Always work in a well-ventilated area to prevent the accumulation of fumes produced by the heat gun. Open windows and doors or use a fan to improve air circulation.
2. Personal Protective Equipment: Wear appropriate safety gear, including heat-resistant gloves, safety goggles, and a dust mask. These will protect your hands, eyes, and respiratory system from potential hazards.
3. Work Area Preparation: Make sure your work area is clear of any flammable materials or substances. Remove any loose objects or debris that may interfere with your work and pose a safety risk.
4. Temperature Control: Use the heat gun at the lowest temperature setting required for the task. This minimizes the risk of overheating the surface or burning the wood. Always read and follow the manufacturer’s instructions for your specific heat gun model.
5. Proper Handling: Hold the heat gun at a safe distance from your body and do not touch the heated nozzle. Always keep the heat gun in motion to avoid concentrating heat in one spot for too long, as this can cause damage or fire.
6. Cool-Down Period: After you have finished using the heat gun, allow it to cool down completely before storing it. Never leave a hot heat gun unattended or in areas where it can cause damage or harm.
7. Electrical Safety: Always plug the heat gun into a grounded electrical outlet. Inspect the power cord for any signs of damage before use. Do not use the heat gun if the cord is frayed or if the outlet is not properly grounded.
8. Children and Pets: Keep children and pets away from the working area when using a heat gun. The high temperatures and potential hazards associated with the tool can pose a significant danger to their safety.
9. Fire Safety: Have a fire extinguisher nearby in case of accidental fires. Do not use the heat gun near flammable liquids, gases, or materials that can easily ignite.
10. Training and Experience: If you are not familiar with using a heat gun, it is advisable to seek guidance from a professional or undergo proper training. Understanding how to use the tool correctly will minimize the risk of accidents or injuries.
By following these safety precautions, you can ensure a safe and successful door stripping process with a heat gun.
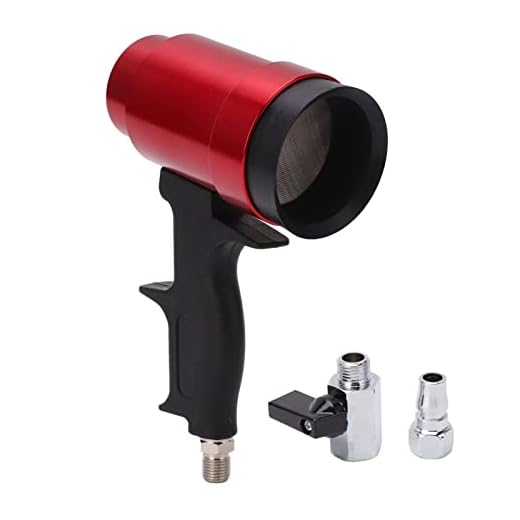
Choosing the Right Heat Gun for Stripping a Door
When it comes to stripping a door with a heat gun, choosing the right tool is crucial. The heat gun you select can greatly impact the efficiency and effectiveness of the stripping process. Here are some key factors to consider when choosing a heat gun for stripping a door:
1. Temperature Range:
Look for a heat gun that offers a wide temperature range. Stripping a door may require different temperatures depending on the type of paint or finish that needs to be removed. Having the ability to adjust the temperature allows for more versatility and precision.
2. Power:
A heat gun with higher wattage will generally provide more heat and be capable of stripping the door more quickly. Consider the size and condition of the door you are stripping, as well as your own preferences for speed and efficiency, when choosing the power of the heat gun.
3. Nozzle Options:
Various nozzle attachments can greatly enhance the performance of a heat gun. Look for a heat gun that comes with a variety of nozzle options, such as a concentrator nozzle for more focused heating or a flare nozzle for spreading heat over a larger area. Having different nozzle options allows for greater control and adaptability when stripping a door.
4. Safety Features:
Safety should always be a priority when working with heat guns. Look for a heat gun with safety features such as an automatic shut-off when the gun reaches a certain temperature or overheats. Additionally, a heat gun with a cool-down function that quickly cools down the tool after use can be beneficial.
5. Ergonomics:
Consider the ergonomics of the heat gun, such as its weight, grip, and handle design. Stripping a door can be a time-consuming task, and having a heat gun that feels comfortable and easy to maneuver can make the process more manageable.
By taking these factors into consideration, you can choose the right heat gun for stripping a door and ensure that your stripping project goes smoothly and efficiently.
Preparation Steps Before Stripping the Door
Before you start stripping a door with a heat gun, it is important to properly prepare the area and gather the necessary materials. By following these preparation steps, you can ensure that the stripping process goes smoothly and efficiently.
1. Gather the necessary materials:
Before you begin, make sure you have all the materials you will need. This includes a heat gun, paint stripper, scraper or putty knife, protective goggles, gloves, and a drop cloth or plastic sheet to protect the surrounding area.
2. Choose a well-ventilated area:
Ensure that you work in a well-ventilated area to allow the fumes from the paint stripper to disperse. Open windows and doors, or set up a fan or ventilation system, for proper air circulation.
3. Protect the surrounding area:
Lay down a drop cloth or plastic sheet to protect the floor and surrounding surfaces from any paint or debris that may fall off the door during the stripping process. This will make cleanup easier and prevent damage to other objects in the area.
4. Remove any hardware:
Before you begin stripping the door, remove any hardware such as handles, locks, hinges, or kickplates. This will make the stripping process easier and prevent any damage or buildup of paint on the hardware.
5. Clean the door:
Thoroughly clean the surface of the door using a mild detergent and water solution. This will remove any dirt, grease, or other contaminants that could interfere with the stripping process. Allow the door to dry completely before proceeding.
6. Test the heat gun:
Before you start stripping the door, it is a good idea to test the heat gun on a small, inconspicuous area to determine the appropriate temperature setting and distance for stripping. This will help prevent any damage to the door or surface.
By following these preparation steps, you can ensure that the door stripping process is safe, efficient, and produces the desired results. Remember, always follow the manufacturer’s instructions for the specific heat gun and paint stripper you are using.
Proper Technique for Using a Heat Gun on a Door
Using a heat gun to strip a door can be a highly effective method for removing layers of paint or varnish. However, it is important to follow the proper technique to ensure the best results and to avoid damaging the door.
Step 1: Preparation
Before using a heat gun, it is important to prepare the work area and gather the necessary materials. Start by removing any hardware from the door, such as knobs or hinges, as the heat can cause them to become damaged or discolored. Lay down a drop cloth to protect the floor from any paint or varnish that may be removed during the process.
Step 2: Safety Measures
Safety should always be a top priority when using a heat gun. Make sure to wear protective goggles or safety glasses to shield your eyes from any flying debris. It is also recommended to wear heat-resistant gloves to protect your hands and a mask to avoid inhaling any toxic fumes. Work in a well-ventilated area to minimize the concentration of vapors.
Step 3: Heat Gun Technique
Hold the heat gun about 6 to 8 inches away from the surface of the door and move it in a slow and steady motion. The goal is to heat the paint or varnish to the point where it becomes soft and begins to bubble or blister. Be careful not to keep the heat gun in one spot for too long, as this can scorch the wood or cause it to warp. Keep the heat gun moving at all times to ensure even heating.
Use a scraper or putty knife to gently scrape away the softened paint or varnish. Start at one edge of the door and work your way across, applying steady pressure to remove the layers. It may be necessary to make multiple passes with the heat gun and scraper to fully strip the door.
Step 4: Finishing Touches
Once all the paint or varnish has been removed, it is important to clean the surface of the door. Use a mild detergent and water to wash away any residue left behind. Allow the door to dry completely before applying any new finish or stain. Sanding may be necessary to smooth out any rough patches or imperfections.
By following these proper techniques, you can ensure that stripping a door with a heat gun is a safe and effective process. Remember to take your time and be patient, as rushing can lead to mistakes or damage to the door. With practice, you will be able to achieve professional-looking results and restore the beauty of your doors.
Removing Paint and Varnish from the Door
When it comes to stripping a door, removing the existing paint and varnish is an essential step to achieve a smooth and clean surface. Here are some steps to help you remove the paint and varnish effectively:
1. Prepare the area: Start by protecting the surrounding area with a drop cloth or plastic sheet to prevent any paint or varnish chips from getting on the floor or furniture.
2. Safety first: Ensure you are wearing protective gear such as safety goggles, gloves, and a respirator mask to protect yourself from any harmful dust or fumes.
3. Heat gun application: Using a heat gun, apply heat to the painted or varnished surface in a slow and even motion. The heat will soften the paint or varnish, making it easier to remove.
4. Scraping the surface: Once the paint or varnish has softened, use a scraper tool to gently lift and remove the old layers. Be careful not to apply too much pressure, as it may damage the wood surface.
5. Repeat if necessary: Depending on the thickness and type of paint or varnish, you may need to repeat the heat gun application and scraping process several times to fully remove all layers.
6. Sanding the door: After removing the paint and varnish, use sandpaper or a sanding block to smooth out any remaining residue or uneven spots on the door’s surface.
7. Cleaning the door: Once you have finished sanding, clean the door using a damp cloth or sponge to remove any dust or debris. Allow the door to dry completely before moving on to the next step.
8. Applying a new finish: Now that the door is stripped and clean, you can apply a fresh coat of paint, varnish, or stain to achieve the desired look. Follow the manufacturer’s instructions for the chosen finish and allow sufficient drying time before using or rehanging the door.
By following these steps and using a heat gun, you can effectively remove paint and varnish from your door, restoring its natural beauty and preparing it for a new finish.
Finishing Steps and Maintenance After Stripping the Door
Once you have successfully stripped your door using a heat gun, there are a few finishing steps and maintenance tasks you should consider to ensure a clean and polished final result. Follow these guidelines to complete the door restoration process:
- Remove any remaining old paint or varnish residue by sanding the entire door surface with fine-grit sandpaper. This will help smooth out any rough spots and prepare the door for a fresh coating.
- Clean the door thoroughly to remove any dust, debris, or sanding residue. Use a damp cloth or sponge and mild soap to gently wipe down the door surface. Make sure to dry it completely before proceeding.
- Apply a wood conditioner to the door to help it absorb the new finish more evenly. Follow the manufacturer’s instructions for application and drying times.
- Select a suitable finish for your door, such as paint or stain. Consider the style and intended use of the door when choosing the finish. Apply the finish using a brush or rag, following the manufacturer’s directions for proper application techniques.
- Allow the finish to dry completely before rehanging the door. This will prevent any smudging or damage to the newly applied finish.
- Once the door is dry, reinstall any hardware or accessories that were removed before stripping. Make sure they are securely tightened and properly aligned.
To maintain the stripped door’s appearance and longevity, you should also consider the following maintenance tasks:
- Regularly clean the door with a mild detergent and water solution to remove dirt and dust. Avoid using abrasive cleaners or harsh chemicals that can damage the finish.
- Periodically inspect the door for any signs of wear or damage. Repair any chips, scratches, or dents promptly to prevent further deterioration.
- Protect the door from excessive moisture and direct sunlight, as these can cause the finish to fade or deteriorate over time. Consider using a protective sealant or wax for added durability.
- Consider applying a fresh coat of finish or touch-up as needed to maintain the door’s appearance. Follow the same steps as before to ensure a seamless and consistent result.
By following these finishing steps and implementing proper maintenance, you can enjoy a beautifully restored door that adds charm and character to your space for years to come.
FAQ
What is the purpose of stripping a door with a heat gun?
The purpose of stripping a door with a heat gun is to remove old paint or varnish from the surface of the door. This allows for a fresh start when repainting or refinishing the door.
How does a heat gun work in stripping a door?
A heat gun works by emitting a stream of hot air that softens the old paint or varnish on the door. This makes it easier to scrape off the loosened material using a putty knife or paint scraper.

Meet Harrison Clayton, a distinguished author and home remodeling enthusiast whose expertise in the realm of renovation is second to none. With a passion for transforming houses into inviting homes, Harrison's writing at https://thehuts-eastbourne.co.uk/ brings a breath of fresh inspiration to the world of home improvement. Whether you're looking to revamp a small corner of your abode or embark on a complete home transformation, Harrison's articles provide the essential expertise and creative flair to turn your visions into reality. So, dive into the captivating world of home remodeling with Harrison Clayton and unlock the full potential of your living space with every word he writes.


