How to use wax seal stamp with glue gun

Wax seal stamps have long been used as a traditional way to add a touch of elegance and personalization to correspondence and crafts. However, the traditional method of melting wax over a flame can be time-consuming and messy. That’s where a glue gun comes in handy! Using a glue gun to melt wax for a seal stamp is a quick, easy, and efficient alternative that still provides that classic look.
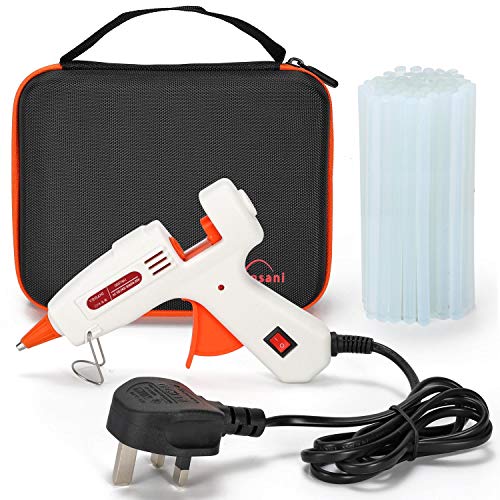
Firstly, gather your materials. You will need a wax seal stamp, wax sticks, a glue gun, and a heat-resistant surface. Make sure your glue gun is clean and ready to use.
Next, insert a wax stick into the glue gun and allow it to heat up. The heat from the glue gun will quickly melt the wax, making it ready for stamping. Be sure to use a wax stick that is specifically designed for glue guns, as other wax sticks may not melt properly.
Once the wax is melted, carefully squeeze the glue gun trigger to release a small amount of wax onto your desired surface. Be mindful of the size of your wax seal stamp and aim to dispense just enough wax to cover the area of the stamp. Too much wax can cause it to overflow and ruin the design.
Quickly place the wax seal stamp gently into the melted wax. Press down firmly, but do not twist the stamp, as this can cause the wax to smear. Hold the stamp in place for a few seconds to allow the wax to cool and harden.
Finally, gently lift the wax seal stamp straight up from the hardened wax. Voila! You have successfully created a beautiful and personalized wax seal using a glue gun.
In conclusion, using a glue gun to melt wax for a seal stamp offers a quick, convenient, and mess-free alternative to the traditional flame method. With a wax seal stamp and a glue gun in hand, you can add a touch of elegance and personalization to your correspondence, crafts, and more!
What is a wax seal stamp?
A wax seal stamp is a traditional tool used to create decorative seals on letters, documents, or other items. It adds a touch of elegance and old-world charm to correspondence or personal belongings.
The wax seal stamp consists of two main parts – the stamp itself and a handle or holder. The stamp is typically made of metal or wood and has a design or symbol engraved on the end. The handle or holder provides a comfortable grip and helps to apply pressure evenly when making the seal.
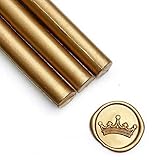
To use a wax seal stamp, you will also need sealing wax, which is a special type of wax that is designed to melt and create a secure seal. Sealing wax comes in different colors and can be customized to match your personal style or the occasion.

To create a seal, you first heat the sealing wax with a glue gun or a traditional wax melting spoon until it becomes malleable. Then, you apply the melted wax to the desired surface and press the wax seal stamp into it, leaving behind a beautiful impression of the design.
Wax seals have been used for centuries as a form of authentication and personalization. They were commonly used by important figures such as kings, nobles, and even government officials to seal official documents. Today, wax seals are often used for decorative purposes, adding a unique and vintage touch to wedding invitations, certificates, or even gifts.
Types of Wax Seal Stamps
There are various types of wax seal stamps available, each with its own unique design and style. Some common types include:
- Initials or monograms: These stamps feature the initials or monograms of the sender, adding a personal touch to the seal.
- Symbols or motifs: These stamps feature various symbols, such as flowers, animals, or religious icons, allowing you to choose a design that reflects your personality or the occasion.
- Crests or coats of arms: These stamps feature family crests or coats of arms, often used to represent a family or organization.
Tips for Using a Wax Seal Stamp
Here are some tips to ensure a successful and beautiful wax seal:
- Choose the right type of sealing wax for your project, considering factors such as color, flexibility, and durability.
- Make sure the wax is heated to the right temperature – too hot, and it may damage the seal or cause the wax to run, too cold, and it may not adhere properly.
- Apply even pressure when pressing the stamp into the wax to create a clear and well-defined impression.
- Allow the wax to cool and harden completely before handling the sealed item to avoid smudging or smearing.
- Consider practicing on a scrap piece of paper or wax before sealing your final item to get a feel for the process.
Using a wax seal stamp with a glue gun allows for easy and convenient use, making it accessible to anyone interested in adding a touch of vintage charm to their correspondence or creative projects.

Why use a glue gun with a wax seal stamp?
Traditionally, wax seal stamps were used with wax sticks that were melted over a flame and then stamped with a seal to mark documents or letters. However, using a glue gun with a wax seal stamp has become a popular alternative. Here are a few reasons why:
Ease and Convenience
Using a glue gun with a wax seal stamp is much easier and more convenient than using traditional wax sticks. With a glue gun, you simply load a wax stick into the gun, plug it in, and wait for the wax to melt. This eliminates the need for an open flame and makes the process much safer and quicker.
Variety of Colors and Finishes
One of the advantages of using a glue gun with a wax seal stamp is the wide variety of colors and finishes available. Wax sticks for glue guns come in numerous colors, including metallics, pearlized, and even glitter finishes. This allows you to personalize your wax seals and add a unique touch to your correspondence or crafts.
Additionally, using glue gun wax sticks allows for easier customization. You can easily mix and match colors to create unique combinations or even experiment with marbling techniques.
Using a glue gun with a wax seal stamp opens up a world of creative possibilities for crafters and artists.

Adhesion and Durability
Glue gun wax sticks offer better adhesion and durability compared to traditional wax sticks. The hot glue from a glue gun creates a stronger bond, ensuring that your wax seal remains intact during transit or handling. This makes it ideal for sealing envelopes, wedding invitations, or any other documents that need to be securely sealed.
Furthermore, glue gun wax sticks are less likely to break or crack, providing a longer-lasting seal. This is particularly important if you’re creating wax seals for keepsakes or using them in a way that requires more durability.
Overall, using a glue gun with a wax seal stamp is a modern and convenient alternative to traditional methods. It offers ease of use, a wide variety of colors and finishes, and enhanced adhesion and durability. Whether you’re a hobbyist, artist, or someone who enjoys adding a personal touch to correspondence, using a glue gun with a wax seal stamp is definitely worth considering.
Step-by-step Guide
Using a wax seal stamp with a glue gun is a simple and efficient way to add a classy touch to your letters and cards. Follow these steps to learn how to use a wax seal stamp with a glue gun:
Step 1: Prepare your materials. You will need a wax seal stamp, a glue gun, a wax stick, and a heat-resistant surface.

Step 2: Insert the wax stick into the glue gun. Make sure it is securely in place.
Step 3: Plug in the glue gun and allow it to heat up. This usually takes a few minutes.
Step 4: Place the heat-resistant surface on a flat and stable surface to work on.
Step 5: Hold the glue gun at a slight downward angle, pointing the nozzle towards the heat-resistant surface.
Step 6: Squeeze the trigger of the glue gun to release the wax. Apply the wax directly onto the surface in a thick, circular motion.

Step 7: When you have applied enough wax, quickly position the wax seal stamp on top of the wax while it is still hot and malleable.
Step 8: Press the wax seal stamp firmly onto the wax for a few seconds to ensure a good impression.
Step 9: Carefully lift the wax seal stamp straight up to avoid smudging the design.
Step 10: Allow the wax seal to cool and harden completely before handling the sealed letter or card.
That’s it! Now you know how to use a wax seal stamp with a glue gun to add a beautiful finishing touch to your correspondence.

Choose the right wax
Choosing the right wax is crucial for achieving a perfect wax seal with a glue gun and wax seal stamp. The right wax should not only ensure a strong adhesion but also create a beautiful and long-lasting impression.
When selecting wax, it is essential to consider its composition and properties. Traditional sealing wax is made from a combination of waxes, resins, and pigments, resulting in a durable and flexible seal. However, traditional wax requires a flame for melting and is not compatible with glue guns.
Fortunately, there are modern alternatives available that are specifically designed for glue gun use. These glue gun sealing waxes eliminate the need for a flame and provide excellent results when used with a wax seal stamp.
Glue gun sealing wax is usually made from a blend of natural waxes, resins, and adhesives that melt at a lower temperature, allowing for easy application using a glue gun. It is important to look for wax that has a good adhesive quality and remains pliable after cooling, as this ensures a strong and durable seal.
Additionally, you can also choose from various colors and finishes to complement your personal style or the occasion. Glue gun sealing waxes are available in a range of shades, including metallic, matte, and traditional antique finishes, allowing you to create a seal that reflects your individual taste.
Before purchasing wax for your glue gun, check the product description to ensure it is compatible with glue guns and wax seal stamps. Some waxes may require specific temperature settings on your glue gun, so it is essential to follow the manufacturer’s instructions for best results.
In conclusion, selecting the right wax is an important step in using a wax seal stamp with a glue gun. Opt for glue gun sealing wax that is specifically designed for glue gun use, ensuring a strong adhesion and beautiful seal. Consider the composition, adhesive quality, and available colors to find the perfect wax for your needs.
Melt the wax with a glue gun
To use a wax seal stamp with a glue gun, you first need to melt the wax. The glue gun method is a quick and easy way to achieve a beautiful wax seal without the mess and hassle of using a traditional wax spoon and candle.
Step 1: Prepare your glue gun
Start by making sure that your glue gun is clean and free from any previous glue residue. You don’t want any old glue to mix with the wax and ruin the final result. Plug in your glue gun and let it heat up.
Step 2: Load the wax into the glue gun
Next, insert a wax stick into the back of the glue gun, where you would normally load the glue sticks. Push it all the way in until it reaches the heating element. Be sure to use wax sticks specifically designed for glue guns, as they have a lower melting point and are easier to work with.
It’s a good idea to use a wax color that contrasts well with your envelope or paper, as this will create a more visible and aesthetically pleasing seal.
Step 3: Melt the wax
Once the glue gun is fully heated and the wax stick is loaded, press the trigger to release a small amount of melted wax onto your desired surface. It’s essential to control the flow of the melted wax, as too much can create a messy and uneven seal.
Slowly move the glue gun in a circular motion to create a pool of melted wax. Keep in mind that you don’t need a large pool of wax, just enough to accommodate the size of your seal.
Step 4: Stamp the wax
While the wax is still hot and malleable, carefully position your wax seal stamp above the pool of wax. Press it firmly and evenly into the wax, making sure that the entire design is imprinted. Hold it in place for a few seconds to allow the wax to cool and set.
Finally, gently lift the wax seal stamp away from the wax. You should now have a beautifully embossed wax seal on your envelope or paper.
Remember to practice and experiment with different colors and designs to achieve the desired effect. With a glue gun and a wax seal stamp, you can add a touch of elegance and personalization to your letters, invitations, or craft projects.
Apply the wax to the desired surface
Once you have prepared your wax seal stamp and glue gun, it’s time to apply the wax to the desired surface. Make sure the surface is clean and dry before starting.
1. Insert a wax stick into the glue gun and allow it to heat up. This usually takes a few minutes.
2. Hold the glue gun at a 45-degree angle and squeeze the trigger to release the melted wax onto the surface. Start at one corner and move in a clockwise or counterclockwise direction, depending on your preference.
3. Apply enough wax to create a seal that covers the desired area. Aim for a thickness of around 1/8 to 1/4 inch for a sturdy seal.
4. If you want to add a personal touch, you can mix different colors of wax sticks. Simply melt them together in the glue gun and apply the mixed wax to the surface.
5. While the wax is still warm and soft, quickly press the wax seal stamp firmly onto the wax. Hold it in place for a few seconds to ensure a clean and clear impression.
6. Gently lift the wax seal stamp straight up to reveal your beautifully sealed surface.
Remember to practice on a scrap piece of paper or surface before applying the wax seal to your final project. This will help you perfect your technique and ensure a clean impression every time.
Press the wax seal stamp into the wax
Once you have melted enough wax onto your desired surface using the glue gun, it’s time to press the wax seal stamp into the wax to create a beautiful impression. Follow these steps to ensure a clean and crisp design:
- Hold the handle of the wax seal stamp firmly with one hand.
- Position the stamp directly above the melted wax.
- Lower the stamp slowly and steadily into the wax, ensuring that all parts of the design make contact with the wax.
- Apply gentle pressure and hold the stamp in place for a few seconds to allow the wax to cool and set.
- Once the wax has hardened, carefully lift the stamp straight up to reveal your custom wax seal.
It’s important to note that while the wax is still hot and malleable, you can make adjustments to the stamp’s position or even remove the stamp entirely if the impression didn’t turn out as desired. Simply reheat the wax and start the process again.
Tips for a successful wax seal impression:
To achieve the best results, keep the following tips in mind:
- Make sure the wax is melted enough to create a smooth and even surface. If the wax is too warm or too cold, it may not take the stamp’s impression properly.
- Ensure that the wax is deep enough to allow the stamp to make a clear impression. If the wax layer is too thin, the design may not come out clearly.
- Avoid rocking or twisting the stamp while pressing it into the wax, as this can smudge the design.
- Be patient. Allow the wax to completely cool and harden before handling the sealed item to prevent smudging or smearing.
With these simple steps and tips, you’ll be able to use a wax seal stamp with a glue gun to add a touch of elegance and personalization to your letters, invitations, and crafts.
Let the wax cool and remove the stamp
After you have pressed the wax stamp onto the surface and created your desired design, it is important to let the wax cool completely before removing the stamp. This usually takes about 30 seconds to 1 minute, depending on the thickness of the wax and the ambient temperature.
During this time, avoid touching or disturbing the wax as it may cause the design to smudge or become misshapen. The cooling process allows the wax to harden and set, ensuring that the design stays intact.
Once the wax has cooled down, gently lift the wax seal stamp upwards to remove it from the surface. Take care not to slide or twist the stamp, as this may distort the design. Lift it straight up to avoid any damage to the wax.
If the stamp feels stuck or difficult to remove, you can try using a gentle, rocking motion to loosen it. Make sure that the wax is fully cooled before attempting to remove the stamp.
Once the wax seal stamp is removed, take a moment to admire your finished wax seal. The design should be crisp and clear, showcasing the elegant and traditional look of a wax seal.
If you are using the wax seal for mailing purposes, ensure that the wax is fully set and secure before handling the letter or envelope. Wait for at least a couple of minutes to give the wax enough time to harden completely.
Remember, practice makes perfect when using a wax seal stamp with a glue gun. With a bit of patience and experimentation, you can create beautiful and personalised wax seals for any occasion.
FAQ
Can I use a glue gun to create a wax seal stamp?
Yes, you can use a glue gun to create a wax seal stamp. It is a convenient and easy alternative to traditional methods.
What type of wax should I use with a glue gun for a wax seal stamp?
You can use any type of wax with a glue gun for a wax seal stamp. However, it is recommended to use sealing wax sticks that are specifically designed for this purpose.
How do I use a glue gun to create a wax seal stamp?
To use a glue gun for a wax seal stamp, first, insert a wax sealing stick into the glue gun. Allow the glue gun to heat up and melt the wax. Then, carefully squeeze the melted wax onto the desired surface and press the wax seal stamp into the wax. Hold it for a few seconds to let the wax cool and solidify before removing the stamp.


Harrison Clayton
Meet Harrison Clayton, a distinguished author and home remodeling enthusiast whose expertise in the realm of renovation is second to none. With a passion for transforming houses into inviting homes, Harrison's writing at https://thehuts-eastbourne.co.uk/ brings a breath of fresh inspiration to the world of home improvement. Whether you're looking to revamp a small corner of your abode or embark on a complete home transformation, Harrison's articles provide the essential expertise and creative flair to turn your visions into reality. So, dive into the captivating world of home remodeling with Harrison Clayton and unlock the full potential of your living space with every word he writes.