How to use glitter glue gun

Glitter glue guns are versatile and fun tools that allow you to add a touch of sparkle to any project. Whether you’re a seasoned crafter or a novice DIY-er, using a glitter glue gun is a simple and enjoyable way to bring your creations to life. In this article, we will guide you through the process of using a glitter glue gun effectively and safely.
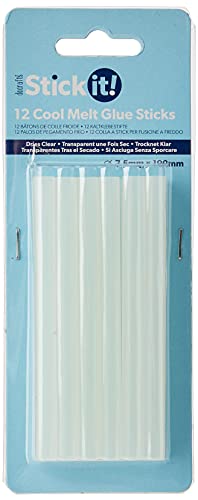
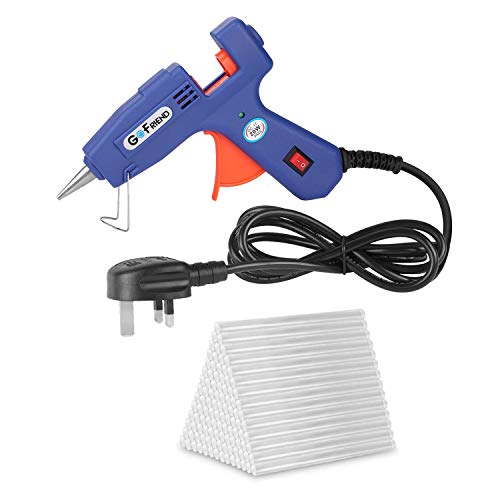
To start, make sure you have all the necessary materials. You will need a glitter glue gun, glitter glue sticks in your desired colors, and the project you would like to embellish. It’s important to choose a glitter glue gun that is compatible with glitter glue sticks, as different manufacturers may have different sizes and temperatures.
Once you have gathered your materials, plug in the glitter glue gun and allow it to heat up. Most glitter glue guns have an indicator light that will turn on when it’s ready to use. This usually takes a few minutes, but be sure to check the user manual for the specific temperature and heating time.
While the glue gun is heating up, prepare your project by cleaning and drying the surface you will be working on. This will ensure that the glitter glue adheres properly and creates a lasting bond. If you’re using the glitter glue gun on a fabric or textile surface, it’s a good idea to do a test patch first to make sure the glue doesn’t stain or damage the material.
Preparing your work surface
Before using your glitter glue gun, it is important to prepare your work surface to ensure a smooth and successful crafting experience. Here are some steps you can follow:

- Cover your work surface: Place a disposable tablecloth or a large piece of paper over your work surface to protect it from any potential glue spills or drips. This will make cleanup much easier.
- Organize your materials: Gather all the materials you will be using for your project and organize them neatly on your work surface. This will help you easily access everything you need as you work.
- Clear clutter: Remove any unnecessary items from your work surface to create a clear and clutter-free area. This will provide you with more space to work and prevent any accidents or distractions.
- Ensure good lighting: Make sure your work area is well-lit to help you see clearly and avoid any mistakes or mishaps. Consider using a portable desk lamp or working near a window for natural light.
- Protect your surroundings: If you are working in an area with walls or other objects nearby, consider placing a barrier or protective covering to prevent any accidental glue splatters or stains.
By following these steps to prepare your work surface, you can ensure that you have an organized and clean area to work with your glitter glue gun. This will help you achieve better results and make your crafting experience more enjoyable.
Choosing the right glitter glue
When it comes to using a glitter glue gun, choosing the right glitter glue is essential for achieving desired results. Here are some tips to help you choose the right glitter glue:
1. Consider the size of the glitter particles: Glitter glues come in various sizes of glitter particles, ranging from fine to chunky. Fine glitter particles create a more subtle and delicate look, while chunky particles provide a bold and eye-catching effect. Consider the overall aesthetic you want to achieve and choose accordingly.
2. Pay attention to the adhesive quality: Glitter glues have different adhesive qualities, and it’s important to select a glue that will hold the glitter securely in place. Look for glitter glues with strong adhesive properties to ensure that your glitter decorations will stay intact.
3. Consider the drying time: Some glitter glues dry quickly, while others may take longer to dry. Depending on your project, you may prefer a fast-drying glitter glue to speed up the process. However, if you need more time for positioning and arranging the glitter, a slower-drying glue might be a better option.

4. Check for color options: Glitter glues are available in a wide range of colors, so consider whether you want to use a clear or colored glue. Clear glues allow the base color to show through, while colored glues can add a pop of color to your project. Choose a color that complements your design or adds an interesting contrast.
5. Test the glitter glue: If possible, it’s always a good idea to test the glitter glue before using it on your actual project. This way, you can see how it looks and dries, and ensure that it meets your expectations.
By taking these factors into account, you’ll be able to choose the right glitter glue for your project and achieve the stunning glittery effect you desire.
Heating the glue gun
Before you start using your glitter glue gun, the first step is to ensure that it is properly heated. This is crucial for the glue to melt and flow smoothly through the gun’s nozzle.
To begin, plug in the glue gun and switch it on. Most glue guns have an indicator light that will turn on when it is being heated. Give it a few minutes to warm up.

While waiting for the glue gun to heat up, it is essential to take safety precautions. Place the glue gun on a heat-resistant surface or use a glue gun stand to prevent any accidental burns or damage to the surface underneath.
Remember to always keep the glue gun out of reach of children and pets, as the heated nozzle can cause serious burns.
Tips for heating the glue gun:
1. Preheating time: The time it takes for the glue gun to heat up varies depending on its size and brand, but it usually takes about 5-10 minutes. Refer to the manufacturer’s instructions for the specific preheating time of your glue gun.
2. Temperature setting: Some glue guns come with adjustable temperature settings, allowing you to control the heat based on the type of glue you are using. If your glue gun has this feature, select the appropriate temperature for your glitter glue.
Once the indicator light of the glue gun turns on, it means that the glue gun is now heated and ready to use. You will notice that the glue stick inside the gun starts to melt and becomes viscous.

Note: Avoid touching the heated nozzle of the glue gun, as it can cause severe burns. Always use the glue gun with caution and keep it away from your body parts.
Now that your glitter glue gun is heated, you can proceed to load a glitter glue stick and start creating beautiful and sparkling crafts!
Applying the glitter glue
Using a glitter glue gun is a fun and creative way to add sparkle and shine to any project. Whether you’re embellishing a greeting card, decorating a picture frame, or creating unique crafts, glitter glue can add a touch of glamour. Follow these steps to apply glitter glue with a glue gun for a beautiful and dazzling finish.
Materials you’ll need:
Before you begin, gather the following materials:
- A glitter glue gun
- Glitter glue sticks
- A project to decorate
- A flat, protected work surface
- Optional: masking tape, stencils, or other embellishments
Step 1: Prepare your work surface
It’s important to set up a clean and protected work area to prevent any glue from getting on unintended surfaces. Place a sheet of wax paper or a plastic tablecloth on your work surface to catch any excess glue that may drip.

Step 2: Heat up the glue gun
Plug in the glitter glue gun and allow it to heat up according to the manufacturer’s instructions. This usually takes a few minutes. Once the glue gun is heated, the glue sticks will begin to melt and flow smoothly.
Step 3: Insert the glitter glue stick
Insert a glitter glue stick into the glue gun’s barrel, making sure it is secure. Allow a few moments for the glue stick to melt completely.
Step 4: Start applying the glue
Gently squeeze the trigger on the glue gun to apply a thin line of glitter glue onto your project. Move the glue gun smoothly and steadily, applying the glue wherever you desire the glitter effect. Take care not to apply too much glue, as it may overflow and create clumps.
Step 5: Add extra embellishments
If desired, you can enhance your glitter glue design with additional embellishments. Use masking tape to create straight lines or stencils to create shapes, and apply the glitter glue over them. You can also add sequins, rhinestones, or other decorative elements to further customize your project.
Step 6: Let the glue dry
Allow the glitter glue to dry completely before handling your project. This usually takes around 1-2 hours, but drying times may vary depending on the thickness of the glue application. Avoid touching the glue until it is fully dry to prevent smudging or smearing.
By following these steps, you can easily apply glitter glue with a glue gun to create stunning and eye-catching designs. So go ahead, let your creativity shine!
Creating different effects
Using a glitter glue gun allows you to get creative and add unique effects to your projects. Here are some ideas to try:
1. Layering
Layering different colors of glitter glue can create a beautiful dimensional effect. Start with a base layer of one color and let it dry completely. Then, add a second layer of a different color on top. The combination of colors will give your project a stunning look.
2. Blending
Blend two or more colors of glitter glue together to create a customized shade. Apply small dots of each color onto the project and use a toothpick or a small brush to blend them together. This technique is perfect for achieving ombre or gradient effects.
3. Textured patterns
If you’re feeling adventurous, try creating textured patterns with your glitter glue gun. Apply the glue in zigzag lines, swirls, or even dots to add an interesting texture to your project. Experiment with different patterns and sizes to find what works best for you.
4. Stencils
Using stencils can help you create precise and intricate designs with your glitter glue gun. Place the stencil on your project and apply the glitter glue over it. Once the glue has dried, carefully remove the stencil to reveal your beautiful design. This technique is great for card making or any other project that requires detailed designs.
Remember, the possibilities with a glitter glue gun are endless. Experiment with different techniques and have fun creating unique effects for your projects!
Cleaning up after use
After you have finished using the glitter glue gun, it is important to clean up properly to maintain its longevity and prevent any potential damage. Follow these steps:
1. Unplug the glitter glue gun from the power source and allow it to cool down completely before cleaning.
2. Carefully remove any leftover glue sticks from the gun. Be cautious as the glue and gun may still be hot.
3. Use a clean cloth or paper towel to wipe away any excess glue from the nozzle and the body of the glue gun. Be gentle to avoid any scratches.
4. If there is any stubborn glue residue, you can use a small amount of rubbing alcohol on a clean cloth to gently rub it away. Make sure to wipe off any alcohol residue afterwards.
5. Store the glitter glue gun in a safe and dry place, away from children and pets.
Remember, regular cleaning and maintenance of your glitter glue gun will ensure its optimal performance and longevity.
FAQ
Can I use glitter glue gun on fabric?
Yes, you can use a glitter glue gun on fabric. Make sure to test it on a small, inconspicuous area first to ensure it adheres properly and does not damage the fabric.
What types of projects can I use a glitter glue gun for?
A glitter glue gun can be used for a variety of projects, such as scrapbooking, card making, decorating frames, creating DIY ornaments, and adding embellishments to clothing or accessories.


Meet Harrison Clayton, a distinguished author and home remodeling enthusiast whose expertise in the realm of renovation is second to none. With a passion for transforming houses into inviting homes, Harrison's writing at https://thehuts-eastbourne.co.uk/ brings a breath of fresh inspiration to the world of home improvement. Whether you're looking to revamp a small corner of your abode or embark on a complete home transformation, Harrison's articles provide the essential expertise and creative flair to turn your visions into reality. So, dive into the captivating world of home remodeling with Harrison Clayton and unlock the full potential of your living space with every word he writes.