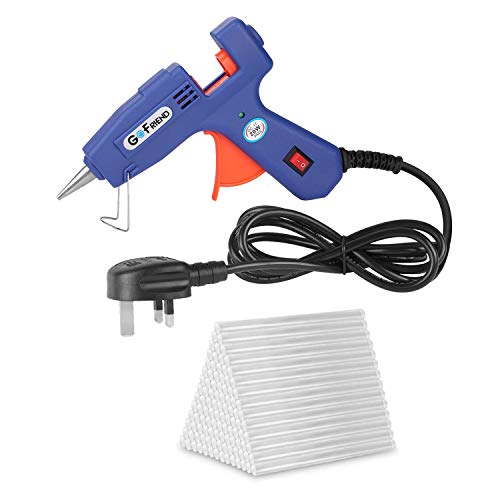
How to refil a low melt glue gun

A low melt glue gun is a handy tool that can be used for various crafts and projects. Whether you are a DIY enthusiast or a professional crafter, knowing how to refill your glue gun properly is essential to ensure a continuous flow of adhesive and prevent any interruptions during your work.
Step 1: Safety First
Before you begin refilling your low melt glue gun, it is crucial to prioritize safety. Make sure the glue gun is unplugged and has completely cooled down to avoid any potential burns or accidents. Always read and follow the manufacturer’s instructions and recommendations.
Step 2: Choose the Right Glue Sticks
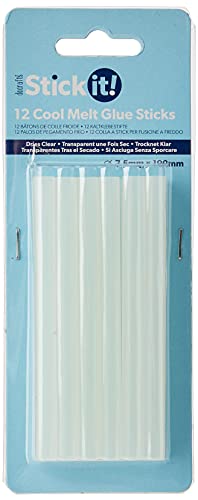
Once you have ensured your safety, it is time to choose the right glue sticks for your low melt glue gun. Low melt glue guns typically use glue sticks that have a lower melting temperature, making them ideal for delicate materials and projects. Using glue sticks with a higher melting point may damage your glue gun and result in poor adhesive performance.

Step 3: Inserting the Glue Sticks
Now that you have the appropriate glue sticks, it’s time to insert them into your low melt glue gun. Most glue guns have a removable chamber or nozzle at the back. Open this chamber or nozzle, and carefully insert the glue stick until it reaches the heating element. Ensure that the glue stick is correctly aligned with the gun’s barrel, allowing it to feed smoothly into the heating chamber.
Step 4: Preheating the Glue Gun
After inserting the glue sticks, it is essential to preheat your low melt glue gun to the recommended temperature. This process usually takes a few minutes, allowing the glue stick to melt completely and ensure a steady flow of adhesive. Follow the instructions provided by the manufacturer to determine the appropriate preheating time.
Step 5: Testing and Adjustment

Once your glue gun has reached the desired temperature, it’s time to test the adhesive flow. Squeeze the trigger or press the feed button to check if the glue is flowing smoothly. If you experience any difficulties or notice an inconsistent flow, make the necessary adjustments. You can increase or decrease the temperature of the glue gun until you achieve the desired adhesive flow.
By following these steps, you can successfully refill your low melt glue gun and continue your crafting or project with ease. Remember to prioritize safety, choose the right glue sticks, and preheat the glue gun correctly for optimal results.
How to Refill a Low Melt Glue Gun
A low melt glue gun is a useful tool for various crafts and DIY projects. However, when the glue stick runs out, it’s important to know how to properly refill it to continue your work. Here are the step-by-step instructions on how to refill a low melt glue gun:
What You’ll Need:
- A low melt glue gun
- A new glue stick
- A pair of scissors
Steps to Refill a Low Melt Glue Gun:
- Unplug the glue gun and allow it to cool down completely. It’s important to handle the glue gun safely.
- Take a new glue stick and cut off the end if it has a plastic covering. This will make it easier to insert into the glue gun.
- Locate the chamber at the back of the glue gun where the old glue stick was inserted. This is where you will insert the new glue stick.
- Insert the cut end of the new glue stick into the chamber, making sure it fits securely.
- Press the trigger of the glue gun gently to push the new glue stick into the heating element.
- Plug in the glue gun and wait for it to heat up. This usually takes a few minutes, but refer to the manufacturer’s instructions for the specific heating time.
- Once the glue gun is heated up, test it by squeezing the trigger to see if the molten glue comes out smoothly.
- If the glue gun is working properly, you are now ready to resume your crafting or DIY project.
Remember to always exercise caution when using a glue gun, as the tip can become extremely hot. Additionally, it’s a good idea to protect your workspace with a heat-resistant mat or surface to prevent any damage.
By following these simple steps, you can easily refill your low melt glue gun and continue your creative projects without any interruptions.

Checking the Glue Stick
Before refilling your low melt glue gun, it is important to check the glue stick to ensure it is compatible and in good condition.
1. Compatibility: Check the size of the glue stick to ensure it fits your low melt glue gun. Different glue guns may require different sizes of glue sticks, so it’s important to use the correct size to avoid any mishaps.
2. Condition: Inspect the glue stick for any signs of damage or contamination. If the glue stick is broken, cracked, or has any foreign particles on it, it may not dispense properly or could cause clogging in the glue gun.
3. Adhesive Type: Determine the type of adhesive on the glue stick. Low melt glue guns typically use adhesive with a lower melting point, so make sure the glue stick is designed for low melt applications. Using the wrong type of adhesive can lead to poor bonding or damage to the glue gun.
4. Quantity: Check how much glue is left on the glue stick. If the glue stick is almost empty, it may be time to refill your glue gun to ensure continuous and efficient operation.

By carefully checking the glue stick before refilling your low melt glue gun, you can ensure proper compatibility, condition, adhesive type, and quantity, which will help you achieve optimal results and prevent any issues during the glue gun refill process.
Preparing the Glue Gun
Before refilling a low melt glue gun, it is important to properly prepare the gun to ensure a smooth and efficient refilling process. Here are the steps to follow:
1. Clean the Gun
Start by cleaning the glue gun to remove any residue from previous glue sticks. Use a soft cloth or paper towel to gently wipe the nozzle and inner chamber of the gun. This will help prevent clogs and ensure a clean flow of the melted glue.
2. Remove the Old Glue Stick
Next, carefully remove the old glue stick from the glue gun. Most low melt glue guns have a removable chamber or a slot where the glue stick is inserted. Follow the manufacturer’s instructions to safely remove the old glue stick.
3. Check the Temperature Settings
Check the temperature settings of the glue gun to ensure that it is set to the appropriate heat level for the type of glue stick you will be using. Different glue sticks require different temperatures to melt effectively, so it is important to adjust the settings accordingly.

Once you have followed these steps to prepare the glue gun, it will be ready for refilling. Properly preparing the glue gun ensures a clean and efficient refilling process, allowing you to continue using the low melt glue gun for various projects and repairs.
Removing the Empty Glue Stick
Step 1: Unplug the Glue Gun
Before attempting to remove the empty glue stick, make sure the glue gun is unplugged and has had enough time to cool down.
Step 2: Locate the Glue Stick Chamber
Identify the glue stick chamber on the glue gun. This is the area where you insert the glue sticks into the gun.
Step 3: Push the Release Button or Lever
On some glue guns, there may be a release button or lever near the glue stick chamber. Press or push this button/lever to unlock the chamber.
Step 4: Pull Out the Empty Glue Stick
With the chamber unlocked, grip the end of the empty glue stick firmly and pull it out of the gun. If the glue stick is still hot, use caution and avoid touching the heated end.

Step 5: Dispose of the Empty Glue Stick
Properly dispose of the empty glue stick in a designated trash bin or recycling container. Do not dispose of it in regular household waste.
Step 6: Prepare for Refilling
Once the empty glue stick has been removed, you can now prepare to refill the glue gun with a new glue stick. Follow the manufacturer’s instructions for refilling the gun to ensure proper operation.
Inserting the New Glue Stick
Once you have prepared your low melt glue gun and removed the used glue stick, it’s time to insert a new one.
- Make sure the glue gun is turned off and unplugged from the power source for safety.
- Take a new glue stick that matches the size and type recommended for your glue gun model.
- Hold the glue gun with one hand and use your other hand to push the glue stick into the larger opening at the back of the glue gun.
- Continue pushing the glue stick until you feel resistance, indicating that it is properly inserted.
- Once the glue stick is inserted, turn on the glue gun and allow it some time to heat up and melt the glue stick.
- If necessary, use the trigger or button on the glue gun to advance the glue stick and make it ready for use.
It’s important to follow the manufacturer’s instructions for inserting the glue stick, as different glue gun models may have slight variations in the process.
Testing the Glue Gun
Before refilling your low melt glue gun, it’s important to test the gun to ensure it is working properly. Here are the steps to test the glue gun:

- Plug in the glue gun and wait for it to heat up. This usually takes a few minutes.
- Once the glue gun is heated, insert a glue stick into the glue gun’s feeding chamber. Push it in until it reaches the back of the gun.
- Press the trigger of the glue gun to release the melted glue. The glue should flow smoothly and evenly from the gun’s nozzle.
- Inspect the glued area for any signs of irregularity or inconsistency. The glue should dry clear and adhere well to the surface.
- If the glue gun passes the test and is working properly, you can proceed with refilling it. If there are any issues, troubleshoot the gun or consider getting it repaired.
Testing the glue gun before refilling is crucial as it ensures that the glue gun will perform correctly and avoid any potential problems during the refill process.
FAQ
What is a low melt glue gun?
A low melt glue gun is a type of adhesive applicator that uses a lower temperature to melt and dispense glue. It is commonly used for crafts and projects that require a more gentle heating process.
Why would I need to refill my low melt glue gun?
You would need to refill your low melt glue gun when the glue stick inside is running low or has completely melted. This ensures that you have a continuous supply of glue for your projects.
What type of glue sticks should I use to refill my low melt glue gun?
You should use low melt glue sticks that are specifically designed for your glue gun. These glue sticks have a lower melting point and will not damage your glue gun or create a mess when melted and dispensed.


Meet Harrison Clayton, a distinguished author and home remodeling enthusiast whose expertise in the realm of renovation is second to none. With a passion for transforming houses into inviting homes, Harrison's writing at https://thehuts-eastbourne.co.uk/ brings a breath of fresh inspiration to the world of home improvement. Whether you're looking to revamp a small corner of your abode or embark on a complete home transformation, Harrison's articles provide the essential expertise and creative flair to turn your visions into reality. So, dive into the captivating world of home remodeling with Harrison Clayton and unlock the full potential of your living space with every word he writes.