How to make super glue gun
If you’ve ever found yourself frustrated with the limitations of traditional glue guns, you’re not alone. While glue guns can be incredibly useful in a variety of crafting projects, sometimes you just need something with a little more power. That’s where a super glue gun comes in. With its enhanced adhesive capabilities, a super glue gun can tackle even the toughest materials, providing a secure and long-lasting bond.
While you may think that a super glue gun is something only professionals can make, you’ll be surprised to learn that you can create your own with just a few simple materials and some basic know-how. By harnessing the power of high-strength adhesives, you can transform an ordinary glue gun into a super glue gun that will meet all of your crafting needs.
Before diving into the details of how to make a super glue gun, it’s important to note that working with high-strength adhesives can be dangerous if not done properly. Be sure to read and follow all safety instructions provided with your adhesive, and wear appropriate protective gear, such as gloves and goggles. Additionally, be sure to work in a well-ventilated area to avoid breathing in any fumes.
Step-by-Step Guide to Making a Super Glue Gun
If you’re a DIY enthusiast or just want to try your hand at making your own tools, a super glue gun can be a fun and useful project. In this step-by-step guide, we’ll walk you through the process of creating your own super glue gun.
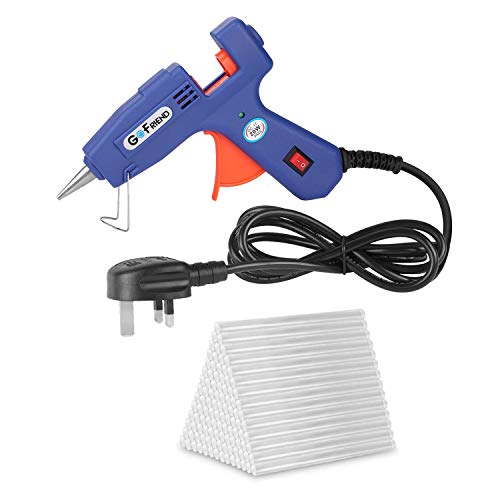
Materials Needed:
- A standard glue gun
- Super glue
- Pliers
- Wire cutters
- Heat-resistant gloves
- Heat-resistant surface
Step 1: Disassembling the Glue Gun
Start by unplugging the glue gun and allowing it to cool completely. Once cooled, use pliers to remove the nozzle and the glue stick from the gun. Set them aside for later use.
Step 2: Removing the Heating Element
Next, you’ll need to remove the heating element from the glue gun. Use wire cutters to carefully disconnect the wires attaching the heating element to the gun’s main body. Set the heating element aside.
Step 3: Preparing the Super Glue
Take a small amount of super glue and apply it to the tip of the removed glue stick. Make sure to cover the entire tip evenly with the glue. Allow the glue to dry for a few minutes until it becomes hard and glossy.
Step 4: Attaching the Heating Element
Now, take the heating element that you set aside earlier and carefully attach it back to the glue gun’s main body. Make sure the wires are securely connected for proper functionality.
Step 5: Testing Your Super Glue Gun
Before plugging in the modified glue gun, put on heat-resistant gloves to protect your hands. Place the gun on a heat-resistant surface. Plug in the gun, switch it on, and wait for it to heat up. Once heated, test the glue gun by squeezing the trigger to dispense the super glue. Ensure it’s working properly before using it for any projects.
Remember to exercise caution and safety when using your homemade super glue gun. Always wear protective gloves and work in a well-ventilated area. Keep the glue gun away from children and pets. Enjoy your new DIY tool!
Gather the Necessary Materials
Before you can create your super glue gun, there are a few materials you will need to gather:
- A hot glue gun
- Super glue
- Small metal tube or nozzle attachment
- Heat-resistant gloves
- Protective eyewear
- Heat source (such as a flame or heat gun)
- Optional: heat-resistant surface or work area
Make sure you have all of these materials on hand before you begin the process.
Create the Gun Body
Once you have gathered all the necessary materials and tools, you can begin creating the body of your super glue gun. This is the part of the gun where the glue will be loaded and dispensed. Follow the steps below to create the gun body:
Step 1: Measure and Cut
Using a ruler or measuring tape, measure and mark the desired length for your glue gun body on the PVC pipe. Once you have marked the length, use a saw or pipe cutter to carefully cut the PVC pipe at the marked point.
Step 2: Sand the Edges
After cutting the PVC pipe, the edges may be rough and sharp. Use sandpaper or a file to sand down the rough edges and make them smooth. This will ensure a clean and polished look for your glue gun body.
Step 3: Drill the Holes
Next, use a drill with a drill bit that matches the size of your glue sticks to create two holes in the PVC pipe. These holes will serve as the channels through which the glue sticks will be inserted into the gun. Make sure the holes are evenly spaced and aligned with each other.
Step 4: Attach the Trigger
Attach the trigger mechanism to the PVC pipe to create the handle of the glue gun. You can use a small metal strip or a trigger mechanism from an old glue gun. Secure the trigger in place with screws or adhesive as needed.
Step 5: Add the Nozzle
Finally, attach the nozzle to the front end of the PVC pipe. The nozzle will determine the shape and size of the glue stream. You can use a metal or plastic nozzle, depending on your preference. Secure the nozzle in place with adhesive or screws.
Once you have completed these steps, your super glue gun body is ready to be used. Make sure to test the gun and check for any leaks or issues before applying any glue. With proper care and maintenance, your homemade super glue gun can be a valuable tool for various DIY projects.
Assemble the Heating Element
Once you have gathered all the necessary materials, you can start assembling the heating element for your super glue gun.
Step 1: Prepare the Nichrome Wire
Begin by cutting a length of nichrome wire, which will serve as the heating element of your glue gun. Make sure to measure and cut the wire according to the desired length, taking into consideration the size of your glue gun.
Tip: It is recommended to use a nichrome wire with a gauge of around 24-28 for optimal heating and durability.
Step 2: Attach the Wire to Copper Rods
Next, take two copper rods and secure them to the ends of the nichrome wire. You can do this by wrapping the wire tightly around each rod, making sure there are no loose ends or gaps.
Tip: Use pliers or any suitable tool to help you wrap the wire around the rods securely.
Step 3: Connect the Rods to Power Source
Once the wire is securely attached to the copper rods, you can connect them to a power source. This can be done by soldering the rods to the wires of a plug or any other electrical connector.
Note: Take caution when dealing with electricity and make sure to follow all safety guidelines and precautions.
After completing these steps, you have successfully assembled the heating element for your super glue gun. Now, you can proceed to the next steps of building your glue gun, which involve creating the housing and the trigger mechanism.
Attach the Glue Reservoir
To create the glue reservoir for your super glue gun, you will need a small container that can hold the glue and withstand high temperatures. You can use a metal or ceramic container, such as a small metal bowl or a ceramic jar.
Make sure the container is clean and free from any dust or debris. Apply a small amount of adhesive epoxy or a strong heat-resistant glue to the bottom of the container.
Place the container on the back side of the glue gun, aligning it with the nozzle. Press firmly to ensure a secure attachment. Allow the adhesive to dry and cure according to the manufacturer’s instructions.
Once the glue reservoir is securely attached, you can fill it with super glue. Unscrew the container’s lid and carefully pour the super glue into the reservoir. Be cautious not to spill any glue.
Make sure the lid is tightly closed to prevent the glue from leaking. This will also help to maintain the glue’s viscosity and prevent it from drying out.
With the glue reservoir securely attached, your super glue gun is now ready for use. Simply press the trigger to release a controlled amount of super glue onto your desired surface.
Always remember to take necessary safety precautions when working with super glue. Use in a well-ventilated area and avoid contact with skin and eyes. Keep the glue gun away from children and store it in a cool, dry place.
Add Safety Features
When making a super glue gun, it’s important to prioritize safety. Here are some safety features you should consider adding:
1. Safety Switch
Install a safety switch that can turn off the glue gun when not in use. This will help prevent accidental burns or injuries.
2. Heat-resistant Handle
Make sure the handle of your glue gun is heat-resistant. This will protect your hands from burns while using the gun for extended periods.
These safety features are essential to ensure the safe operation of your homemade super glue gun. Always prioritize safety when working with hot glue to avoid any accidents or injuries.
Test and Use your Super Glue Gun
Once you have successfully built your super glue gun, it’s time to test it out and put it to good use. Here are some steps to follow:
- Start by placing the super glue stick into the glue gun, making sure it is secure.
- Plug in the glue gun and wait for it to heat up. This usually takes a few minutes.
- Once the glue gun has heated up, press the trigger gently to test the flow of the glue. Make sure it is coming out smoothly and evenly.
- If the glue is not flowing properly, check the temperature of the glue gun. It may need more time to heat up or adjust the temperature setting if your glue gun has one.
- When you are ready to use the glue gun, position the nozzle close to the surface you want to glue and apply gentle pressure to the trigger to release the glue.
- Move the glue gun slowly along the surface, applying the glue as needed. Be careful not to apply too much glue, as it can overflow and create a mess.
- If you make a mistake or need to remove the glue, you can use a solvent or adhesive remover to dissolve the glue.
- After you have finished using the glue gun, unplug it and allow it to cool down before storing it away.
Remember to always follow safety precautions when using a glue gun, such as wearing protective gloves and working in a well-ventilated area. With your super glue gun, you can tackle a variety of DIY projects and repairs with ease!
FAQ
Is it safe to convert a hot glue gun into a super glue gun?
Converting a hot glue gun into a super glue gun can be done, but it is important to note that this modification is not recommended and can be potentially dangerous. Hot glue guns are designed specifically for hot glue sticks, which melt at a lower temperature compared to super glue. Using super glue in a hot glue gun can cause it to overheat, release toxic fumes, and potentially damage the gun. It is always best to use tools and materials as intended to ensure safety.
Can I use any type of super glue in a converted hot glue gun?
It is important to use the correct type of super glue when converting a hot glue gun. Gel-type super glue is recommended as it is thicker and has a slower drying time, which allows it to flow through the hot glue gun more effectively. Using a different type of super glue, such as a liquid or a fast-drying one, may lead to clogs or other issues with the glue gun. Always check the label on the super glue to ensure compatibility with hot glue guns before using it in this manner.


Meet Harrison Clayton, a distinguished author and home remodeling enthusiast whose expertise in the realm of renovation is second to none. With a passion for transforming houses into inviting homes, Harrison's writing at https://thehuts-eastbourne.co.uk/ brings a breath of fresh inspiration to the world of home improvement. Whether you're looking to revamp a small corner of your abode or embark on a complete home transformation, Harrison's articles provide the essential expertise and creative flair to turn your visions into reality. So, dive into the captivating world of home remodeling with Harrison Clayton and unlock the full potential of your living space with every word he writes.